To avoid these ads, REGISTER NOW!

Built-in Utility Sinks

Jayhawk_Aviator

Well-known member
Joined
Jun 2, 2015
Messages
123
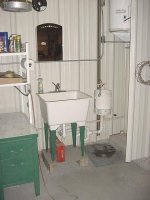
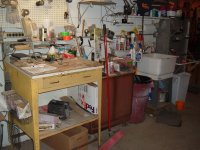
I have a standard 24x24 utility sink. Rather than using the cheap looking legs that came with it, I'd like to build it in to some cabinets. Looking for ideas on what others have done?

Also, any leads for more cost effective larger sinks? The 24x24 is cheap, but the 24X40 seems to triple or quadruple in price?

Thanks.
 
To avoid these ads, REGISTER NOW!

mfs54729

Well-known member
Joined
Nov 5, 2013
Messages
46
Location
NW Wisconsin
I took a standard 24x24 kitchen base cabinet and dropped a utility sink into it. It didn't have a
counter top on it and I had to remove the drawer. I believe I just glued the drawer front on the front
to cover the drawer opening. The lip of the utility sink sat directly on the sides of the cabinet so
the sink was supported from the lip. There were no cabinets next to it so I didn't have to worry
about adjacent counter tops.
 

Gigemags05

Active member
Joined
Nov 24, 2016
Messages
25
Location
Denton, TX
I went to a habitat for humanity re-store and got a large, double basin sink for $40. Not sure if they have those stores everywhere
 

sberry

Banned
Joined
Jun 18, 2005
Messages
35,747
Location
Brethren, Michigan
They were short for me and I like a kitchen faucet on them so they need a little mod to fit it. Mine isn't about the finish or the mount as much as it is about the location which makes them easy to use. They are right in the foot traffic raceway so to speak, on your way to something else.
 

Attachments

  • sink P.JPG
    sink P.JPG
    34.5 KB · Views: 81
  • yellow desk sink.jpg
    yellow desk sink.jpg
    143.4 KB · Views: 84
  • yellow desk door.jpg
    yellow desk door.jpg
    145.4 KB · Views: 78

rwhite692

Well-known member
Joined
Mar 4, 2008
Messages
1,850
Location
Central Valley, CA
I had some bowling lane material left over after I built my workbench, so I used it.

It is screwed to cleats (from underneath) which are attached to the wall (studs), and the single support leg / frame, is attached at each end, w/lags into the walls (studs).

2987657200011691741OMGqRc_fs_zps7qc8tnqt.jpg

2027793820011691741iDnlir_fs_zps755ig770.jpg
 
Last edited:
To avoid these ads, REGISTER NOW!

sberry

Banned
Joined
Jun 18, 2005
Messages
35,747
Location
Brethren, Michigan
I like that, I bet its in a pretty friendly location. The price has really dropped on these. I have replaced a couple as they aged and got super dirty where they didn't want to clean well. Takes a few minutes to retro if for kit faucets.
That look like it may be a bit more pricey than the generic ones.
 

rwhite692

Well-known member
Joined
Mar 4, 2008
Messages
1,850
Location
Central Valley, CA
I like that, I bet its in a pretty friendly location. The price has really dropped on these. I have replaced a couple as they aged and got super dirty where they didn't want to clean well. Takes a few minutes to retro if for kit faucets.
That look like it may be a bit more pricey than the generic ones.

Thanks Steve. Mine is the one sold at Lowes (at least, it was, back in 2009).

It (along with the rest of my shop) isn't nearly so clean any more!
 

BearsFan315

Well-known member
Joined
Jun 12, 2014
Messages
689
Location
Portsmouth, VA
My utility sink was mounted on a 36 kitchen sink base bought on clearance. great storage and sink.

my utility sink has a long neck and sprayer nozzle and love it. here is what i have, can drop in a 5 gallon bucket and fill it up no issues. love my sink... use the hell out of it.
 

tarmy

Well-known member
Joined
May 28, 2014
Messages
4,657
Location
Nor Cal
View attachment 616376

I have two...this one near the door to house so that dirty shoes get dropped and washed and hands cleaned before going inside.

Bought a cheapo counter from HD and used that...30 bucks...I put a good sink in...as those cheap one can't take the solvent wash off or beating mine take from cleaning metal up to weld.
 
Last edited:

HoosierGarage

Member
Joined
Apr 23, 2013
Messages
16
I just used an old kitchen cabinet and cut where needed to make the blumbing fit.
Removed the top sliding drawer and nailed the face of the drawer to the cabinet.
Put in a brace where I thought it could use some more support.

The best part was that it was free and the bottom door hides the pipes.
 
To avoid these ads, REGISTER NOW!
Top Bottom