To avoid these ads, REGISTER NOW!

Carsiding install questions

DGUS

Member
Joined
Feb 27, 2008
Messages
21
Location
West central Wisconsin
I've been gifted a load of tongue and groove pine carsiding. Tongue and grove on edges, (not on the ends).
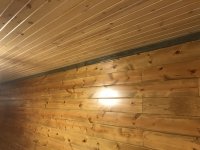
3/4" thick, 6" wide, 6' long. Id like to use it on the walls (currently unfinished, insulated with poly vapor barrier, see pic) in my new shop.
I plan on doing metal wainscot 3' up the wall (plus wood baseboard and cap) from the floor. I plan on attaching fi\urring strip to the stud then the wainscot to the firing strips.
Since the carsiding pine is 3/4" thick, I thought I could attach it right to the studs. Issue is, the studs are at 16" on center. So landing the end of the boards only on studs, would mean cutting each one. Wasting a lot of board.
Questions: Can I keep the 6' length and somehow land the ends between the studs? Maybe biscuit the ends together? Or back cut the ends to 45, over lap them and nail the 45's flush together? Very nice wood so I'd like to utilize it.
Appreciate some advise from you more experienced members. TIA!
 

Attachments

  • IMG_20190201_212111483.jpg
    IMG_20190201_212111483.jpg
    100 KB · Views: 107
To avoid these ads, REGISTER NOW!

Copymutt

Well-known member
Joined
Sep 3, 2016
Messages
3,388
Location
Colorado
I’d do a simple test run. 3/4 is stout. Being just under 16” is the most free end you could have, I’d be inclined to either bevel or route a t&g end. This gives you an excuse to buy router bits, although end t&g can be done on a table saw. heavy shelving should be on studs. Sounds like it will look great.
Jim
 
Last edited:

tthornto

Well-known member
Joined
Mar 11, 2011
Messages
743
The tongue and groove should support the pieces above and below. Just make sure they are staggered so you don't have all of the joints right next to each other. If you are still concerned you can use scrap wood as a backer for the unsupported joints.
 

shoot summ

Well-known member
Joined
Jun 8, 2010
Messages
2,952
The tongue and groove should support the pieces above and below. Just make sure they are staggered so you don't have all of the joints right next to each other. If you are still concerned you can use scrap wood as a backer for the unsupported joints.

This, also realize there is some potential for the wood to expand and contract, let it acclimate in that area for a bit before you install it, and make sure you coat both sides with whatever you are painting it with.

I would treat it like wood flooring, make a run, and the left over cut from the last board start the next run with. Try to keep your joints at least a board width apart.
 

PassnThru

Well-known member
Joined
Jan 5, 2010
Messages
6,510
Location
Bowling Green KY
How tall is the ceiling? I'm thinking about 9' looking at the door.
You could always start with 7/16 OSB on the studs and then you can nail it however you want.
 

shoot summ

Well-known member
Joined
Jun 8, 2010
Messages
2,952
Easier said than done. Easier done with biscuits if he has a tool.

Even easier to use scraps of the siding as a scab block from behind.

Biscuits don't make perfect alignment, and they are dependent on glue to make them expand. You don't want to glue this stuff on the ends.

You do however want to get a clean cut on the ends of the siding, the mill ends can sometimes be a little rough.
 
To avoid these ads, REGISTER NOW!

joes99

Active member
Joined
Jun 17, 2017
Messages
25
Location
Smyrna, GA
Might do a 15 or 22.5 degree bevel on the ends and glue the joint. If the joints are staggered I see no issue between studs. The wood will expand and contract so there will be seams showing over time
 

tom-ky

Well-known member
Joined
Mar 11, 2017
Messages
512
Location
Morgantown, Ky
We did a room with it and I cut all the ends on 45 degrees so if there was any shrinkage it would not show so bad. Been up about a year with not issues yet. We just let them land where ever as the tongue and groove should hold them. I did cut the bottom run to land on a stud.
 

bad_idea

Well-known member
Joined
Jun 11, 2011
Messages
4,332
Location
Pasquotank, NC
With seasonal expansion and contraction would you have gaps at the end of each board? For that reason it may be good to tongue and groove the ends of the boards. I am not a carpenter, never claimed to be, and am staying at a Residence Inn (not a Holiday Inn). However you tackle it please post some install pics. Would like to see the end result.
 
OP
D

DGUS

Member
Joined
Feb 27, 2008
Messages
21
Location
West central Wisconsin
Thanks for all the great feedback! I do have a biscuit joiner, and miter saw to bevel cut the ends. Gonna play around with techniques when I get the wainscot up. Will update!
 

ripperd

Well-known member
Joined
Jul 2, 2014
Messages
2,044
Location
Twin Cities, MN
We did a room with it and I cut all the ends on 45 degrees so if there was any shrinkage it would not show so bad. Been up about a year with not issues yet. We just let them land where ever as the tongue and groove should hold them. I did cut the bottom run to land on a stud.

This is probably what I would do.
 

The Cobbler

Super Moderator
Staff member
Joined
Oct 24, 2013
Messages
25,856
Location
Niagara Region, Ontario, Canada
way overthinking this IMO. a good square **** cut on each board will be fine, no need to biscuit , cleat or anything. the T&G on the edges will be all you need, and a **** cut will be a lot faster than trying to line up a 45
 

shedfullatools

Well-known member
Joined
Apr 10, 2016
Messages
834
Location
Nova Scotia
This stuff tends to be quite popular around here for cottage ceilings and the like, I've also seen loads installed on walls. It's rare I've seen it installed with anything other than 90° **** ends however I have seen some installed with overlapped 45° mitres. In the end unless you are extremely picky with the final install of the 45° ones and the wall is quite flat the fitment won't be a ton better and may end up worse than 90° **** ends as long as you make those 90° cuts with a sharp blade and get em tight on install.
 

tom-ky

Well-known member
Joined
Mar 11, 2017
Messages
512
Location
Morgantown, Ky
Here is what we did. Ceiling and walls.
 

Attachments

  • DB7562C9-BBFE-4CC5-8575-CC9598A47F29.jpg
    DB7562C9-BBFE-4CC5-8575-CC9598A47F29.jpg
    145.6 KB · Views: 48

tom-ky

Well-known member
Joined
Mar 11, 2017
Messages
512
Location
Morgantown, Ky
tom-ky
did you land end on studs? what did you use for finish? Did you apply finish before or after hanging? TIA

The first run I put on studs after that I just let them end wherever. I used Minwax Spar Urethane at the suggestion of Minwax. We did it after it was put up. Process was slow as it was, really would have slowed me even more. So far no issues, been up about a year. It may all fall off wall tonight though.
 
To avoid these ads, REGISTER NOW!
Top Bottom