To avoid these ads, REGISTER NOW!

ceramic tile on concrete (tips, best practices)

rieferman

Well-known member
Joined
May 18, 2009
Messages
2,586
Location
Collegeville PA (30 min west of Philly)
Well, thanks to the suggestions of the fine GJ community, I used a power chipping hammer (also called a demolition hammer... looks like a sawzall with a point chisel tip or flat chisel tip basically) to pull up old ugly tile in front of the living room fireplace (errrrr... I mean the garage fireplace.. yeah... anyways).

So, I got the surface very nice and even, although there's some pitting due to learning curve on using the demo hammer, and some stubborn spots.

I'm looking for best "real life" practices on prepping and installing new not-ugly tiles. I've read a lot of articles online with conflicting levels of overkill, so I want the real scoop from the group I trust.

I'm assuming it goes like this:
- Dry fit the tile layout and check for any tiles that "rock".. smooth out as needed.

- concrete patch (reminds me of spackle) any divets

- apply thinset with flat side of trowel, then comb with grooved side

- wiggle/press tile into place, let dry one day

- apply grout (sandless??) with rubber float... and then at some point?? wipe away excess with damp sponge

- at some point some sort of grout sealer? what does it do?


Thanks!
 
To avoid these ads, REGISTER NOW!

PecosBill

Well-known member
Joined
Mar 27, 2010
Messages
120
Location
Oregon
You've got the idea. Depending on the size of any divets, you can just fill them with thinset when you burn in your thinset with the flat side of your notch trowel.

Grout sealer is a topical product that creates a layer over your grout. When liquids are spilled on it, it allows you time to clean it up before it absorbs into your grout.

Penetrating sealer is a step up, because it impregnates the top layer of grout, and tile in the case of an unglazed ceramic. This makes the sealer more durable, and creates a more stain resistant final product.
 

red

Well-known member
Joined
Feb 20, 2009
Messages
721
Location
Hudson Valley, NY
Reiferman, I agree with PecosBill on using the thinset instead of concrete patch. For the grout most of the time sanded grout is used on floors. The exception would be if you use tile that may scratch from the sanded grout or really tight joints (less than an 1/8") You can also experiment with different patterns, like doing diagonals with a square boarder. Good Luck!
 

jkuro

Well-known member
Joined
Apr 28, 2009
Messages
555
Here are a few tips, not in any order:
Use a long straight edge across the tiles to make sure they are all being laid at the same height.
Use spacers between the tiles to get a good spacing.
Once your happy with your dry fit, mark a vertical and horizontal line to work from, use a chalk line.
When you comb the thinset make sure you scrape the floor with the trowel to get an even layer.
Use sanded grout and scrape the excess off with your float at an angle to the grout lines to keep from pulling out the grout.
Let grout set up then wipe off excess with damp sponge, you will still have a haze left on the tile, use a dry towel to buff, making sure not to pull grout from joints.
Don't work to big of an area and take your time.
You can rent a tile saw to make cuts easier.
Hope this helps.
 

bczygan

Well-known member
Joined
Nov 4, 2009
Messages
22,002
Location
DETROIT! Arsenal of Scrappers
When laying out your pattern see if a standard size joint for that tile will allow full tiles to all walls. If not, and the joint can't be adjusted enough, then lay out tile so a tile more than half size (And equal in size) runs along both side walls. This will mean you either start with a joint in the middle or a tile in the middle. Start with a row of full tiles at the garage door opening and run them until they hit the back wall. You can adjust where they start to end up with either a full tile row or at least a more than half one. Understand?

Bill
 
Last edited:

bczygan

Well-known member
Joined
Nov 4, 2009
Messages
22,002
Location
DETROIT! Arsenal of Scrappers
When laying out your pattern see if a standard size joint for that tile will allow full tiles to all walls. If not, and the joint can't be adjusted enough, then lay out tile so a tile more than half size (And equal in size) runs along both side walls. This will mean you either start with a joint in the middle or a tile in the middle. Start with a row of full tiles at the garage door opening and run them until they hit the back wall. You can adjust where they start to end up with either a full tile row or at least a more than half one. Understand?

Bill

Also, carefully choose your materials. Thin sets vary in quality and price. Here is a discussion:
http://www.johnbridge.com/vbulletin/archive/index.php/t-206.html
You need additives that allow for flexibility and adhesion. You can choose materials to which you add latex additives or which already are improved.
Buy good quality grout and a penetrating sealer.
Back butter larger tiles with a notched trowel or when placing tiles in hard to reach places under items or near edges where hard to place thinset, or when necessary to adjust height.
Roughen sharp cut edges with a stone.
Snap layout lines.
Watch your joints and lines and heights as you go.
Use spacers as necessary.
More advice:
http://www.stripersonline.com/surftalk/showthread.php?p=7966496
 
Last edited:

PecosBill

Well-known member
Joined
Mar 27, 2010
Messages
120
Location
Oregon
You do not always need additives. There are different thinsets for different purposes. A lot depends on type of tile and substrate. Remember, thinstes have only been around for a few decades, and modified thinsets even less. There are tile installations that are thousands of years old. Be very careful what info you get for so called experts online (yes, I see the irony :lol: ). Do your research, and choose the right product for the right application. Your best bet is to find a trusted local expert, and ask his advice... or better yet, hire him. :lol:
Tile setters have to eat too.
 
To avoid these ads, REGISTER NOW!
OP
R

rieferman

Well-known member
Joined
May 18, 2009
Messages
2,586
Location
Collegeville PA (30 min west of Philly)
Thanks fellas! I'm going to give this a go this weekend and I'll post the pics in here afterwards. It's about 2 rows of 12" tiles by 12 tiles wide, so not a big job, but I still want it to look nice. I appreciate your help and expertise!
 

PecosBill

Well-known member
Joined
Mar 27, 2010
Messages
120
Location
Oregon
Take a look at using epoxy grout instead of regular grout.

Epoxy grout costs a bit more, takes a little more effort to apply, but you don't need to seal it. It won't get dirty - stays clean.

While they are stain resistant, epoxy can get dirty. :lol:

Epoxy work best against liquid stains. Most epoxy grouts still contain sand as an aggregate, which catches dirt. Fireplaces aren't usually subject to much in the way of liquid stains. Personally, I don't think it is worth the extra time and expense.

The industry is always coming out with "newer and better", but that doesn't always mean these products are best for every situation.
 

Kevro

Well-known member
Joined
Jan 20, 2010
Messages
108
Location
Chester County, PA
If you haven't done so already, check out YouTube to see techniques for mixing thinset and grout consistency, combing mud and back-buttering tiles, setting/pressing them into the mud, dragging the grout float diagonally, etc. Look at videos from several different people to get a concensus, and not be led astray by any particular incorrect demonstration.

Also, the thinset and grout packaging will have pretty good instructions on how much water to add, how long to slake, how long to wait before cleaning, etc. - follow them to a T.

And not to take anything away from this great site, but JohnBridge.com is an excellent resource for any kind of tile job. I wish I had found that site before I started my first tile project a few years ago...
 
OP
R

rieferman

Well-known member
Joined
May 18, 2009
Messages
2,586
Location
Collegeville PA (30 min west of Philly)
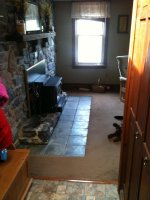
Everything went smoothly.. The only picture I have is before final cleanup, but you can get the general idea.

Side note: Doing a whole room of this (or garage floor) would be brutal :)
 

Attachments

  • finished hearth.jpg
    finished hearth.jpg
    138.3 KB · Views: 62
To avoid these ads, REGISTER NOW!
Top Bottom