To avoid these ads, REGISTER NOW!

CJ5 swing out tire carrier

Griff93

Well-known member
Joined
Jul 25, 2009
Messages
1,121
Location
Huntsville, AL
I've finally been getting around to working on my wife's rear bumper. I still have to do a bit of adjusting on the jerry can mounts to get them to fit tight on my wife's German cans. I was using one of my NATO cans because it was handy and they are a bit wider than the German cans. I also need to fully weld it as I like to tack things together to make sure they are going to fit properly before fully welding. I also need to make the reinforcements for the rear crossmember.

I tried to make this tire carrier easy to use. I used a pop pin so that the swing out part will stay open until you release it. This also doubles as my back up for the latch. When it's closed you have to unlatch it and pull the pop pin up to swing the gate open. I also put a piece of round tubing on the mounting surface for the spare tire. It helps by being able to just set the center of the wheel over it then you can roll it to line up the lug holes. I did not want to have to use straps to hold down the jerry cans so I used some old door hinges cut down to size for the arms that go over the cans. I also wanted to be able to take them off without having to get out any tools. I used some knobs that I found at Mcmaster. I'm planning on making a couple of recievers on the sides of the swing out placed vertical for a removable basket that will go over the spare. I figured it might be a good place to keep a chainsaw.

IMG_5171.jpg


IMG_5172.jpg


IMG_5174.jpg


IMG_5175.jpg
 
To avoid these ads, REGISTER NOW!

kbs2244

Well-known member
Joined
Nov 11, 2006
Messages
14,065
It did occure to me the the first paragraph and the PICs did not match.
 

mdbeck1

Well-known member
Joined
Mar 7, 2010
Messages
2,297
Location
Norman, OK
I've been thinking about doing something like that for my jeep. I usually only use it during deer season but it would be nice to have a place to put things AND carry a spare.

...also... How is the "shelf" above the bed connected? I'd like to put one on my roll bar high enough to stand on and fill deer feeders (in other words I'd be standing on it with a bag of feed). I'm a little bit worried about it sliding down while I'm standing there.
 
OP
G

Griff93

Well-known member
Joined
Jul 25, 2009
Messages
1,121
Location
Huntsville, AL
My wife's German can on the right. No pictures of the other kind as she's not German.
jerrycans.jpg


I don't have any close up pictures of the rack. It's hinged in the front to flip up out of the way for getting stuff in and out of the bottom of the jeep. The hinges mount on a piece of tubing that is part of the roll cage. It has tabs made from square tubing that sit down in receivers on the diagonal factory down bars. I can take some pictures if you want. It works really well. We made it for when we go camping. Before the cooler ended up at the bottom of the pile due to being big and heavy. To get a drink out you had to unstrap all the sleeping bags, tent, etc to get to the cooler. Now all that stuff goes down below and the cooler sits on the rack.
 

mrrisotto

Active member
Joined
Apr 7, 2011
Messages
36
Location
Denver, CO
Lookin' good! I'm digging the simplicity of the Gerry can retainer... those big knobs are a great idea, but I wonder if they'll vibrate off? What hinge did you use for the tire carrier and did you tie the bumper in to the frame?
 

koditten

Well-known member
Joined
Apr 10, 2008
Messages
5,528
Location
Midland, Michigan
Nice. Thanks for the picks. I see those cans offered on the internet quite often andhave been thinking of picking up a few.

What are your plans for for finish coat? Paint or some type of bed liner meterial? Looking forward to seeing the final outcome.
 

zmotorsports

ALLIANCE MEMBER
Joined
Oct 20, 2009
Messages
21,598
Location
Northern Utah
Nicely done. Are you going to paint it or powder coat it? Could you show a close up of the latching mechanism, I am curious as to how to do mine. I don't want to design myself in a rattle.

Mike.
 

bluesman2a

Well-known member
Joined
Aug 16, 2005
Messages
1,312
Location
Atlanta, Ga.
OP
G

Griff93

Well-known member
Joined
Jul 25, 2009
Messages
1,121
Location
Huntsville, AL
I really didn't want to have to use ratchet straps to hold the jerry can's on. I don't think the knobs will vibrate off as I also use them for my hood hinge mounted hi lift and haven't had any problem. If I do, I'll cross drill the bolts for hitch pins. I used a kit for the hinge and latch. http://www.emsoffroad.com/store/index.php?main_page=index&cPath=78 The bumper mounts are made out of 3/8 plate. I'll be welding in some reinforcements for the bumper mounts on the frame.

Keep in mind each version of the jerry can uses a different nozzle. For the German can's I had to get some ordered straight from Germany as they aren't available in the states. Both versions are really nice. I prefer the Nato can's as the vent works a bit better. Both don't leak and I would take either of them any day over the carb junk. I think I'm just going to spray paint it black. Powder coat would be nice but funds don't allow for it right now. I'm going to find something like a piece of grip tape to put on top of the bumper so it's not slippery with muddy feet.

Mike, I'll take a picture of the latch if you want but you can probably get a good idea from the link I posted. The poly block is nice as well. I do not like the 341-R style as they stick out to far.

The pin is called a pop pin. http://www.mcmaster.com/#pop-pins/=e8jsln This is the one I used. They are useful for all sorts of other things. They make them in a round knob handle as well as stainless. They come with the weld on threaded tube for them which is kinda nice not to have to make one.There are two holes in the plate that the pop pin rides on. One is a backup for keeping the tire carrier closed. The other is of course for keeping the swing part open.
 
Last edited:

472scout

Well-known member
Joined
Sep 18, 2010
Messages
1,284
Location
back 40
Is that a trailer spindle? There are many horrors stories of those snapping off after a few years of fatigue causing the swing arm and tire to go bouncing down the road and into oncoming traffic.
 

dtt454

Well-known member
Joined
Feb 24, 2011
Messages
363
Location
missouri
yeah i like homemade things like this, i was thinking something along the same lines though as above.

so not to sound critical but it sure looks like you have a single shear hinge.

when you have alot of **** hanging off it, i also know of several stories of the pin shearing off. although i have not experienced it myself.

there is a few ways you can mount it in double shear. which is much less harder to shear off. i went back and modified mine after the fact.
 

dtt454

Well-known member
Joined
Feb 24, 2011
Messages
363
Location
missouri
if your interested ill post some photos of how i modified the hinge like yours to a double shear.
 
OP
G

Griff93

Well-known member
Joined
Jul 25, 2009
Messages
1,121
Location
Huntsville, AL
Sure I'd like to see some pictures of a double sheer setup. I was thinking about doing something along those lines myself. I really don't like to do anything in single sheer but didn't have a good way to do it with this setup. I'm only running a 33 which should help as well.
 
To avoid these ads, REGISTER NOW!

dtt454

Well-known member
Joined
Feb 24, 2011
Messages
363
Location
missouri
my first design.
P1010046-1-1.jpg


after deciding i wanted to do it up in double shear. its still dirty from the last trip, but i think you can get the idea.
100_1791.jpg


essentially i took a scrap 3/8 thick rectangle tube and cut out the shape for that brace with a couple gussets. then i tapped the top of the spindle to 5/8 coarse thread and used a bolt to hold the top. i had to cut a hole in that cap for the bolt which isnt ideal being it can allow water to get in. but i figured in my case, its usually parked inside and i put a grease fitting in the middle so i can keep it full of grease. being its just a hinge i figure it can withstand a little water in there.

that big brace also welds down the back of the bumper even though you cant see that part.


100_1792.jpg


100_1793.jpg


i would have done it different if i had double shear in mind from the start, but for retrofitting it, it seemed like the best idea i could come up with.

the 5/8 bolt is a grade 9 cat bolt.
 

dtt454

Well-known member
Joined
Feb 24, 2011
Messages
363
Location
missouri
just another thought, i used to really load my bumper down. but i started having trouble with it wanting to tear out the frame. i dont know how much different your cj5 is, but after repairing the frame, i decided to just not put so much on it as i used to. unless your gonna go to the trouble of beefing up the frame too.
DSC00788.jpg


of course if you dont beat the **** out of it, that helps too.
 

mrrisotto

Active member
Joined
Apr 7, 2011
Messages
36
Location
Denver, CO
just another thought, i used to really load my bumper down. but i started having trouble with it wanting to tear out the frame. i dont know how much different your cj5 is, but after repairing the frame, i decided to just not put so much on it as i used to. unless your gonna go to the trouble of beefing up the frame too.
DSC00788.jpg


of course if you dont beat the **** out of it, that helps too.

How did you tie the bumper into the frame? Did you just weld/bolt the bumper to the rear cross member, or did you tie into the frame rails? Most of the damage I've seen with tire carriers bending the frame are from loading it down too much (big tires and/or cargo) and only mounting to the cross member...
 
OP
G

Griff93

Well-known member
Joined
Jul 25, 2009
Messages
1,121
Location
Huntsville, AL
Thanks for the pics dtt454. I was trying to figure out how to do that but make it seal. Unless I'm missing something, you have to get out the torch to change the spindle bearings as well if they get rusted up. I guess if you put a grease fitting in the side of the pivot and keep them full of grease it they should be alright. I've already been working on the frame reinforcement plates. I'm making some out of 1/4 in plate to tie the rear cross member into the frame for support.
 

dtt454

Well-known member
Joined
Feb 24, 2011
Messages
363
Location
missouri
the latest, i have some large mount plates to spread the surface area, but it just uses the existing bolt holes with sanwich plates behind them, i wanted to stay away from having to do frame work. once i tore the mounts off the bumper, and had to redo them better, but the frame was still intact.

i just decided i wont load it so heavy, like in that picture it just flexes so much back and forth, with the weight. you wont have as much trouble with yours being your weight isnt near as far away from your anchor point as what i have.

anymore the most i put on my rack just a cooler.
 

dtt454

Well-known member
Joined
Feb 24, 2011
Messages
363
Location
missouri
and yes i have a grease fitting there on the inside, it doesnt show real well in my last photo, but i was trying to show it.

and yes if i ever decide to take it apart it will require cutting.

but its the best i could think of after already having made the thing.

i figure though when used as a hinge roller bearings really ought to last almost forever.

oh and if i remember right i poked a couple holes in the seal on the bottom, so it still mostly functions to keep dirt out, but if water gets in, it has a way out.
 
OP
G

Griff93

Well-known member
Joined
Jul 25, 2009
Messages
1,121
Location
Huntsville, AL
I think I have an idea that may work. I'm going to have to make a couple of parts on a lathe. If it works, I'll post some pictures.
 

Zane

Well-known member
Joined
Feb 25, 2011
Messages
63
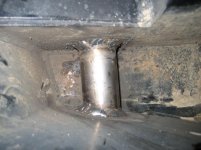
When I built my rear swing out, to make the spindle as strong as I could, rather than welding the spindle to the top of the bumper I went all the way through it. This provided two welding points. If that is not an option, using some good gussets to add strength to it would be a good idea. I knew someone who's carrier fell off going down the highway, it did not turn out well for the person that was behind him..

I really like the way you have the cans storage built into your carrier, very slick set up. Not sure if it will give you guys any new ideas, but i will attach a few pictures of mine, although its not on a Jeep. A complete write up on the build was done HERE if interested.
 

Attachments

  • IMG_7041.jpg
    IMG_7041.jpg
    142.1 KB · Views: 22
  • hole bumper.jpg
    hole bumper.jpg
    90.8 KB · Views: 21
  • spendle 2.jpg
    spendle 2.jpg
    96.8 KB · Views: 26
  • left angle.jpg
    left angle.jpg
    92.9 KB · Views: 25
  • back right angle.jpg
    back right angle.jpg
    100.3 KB · Views: 24

472scout

Well-known member
Joined
Sep 18, 2010
Messages
1,284
Location
back 40
When I built my rear swing out, to make the spindle as strong as I could, rather than welding the spindle to the top of the bumper I went all the way through it. This provided two welding points. If that is not an option, using some good gussets to add strength to it would be a good idea. I knew someone who's carrier fell off going down the highway, it did not turn out well for the person that was behind him..

I really like the way you have the cans storage built into your carrier, very slick set up. Not sure if it will give you guys any new ideas, but i will attach a few pictures of mine, although its not on a Jeep. A complete write up on the build was done HERE if interested.

Zane,

Super nice job on the bumper. Seriously, the fit and finish looks great. If I can make one comment though (I don't want to offend) mounting the spindle all the way though the bumper and welding it top and bottom will not alone prevent the spindle from flexing back and forth and potentially snapping off at the upper weld. Not only do we have 50-100 lbs of tire and rim with a couple of feet of leverage flexing against the spindle hundreds of times an hour, but also a spindle which is potentially somewhat brittle, at the point of highest load, due to the welding process. To eliminate any chance of failure a strong spindle and double shear design is really the best way to go. The cost of failure is just too high in my opinion to take any chances.
 
Last edited:

Zane

Well-known member
Joined
Feb 25, 2011
Messages
63
Zane,

Super nice job on the bumper. Seriously, the fit and finish looks great. If I can make one comment though (I don't want to offend) mounting the spindle all the way though the bumper and welding it top and bottom will not alone prevent the spindle from flexing back and forth and potentially snapping off at the upper weld. Not only do we have 50-100 lbs of tire and rim with a couple of feet of leverage flexing against the spindle hundreds of times an hour, but also a spindle which is potentially somewhat brittle, at the point of highest load, due to the welding process. To eliminate any chance of failure a strong spindle and double shear design is really the best way to go. The cost of failure is just too high in my opinion to take any chances.

Completely agree, no offence taken and you make VERY good point. The quality of the spindle is one of the most important aspects of a swing out tire carrier build. I spent quite a bit of time researching what spindle to use and purchased the one I used from 4x4 Labs HERE. The spindle is massive and to be honest it was the most expensive part of the build, but worth the cost in my opinion.
 
To avoid these ads, REGISTER NOW!
Top Bottom