oddrodder
Member
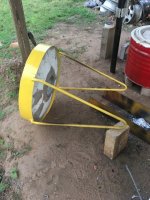
About the size of it....

Sent from my SM-G950U using Tapatalk
Sent from my SM-G950U using Tapatalk

About the size of it....
Sent from my SM-G950U using Tapatalk

That is GOLD! I am printing that one out and hanging it in my shop.

About the size of it....
Sent from my SM-G950U using Tapatalk
Andy I don't need to say a thing...……….

Yes! You're absolutely right.

Looks like you're having a ton of fun.
About the size of it....
Sent from my SM-G950U using Tapatalk
That is GOLD! I am printing that one out and hanging it in my shop.
I'd be down for a youtube video. Nothing purrs like an IH. I'm cleaning up a C right now; finishing up tires (if you ever need a good deal on fronts, Carlyle Farm Specialist is USA and cheap). NAPA got in my headgasket today so she can go back together soon (turns out someone else put SC pistons in).
ditto.
GB.

Andy, on the slim possibility of any profits from bracelets sells, let me remind you a certain someone probably still has my... er, I mean your Dewalt drill. I’d say it would be fair to keep any split in profits. I won’t tell if you don’t.
You can stamp my bracelet #3.
Sent from my iPhone using The Garage Journal mobile app
Endorsed..
")
Andy..
Andy..
That's funny that the dealer would do that. Mine does have SC stickers; although I'm going to revert back to C stickers.
They are IH pistons. If the dealer painted it they didn't do the best job or use oem decals, though.
I second what Steve said!
Lyndon
Don't have time for too many words, but I am watching!
About the size of it....
I Know it's a way back up the thread but thats spot on.. Printing it out too..lol
Yeah, I'm with you in that boat. Not sure why the dealers would; I feel everyone knows (knew) the easiest way to distinguish them would be the brakes, which weren't changed.
Handy: just curious if you like Aluminum chips better than steel on your mill and lathe or do they cut equally as well with your sharp tools?
I'm guessing it's SATURDAY in your world today?
I'm going to war against the Carpenter Ants today and my bride is armed and ready.
have a great day no matter what you do.
The brackets are looking great, Andy. The folks down at the pharmacy will love them.
Enjoy the holiday weekend!
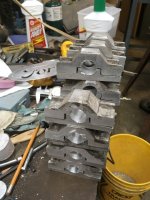
The brackets look very professional, but then again you always make things to that grade. Sometimes you get lucky with the castings. I out a gas vent on an injection mould I made once in the wrong spot, when they first come out of the mould it looked like they had piles.
The theme is steampunk so I didn't worry too much about small variations.About the size of it....
I Know it's a way back up the thread but thats spot on.. Printing it out too..lol
It's so sad, and it does not get better with age.
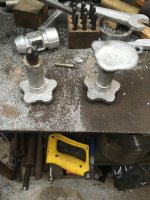
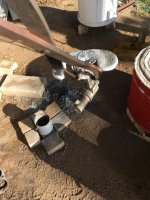
At my friend's house we did a melt and pour. His plan is to make a bulky casting and then machine to shape. He also uses existing items for patterns. He does very well at it. So we looked around for a pattern to cast and he suggested the two knobs to the left of the flask.
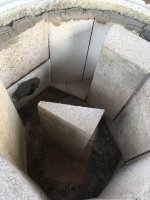
Since they were not flat on the back they do not lend themselves well to sand casting. So I tried putting the bottom of the knob extension at the parting line (between the two flask halves) then dug out to the large part of the knob when ramming the cope. This lets you removed the patterns from the sand and results in a parting line which is not a plane, but bends to where it needs to be. Does that make sense? I had read about the technique but had never done it. Maybe a picture will help.

The knobs came out very well. bottom

And top

Now they just need the sprues cut off, flashing trimmed, and a hole drilled and tapped for mounting.
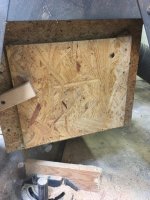
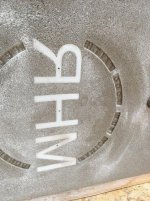
This morning I made two trivets early on. They are getting better, I've improved my technique.

Thanks for stopping by!
Glad to a glimpse of sawdust being made in the woodshop Andy. How do you like the Grizzly combo planer? I have always wanted one to save space. I am also curious what the machine to the left behind the combo machine is?
Bret
Yes, there are two stages of SH/SM, however both have disc brakes. Belly pump & battery location being key.
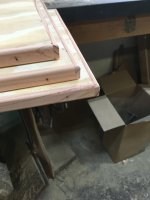
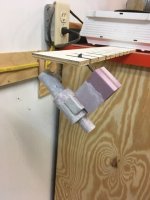
Handy: great to see you cutting some wood to make shelving or whatever for the pharmacy and thanks for mentioning the safety tips for all of us to know or remember when using our power tools.
just a reminder since you said you were going to melt some aluminum tomorrow that it's actually SUNDAY!!
we had our sort of relaxing rest day today and they really help to recharge my (our) batteries so to speak.
cheers and I think I saw tea bags so maybe just some hot water and ice cubes and i'll make my own tea when i stop by to watch all the goings on while you get stuff done.
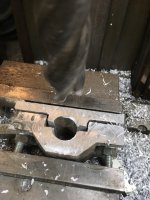
I need to make some more lost foam brackets and did not get them made last night, and I'm caught up on trivets. I think I have six to deflash and finish up.Hey Andy, could you take a picture of all your storage boxes that in the picture of your wood working area? Trying to get some ideas for my shop. Thanks, BUG
Looking forward to seeing the pharmacy shelves. Keep up the great lessons.
Sent from my iPhone using Tapatalk
 the trivets are looking really sharp, Can you do a tuit the're also round..
 Andy good to see the work progress. I sounds like more design time to make the brackets to make the vertical brackets.
Dwight
Evening Andy,
Your foundry work has been a revelation and an education to me, it's not something I've ever looked at, thanks for posting.
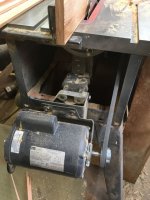
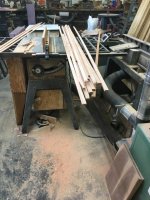
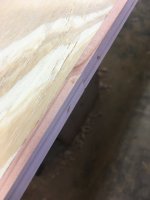
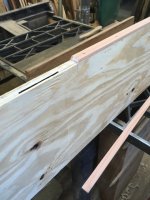
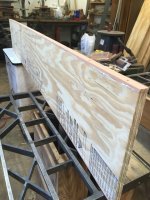
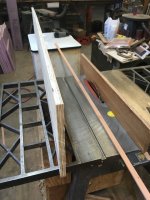
Mitres prevent showing end grain , which is not always welcome, but with thin edge banding like yours ,it's less of a problem. I have a overhand/underhand planner like yours, it's used mostly under, for planning and leaves the self same roller marks on thin material.You can't rebate with the factory guards on the saw.
Paint the push sticks a bright colour , makes it less likely you can't find it, or tied to the machine on a length of string.
Regards
Steve
Andy, everything aside you have done a great job.
I can't wait to see the finished product.
I really can't put stuff in the drawers until I get a round tuit for labels. Not surprised that you are tired Andy... you've been working hard and cleaning too! anyway they are selling all the fixtures and shelving. They have the nut and bolt bins that look like the ones you have, they were asking $20.00 each small section.? I was one of the first to leave my name when the time comes for them to close. They said they wouldn't sell the bins until all the content is gone. But I did notice a welder shop guy came in and bought about 40 bins with all the stainless Andy you will not know yourself when you get your storage bins done as there is nothing like getting things sorted..
There is only one thing worse than a picky paying customer and that is a picky non-paying customer.
Now I feel bad for almost taking the whole weekend off.
I agree wholeheartedly with you Andy on the use of the push sticks and the tablesaw. When I was taught by my dad he refused to use the guard for the same reason. He always said the only carpenters he knew that were missing fingers or had a serious accident at the saw was because of the guard. But push
sticks were plentiful around the shop. He even had a couple he knew tell me their stories on their accidents.
We argued though on the terminology he used when I was using his power tools. He always told me to fear the tools. I argued that if I feared something then I wasn't going to be around it, however if I had a deep respect for what it was capable of then I stayed aware and focused on the use and where my body parts are. I've had very few kickbacks but my hands still have all of my fingers.
I am hoping to find a planer this year so thanks for your review of the Grizzly. I keep hoping that the stars will align for me and I will find one for sale and the money will be there at the same time. So far I haven't had the timing thing right yet.
Keep up the great work. I really enjoy your thread every day even though I don't post to it much.
Nice job Andy! I enjoyed catching up with your thread while having my morning coffee, I'm with you on hating miter joints!
Bolt bins are indispensable!
They have some at a store here in town. They are closing after 70 or so years. The store was called Merchandise Mart originally, then turned into a Sentry Hardware, then a Ace Hardware. The building is over 100 years old. It got to be where they were in completion with Wal Mart and the bigger lumber yard.
They did have hard to find parts on the older appliances, but not enough to keep the business going.
A lot less cleanup