To avoid these ads, REGISTER NOW!

CL's score / clausing drillpress resto

chris fresh

Well-known member
Joined
Jan 10, 2011
Messages
1,519
Location
savannah ga
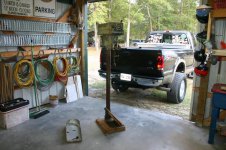
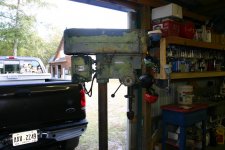
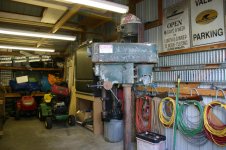
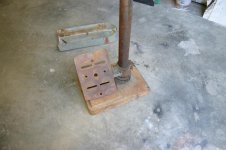
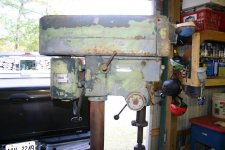
so today i scored an old clausing drill press,model number say's, series 16v.got it from an old timer who was scraping a bunch of junk at his place,i asked if it worked and he fired it up.only problem is that it's 3 phase,but it does work.so i have a bunch of stuff going on right now,but within a week or two i will begin the break down.everything is gonna get blasted,powder coated and restored.

it's only missing one knob on the speed control and instead of trying to find one,all are going to get replaced with aluminum ones.i could turn them myself,but i have a good source for some larger ones for about 15 apiece,wich i think will look nice once it's all said and done.oh, and i paid 45 clams for it :) ,and heres the pics.
 

Attachments

  • IMG_0339.jpg
    IMG_0339.jpg
    151.2 KB · Views: 501
  • IMG_0340.jpg
    IMG_0340.jpg
    144.6 KB · Views: 462
To avoid these ads, REGISTER NOW!

2oolhound

Well-known member
Joined
Dec 18, 2010
Messages
5,918
Location
BC Canada
I'll be the 1st. YOU ****!

A working variable speed clausing for $45.00!

Definitely worth restoring.
 
OP
C

chris fresh

Well-known member
Joined
Jan 10, 2011
Messages
1,519
Location
savannah ga
Add a 120V 1 phase to 240V 3 phase variable frequency drive and you are set!

already talked to a guy i got my 5hp baldor from, my compressor had a 3 phase 5hp baldor when i bought it,found a surplus guy and got a single phase 5hp baldor from him for 260.00,then i sold the 3 phase for 200.

he's gonna get back to me on the 3/4 hp i'm looking for.i've thought about doin a converter a few times,and really i should of kept the 5hp 3phase,to make a converter,but i know that some day i will find a mill that's 3 phase and bring it home,that will be the day that i either build,or buy a converter.
 
OP
C

chris fresh

Well-known member
Joined
Jan 10, 2011
Messages
1,519
Location
savannah ga
I'll be the 1st. YOU ****!

A working variable speed clausing for $45.00!

Definitely worth restoring.

thanks man on the suckage (wow,you never hear that), the hardest part for me is ,what color? don't want grey,thought about the original green,now i'm thinking of somewhere like an off white or a cream color.something along the lines of the color that JET uses for there stuff.

i want new,but with the look of something old and rich.maybe cream with some sort of chocolate or brown. something 50's ish.
 

DavidB

Well-known member
Joined
Feb 6, 2010
Messages
734
Location
Navarre, FL
Congrats on the Clausing. That's a hell of a deal for $45. I've got the same model, I think, and need to finish my resto on it. You might want to check if there is any lateral play on the spindle. The bearings were shot in mine and chewed up the spindle. If your bearings are questionable it's cheaper to replace them than the spindle. Clausing has parts for any of their machines if you need anything.

If you want the manual for you machine check here. http://vintagemachinery.org/mfgindex/detail.aspx?id=182&tab=3 If you don't see it listed you can email Clausing and they'll send you a scanned pdf of the manual.
 
OP
C

chris fresh

Well-known member
Joined
Jan 10, 2011
Messages
1,519
Location
savannah ga
Congrats on the Clausing. That's a hell of a deal for $45. I've got the same model, I think, and need to finish my resto on it. You might want to check if there is any lateral play on the spindle. The bearings were shot in mine and chewed up the spindle. If your bearings are questionable it's cheaper to replace them than the spindle. Clausing has parts for any of their machines if you need anything.

If you want the manual for you machine check here. http://vintagemachinery.org/mfgindex/detail.aspx?id=182&tab=3 If you don't see it listed you can email Clausing and they'll send you a scanned pdf of the manual.

awsome man,thanks for the info. i was on vintage earlier just looking around,i said earlier that i was gonna wait a week or two,but i know it's gonna be just like my snap-on resto,i've already gone thru it with pb blaster and have all the bolts free'd up or soaking.and i've already texted my powder coater to let him know i have stuff comin in. :bounce:

it's only sunday,i know i will be heavily envolved by wed.:pimpflash
 
OP
C

chris fresh

Well-known member
Joined
Jan 10, 2011
Messages
1,519
Location
savannah ga
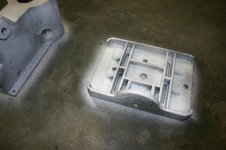
so i called it!,it's tuesday and i started playin around with stuff.i pulled the top cover off,wich someone made out of sheet metal.i think this thing came out of a factory and someone had to cover the pulley's for some saftey reason.don't know if it actually had a cover originally.then i pulled the top cover that wraps around the pulley's,just to see what it looked like inside,it's seen it's share,but not bad.

turns out that my powder coater is out of commision due to layin down a bike,so i'm going to blast whatever will fit in my cabinet,then i will probably prime and paint myself.

heres the beginning pics of the first little bit of tear down
 

Attachments

  • IMG_0354.jpg
    IMG_0354.jpg
    123 KB · Views: 190
  • IMG_0351.jpg
    IMG_0351.jpg
    136.7 KB · Views: 205
  • IMG_0350.jpg
    IMG_0350.jpg
    141.2 KB · Views: 224
OP
C

chris fresh

Well-known member
Joined
Jan 10, 2011
Messages
1,519
Location
savannah ga
so i got into it tonight and started breaking it down,i pulled the top pieces and worked my way down
 

Attachments

  • IMG_0356.jpg
    IMG_0356.jpg
    140.6 KB · Views: 116
  • IMG_0357.jpg
    IMG_0357.jpg
    139.3 KB · Views: 113
  • IMG_0358.jpg
    IMG_0358.jpg
    134.8 KB · Views: 102
OP
C

chris fresh

Well-known member
Joined
Jan 10, 2011
Messages
1,519
Location
savannah ga
then onto the other stuff,i pulled the handles and the shaft that runs through the press
 

Attachments

  • IMG_0361.jpg
    IMG_0361.jpg
    143.9 KB · Views: 111
  • IMG_0360.jpg
    IMG_0360.jpg
    136.7 KB · Views: 102
  • IMG_0359.jpg
    IMG_0359.jpg
    135.8 KB · Views: 104
OP
C

chris fresh

Well-known member
Joined
Jan 10, 2011
Messages
1,519
Location
savannah ga
after pulling the through shaft i found a nice clump of dried up mud inside the hole about the size of a golf ball,some mud wasp had himself a nice warm hole to live in for a while
 

Attachments

  • IMG_0362.jpg
    IMG_0362.jpg
    135.4 KB · Views: 96
OP
C

chris fresh

Well-known member
Joined
Jan 10, 2011
Messages
1,519
Location
savannah ga
so right now it's stripped and all i have left is to figure out how to get this pulley off,or get the shaft out and pull the pulley off afterwards.tomorrow i will have everything else broke down and ready for blasting.
 

Attachments

  • IMG_0371.jpg
    IMG_0371.jpg
    135.8 KB · Views: 84
  • IMG_0366.jpg
    IMG_0366.jpg
    136.9 KB · Views: 76

DavidB

Well-known member
Joined
Feb 6, 2010
Messages
734
Location
Navarre, FL
Hmm, I was hoping I could help but the pulley setup on yours is backwards from mine. With the progress you've made I don't think you'll have a problem getting the rest of it apart. Still, look around for some kind of retaining ring on the bottom of the shaft that is connected with the top pulley half.
 
OP
C

chris fresh

Well-known member
Joined
Jan 10, 2011
Messages
1,519
Location
savannah ga
Hmm, I was hoping I could help but the pulley setup on yours is backwards from mine. With the progress you've made I don't think you'll have a problem getting the rest of it apart. Still, look around for some kind of retaining ring on the bottom of the shaft that is connected with the top pulley half.

that's what i was thinkin,couldn't see to well in the opening,and of course my shop flashlight is nowhere to be found.tomorrows a new day,it will come out and then i'll pull the head off the column and the table and base. a friend of mine has a machine shop with a huge lathe,i think i'm gonna bring him the column and have him turn it and sand it up for me.
 
OP
C

chris fresh

Well-known member
Joined
Jan 10, 2011
Messages
1,519
Location
savannah ga
so this morning i got back into it,the first thing was to get that pulley off of it,after looking and looking,i decided to try my luck with a big pry bar.i put a little pressure on the under side of the pulley and it began to raise.i would call it a snug press fit.the shaft came up and brought both bearings with it.bearing are in great shape,so they will be reused.

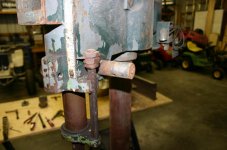
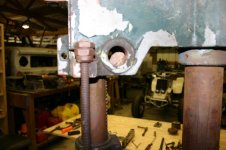
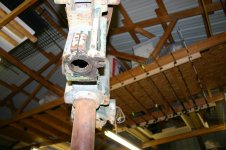
now with that off,next was to remove the head and base from the column,i soaked everything with pb blaster over night and it help,but wasn't coming easy.so heres where i smartened up,i put the press on the edge of my shop door and threw a 6x6 block across the base,then i put the front bucket of my backhoe on it to keep it from moving.then with the help of a piece of pipe run in through the switch hole,i could turn side to side to free it up.that came off fairy easy.
 

Attachments

  • IMG_0375.jpg
    IMG_0375.jpg
    139.9 KB · Views: 89
  • IMG_0374.jpg
    IMG_0374.jpg
    147.4 KB · Views: 92
  • IMG_0376.jpg
    IMG_0376.jpg
    140.2 KB · Views: 92
OP
C

chris fresh

Well-known member
Joined
Jan 10, 2011
Messages
1,519
Location
savannah ga
the bottom was a different story,it had been soaked more than once and still faught me.i pulled both set screws and put a pipe wrench on it,and nothin!,so that's when the 4ft piece of pipe and the come along came into play,then she came out.
 

Attachments

  • IMG_0379.jpg
    IMG_0379.jpg
    144 KB · Views: 104
  • IMG_0378.jpg
    IMG_0378.jpg
    144.8 KB · Views: 102
  • IMG_0377.jpg
    IMG_0377.jpg
    143.6 KB · Views: 99
OP
C

chris fresh

Well-known member
Joined
Jan 10, 2011
Messages
1,519
Location
savannah ga
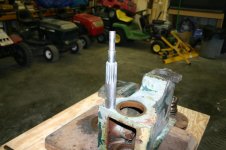
with everything broke down,i now have a pile of parts to blast and clean,heres a before and after of the shaft.the grease was so old that i had to use a putty knife to chip it out of the splines.i didn't blast it because of the machine surfaces,it just got the wire wheel treatment
 

Attachments

  • IMG_0380.jpg
    IMG_0380.jpg
    145.7 KB · Views: 106
  • IMG_0385.jpg
    IMG_0385.jpg
    132.9 KB · Views: 121
To avoid these ads, REGISTER NOW!
OP
C

chris fresh

Well-known member
Joined
Jan 10, 2011
Messages
1,519
Location
savannah ga
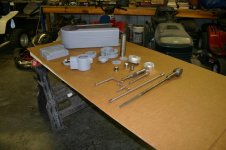
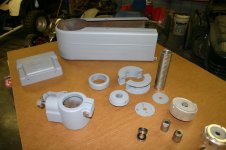
and heres the cleaned shaft and some parts that made it through the blasting cabinet
 

Attachments

  • IMG_0387.jpg
    IMG_0387.jpg
    134.2 KB · Views: 123
  • IMG_0390.jpg
    IMG_0390.jpg
    132.4 KB · Views: 131
OP
C

chris fresh

Well-known member
Joined
Jan 10, 2011
Messages
1,519
Location
savannah ga
so today was a pretty good day except for fighting the 4 layers of paint on the body parts.last night i soaked everything in stripper and let it ride over night,then this morning i thought it should come off fairly easy,nope!.what i found is that all three layers are apoxy paint,just laugh's at stripper.so after a good scraping and another coat of stripper,then a wash down,it finally went into the blast cabinet.

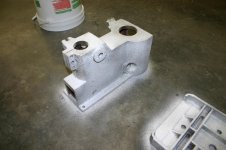
a lot of other pieces are prepped and in prime,and the handles and such are just wire wheeled and are going to stay like that with some clear coat to prevent rust.

more pics and more coming
 

Attachments

  • IMG_0393.jpg
    IMG_0393.jpg
    147.9 KB · Views: 104
  • IMG_0401.jpg
    IMG_0401.jpg
    139.9 KB · Views: 101
  • IMG_0402.jpg
    IMG_0402.jpg
    137 KB · Views: 108
OP
C

chris fresh

Well-known member
Joined
Jan 10, 2011
Messages
1,519
Location
savannah ga
and heres a couple more pics,last one you can see that theres not to many pieces left to prep before they see primer
 

Attachments

  • IMG_0405.jpg
    IMG_0405.jpg
    143.1 KB · Views: 89
  • IMG_0404.jpg
    IMG_0404.jpg
    140.8 KB · Views: 89
  • IMG_0403.jpg
    IMG_0403.jpg
    135 KB · Views: 85

zruvalcaba

Well-known member
Joined
Oct 25, 2011
Messages
315
Location
San Diego, California
Interested to see how this turns out. I'm right in the middle of a Clausing restoration project myself. I didn't get quite the deal that you got but I'm happy with my purchase nonetheless. It's a 15" step-pulley floor model circa 1963. So far I have the whole thing broken down. I was going to use Jasco paint stripper on it as well but after reading your post about the stripper, I'm wondering if it's even worth it to try. Curious to know what paint you end up using...I was going to go with Rust-O-Leum's Dark Machine Grey but I'd actually prefer the JET color scheme as well.
 
OP
C

chris fresh

Well-known member
Joined
Jan 10, 2011
Messages
1,519
Location
savannah ga
Interested to see how this turns out. I'm right in the middle of a Clausing restoration project myself. I didn't get quite the deal that you got but I'm happy with my purchase nonetheless. It's a 15" step-pulley floor model circa 1963. So far I have the whole thing broken down. I was going to use Jasco paint stripper on it as well but after reading your post about the stripper, I'm wondering if it's even worth it to try. Curious to know what paint you end up using...I was going to go with Rust-O-Leum's Dark Machine Grey but I'd actually prefer the JET color scheme as well.

i've used jasco for a long time,and airplane stripper before that,they both work really well except for when you get into old apoxy paint.the thing had been repainted and a few times and the stripper took the rattle can off quick.

as for the blasting in use dupont starblast,it works really well,unless it's older and dull,so today i tried a bag of black bueaty,wich i think is more of a charcole base.it's a very aggressive cut,but my gun doesn't like it,with it being larger i had clogging problems.

all and all it hasn't been that bad of a job to do,it's more of a no patience thing with me.

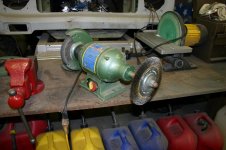
as for the shiny chrome stuff,HA!,i wish.the handles were rusted,but just surface.i have a bench top grinder/wire wheel set up with a med cut 8'' wheel.i just ran them back and forth and they cleaned up great.i'm not going to paint them,just one final cleaning with some laquer thinner and then i'm goin to clear them.

as for paint,i haven't decided,i'm still leaning toward the JET scheme,but that might change.i have a friend who owns a body shop and can get me whatever i want,i'm going to ask him tomorrow if i can see his paint book and maybe find something i like.i think the closest color right out of a can would probably be that cream color they use on the chrysler 300c's,if i went with that,it would probably be pricey.i might be able to get the same mix from a different company and save a ton of dough.

all the primer you see is duplicolr 500 degree motor paint (rattle can),because i was out of primer i usually use,but it won't matter.it will get two fat coats of color and then cleared.

hope that kinda helps,now wheres your resto pics? :)
 

zruvalcaba

Well-known member
Joined
Oct 25, 2011
Messages
315
Location
San Diego, California
No pics to share yet unless you want to see a massive pile-o-parts? I can certainly post those for ya! :) Perhaps we convert this thread to 2 Clausing Drill Press Restorations!

It's great to see another member restoring pretty much the exact same DP I'm restoring...I'm really looking forward to seeing how yours turns out.

I plan on using 70 grit Aluminum Oxide to blast the parts...same stuff I use on all my gun parts...you think that's too aggressive?

Also, how did you clean up the quill, bearings, and all the other inner components? Same wire wheel?

Zak
 
Last edited:
OP
C

chris fresh

Well-known member
Joined
Jan 10, 2011
Messages
1,519
Location
savannah ga
No pics to share yet unless you want to see a massive pile-o-parts? I can certainly post those for ya! :) Perhaps we convert this thread to 2 Clausing Drill Press Restorations!

It's great to see another member restoring pretty much the exact same DP I'm restoring...I'm really looking forward to seeing how yours turns out.

I plan on using 70 grit Aluminum Oxide to blast the parts...same stuff I use on all my gun parts...you think that's too aggressive?

Also, how did you clean up the quill, bearings, and all the other inner components? Same wire wheel?

Zak

if your using it to do gun parts,it might not be aggressive enough,all depends on what shape your starting with.i don't know the grit of the starblast,but it's fine,the black stuff today was almost like crushed glass,it will hurt your fingers to push your hand in the bag.

as for the wire wheel,yeah,i used it for everything shiny,it's a little old and i'm due for a new one,but sometimes that's good depending on what your cleaning. i did end up going and getting a set of new bearings,they felt good together,then when i pulled them,one was rough.plus i used a long piece of 1/2 round stock to punch them out.and i wasn't exactly babying them when i did it.new ones were 10 bucks and change for the pair,and there pre greased/sealed.

i'll take a pic of the wire wheel set up and show ya what i'm using.

also,tomorrow i'm going to get the pulley apart and cleaned,then i'll check those bearings as well,i say i won't,but i know i will go get a fresh set regardless of how they feel and put them in before putting it all back together.

couple other things i'm doing,

as for the column that connects the head to the base,and the table rides on,for cleaning i could of just sanded it,but i have a friend with a machine shop with a 10 ft lathe,i dropped off the tube to him toady and he's gonna chuck it up for me and sand it out smooth with some emery cloth,picking it up sat morning.

and i don't know what kind of shape all your tags are in but,what i'm doing is this.i have a friend who owns a graphic design place,they do alot of sign's and stickers and what not,today i brought him the black gauge on the front for the variable speed,the ruler,and both the tags that say clausing from the front of the dp and the side.all the tags on mine were really bad,so he's making me stickers that are exact replica's and they are gonna go over the exsisting etchings,won't be original,but will look as good,if not better than the day it left the factory
 
OP
C

chris fresh

Well-known member
Joined
Jan 10, 2011
Messages
1,519
Location
savannah ga
heres the pic of the wire wheel set up,and also a pic of the jasco stripper at work,the weathers been great during the day,but colder at night.were about 50 here tonight,and i think that the colder weather is to my advantage with the stripper,it's not drying out and has longer time to work.
 

Attachments

  • IMG_0407.jpg
    IMG_0407.jpg
    146 KB · Views: 95
  • IMG_0408.jpg
    IMG_0408.jpg
    145.4 KB · Views: 90
  • IMG_0409.jpg
    IMG_0409.jpg
    142 KB · Views: 108

zruvalcaba

Well-known member
Joined
Oct 25, 2011
Messages
315
Location
San Diego, California
Awesome, thanks for the details. That definitely gives me some more direction on what I need to do to clean up other parts. Since you brought it up, here's my pile-o-parts.

Photo%20Nov%2018%2C%206%2055%2016%20AM%20%281%29.jpg


Again, I have about 2 hours total in breakdown. Many hours in experimenting with various cleaners, etc. So far I've found ScotchBrite pads and WD40 to be invaluable. Looks like I'll need a wire wheel as well.

BTW, I would REALLY like to see a detailed breakdown of the motor resto.
 
OP
C

chris fresh

Well-known member
Joined
Jan 10, 2011
Messages
1,519
Location
savannah ga
for the motor i'm swapping out to a single phase,just easier.but i did get a little done today,i finally got all the **** apart for the variable speed,got the pulley apart and everything related to that area.everything was gummed up and the bearings in the pulley are shot,didn't hurt the shaft,but they were starting to change color.

should be in good shape within the next few day's,picking up the column tomorrow,picking up all the stickers on tuesday.planning on paint maybe on monday
 
OP
C

chris fresh

Well-known member
Joined
Jan 10, 2011
Messages
1,519
Location
savannah ga
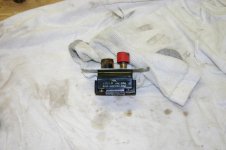
well i've got a couple updates.getting closer on the prep and pieces in prime,along with hunting certain parts.heres a pic of the switch that came out of it,one button is broke and the whole thing is in rough shape.gonna go to grainger tomorrow and see what they have.
 

Attachments

  • IMG_0413.jpg
    IMG_0413.jpg
    148 KB · Views: 68
  • IMG_0410.jpg
    IMG_0410.jpg
    143.1 KB · Views: 69
OP
C

chris fresh

Well-known member
Joined
Jan 10, 2011
Messages
1,519
Location
savannah ga
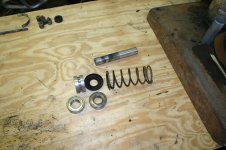
i decided to pull the pulley's apart to blast a wheel everything,glad i did because the bearings were not in good shape,i'll be replacing these tomorrow as well.
 

Attachments

  • IMG_0419.jpg
    IMG_0419.jpg
    144.7 KB · Views: 44
OP
C

chris fresh

Well-known member
Joined
Jan 10, 2011
Messages
1,519
Location
savannah ga
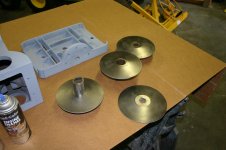
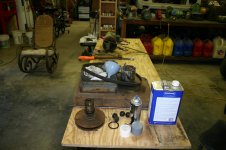
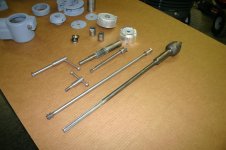
pulley's cleaned up very nice,i blasted them,then i used the wire wheel on the belt area.i figured if i painted it,it would just wear off.only the outer parts will be painted.
 

Attachments

  • IMG_0421.jpg
    IMG_0421.jpg
    137.7 KB · Views: 84
OP
C

chris fresh

Well-known member
Joined
Jan 10, 2011
Messages
1,519
Location
savannah ga
i had mentioned earlier that my buddy was gonna turn the column for me,well that didn't work out because of him being covered up with work,so i started thinkin about it and came up with an idea.i could use my lathe with some sort of outer support to carry the length.i remembered i had an old pair of rollerblades layin in a box,so i got busy building.it's not the prettiest,but it's workin damn good.


and this i would have shown,but apparently gj doesn't feel like allowing me to post the pics.i tried 4 different ones and nope!,this has been the case a lot lately,and it's only this board,so if it goes well and the server decided to work with me instead of against me,maybe i'll post them later or tomorrow
 

DavidB

Well-known member
Joined
Feb 6, 2010
Messages
734
Location
Navarre, FL
I think I came across someone who did something similar to clean up their drill press post. Your cleanup is going very fast! Makes me want to start on mine. You'll have yours finished by next weekend at this rate.
 
To avoid these ads, REGISTER NOW!
Top Bottom