ovrrdrive
Well-known member
I've been working on this for a few months now and am finally getting around to a build thread. I posted this on pirate too but I also wanted to post it here for more feedback. Hope you guys don't mind.
A little history on me first... I got my first welder (MM180) about 8 months ago and before that my experience with working with metal were a hf 4" grinder with cutoff wheels and a drill. I always wanted to do it though and finally got around to it and love it. I got an Eastwood Versa Cut60 at the end of October and loved that even more. About the time I realized I didn't really have much hand/eye coordination and even less raw talent I saw my first cnc plasma vid and figured what the hell, even I could do that. I read for a few months and studied, put the non-cnc capable Eastwood up on CL and sold it, and started ordering parts at the end of December. Parts started showing up in January and I got started around the end of the month, working mostly a few hours after work and a little bit on the weekends.
It's been a great experience so far. Most of my welds are ok, some borderline and a few look great. Overall I think it ended up looking pretty damned good. I'm sure my methods and skill level isn't up to what most you are doing but it really feels like it turned out pretty good. From what I can figure out the CRS rails are the only thing that needs to be almost perfect and I ended up pretty happy with them.
Enough bs and on to the build. I'll try to add to the pics but they will do most of the talking for me.
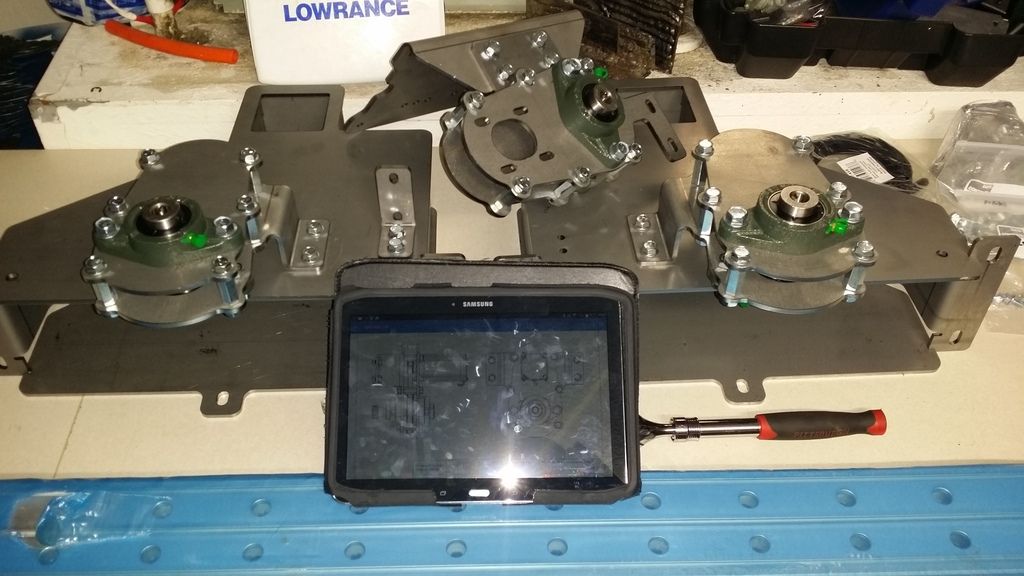
This is the order from Precision Plasma:
Magnum HD II Gantry kit in 5x10
Velox Z breakaway mount
From Velox:
ZA-650P
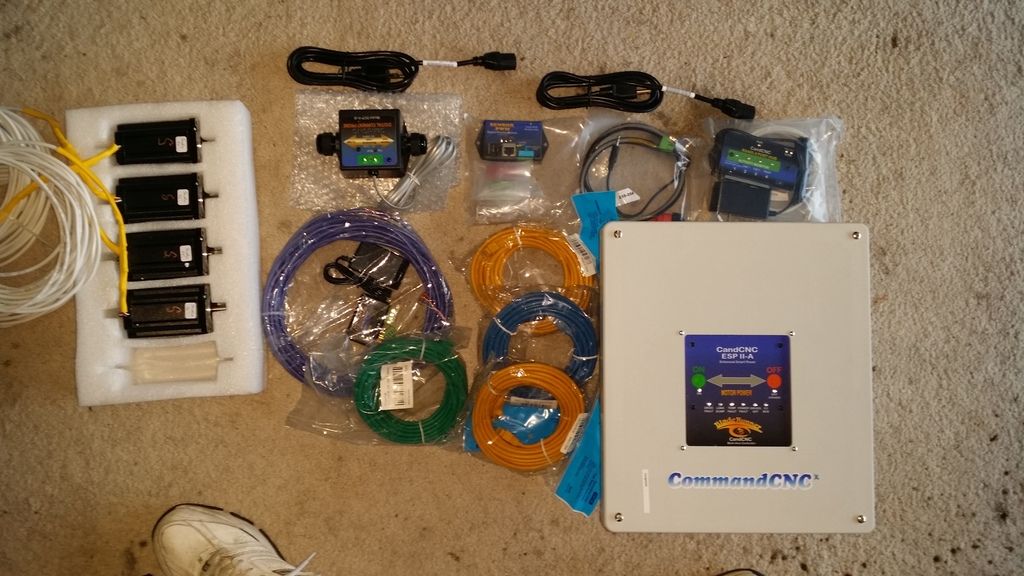
From CandCNC:
Dragon Cut Linux 620-4 Bundle with Linux Computer
HyT Advanced Connection Kit B (without Hub)
SheetCAM for Linux
I decided to go with Precision Plasma LLC for the gantry kit. After emailing back and forth with Ron a few times I decided on the Magnum HD II kit because my goal is to build a versatile machine that can do several different tasks because right now I'm not really sure what I'll be doing with it. If something looks like it will generate more revenue I'll change directions mid stream. According to Ron if I want to do any routing the Magnum is the better gantry and 70% of the kits he sells to people go that route. I bought the kit in 5x10 even though I am only building a 5x5 kit right now because it's cheaper to order it up front and if the table makes money for me I'll do the expansion asap. For now the 5x5 kit will be plenty.
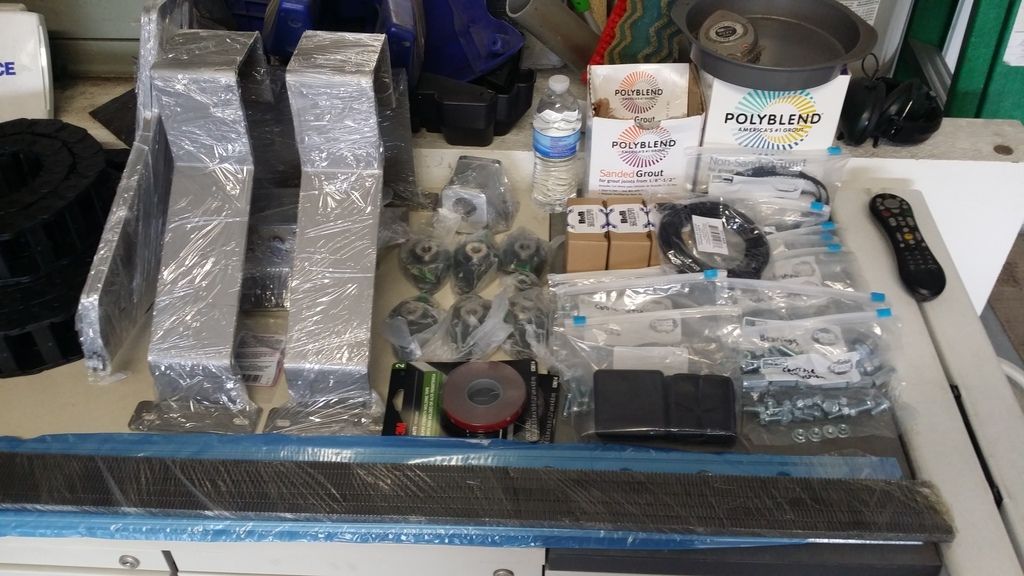
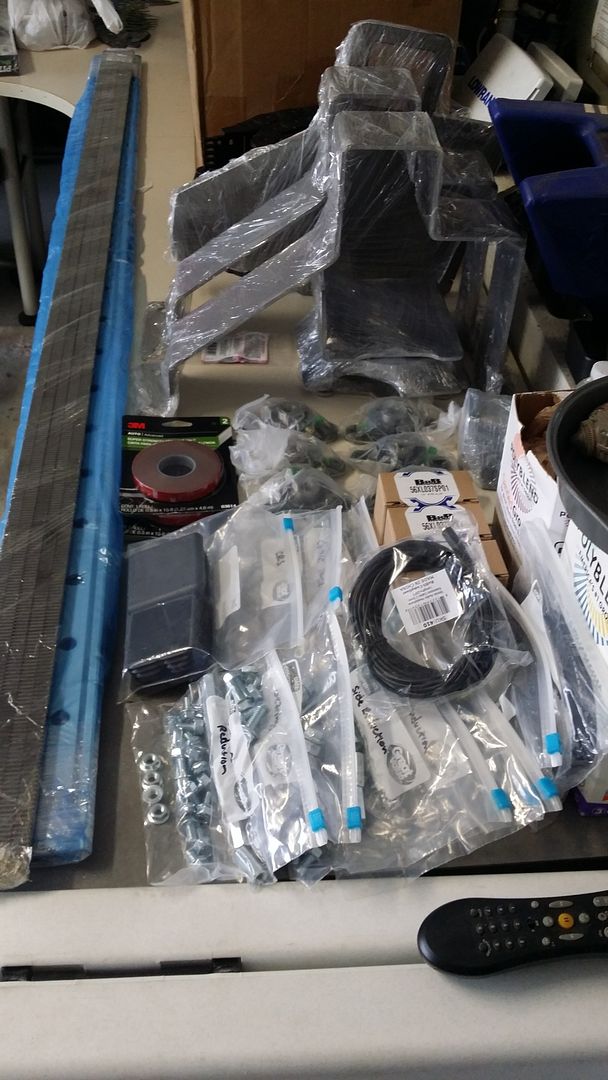
The kit from PPllc is very complete and well laid out. Everything is in bags and is separated by section with a bag sealer and labeled. Very nice stuff...
Steel was a ***** for me here. I ended up buying from the local scrap yard as they had the most in town and were easy to work with. The first order was just the 3x3's. The second got almost all of the rest except for the CRS rails that I had to drive to Orlando to get from another supplier as they couldn't even order it here. I spent about $600 at the scrap yard and $250 more for the CRS. Only have a pic of the first pickup but you've all seen steel before anyway...

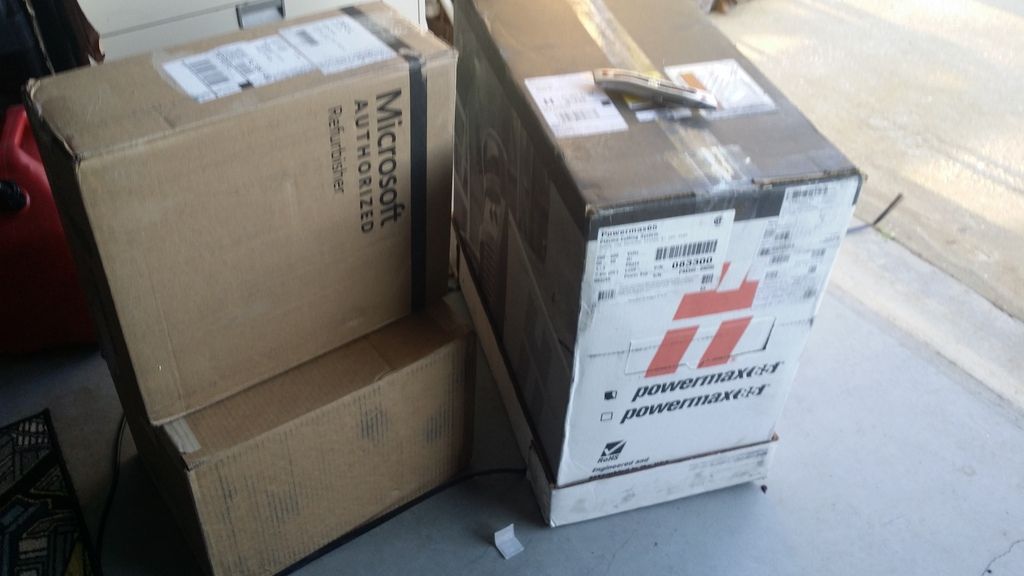
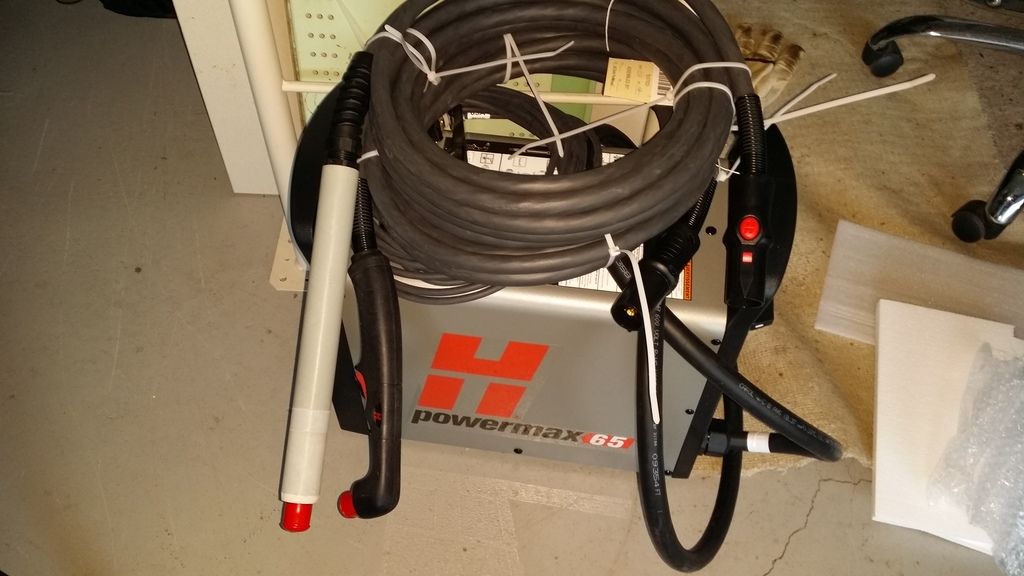
Next to show up was the order from CandCNC and the PM65 from Weldersupply.com.
Construction started with the legs. I chose to use 1/8" wall tube to make it easier for me to weld. I figured I didn't want to spend half my time stitching holes up and the extra strength wouldn't hurt either. I drilled and tapped the 1/2" plate for the legs and welded them on. I modified them a little from Ron's plans as I never plan to bolt it to the floor anyway. The feet came from Amazon and at the time these were over half of the cost of the bigger feet so I figured I'd give them a shot.

I also modified the table a little. I lowered the bottom support to make enough room to mount the plasma and possibly a toolbox under the table in the future if I ever get ambitious. It worked out like I planned but it was really a ***** painting the underside of them. I welded the side on the floor... Not exactly straight and I paid for that later on but in the end they turned out OK.
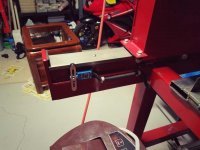
On to the cross beams with a little help from a few straps...
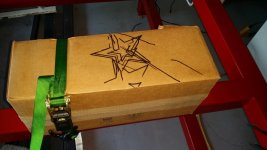
Then the box from velox showed up... Very pretty.
When I bought steel, I had to buy whole sticks if it was new which most of it was so I had a lot left over. I would have used smaller tube for the cross beams but this was already paid for so I stuck a few pieces of 3x3 in there for extra support under the water table.
After learning I couldn't drill straight by hand for **** I picked up this drill-press from cl for $50. It made things a lot easier.
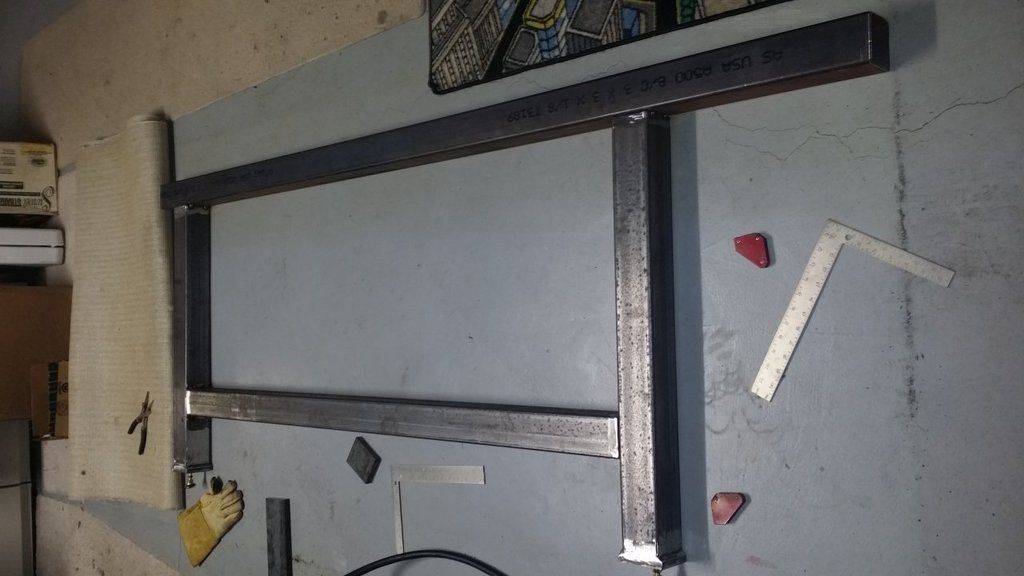
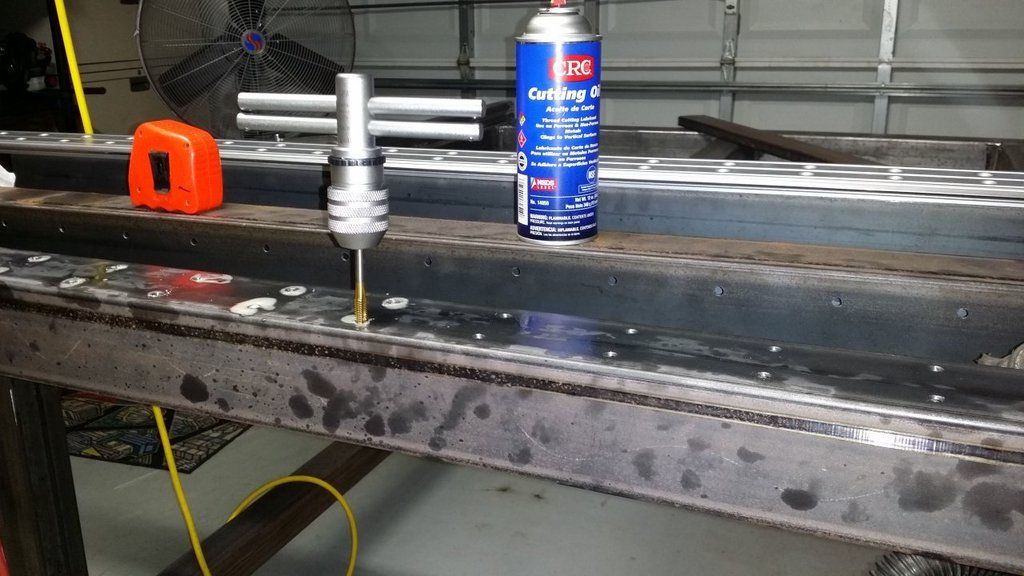
After thinking about drilling the CRS rails and the support for them I made this little stand for it to make it possible to drill them with the press. It worked well. I measured where the rails would be and built it to that height. Then I just wheeled it over and jacked up the table until it was tight under the bottom rail and did all the drilling.
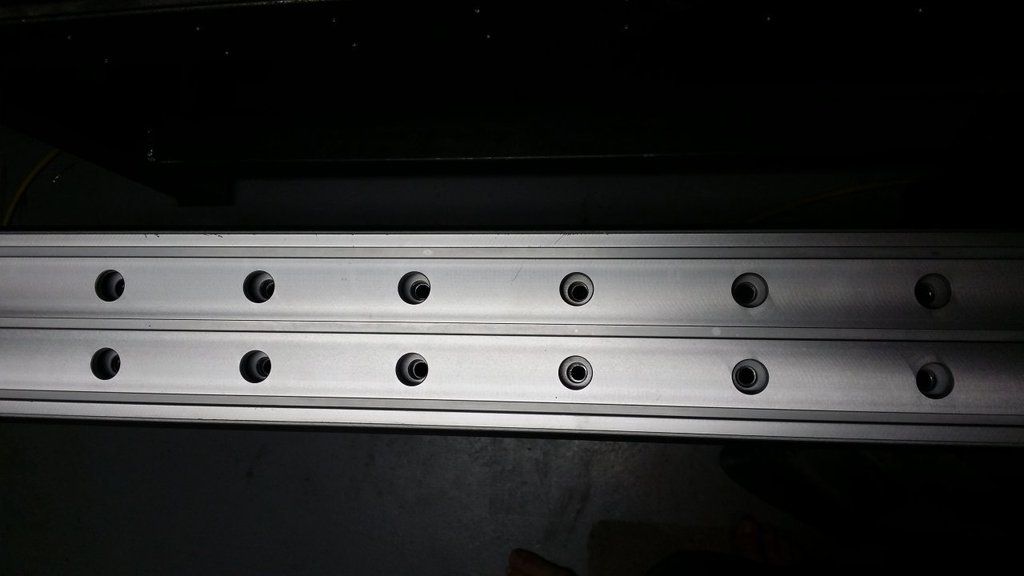
Drilling and tapping the 46 holes in the gantry cross member... First time ever using taps for me too. The ratcheting tap handle from hf really made this easy... My first attempt at using transfer punches was a miserable failure. On my second attempt (thank goodness I had extra steel...) after a few YouTube videos it was almost perfect.
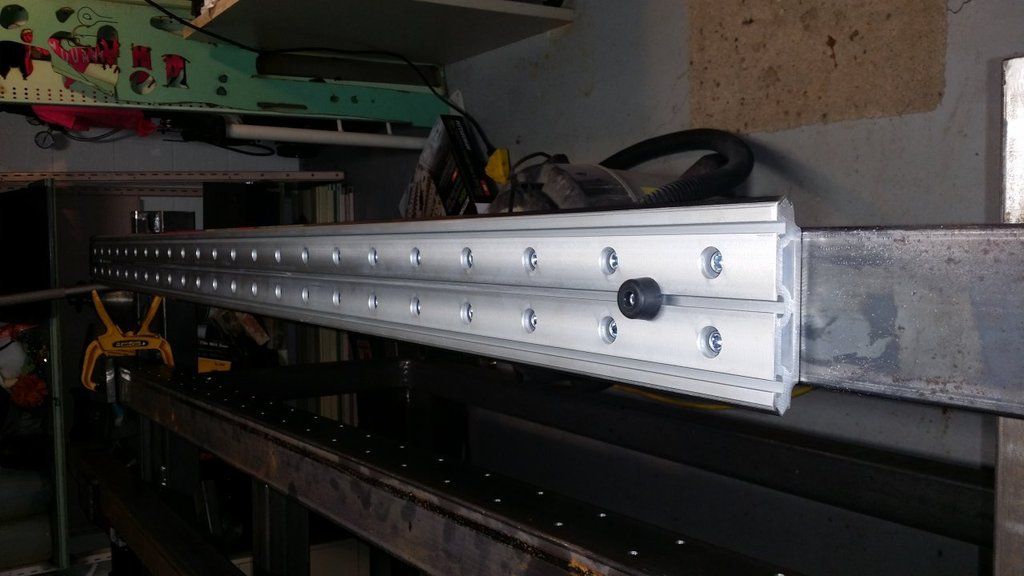
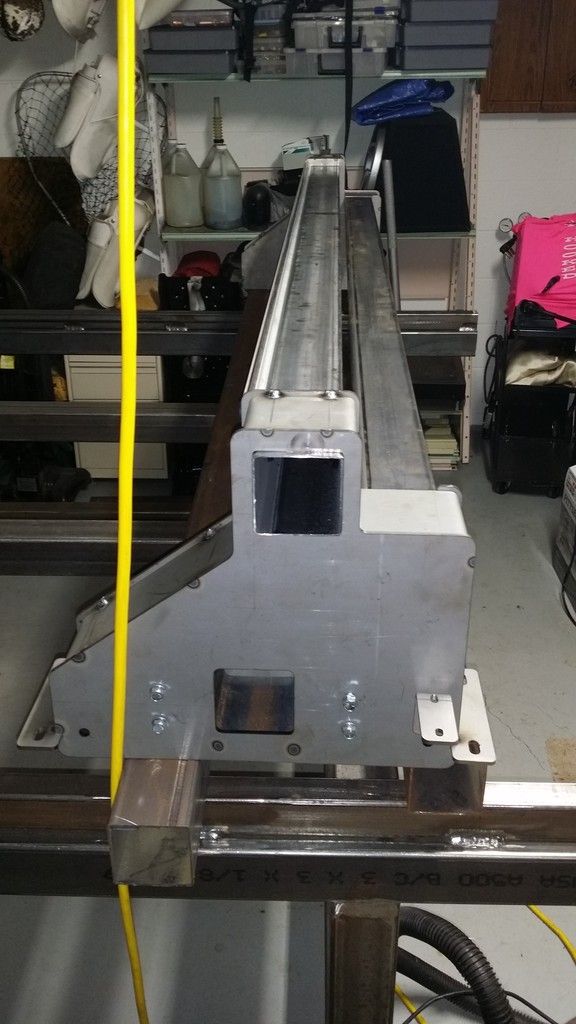
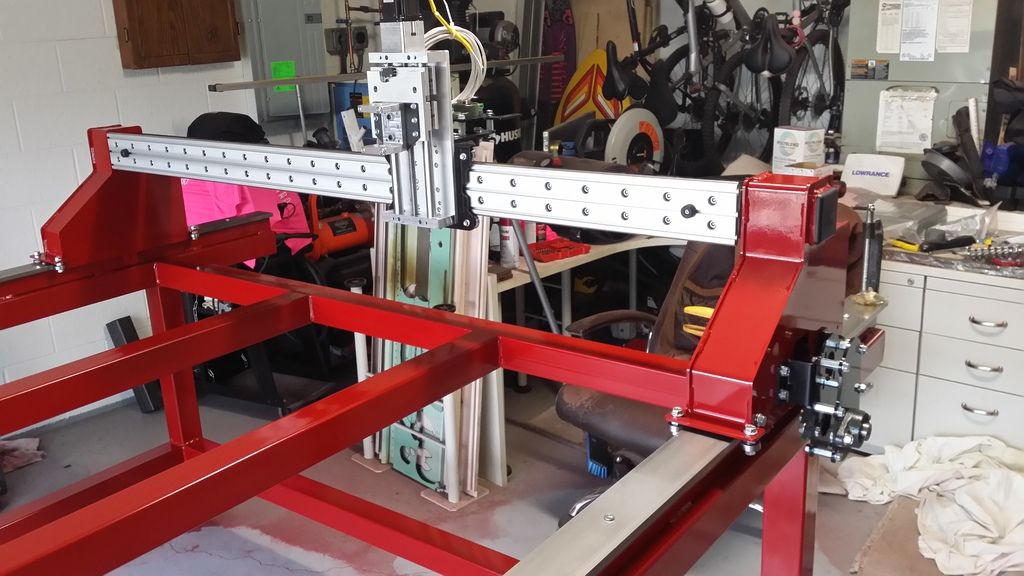
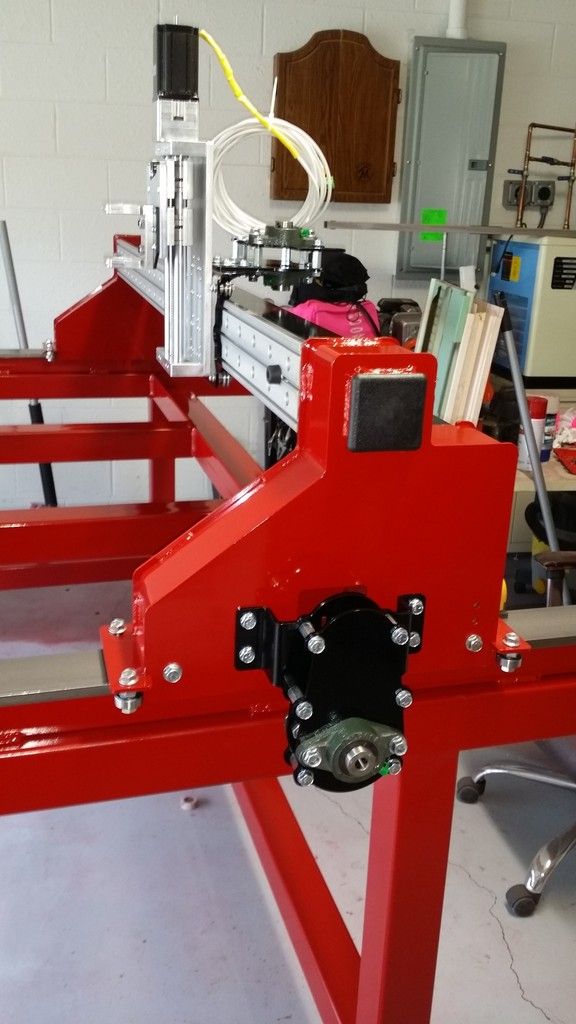
Gantry tacked and mocked up...

About this time the hf air dryer showed up. I had the issue with the manual wiring where nothing happened on first plug in until I switched the wires. I had a small cooling manifold on the wall I made out of copper tube so with a lack of proper hardware to install it I just hard plumbed it in for now. If I see a need in the future I'll cut it out and use some flexible hose to hook it in. It seems to work pretty well. We'll see if it lasts.

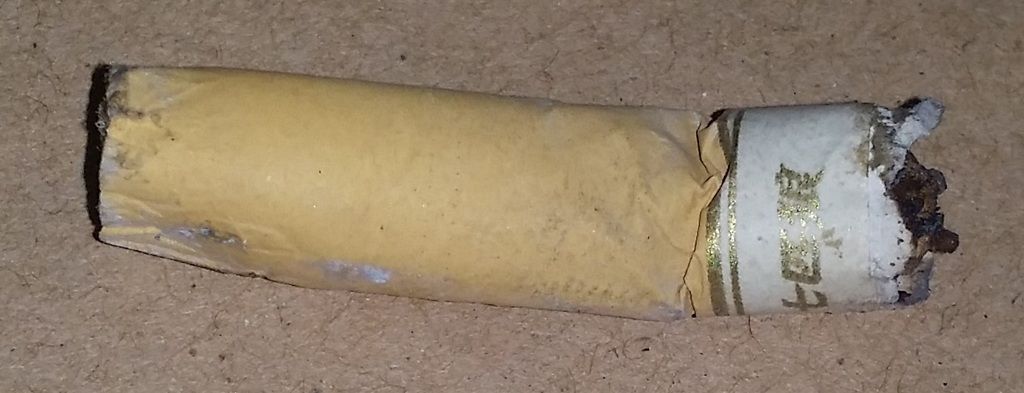
I still laugh about this... When I was hooking it up this fell out of it somewhere. It's funny that someone was not only smoking in the plant but felt it necessary to hide the **** inside of the machine...
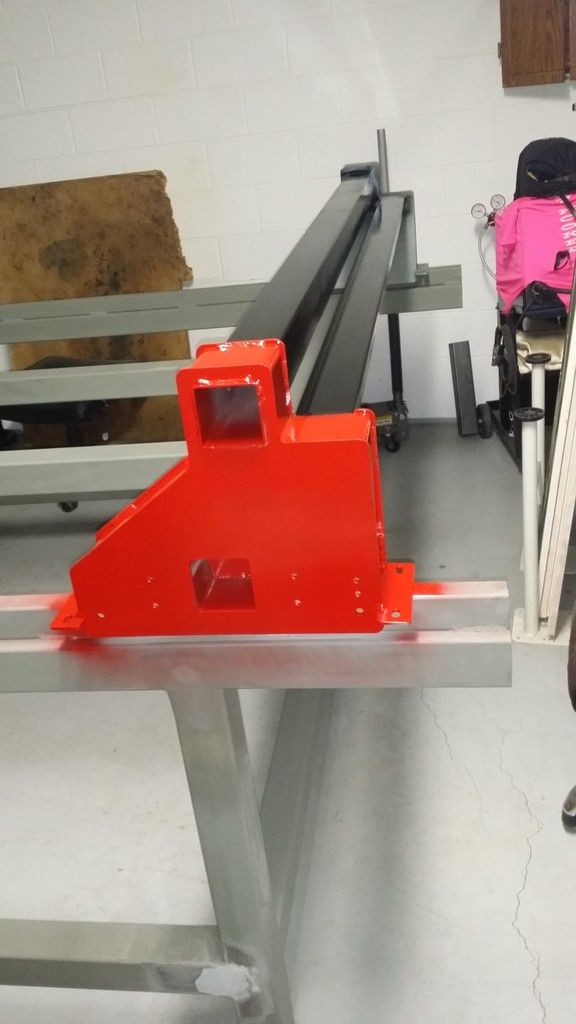
Once everything was pretty much built I hit it with some self etching primer and sanded the piss out of it. I decided on going two tone on the gantry and using regal red on the rest of it. Yes I painted in the garage and didn't use drop cloths. It cleans up fairly easy with some paint thinner, acetone and elbow grease but I'm going to put a fresh coat of epoxy on it when I'm done building the table anyway. next time I will probably go ahead and put some plastic down though... Live and learn. lol

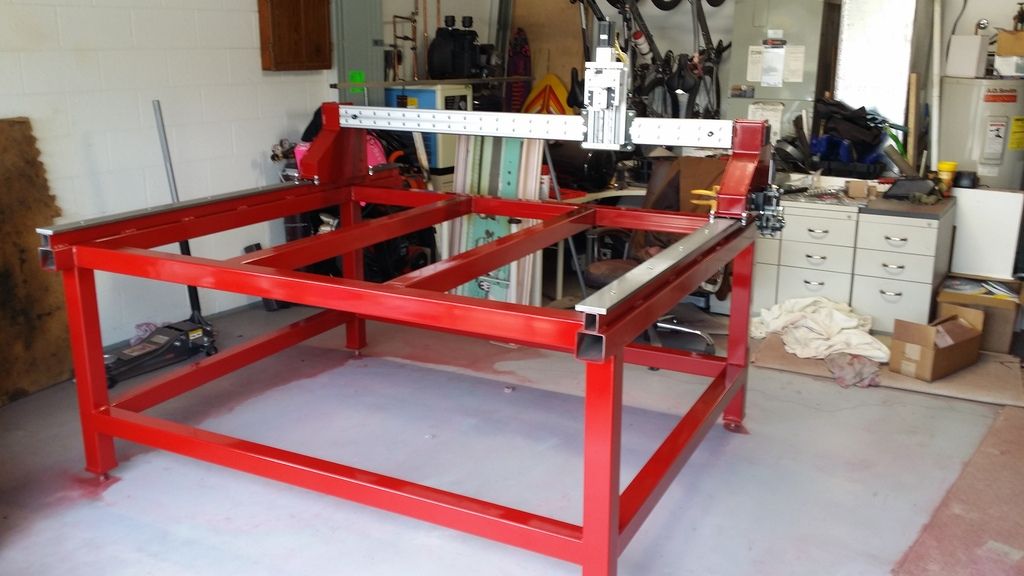
That pretty much gets this caught up to where I am now. This week I'll probably work on getting the motors and wires hooked up and try to get it moving by the end of next week hopefully. Then I'll probably get some sheet bent up and work on the water table.
More to follow as I come up with anything noteworthy. I don't have a timeline for the build. It's a no pressure - work on it as I have time kind of thing. I'm trying hard not to rush it but it's getting to the point where I'm ready to fire it up.
So, How am I doing so far?
A little history on me first... I got my first welder (MM180) about 8 months ago and before that my experience with working with metal were a hf 4" grinder with cutoff wheels and a drill. I always wanted to do it though and finally got around to it and love it. I got an Eastwood Versa Cut60 at the end of October and loved that even more. About the time I realized I didn't really have much hand/eye coordination and even less raw talent I saw my first cnc plasma vid and figured what the hell, even I could do that. I read for a few months and studied, put the non-cnc capable Eastwood up on CL and sold it, and started ordering parts at the end of December. Parts started showing up in January and I got started around the end of the month, working mostly a few hours after work and a little bit on the weekends.
It's been a great experience so far. Most of my welds are ok, some borderline and a few look great. Overall I think it ended up looking pretty damned good. I'm sure my methods and skill level isn't up to what most you are doing but it really feels like it turned out pretty good. From what I can figure out the CRS rails are the only thing that needs to be almost perfect and I ended up pretty happy with them.
Enough bs and on to the build. I'll try to add to the pics but they will do most of the talking for me.
This is the order from Precision Plasma:
Magnum HD II Gantry kit in 5x10
Velox Z breakaway mount
From Velox:
ZA-650P
From CandCNC:
Dragon Cut Linux 620-4 Bundle with Linux Computer
HyT Advanced Connection Kit B (without Hub)
SheetCAM for Linux
I decided to go with Precision Plasma LLC for the gantry kit. After emailing back and forth with Ron a few times I decided on the Magnum HD II kit because my goal is to build a versatile machine that can do several different tasks because right now I'm not really sure what I'll be doing with it. If something looks like it will generate more revenue I'll change directions mid stream. According to Ron if I want to do any routing the Magnum is the better gantry and 70% of the kits he sells to people go that route. I bought the kit in 5x10 even though I am only building a 5x5 kit right now because it's cheaper to order it up front and if the table makes money for me I'll do the expansion asap. For now the 5x5 kit will be plenty.
The kit from PPllc is very complete and well laid out. Everything is in bags and is separated by section with a bag sealer and labeled. Very nice stuff...
Steel was a ***** for me here. I ended up buying from the local scrap yard as they had the most in town and were easy to work with. The first order was just the 3x3's. The second got almost all of the rest except for the CRS rails that I had to drive to Orlando to get from another supplier as they couldn't even order it here. I spent about $600 at the scrap yard and $250 more for the CRS. Only have a pic of the first pickup but you've all seen steel before anyway...
Next to show up was the order from CandCNC and the PM65 from Weldersupply.com.
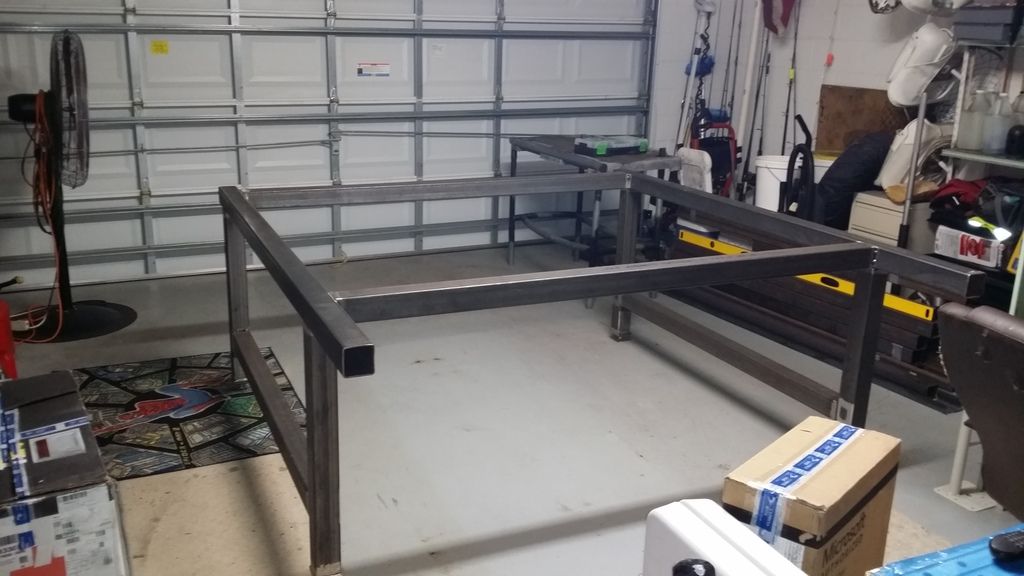
Construction started with the legs. I chose to use 1/8" wall tube to make it easier for me to weld. I figured I didn't want to spend half my time stitching holes up and the extra strength wouldn't hurt either. I drilled and tapped the 1/2" plate for the legs and welded them on. I modified them a little from Ron's plans as I never plan to bolt it to the floor anyway. The feet came from Amazon and at the time these were over half of the cost of the bigger feet so I figured I'd give them a shot.
I also modified the table a little. I lowered the bottom support to make enough room to mount the plasma and possibly a toolbox under the table in the future if I ever get ambitious. It worked out like I planned but it was really a ***** painting the underside of them. I welded the side on the floor... Not exactly straight and I paid for that later on but in the end they turned out OK.
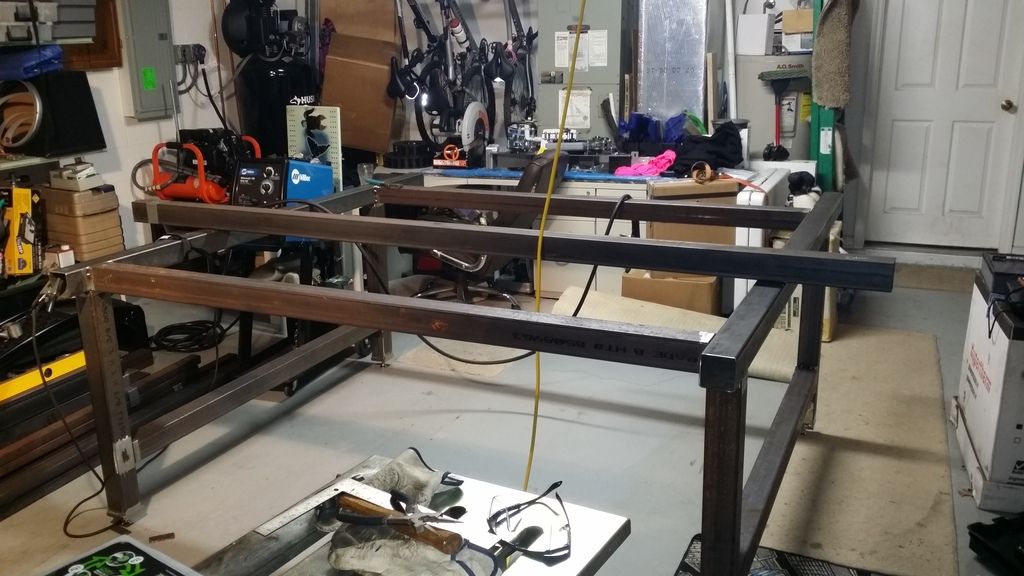
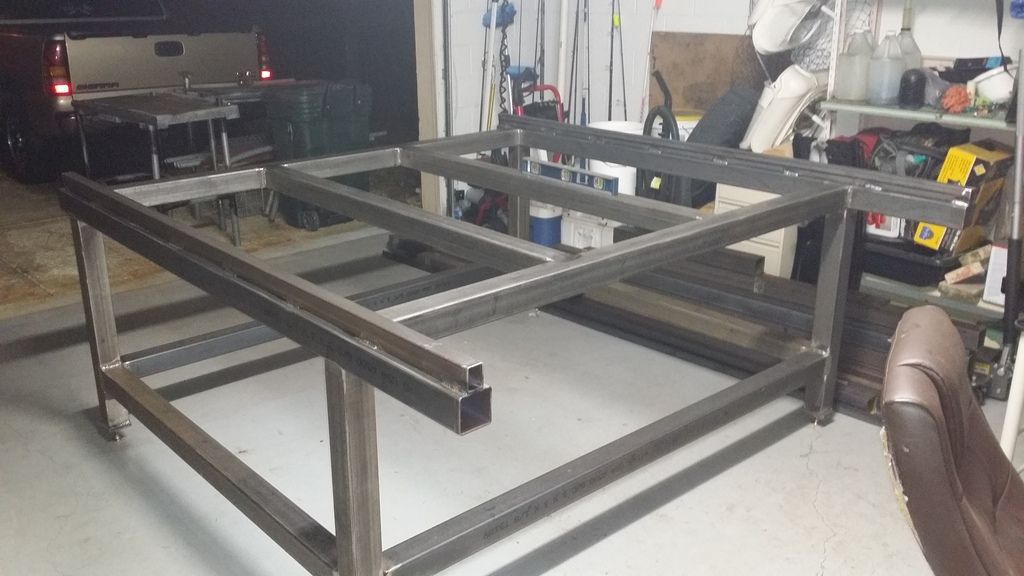
On to the cross beams with a little help from a few straps...
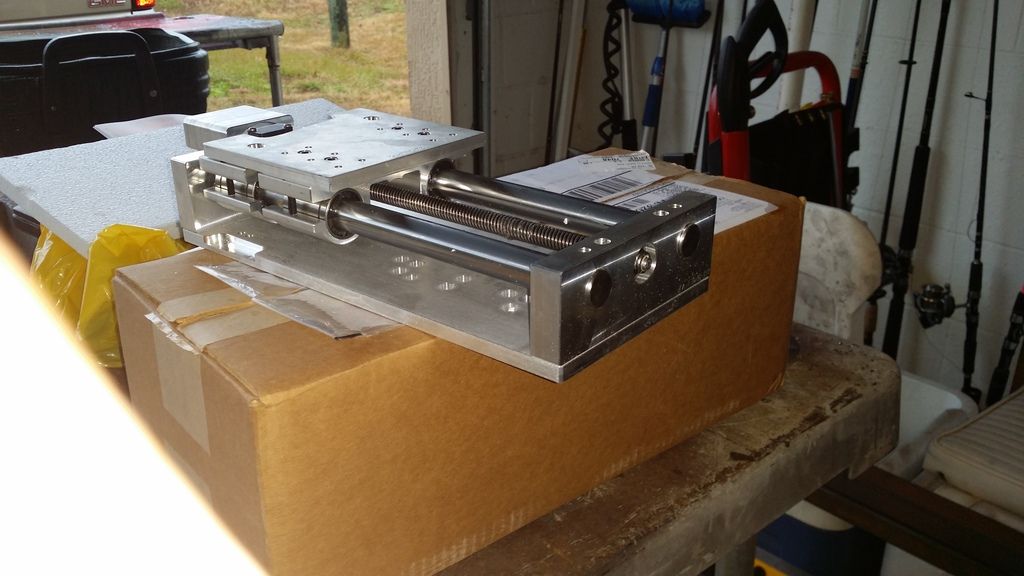
Then the box from velox showed up... Very pretty.
When I bought steel, I had to buy whole sticks if it was new which most of it was so I had a lot left over. I would have used smaller tube for the cross beams but this was already paid for so I stuck a few pieces of 3x3 in there for extra support under the water table.
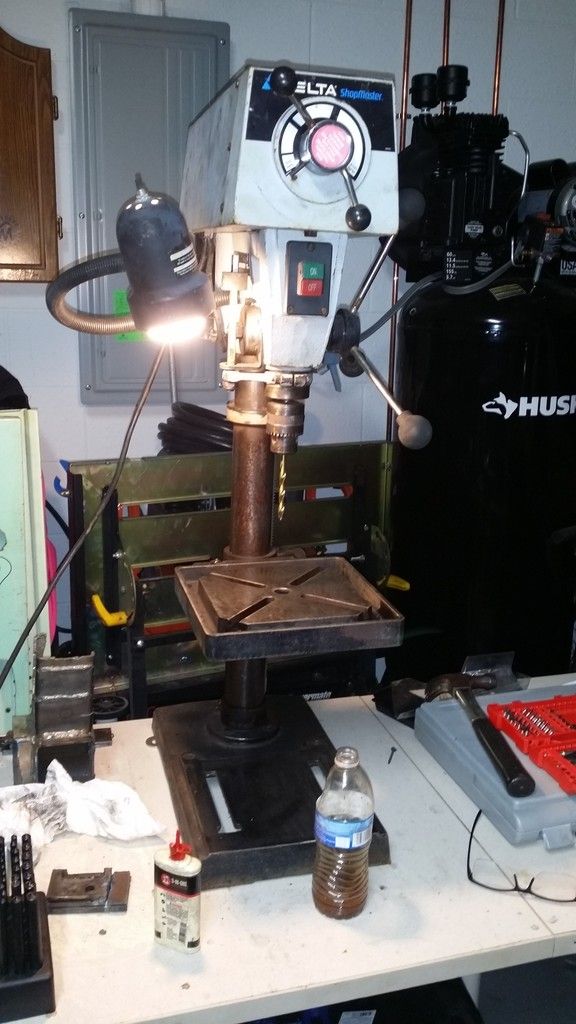
After learning I couldn't drill straight by hand for **** I picked up this drill-press from cl for $50. It made things a lot easier.
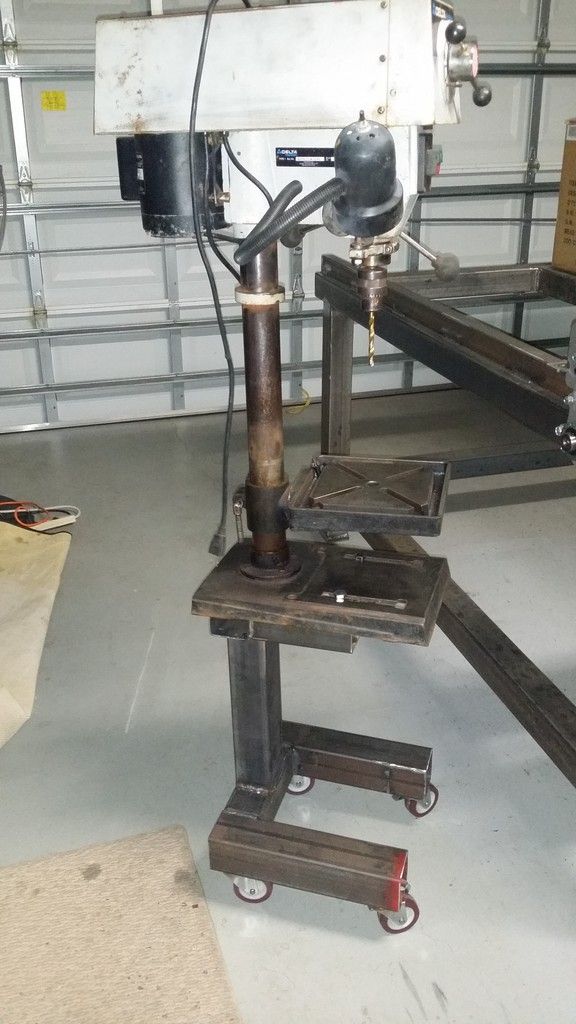
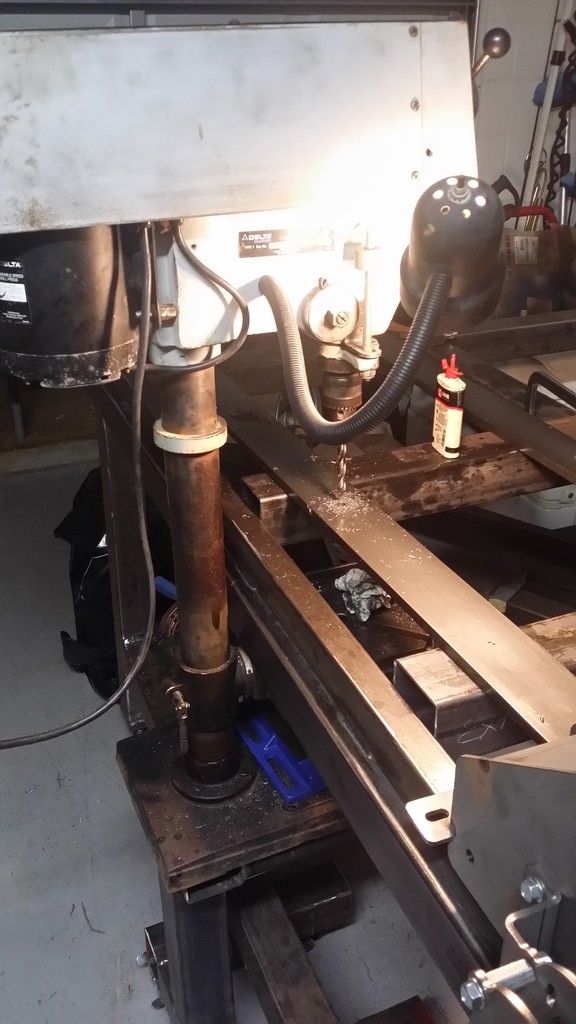
After thinking about drilling the CRS rails and the support for them I made this little stand for it to make it possible to drill them with the press. It worked well. I measured where the rails would be and built it to that height. Then I just wheeled it over and jacked up the table until it was tight under the bottom rail and did all the drilling.
Drilling and tapping the 46 holes in the gantry cross member... First time ever using taps for me too. The ratcheting tap handle from hf really made this easy... My first attempt at using transfer punches was a miserable failure. On my second attempt (thank goodness I had extra steel...) after a few YouTube videos it was almost perfect.
Gantry tacked and mocked up...
About this time the hf air dryer showed up. I had the issue with the manual wiring where nothing happened on first plug in until I switched the wires. I had a small cooling manifold on the wall I made out of copper tube so with a lack of proper hardware to install it I just hard plumbed it in for now. If I see a need in the future I'll cut it out and use some flexible hose to hook it in. It seems to work pretty well. We'll see if it lasts.
I still laugh about this... When I was hooking it up this fell out of it somewhere. It's funny that someone was not only smoking in the plant but felt it necessary to hide the **** inside of the machine...
Once everything was pretty much built I hit it with some self etching primer and sanded the piss out of it. I decided on going two tone on the gantry and using regal red on the rest of it. Yes I painted in the garage and didn't use drop cloths. It cleans up fairly easy with some paint thinner, acetone and elbow grease but I'm going to put a fresh coat of epoxy on it when I'm done building the table anyway. next time I will probably go ahead and put some plastic down though... Live and learn. lol
That pretty much gets this caught up to where I am now. This week I'll probably work on getting the motors and wires hooked up and try to get it moving by the end of next week hopefully. Then I'll probably get some sheet bent up and work on the water table.
More to follow as I come up with anything noteworthy. I don't have a timeline for the build. It's a no pressure - work on it as I have time kind of thing. I'm trying hard not to rush it but it's getting to the point where I'm ready to fire it up.
So, How am I doing so far?


")