Hi all, thought id start a thread here on my own. Picked up a 5030 for almost nothing last week.. (incl a balancer) and thought id share my journey of getting it working, incl specs and parts ive found. I will need som help getting it up and running so if anyone is familiar with these please help me -
I know nothing about these machines and so far it seems anyone with mediocre skills can work on them.. it just takes some poking around. The lady at the coats number is very helpful and knowledgable.
So the first thing I noticed, is when I went to clamp the rim, is that the air just rushed out of the valve on the bottom, so i removed that and opened it up, it has i think 8 green orings inside and a shaft, everything was in good working order just dirty, so I cleaned it all up and re-installed.

No change - a call later to the coats lady and she said thats a definitive issue in the top cylinder (sits under the main plate). She added this is accessed from the top, so I remvoed the 4 allen bolts on the top plate, popped off the 4 high pressure hoses and the plate lifted off.
From there, the cylinder was easy - 2 hoses and 2 bolts (you have to use a thin wrench to hold the shaft). The cylinder has 4 long bolts on each side, one side is a cap, the other has a shaft and seals. The inside seal (3-1/2" diamter) was clearly damaged as u can see (lip was folded over / no lube??).
New part was $45. Lubed it with hydr oil (i read silicone grease is better) but its together and working flawlessly now..

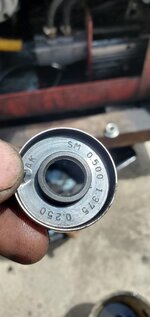
The upper seal kit: Ref part number highlighted - its a 3.75" OD seal kit number: 8183811 / 183811. Remember to lube between the 2 lips as well! Gently rotate it into place and remove any burrs/edges from shaft before assembly. Remember the scarf seal and orings too in the end caps.

Canister that houses the seal:
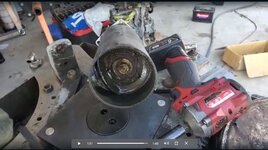
Canister end caps:


I know nothing about these machines and so far it seems anyone with mediocre skills can work on them.. it just takes some poking around. The lady at the coats number is very helpful and knowledgable.
So the first thing I noticed, is when I went to clamp the rim, is that the air just rushed out of the valve on the bottom, so i removed that and opened it up, it has i think 8 green orings inside and a shaft, everything was in good working order just dirty, so I cleaned it all up and re-installed.
No change - a call later to the coats lady and she said thats a definitive issue in the top cylinder (sits under the main plate). She added this is accessed from the top, so I remvoed the 4 allen bolts on the top plate, popped off the 4 high pressure hoses and the plate lifted off.
From there, the cylinder was easy - 2 hoses and 2 bolts (you have to use a thin wrench to hold the shaft). The cylinder has 4 long bolts on each side, one side is a cap, the other has a shaft and seals. The inside seal (3-1/2" diamter) was clearly damaged as u can see (lip was folded over / no lube??).
New part was $45. Lubed it with hydr oil (i read silicone grease is better) but its together and working flawlessly now..
The upper seal kit: Ref part number highlighted - its a 3.75" OD seal kit number: 8183811 / 183811. Remember to lube between the 2 lips as well! Gently rotate it into place and remove any burrs/edges from shaft before assembly. Remember the scarf seal and orings too in the end caps.
Canister that houses the seal:
Canister end caps:
Attachments

Last edited: