To avoid these ads, REGISTER NOW!

Above 1200 Sq/FT Cody's 33'x62' Garage

Wokspaces above 1200 squarefeet.
OP
M

madison069

Well-known member
Joined
Nov 5, 2010
Messages
4,151
Location
Monroeville, PA
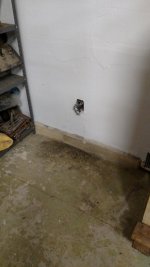
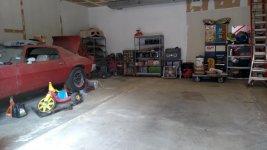
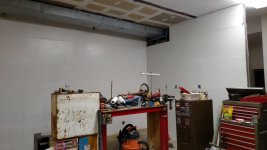
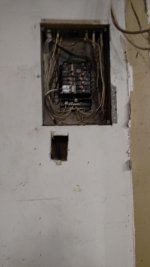
So the breaker came in! So first order of business was to get the outlet in place. Since the walls are made with steel studs i decided to just put a board across so I can have two studs help keep the outlet in place. Made my holes to help wrangle the 6/2 wire in place. Once I got the wire through to the breaker box and the outlet wired up and installed to my board i started focusing on the breaker installation. So to get an idea of how long my new wires need to be I installed the new breaker . Well it didn't fit. Apparently in the 60's cutler and Hammer placed a steel bar in the middle of the panel, it served no purpose except interfered with the new style of type ch breaker! After further reading i decided to just cut the bar out. Mind you I had the panel power turned off before I did all this ok. I cut the bar and voila the new breaker fit in place! Why did I cut it out instead of removing the screws? The screws are tamper proof and I didn't have the proper bit for it. Finished wiring it up and double checked my connections and stood back as I flipped the breaker back on. No sparks, no shocks, so no drama is a good thing! Tested the outlet with my voltmeter and its reading 240v in the right prongs!

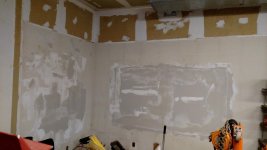
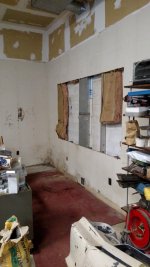
So I stopped here since it's getting late and I'll start back up tomorrow with cleaning up the mess, put the panel cover back on, and patch the wall back up. Then I'll try out the welder on so scrap and see how it welds!
 

Attachments

  • IMG_20190607_213344287.jpg
    IMG_20190607_213344287.jpg
    36.2 KB · Views: 112
  • IMG_20190607_213340226.jpg
    IMG_20190607_213340226.jpg
    38.2 KB · Views: 139
To avoid these ads, REGISTER NOW!
OP
M

madison069

Well-known member
Joined
Nov 5, 2010
Messages
4,151
Location
Monroeville, PA
Why look at those booger welds! Been years since I've welded but the welder does work!
 

Attachments

  • IMG_20190608_100228711.jpg
    IMG_20190608_100228711.jpg
    146.2 KB · Views: 219
  • IMG_20190608_100341870.jpg
    IMG_20190608_100341870.jpg
    146.1 KB · Views: 212
  • IMG_20190608_100640285.jpg
    IMG_20190608_100640285.jpg
    146.3 KB · Views: 208
OP
M

madison069

Well-known member
Joined
Nov 5, 2010
Messages
4,151
Location
Monroeville, PA
So some updates on my QST as 1/2 Cup says, I got my welder put in the corner and place all of my welding related gears with it. I'll probably make a shelf or cabinet for the welder supply so it's protected from the garage but for now it's going to live like that.

My wife got some cast iron chairs from the mother in law, but they were rusty and crusty so I slather a thick coat of exterior paint on the bench last week after I just dragged a wire brush across it. I'll most likely take them to the sand blaster next time and then do a proper paint job on it, but for now we wanted to get it out front to see if we will enjoy it for decoration purpose.

Then the new Dance shoes from eBay came in that my wife found cheaper then at the store. Well they were old and I guess the adhesive has lost it's bond so when my step daughter took them for a tap, the sole of the shoes proceeded to leave the body!! So hopefully a little (Ok a lot!) of shoe goo was applied and I Clamped them down on the bench. We will see how it holds up but it's still curing on the bench as we talk cause I just applied it yesterday.

I also took the time to finally mount a wood vise I bought earlier in the year. I just need to decide what kind of handle I want to install on it, wood or steel??

I started working on a small wood project, I actually finished routing the names on it and got two coats of poly on it last night. Since it's for someone on the board I'nm not going to reveal the finish project til he gets it! But Once I found a suitable piece of wood I cut the excess off and then knocked the bark off. Usually the bark falls off over time so I just go ahead and knock it off in the first step when doing live edge projects.

I also scratched off a few things on the camaro to do list. This is just a list of things to do to get it running again. I got a lot more to do like the electrical, body work and paint, and the interior. One of these days it will be drivable!

Oh and the wind down the night I finish applying a thick coat of exterior paint on the last two cast iron chairs for the wife. I'll be glad to see them out of my garage!!
 

Attachments

  • IMG_20190618_211116123.jpg
    IMG_20190618_211116123.jpg
    152 KB · Views: 147
  • IMG_20190618_211033749.jpg
    IMG_20190618_211033749.jpg
    58.3 KB · Views: 147
  • IMG_20190618_125116196.jpg
    IMG_20190618_125116196.jpg
    71.2 KB · Views: 142
  • IMG_20190617_204714043.jpg
    IMG_20190617_204714043.jpg
    148.3 KB · Views: 136
  • IMG_20190617_200606944.jpg
    IMG_20190617_200606944.jpg
    139.7 KB · Views: 147
  • IMG_20190616_173859390.jpg
    IMG_20190616_173859390.jpg
    154.4 KB · Views: 153
  • IMG_20190608_130949949.jpg
    IMG_20190608_130949949.jpg
    70.7 KB · Views: 143
Last edited:
OP
M

madison069

Well-known member
Joined
Nov 5, 2010
Messages
4,151
Location
Monroeville, PA
Oh and one more thing, I found these horse shoes under my smoker. I guess my Dad threw them under there when I got my smoker back from him. I'll be using these to make handles for my Discada! They are used horse shoes and you can tell the horse favored the front of his hoof for sure!!
 

Attachments

  • IMG_20190618_212359713.jpg
    IMG_20190618_212359713.jpg
    137.4 KB · Views: 94
Last edited:
OP
M

madison069

Well-known member
Joined
Nov 5, 2010
Messages
4,151
Location
Monroeville, PA
So awhile back, I purchased some LED Lights that I was planing to install for backup lights on the Truck. Well the past few nights I had to back up in a narrow driveway and those factory lights was not cutting it!!

So I took the time to install the lights on the rear and man are they bright! I fasten the lights to the bottom of the bumper brackets with some pop rivets and then took my time crimping/heat shrink and routing the wire in a safe location. Then I crimped all the wire together on the backup wire of the trailer harness and coated the new connection with liquid tape. Hopefully it gives me years of trouble free use!

So the below pics are before and after the lights, and the last picture is all of the tools and supply I used during the build. One never thinks a job is complicated until they look at what it all required to complete that job!
 

Attachments

  • IMG_20190620_200321852.jpg
    IMG_20190620_200321852.jpg
    152.7 KB · Views: 140
  • IMG_20190620_193430824.jpg
    IMG_20190620_193430824.jpg
    146.3 KB · Views: 140
  • IMG_20190620_193421960.jpg
    IMG_20190620_193421960.jpg
    116.4 KB · Views: 140
  • IMG_20190620_193538793.jpg
    IMG_20190620_193538793.jpg
    122 KB · Views: 129
  • IMG_20190620_193530426.jpg
    IMG_20190620_193530426.jpg
    107.1 KB · Views: 137
  • IMG_20190620_182738023.jpg
    IMG_20190620_182738023.jpg
    149.3 KB · Views: 168
Last edited:
OP
M

madison069

Well-known member
Joined
Nov 5, 2010
Messages
4,151
Location
Monroeville, PA
So Friday me and the youngest went to Kennywood for the night and we had a blast! I enjoy riding all of the old rides with her.

Then Saturday I started on a lawnmower that my father in law has and it seems to be a rare model since there's no information on the internet for it. Oh well, i got a new belt but I'll be getting a new chain for it since the old one is not cleaning up well.

Sunday I just spent time with the family and cleaned around the house.

Tuesday I spent time on the disc and welded my horse shoes handled. Keeping with the theme of reusing, I found some old bolts and pipes in the garage and the horse shoes to make my handles! Now while I'm cooking my handles will fold under and out of my way while cooking!

I think my first dish will be West Texas Asado when I get back from vacation!
 

Attachments

  • IMG_20190621_185353506_HDR.jpg
    IMG_20190621_185353506_HDR.jpg
    147.8 KB · Views: 212
  • IMG_20190624_184921017.jpg
    IMG_20190624_184921017.jpg
    153.5 KB · Views: 200
  • IMG_20190625_200224907.jpg
    IMG_20190625_200224907.jpg
    147.5 KB · Views: 201
  • IMG_20190625_200056522.jpg
    IMG_20190625_200056522.jpg
    108.6 KB · Views: 193

jblnut

ALLIANCE MEMBER
Joined
Jan 17, 2015
Messages
6,990
Location
In the Middle of MN
The Discada looks amazing !!! The fold under handles are a good idea. I may have to do that to mine :thumbup:

I am sure everyone is sitting on the edge of their chairs to see how the live edge piece turns out ..... I know I am :bounce:
 
OP
M

madison069

Well-known member
Joined
Nov 5, 2010
Messages
4,151
Location
Monroeville, PA
My wife said it looked cute!

What do you think??? :bounce:
 

Attachments

  • IMG_20190711_184622197.jpg
    IMG_20190711_184622197.jpg
    36.7 KB · Views: 242
  • IMG_20190711_184618276.jpg
    IMG_20190711_184618276.jpg
    46.4 KB · Views: 202
OP
M

madison069

Well-known member
Joined
Nov 5, 2010
Messages
4,151
Location
Monroeville, PA
Not going to lie, if those 2-ply quilted Downy towels didn't get sent along we may be underwhelmed as it won't look like that when I show it to Mama Bear :lol_hitti

LOL, I am actually now sweating about it cause in hindsite I should of shrink wrapped it to protect the finish surface against the cardboard. We will see how it arrives!
 
OP
M

madison069

Well-known member
Joined
Nov 5, 2010
Messages
4,151
Location
Monroeville, PA
So between typical house task, yard work, house cleaning, playing with family, and working on mother in law's koi pond I got asked to build a dunk tank for church VBS. So automatically I wanted to ensure the bucket will be refillable, so i decided to use the guts of a toilet tank( new assembly!). So with pvc i built the frame and arm for the tank and used temporary wood boards for the shelf. then assembled the toilet parts inside the 5 gallon bucket and set everything in place. So far it has been a lot of fun here at the house and tonight will be the "Carnival" part of the VBS and this will be used.

When I get a chance I'll be replacing the line between the arm and the toilet flapper with some better rope/wire and the board will get replaced with either HDPE or some kind of plastic material to last longer. But for tonight it should be fine and when done I'll make the changes so it's nicer for future events! Oh did I say I'll probably be the victim in the chair?
 

Attachments

  • IMG_20190723_131230628.jpg
    IMG_20190723_131230628.jpg
    129.8 KB · Views: 195
Last edited:
OP
M

madison069

Well-known member
Joined
Nov 5, 2010
Messages
4,151
Location
Monroeville, PA
So what happens to a garage when you are working on multiple projects and you're just too tired to put it all away properly? It becomes a mess.

So I worked on cleaning it up some, throwing away scrap stuff, and putting stuff away. Also opened the camper up to inspect it before it goes on the weekend camping trip and no issues was found that a little cleaning couldn't fix. No progress pics of the garage since I'm still working on it.

Side note, the dunk tank was a hit at VBS and several people asked to borrow it for their events so I need to make my changes to make it last longer and then pass it on. Would you know that the pieces I wanted to originally use for the pull strings of the flapper was found after I built the dunk tank? :mad:
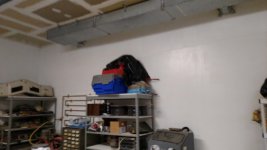
. Oh well at least I found them and now can replace the fishing line I initially used. Also got to keep my eyes open for a piece of abs/hdpe to replace the wood. Would like to keep it cheap since this is a budget build for the church.
 

Attachments

  • IMG_20190727_182134321.jpg
    IMG_20190727_182134321.jpg
    155.3 KB · Views: 160
  • IMG_20190728_160303978.jpg
    IMG_20190728_160303978.jpg
    152.4 KB · Views: 155
  • IMG_20190728_160306875.jpg
    IMG_20190728_160306875.jpg
    155.4 KB · Views: 152
  • IMG_20190728_160300600.jpg
    IMG_20190728_160300600.jpg
    134.8 KB · Views: 159
OP
M

madison069

Well-known member
Joined
Nov 5, 2010
Messages
4,151
Location
Monroeville, PA
So I started this thread about an old lawnmower and seems nobody seen one like it. I couldn't find another one on the internet to see what size belt it was I needed.

https://www.garagejournal.com/forum/showthread.php?p=8004518#post8004518

So after letting it sit for almost a month due to vacation, VBS, wife gone on a trip without me, and family time I was finally able to spin some time on it. It fought me but I got it back together. After having it apart 4 times I've gotten pretty good at dissembling it! But it's working now, just need a new handle and I already greased the underside up along with the chain.
 

Attachments

  • IMG_20190730_185155013.jpg
    IMG_20190730_185155013.jpg
    69 KB · Views: 93
  • IMG_20190730_185051053.jpg
    IMG_20190730_185051053.jpg
    99.5 KB · Views: 94
  • IMG_20190730_193605845.jpg
    IMG_20190730_193605845.jpg
    147.1 KB · Views: 95
  • IMG_20190730_184315791.jpg
    IMG_20190730_184315791.jpg
    94.8 KB · Views: 106
  • IMG_20190730_184311360.jpg
    IMG_20190730_184311360.jpg
    88.7 KB · Views: 103
  • IMG_20190730_184936066.jpg
    IMG_20190730_184936066.jpg
    152.3 KB · Views: 116
Last edited:
OP
M

madison069

Well-known member
Joined
Nov 5, 2010
Messages
4,151
Location
Monroeville, PA
So over the weekend between cleaning the house, going to cabela to pick up some .410 shotguns, and spending time with the family I started on the new deck rail around the grilling area. I will be staining and sealing it to match the rest of the deck rails and then putting the black balusters on after staining. Figured it would be easier to do that instead of painting in between each baluster like I did the existing ones. Also finally got the top of the railing back on the a couple of the old ones. The older ones was rotted and so I removed them before I stained the railing. Now I got to get the really long top piece and one more short side and I'll be done installing the wood and back to staining and painting.

I'm still unsure of how I'm going to refinish the grilling area concrete slab. Also I'm not too happy with how the ends of the new rail is wobbly, So I'm going to get some really thick stiff L brackets to re-enforce the ends and hopefully stiffen it up!
 

Attachments

  • IMG_20190818_172338977_HDR.jpg
    IMG_20190818_172338977_HDR.jpg
    112.7 KB · Views: 140
  • IMG_20190818_172328743_HDR.jpg
    IMG_20190818_172328743_HDR.jpg
    155.3 KB · Views: 154
  • IMG_20190818_162006626.jpg
    IMG_20190818_162006626.jpg
    146.1 KB · Views: 158
  • IMG_20190818_161944307_HDR.jpg
    IMG_20190818_161944307_HDR.jpg
    147.8 KB · Views: 163
  • IMG_20190818_161850177.jpg
    IMG_20190818_161850177.jpg
    148.5 KB · Views: 176
Last edited:
OP
M

madison069

Well-known member
Joined
Nov 5, 2010
Messages
4,151
Location
Monroeville, PA
So as I said, I wasn't happy with the ends of the rail, but I was limited by how much concrete slab I had at the post. None the less I decided to just go with the 4 anchor bolt mount and drilled the anchors at an angle to ensure I get enough concrete to hold the anchors. Now they are very solid instead of the wobbley mess it was before. Also I got the rest of the deck's rail top installed but have to wait a few weeks before I can stain and seal them to match. I also cut and pre-drilled 66 Balusters for the new rails so it will match the style of the others. I will have the kids paint the Balusters and in a couple of weeks I'll stain the new rails to match everything else.

The more I think about it, the more I think I'm just going to skim the slab with that concrete refresher that I've read about and used before. I do need to redo the side with the surface cement bond I applied before. When I first did it the forecast was showing no rain to be had that day. As soon as I spread the last bit of the cement on the wall, a cloud just dumped out rain all over the area and it was over before I could get the tarp out to cover the work. Needless to say it does look like **** but it has held up through the winter so it's decent stuff! That's why the side of the cellar that my grills are sitting on looks like **** under the glass block window. But I was pissed at the time and thought screw it, I'll leave it and see if it even stays on through the winter. Well it did so I'll get it fixed now.

Otherwise I've started cleaning out a corner of the garage behind the camaro because I wanted to make more room for all of the body panels I'll be taking off the camaro. Hopefully to start and finish the body work/paint during winter season.
 

Attachments

  • IMG_20190822_130442588.jpg
    IMG_20190822_130442588.jpg
    114.6 KB · Views: 105
  • IMG_20190822_125428437.jpg
    IMG_20190822_125428437.jpg
    138.4 KB · Views: 95
  • IMG_20190821_175448573.jpg
    IMG_20190821_175448573.jpg
    132.3 KB · Views: 92
  • IMG_20190821_175350263.jpg
    IMG_20190821_175350263.jpg
    89.3 KB · Views: 87
  • IMG_20190820_211342702.jpg
    IMG_20190820_211342702.jpg
    54.8 KB · Views: 105
Last edited:
OP
M

madison069

Well-known member
Joined
Nov 5, 2010
Messages
4,151
Location
Monroeville, PA
So while I wait for the pressure treated wood to age a few weeks, hopefully it dries out some, I began working on this corner of the garage. In the past the baluster stock was kept in this corner and so I didn't do anything in this area other then just put stuff over there. Well Since I needed to organize and clear some space for the camaro body panels I decided it's time to tackle this corner to clean it up and reduce the foot print of all of the stuff. As you can see there is a big gapping hole in the wall, to this day I don't know why they removed this drywall along with cutting the metal stud sections out. I've monitored it and kept expecting water to come through the wall or something but never did see anything of such. So I decided it's time to fixed the metal studs and replace the r-13 insulation. Once I got those two in place I started hanging the drywall and mudding the joints.
On the other side of the corner there was a lot of arrow holes in the wall. In the past, this garage was used as a bow and arrow shop along with the past owner was a state champion archery shooter. So it appeared he made his own shooting room so to speak based on the joints where the old walls used to reside. So I took the time to fill in those holes with joint compounds and smoothed it out some. I wasn't going for showroom perfect since this is a garage after all. So after spending 40 mins of sanding and knocking down high spots I started cleaning the wall.

Then I took some old paint I had from repainting the apartment and put two coats of paint on the wall. I must say it made this corner of the room a lot cleaner and fresh looking! After the paint had a chance to dry I put my camaro hoods against the wall and then started putting the shelves close to the hood so I can keep the hoods out of the way but still be accessible. Oh I also ripped the old carpet off the floor and then just put a narrow strip behind the shelves to help the hoods slide better and not get too damaged.

Finally I was getting tired of bending over to search the bolt bins so I decided to raise it up. Just a quick and dirty job that does the task I want it to do but also still be on wheels. One of these days I'll either make or get a better cabinet that can properly hold the tackle box but for now It's doing the job of raising the bolt bins up and reducing the footprint of all of the hardware boxes.

Today I'll be getting some box extenders for the wall outlets since the outlet in the wall here was sunked into the wall, so much that it was making it almost unusable. Once I fix that issue then it's back to moving stuff in place and cleaning up the area!
 

Attachments

  • IMG_20190827_215942428.jpg
    IMG_20190827_215942428.jpg
    124 KB · Views: 115
  • IMG_20190827_205252330.jpg
    IMG_20190827_205252330.jpg
    89.8 KB · Views: 126
  • IMG_20190827_182730710.jpg
    IMG_20190827_182730710.jpg
    91.9 KB · Views: 113
  • IMG_20190827_124528728.jpg
    IMG_20190827_124528728.jpg
    106.1 KB · Views: 111
  • IMG_20190824_093429323.jpg
    IMG_20190824_093429323.jpg
    143.2 KB · Views: 110
  • IMG_20190824_091212797.jpg
    IMG_20190824_091212797.jpg
    71.3 KB · Views: 105
  • IMG_20190824_090558187.jpg
    IMG_20190824_090558187.jpg
    153.1 KB · Views: 117
Last edited:
OP
M

madison069

Well-known member
Joined
Nov 5, 2010
Messages
4,151
Location
Monroeville, PA
So my walls are metal stud walls. Let me say I've grown to dislike metal stud walls for several reasons. One of them is how the electrical outlets can flex in the walls. Also when they built the walls I don't think they were thinking of putting drywall up cause just about everyone of the outlets are sunk back in the wall. So I found this mud ring that has a little extension on the back and a wing like siding. I'm sure these are specialty type deal but they appeared to fit the bill to fix the exposed opening between the surface of the wall and the outlet box. Along with the wings on the side it allows the outlet to become stiffer and stays in place instead of flexing around when I plug a cord in or remove one. I had to make a little opening to hold the outlet box while I get the screws started, it's that bad on how the outlet box flex on the metal studs. Now this outlet stays in place and I don't have to worry about exposed wires out of the outlet box. As the other outlets keeps moving I'll start installing these mudrings to fix this issue.
 

Attachments

  • IMG_20190904_123144212.jpg
    IMG_20190904_123144212.jpg
    45.9 KB · Views: 90
  • IMG_20190904_120506865.jpg
    IMG_20190904_120506865.jpg
    48.5 KB · Views: 80
  • carlon-covers-a411rr-64_1000.jpg
    carlon-covers-a411rr-64_1000.jpg
    47 KB · Views: 82
Last edited:
OP
M

madison069

Well-known member
Joined
Nov 5, 2010
Messages
4,151
Location
Monroeville, PA
So last week I went to pick up a recumbent excerise bike for the wife and me and while there the guy asked if I would be interested in these shelves. Well it didn't take much conviencing me that I needed them since they are on wheels and they were free! I brought them home and transfered all of the camaro parts onto one of the new shelves unit. Then I kept cleaning and organizing. So after a few weeks of throwing stuff away, selling off stuff, and getting things better organized I'm now left with this progress.

I still need to go through a lot of it but atleast I gained back a lot of the space I had when I first moved into it! Tonight I will be working on the wife's van doing the brakes and visual inspection while I'm under there. Also need to replace the timing belt in the van as it got 130,000 miles on it and I hear a sound of a bad pulley. I can't pin point the sound so I'm going to play it safe and get the timing belt replaced along with the tensioner pulley!
 

Attachments

  • IMG_20190913_124139457_HDR.jpg
    IMG_20190913_124139457_HDR.jpg
    140.7 KB · Views: 148
  • IMG_20190913_124134476_HDR.jpg
    IMG_20190913_124134476_HDR.jpg
    143.4 KB · Views: 133
  • IMG_20190913_124125369.jpg
    IMG_20190913_124125369.jpg
    138 KB · Views: 128
  • IMG_20190913_124120171.jpg
    IMG_20190913_124120171.jpg
    103.9 KB · Views: 135
  • IMG_20190909_191928949.jpg
    IMG_20190909_191928949.jpg
    148.1 KB · Views: 148
Last edited:

jblnut

ALLIANCE MEMBER
Joined
Jan 17, 2015
Messages
6,990
Location
In the Middle of MN
I like how the railings turned out !!

Free stuff is always nice to find ESPECIALLY if it helps organize some stuff you maybe should give away for free :lol_hitti

I bet the Mrs smiles a little more now when you can get stuff in the garage now that the shelving situation is looking a little more healthy :thumbup:
 
To avoid these ads, REGISTER NOW!
OP
M

madison069

Well-known member
Joined
Nov 5, 2010
Messages
4,151
Location
Monroeville, PA
I like how the railings turned out !!

Free stuff is always nice to find ESPECIALLY if it helps organize some stuff you maybe should give away for free :lol_hitti

I bet the Mrs smiles a little more now when you can get stuff in the garage now that the shelving situation is looking a little more healthy :thumbup:

Those railing are turning out nice, thanks! Last night my middle daughter finished painting the ballisters. So once they are fully dried I'll complete the ballisters on the railing around the grilling station. I even got the top of the railing stained after we had a whole week of NO RAIN!!! That's a rare thing here in Pittsburgh area. Over the winter I'll think more about how to redo the grilling station floor and hopefully finish that area off.

As for organizing stuff that I should give away, it does help cause I can't seem to get rid of all of it! For awhile I suspected my neighbors was thinking I'm a hoarder just based on how much I'm putting out to the curb for trash night! But as for the Mrs being happy, shes upset cause I dribbled a little paint on the floor, I just can't win.:lol_hitti
 
OP
M

madison069

Well-known member
Joined
Nov 5, 2010
Messages
4,151
Location
Monroeville, PA
So on Saturday after attending my daughter's soccer game and did a little grocery shopping with the family, I started on replacing the timing belt on the van. Those bolts on the motor mount are the worst designed idea of the van that I want to slap the engineer involved in that design, and I'm an Engineer! Either way the bolts are apparently 7 inches long with maybe 1.5" of thread. some of those threads are exposed on the other end of the lower engine side mount and apparently PA has this habit of corroding metal to where they don't want to come apart. I couldnt' risk putting heat on it and freezing it did nothing. I did break one of the bolts and decided to just stop. So I googled and found they sold the lower engine side mount with the 2 bolts, so I ordered the parts and just put the van back together for the time being. I can't risk having the van completely down for repair during the week so it will jsut have to wait.

Other news I finally started seasoning the Wisk Wok with some bacon! I also threw some burgers on there after the first seasoning and they came out great! Maybe it was the fact the patties was made of brisket meat and seasoned like a steakhouse would season it but I claim it's the wok's magic!

So more progress was made on the railing as I mentioned earlier. I put the first batch of ballisters up that my daughter has painted and I think it's turning out great! Hopefully I'll get the rest done this afternoon or later this week.

I also took the time to wash the truck, it needs a wax job but I am fixing to spray the underside with fluid film for the winter so I'll wash it after the fluid film and wax it then.

Also a picture of the dribbled paint on the concrete. It didn't matter that it was covered in green paint, glue from the carpet that was on the concrete, crumbling mess that was used to level the concrete for carpet, and the old oil/paint stains covered concrete before I moved in. Only that I dribbled some piant in a working garage.:lol_hitti

PS: The old shelves outside the garage in the truck pictures are going to the curb with free on them, maybe someone else can use them and tonight folks usually go down our street due to trash night.
 

Attachments

  • IMG_20190916_071523219.jpg
    IMG_20190916_071523219.jpg
    58.1 KB · Views: 157
  • IMG_20190915_181941808.jpg
    IMG_20190915_181941808.jpg
    151.6 KB · Views: 193
  • IMG_20190915_092942464.jpg
    IMG_20190915_092942464.jpg
    156.5 KB · Views: 192
  • IMG_20190915_092947332.jpg
    IMG_20190915_092947332.jpg
    157 KB · Views: 210
  • IMG_20190914_172642518.jpg
    IMG_20190914_172642518.jpg
    151.1 KB · Views: 208
  • IMG_20190914_130334620.jpg
    IMG_20190914_130334620.jpg
    74 KB · Views: 180
Last edited:
OP
M

madison069

Well-known member
Joined
Nov 5, 2010
Messages
4,151
Location
Monroeville, PA
Five minutes with a stripper disc on a grinder and the paint is gone. I can't say much about the rest of the garage floor.....
 

Attachments

  • IMG_20190916_124258434.jpg
    IMG_20190916_124258434.jpg
    52.7 KB · Views: 122
OP
M

madison069

Well-known member
Joined
Nov 5, 2010
Messages
4,151
Location
Monroeville, PA
Yesterday I went to a friend's house to let our kids play and chew the fat with him. As we were looking at his new kobalt toolbox he just bought he said he wanted to get rid of the old Craftsman setup he had. Since I've expressed interest in it in the past he said I could have it!

So here it is, I'll do some cleaning and then I'll start moving some of my tools from the other box to make more room in them. My plans are to put all metric in this chest and any specialty tools related to the newer truck/cars will go in this box. We will see how it goes once i start moving stuff around.
 

Attachments

  • IMG_20190917_210359414.jpg
    IMG_20190917_210359414.jpg
    64.6 KB · Views: 135
Last edited:
OP
M

madison069

Well-known member
Joined
Nov 5, 2010
Messages
4,151
Location
Monroeville, PA
So lets continue with the wall repairs shall we!

So I moved everything from this corner so I can access the other "Hole" in the wall. Like the other "Hole" I had previously repaired, this one was missing the studs and insulation. I'm still unsure why it was done. Either way, I took a couple of left over metal studs and cut them down to stick it in the wall and reattached the cut studs. Then I filled the space inbetween the studs with the left over insulation I had. Well I ran out of the pink insulation and wasn't about to buy another roll of pink insulation for two more space area, so I took the foam board that I removed and cut it down to fit inbetween the studs. I figured if the foam board is equal to R-13 as per the number on the board, then it's just as good as the pink stuff. Then I thought well, you still got more foam board after putting one layer in the space so why not keep cutting it down and fillign in the space! So 2 of those columns for three layers of R-13 foam boards before I ran out of the stuff.

Then I put what drywall stuff I had left over on and decided I need one more sheet of drywall to finish that job. So maybe today I'll go to home depot to get one sheet of drywall and some joint compound to get this wall ready to paint. Oh and I need a mud ring like the one I previously installed on another outlet in the garage. Apparently I had this outlet stick out and forgot about it. Oops.....
 

Attachments

  • IMG_20190918_201811850.jpg
    IMG_20190918_201811850.jpg
    126.4 KB · Views: 114
  • IMG_20190918_195003915.jpg
    IMG_20190918_195003915.jpg
    67.3 KB · Views: 99
  • IMG_20190918_193805444.jpg
    IMG_20190918_193805444.jpg
    116.1 KB · Views: 107
  • IMG_20190918_181043972.jpg
    IMG_20190918_181043972.jpg
    129.1 KB · Views: 94
  • IMG_20190918_124759610.jpg
    IMG_20190918_124759610.jpg
    147.9 KB · Views: 116
Last edited:
OP
M

madison069

Well-known member
Joined
Nov 5, 2010
Messages
4,151
Location
Monroeville, PA
Oh and I did finish up the grilling station railing. Was able to get the ballusters installed during lunch time. So now I need to touch up the screw heads and any little white spots i find while it's in the sunlight now!
 

Attachments

  • IMG_20190917_125543059_HDR.jpg
    IMG_20190917_125543059_HDR.jpg
    155.5 KB · Views: 131

Unruh

Well-known member
Joined
Aug 12, 2017
Messages
1,431
Location
Silverdale, Washington
Yesterday I went to a friend's house to let our kids play and chew the fat with him. As we were looking at his new kobalt toolbox he just bought he said he wanted to get rid of the old Craftsman setup he had. Since I've expressed interest in it in the past he said I could have it!

So here it is, I'll do some cleaning and then I'll start moving some of my tools from the other box to make more room in them. My plans are to put all metric in this chest and any specialty tools related to the newer truck/cars will go in this box. We will see how it goes once i start moving stuff around.

Great score. I love the look of that box, she looks like she has been used and loved at the same time.
 
OP
M

madison069

Well-known member
Joined
Nov 5, 2010
Messages
4,151
Location
Monroeville, PA
Great score. I love the look of that box, she looks like she has been used and loved at the same time.


Thanks! He said his dad bought it for $500 new and his new Kobalt 41" setup costed him $500. I was kinda taken back by how much he said his dad paid for it cause $500 in the late 70's was a lot of money!

It has some rust at the bottom but I'll just scuff it up to knock the rust off and maybe shoot a coat of red on the door/drawer that got a good amount of surface rust. The inside has red liners that will most likely stay since it's in good shape still. I think it will look nice beside the craftsman box I already have in place!
 
OP
M

madison069

Well-known member
Joined
Nov 5, 2010
Messages
4,151
Location
Monroeville, PA
So today, I knocked down the high spots on the joint compound, cleaned off the dust, and started painting. Two coats later and it's looking a lot better. Not perfect but good enough for a garage. I'm sure I'm going to knick it as I work on stuff. Tomorrow I'll tackle the outlets and get them tight against the wall and replace the old outlets too. Oh and a repair to the flood light outside. This light never worked since I moved in and I was getting tired of not having a light there. So I replaced the whole assembly with a new one since the old one would seal up to keep rain out of the bill area. It was nice to have the light as I cleaned the paint supply!

No pics but I helped a kid fix his car. He's always had issues with this car since he bought it. Finally it was getting bad enough that it didn't want to start easily. So found out an oxygen sensor was bad and fuel injector on one of his cylinder wasn't working. Since the parts came in we got them put on the car today. I did my best to teach the kid as to why it was these parts, how to replace them, and tips and tricks to do them all. I feel like it was a success since the car now runs on all 4 cylinders and actually have the power to go up hills without smashing the gas pedal to the metal!
 

Attachments

  • IMG_20190921_202304273.jpg
    IMG_20190921_202304273.jpg
    150.5 KB · Views: 103
  • IMG_20190921_202250015.jpg
    IMG_20190921_202250015.jpg
    148.3 KB · Views: 104
  • IMG_20190921_201758478.jpg
    IMG_20190921_201758478.jpg
    99.4 KB · Views: 92
  • IMG_20190921_201806352.jpg
    IMG_20190921_201806352.jpg
    87 KB · Views: 96
  • IMG_20190921_201751015.jpg
    IMG_20190921_201751015.jpg
    116.3 KB · Views: 98
  • IMG_20190921_190400697.jpg
    IMG_20190921_190400697.jpg
    84.4 KB · Views: 93
  • IMG_20190921_190408425.jpg
    IMG_20190921_190408425.jpg
    109.2 KB · Views: 96
OP
M

madison069

Well-known member
Joined
Nov 5, 2010
Messages
4,151
Location
Monroeville, PA
So today was a bit of odd jobs outside the garage, church, and toilet repair. When I got home I started working on the outlets and got all five outlets fixed and tight in their places now.

Then I moved the storage stuff back against the walls with the goal of not covering the outlets. So far I'm doing good on not covering the outlets. Only thing I question is the shelves on the filing cabinet. The only way I'll feel ok with it, is I strap it to the wall. For now I'm going to start going through the piles and separate them. Along with throw most of it away.....
 

Attachments

  • IMG_20190922_180759404.jpg
    IMG_20190922_180759404.jpg
    145 KB · Views: 99
  • IMG_20190922_180802564.jpg
    IMG_20190922_180802564.jpg
    140.8 KB · Views: 96
OP
M

madison069

Well-known member
Joined
Nov 5, 2010
Messages
4,151
Location
Monroeville, PA
So I always had this wire hanging from the ceiling that I assumed was hot. From what I know about the garage I assumed it was am old outlet power wire from the wall that used to be here. So I turned the breaker that powered the wires that came from this wall cause I have a couple that's already back in service. Once I tested to be sure it wasn't hot I started the process of installing an outlet in the ceiling. Figured it's a good spot for a cord reel or light reel. Once I got it all together I went to the breaker box and tripped the breaker on. Went back up the ladder and nothing. No power was going to that wire. I tripped the other breakers just to see if it was another breaker that controlled it. I even flipped some light switchs that I had no idea where they went, but no power to this new outlet. So now I got to get in the attic and trace that wire a little closer!!

Either way I did some more cleaning, hung the ladder on the ceiling to get it out of my way. It's the 28 foot ladder that I use about 2 times a year. I picked up all of the stuff I planned to keep and threw away alot of stuff that just had no value for keeping. I even got my bench cleared off and I got another table cleared off that I didn't get pictures of after clearing it. Heck I even cleaned the bathroom some just to make it look nicer.
 

Attachments

  • IMG_20190923_185610217.jpg
    IMG_20190923_185610217.jpg
    128.6 KB · Views: 101
  • IMG_20190923_185439808.jpg
    IMG_20190923_185439808.jpg
    142.7 KB · Views: 95
  • IMG_20190923_185447503.jpg
    IMG_20190923_185447503.jpg
    114.3 KB · Views: 90
  • IMG_20190923_183901327.jpg
    IMG_20190923_183901327.jpg
    97 KB · Views: 92
Last edited:

bj383ss

Well-known member
Joined
Sep 29, 2011
Messages
3,166
Location
TX
Yesterday I went to a friend's house to let our kids play and chew the fat with him. As we were looking at his new kobalt toolbox he just bought he said he wanted to get rid of the old Craftsman setup he had. Since I've expressed interest in it in the past he said I could have it!

So here it is, I'll do some cleaning and then I'll start moving some of my tools from the other box to make more room in them. My plans are to put all metric in this chest and any specialty tools related to the newer truck/cars will go in this box. We will see how it goes once i start moving stuff around.

Man that is a great score!

Bret
 
OP
M

madison069

Well-known member
Joined
Nov 5, 2010
Messages
4,151
Location
Monroeville, PA
Nice to have a clean workbench.

Bret

It sure is! I did take the time last night to cut a sheet of OSB board to fit on the wall over the bench. This will allow me to mount so of the stuff on the bench onto the wall. Along with having a place to store my really big wrenches instead of sticking out of the bottom of the toolboxes!
 
OP
M

madison069

Well-known member
Joined
Nov 5, 2010
Messages
4,151
Location
Monroeville, PA
Currently in mock up stage, but I started on an air dryer. Also I'll be attaching two air compressors to this setup hence the two inputs. I'm going to pick up a few pieces from the store tomorrow but luckily I had everything but the sticks of copper. So I'm $30 into this right now. It pays to shop estate sale sometime.
 

Attachments

  • IMG_20190928_201300188.jpg
    IMG_20190928_201300188.jpg
    140 KB · Views: 106
OP
M

madison069

Well-known member
Joined
Nov 5, 2010
Messages
4,151
Location
Monroeville, PA
So while as I was building the air cooler for the upcoming paint job I have, I had to wait for the paint to dry on the back board I used to hold the air dryer in place. I've never really liked this wooden particle board cabinet that I had on this wall so I decided to scrap it. Instead I put up my part cabinets and thinking a lower cabinet will work well there under the part cabinets, I'll think more on this idea.

As I was saying I had this air cooler to build and so far the solder joints are holding air but the threaded joints have a very small amount of air leakage. You might can tell which solder joint was my first one due to high heat. I don't know why but I tend to over heat the first few joints as I get into the motion of soldering, maybe in the future I should do a few practice run before I attempt the actual project? I might remove the quick connects and put some pipe paste on the thread. But my time in the garage is limited so I went ahead and mounted it on the board and put the whole assembly on the wall. I think it came out well. the drain valves are easy to reach behind the part drawers and the air compressor. I can reach the input connections, and I have enough room below the output connection for a water trap and a hose reel. I might change the output setup, but for now this will work.

One step closer to where I can paint the camaro!
 

Attachments

  • IMG_20191007_192319484.jpg
    IMG_20191007_192319484.jpg
    137.7 KB · Views: 114
  • IMG_20191007_190732113.jpg
    IMG_20191007_190732113.jpg
    102.6 KB · Views: 103
  • IMG_20191004_190322746.jpg
    IMG_20191004_190322746.jpg
    123 KB · Views: 104
  • IMG_20191007_184814349.jpg
    IMG_20191007_184814349.jpg
    88.7 KB · Views: 95
  • IMG_20191002_171850879.jpg
    IMG_20191002_171850879.jpg
    92.5 KB · Views: 101
Last edited:
OP
M

madison069

Well-known member
Joined
Nov 5, 2010
Messages
4,151
Location
Monroeville, PA
So I got the last fitting to install the ball valve on the air compressor tank for a drain valve. The petcock was becoming harder to open and such a pain to do it. Then I installed both compressor to the air cooler and both pressured up and no major leaks are seen. Seems the pipe dope was the answer to the thread connect so I'll be pulling the quick connects off to apply pipe dope on them. Now I need to set up the water separator and get a hose reel set up on it.

Side note, my father in law came over and wanted me to cut some wood down for his project. So I decided to try the gripper out. It works very well, you have to be cautious of where the blade is but that's a given when cutting wood anyway. But it does give a safer feeling when holding the wood down over the blade area so I'll keep it close by for use.
 

Attachments

  • IMG_20191008_195035850.jpg
    IMG_20191008_195035850.jpg
    79.9 KB · Views: 85
  • IMG_20191008_181316822.jpg
    IMG_20191008_181316822.jpg
    66.1 KB · Views: 86
OP
M

madison069

Well-known member
Joined
Nov 5, 2010
Messages
4,151
Location
Monroeville, PA
So while walking the local flea market I came across a Barbie playhouse. Seeing how my 4 years old daughter been wanting one and Christmas is coming up soon, I decided to get it for her! I was able to get a bunch of little furniture that went with it and a Barbie Volkswagen bettle car for her Barbie's. Well with all of the cleaning up I've been doing it's now made it interesting to hide stuff in the garage!!! So hopefully she don't find this until Christmas morning under the tree!
 

Attachments

  • IMG_20191013_174719676.jpg
    IMG_20191013_174719676.jpg
    87.5 KB · Views: 72
  • IMG_20191013_174614826.jpg
    IMG_20191013_174614826.jpg
    101 KB · Views: 70
  • IMG_20191013_174308530.jpg
    IMG_20191013_174308530.jpg
    75.4 KB · Views: 81
OP
M

madison069

Well-known member
Joined
Nov 5, 2010
Messages
4,151
Location
Monroeville, PA
So this is just a progress thread from early October to Last Night. So i decided to tackle the camaro door hinges. The driver side was very worn out and the door was a pain to close and open due to a wornout/missing bushing on the lower door hinge. So I took the front clip off to make it easier to remove the door when my dad got up here from Texas. In the mean time i decided to sand the front fender down to see what I was working with since it's been 22 yrs since I've seen the original surface. The bondo work and the little holes I found on the back side with bondo coming out indicates this fender was maybe damaged at one point. Either way I think I'll knock the old bondo out, weld the little holes back up and then see if I can straighten it out some more before I do some filler.

When my dad got here we took the doors off and placed them on some stands. Then they sat there til I got back from the vacation with the family. Finally last night I tool the hinges apart and inserted bushings with a new pin. Luckily the hinges was not too worn out and the new bushings made the hinges tight again. Before they were just sloppy and allowing the door to drop down a good bit. Hopefully this fits the driver side sagging and I can get the door back on!
 

Attachments

  • IMG_20191113_171000411.jpg
    IMG_20191113_171000411.jpg
    67.5 KB · Views: 80
  • IMG_20191113_164227763.jpg
    IMG_20191113_164227763.jpg
    86.2 KB · Views: 72
  • IMG_20191101_200312372.jpg
    IMG_20191101_200312372.jpg
    137.9 KB · Views: 68
  • IMG_20191101_200304971.jpg
    IMG_20191101_200304971.jpg
    147 KB · Views: 67
  • IMG_20191017_125410218.jpg
    IMG_20191017_125410218.jpg
    151 KB · Views: 68
  • IMG_20191014_212221195.jpg
    IMG_20191014_212221195.jpg
    145.1 KB · Views: 70
  • IMG_20191113_204309888.jpg
    IMG_20191113_204309888.jpg
    115.2 KB · Views: 82
Last edited:
To avoid these ads, REGISTER NOW!
Top Bottom