To avoid these ads, REGISTER NOW!

Above 1200 Sq/FT Cody's 33'x62' Garage

Wokspaces above 1200 squarefeet.
OP
M

madison069

Well-known member
Joined
Nov 5, 2010
Messages
4,150
Location
Monroeville, PA
Just some more pics of the hinges and some of the issues i found. Also yes I bought some car dollies. So hopefully once I replace the coil spring and do a few more things under the car, i will be lowering the car on the dollies to make it easier to move and work on the Camaro.
 

Attachments

  • IMG_20191113_164836303.jpg
    IMG_20191113_164836303.jpg
    47.4 KB · Views: 80
  • IMG_20191113_164949665.jpg
    IMG_20191113_164949665.jpg
    53.9 KB · Views: 74
  • IMG_20191113_172928506.jpg
    IMG_20191113_172928506.jpg
    43.2 KB · Views: 73
  • IMG_20191113_172946719.jpg
    IMG_20191113_172946719.jpg
    66.9 KB · Views: 85
Last edited:
To avoid these ads, REGISTER NOW!
OP
M

madison069

Well-known member
Joined
Nov 5, 2010
Messages
4,150
Location
Monroeville, PA
So why did it take almost 2 months to take the doors off and rebuild one set of hinges? well My dad came up for a visit since it was close to his 60th birthday and we haven't been hunting in a long time. After a short walk through some woods we got one squirrel but a lot of time to talk. We also did some site seeing and saw this old Iron furnace from 1902 as per the dates. I took this exact same picture of this furnace with my 78 bronco in the same spot. So now I need to get the camaro done and take it to this same spot to take a picture for the photo collection.

During my dad's visit I had to take him to the hospital due to his health so he stayed for 4 more days then he originally planned, but that's ok as he's recovered from this spell and it gave us more time to talk. Then it was off to the airport for him to go back home and then the family went to Puerto Rico and the Virgin Island (St Thomas and Totola) on a cruise. Just a few random pics from the trip along with a roster that was on the island beach. I fear I might of eaten his brother that day but he tasted great in the caribbean season that they cooked him in that day!
 

Attachments

  • IMG_20191107_132941554.jpg
    IMG_20191107_132941554.jpg
    146.4 KB · Views: 131
  • IMG_20191107_111131400.jpg
    IMG_20191107_111131400.jpg
    147 KB · Views: 128
  • IMG_20191106_072322199.jpg
    IMG_20191106_072322199.jpg
    146.7 KB · Views: 171
  • IMG_20191105_175638641.jpg
    IMG_20191105_175638641.jpg
    151.2 KB · Views: 235
  • IMG_20191026_124935631_HDR.jpg
    IMG_20191026_124935631_HDR.jpg
    150.6 KB · Views: 187
  • IMG_20191026_105333072.jpg
    IMG_20191026_105333072.jpg
    147.5 KB · Views: 170
Last edited:
OP
M

madison069

Well-known member
Joined
Nov 5, 2010
Messages
4,150
Location
Monroeville, PA
So some progress on the Camaro. First off I removed the front springs since the front end was sitting too low. While the springs are off I took the time to clean the grease and dirt off of the painted surfaces. Needless to say the paint has seen better days but I think I'll just scuff it up and do some touch up when I paint the other chassis parts. So to get the bumper ready for paint I had to remove the bumper cover insert by drilling out several rivets. After drilling the rivets out I was left with this nasty dirty metal bumper. I'm going to take the bumper and the inner fenders to the car wash to get them cleaned up before I start sanding and scuffing the parts for new paint. the inner fenders are in good shape but I need to fix some metal issues and also retouch the paint so I figured I'd just sand it all down and reshoot the paint. But first lets get all of the dirt off the surface. I got some bumper brackets wire wheeled and scuffed up. I went ahead and wiped them down with wax and grease remover and hung them on the body stand. I'm going to try shooting this parts with rustoleum mixed with reducer and hardner. I've heard good things about this paint and it would be easy to touch up in the future. Hopefully I'll make some progress this weekend and have the parts ready for paint!
 

Attachments

  • IMG_20191121_191451363.jpg
    IMG_20191121_191451363.jpg
    133.7 KB · Views: 86
  • IMG_20191121_191225006.jpg
    IMG_20191121_191225006.jpg
    148.4 KB · Views: 81
  • IMG_20191121_182941027.jpg
    IMG_20191121_182941027.jpg
    81.5 KB · Views: 75
  • IMG_20191121_182630754.jpg
    IMG_20191121_182630754.jpg
    71.8 KB · Views: 74
  • IMG_20191121_182425865.jpg
    IMG_20191121_182425865.jpg
    68.3 KB · Views: 75
  • IMG_20191119_071806836.jpg
    IMG_20191119_071806836.jpg
    150.5 KB · Views: 79
  • IMG_20191118_190648283.jpg
    IMG_20191118_190648283.jpg
    147.2 KB · Views: 87
Last edited:
OP
M

madison069

Well-known member
Joined
Nov 5, 2010
Messages
4,150
Location
Monroeville, PA
Reason for replacing the springs? I think someone cut a coil off these worn-out springs and it was causing the front to sit too low.
 

Attachments

  • IMG_20191121_191715113.jpg
    IMG_20191121_191715113.jpg
    148.3 KB · Views: 75
OP
M

madison069

Well-known member
Joined
Nov 5, 2010
Messages
4,150
Location
Monroeville, PA
Playing with a image host site. Used to use Supermotor.net back in the days so let's see if it still works.

img_20191121_191715113.jpg
 
OP
M

madison069

Well-known member
Joined
Nov 5, 2010
Messages
4,150
Location
Monroeville, PA
For the folks who are interested in the Camaro project i provide you with this update!

My goal this weekend was to get those coil spring installed. Needless to say I fought them springs for several hours until I decided to use a coil spring compressor. I took the sliding part of the compressor off and install the compressor inside the shock mounting holes. Then I attached the lower hooks o the spring after making sure the spring was properly set in the coil spring cup.

img_20191124_094411969.jpg


Then I compressed the spring upward and slowly raised the lower arm to keep tension on the spring and prevent it from flying out! Once it got to a certain point I just hit the lower spring with a hammer and popped goes the spring in place on the lower a arm!

img_20191124_095147231.jpg


Needless to say I need to do some touch up painting so I'll leave the sway bar and shocks out until I paint it again.

Then I worked on removing the windshield adhesive and slowly it's all coming out with razor blades, wire wheel on a grinder, and acetone.


img_20191125_124647389.jpg


Will see how it goes but I'd like to have the parts that's going to be gloss black to be painted by Sunday this week. Will have to see how much time I actually get to spend on the Camaro this week.
 
OP
M

madison069

Well-known member
Joined
Nov 5, 2010
Messages
4,150
Location
Monroeville, PA
A little update from last night work.

I got the water and oil separator up, luckily I have the pipe fittings collection I have cause I was able to pull the few bits I needed to get the job done without a trip to the store. The little water and oil separator is small but figured I already have it so might as well use it. O can upgrade if I need to later on.

img_20191126_191358839.jpg


Since I got the bumper and inner fenders scuffed up and washed i wanted to use clean air to blow dry the water off. I've designated the green air hose as clean air only hose! Just need to get a reel or hanger for it.

img_20191126_191409261.jpg


img_20191126_192415548.jpg


Today I'll do some more scuffing and sanding on the Camaro subframe to get it ready to paint and then clean the garage to be ready for paint this weekend!
 
OP
M

madison069

Well-known member
Joined
Nov 5, 2010
Messages
4,150
Location
Monroeville, PA
So this morning i finally did it, i painted the Camaro suspension and inner fenders parts gloss black. It turned out good for suspension parts. It does have some orange peel and one run on the frame. It did develope some fisheyes on the dash, but overall I not complaining! I'll redo the dash but everything else looks good and im satisfied with it. If it was the body i wouldn't be happy with the orange peel and I would be wet sanding. But I'm going to leave everything as is and just redo the dash only. So without further ado, here are the pictures!

img_20191201_082046952.jpg

Everything was shot and I used about 16 oz of paint, 4 oz of acetone, and 2 oz of hardener. Next time I'll use 6-8oz of actone to help reduce the orange peel.

img_20191201_082054060.jpg


img_20191201_082102354.jpg


img_20191201_082109291.jpg

img_20191201_082125871.jpg


Stupid fisheyes,

img_20191201_082141898.jpg


On other news, I ordered a new Edelbrock 650cfm carburetor to replace the Holley 750 double pumper that's on the Camaro now. Hopefully it will be easier to tune and be more responsive on acceleration. Buying it on black Friday saved me $40 so not a big saving but better then nothing.

img_20191201_082534257.jpg


Well, once the paint fully cures I'll access the paint again and see if it levels out some more. Hope everyone had a good Thanksgiving!
 
OP
M

madison069

Well-known member
Joined
Nov 5, 2010
Messages
4,150
Location
Monroeville, PA
We got heat in the garage! Gas man came and turned the meter on for me today. I went through the furnace myself and everything looks good. No cracks in the exchanger so I turned it on and it roared to life. It's old but it got the garage from 55f to 62f in 2 hours. It was nice and toasty when I walked in from a 35f outside temp.
img_20191202_163652596.jpg


So I moved the painted parts out of the way and started staging my next batch of parts. I need to sand the door jambs, hood jams, and do some body work. Hopefully I'll get the color and clear soon from my body man. Just waiting to get setup on the account. But can't hurt by getting ready to paint when I get it.

img_20191202_185707403.jpg


I use this mask to protect my lungs while sanding. Why the color pink though???

img_20191202_191112164.jpg


Also I didn't show what paint and supply i was using for the black surface. Rust-Oleum gloss black, valspar enamel hardner, and acetone to reduce. It worked very nicely and it laid pretty good. Once some time had past the paint did lay down better. Sure it has some orange peel but nothing a little wet sanding wouldn't take out.

img_20191202_191237914.jpg


Hopefully I'll get it all sanded down, do a little body filling, and have it primed. Working with the body man and we been debating on tinting the primer to help make a good coverage with the red tint and not have to use so much basecoat paint to get a good coverage. Hopefully I get it squared soon!
 

bj383ss

Well-known member
Joined
Sep 29, 2011
Messages
3,166
Location
TX
Good luck with your painting. I did not have great luck this year but maybe next year I will.

Also if you are looking for more color variety than the Rustoleum offers check out Tractor supply they have more colors in the Enamel paint.

Did you get the Valspar Hardener at Lowes?

Bret
 
OP
M

madison069

Well-known member
Joined
Nov 5, 2010
Messages
4,150
Location
Monroeville, PA
Good luck with your painting. I did not have great luck this year but maybe next year I will.

Also if you are looking for more color variety than the Rustoleum offers check out Tractor supply they have more colors in the Enamel paint.

Did you get the Valspar Hardener at Lowes?

Bret

Thanks for the luck! I've decided I'd just do the primer on the whole car then only do the color and clear on the jambs and the underside of the hood and trunk. Then I'll take the whole car to my buddy's paint shop and let him do the basecoat and clear. He has a paint booth and proper guns to be spraying the overall paint job better then I can with a harbor freight gun. With the color red being a very expensive paint color in the automotive world I rather not waste the paint!

I will keep that in mind on the different colors at tractor supply. This stuff has been spraying pretty nicely and I might just do some small lawn equipment painting this winter once I get the camaro done!

I actually ordered the Valspar hardener on amazon. I was told they sold it at Tractor Supply also but I don't drive by the tractor supply often so I just ordered it online. Next time I get in the area of the tractor supply I'll stop by and see what they offer!
 
OP
M

madison069

Well-known member
Joined
Nov 5, 2010
Messages
4,150
Location
Monroeville, PA
So this weekend was a case of disassembly to get the car in better shape for it's maiden voyage and prepare for paint. One of the things done was inspection of the rear brakes. Needless to say the signs of brake fluid and rust under the drums indicated a rebuild was in order. Sad cause I did this 15 years ago and never drove the car.

img_20191207_093428542.jpg


None the less I pressed on with the car. Since I had to order parts for the brakes i figured I'd see if I need anything for the carburetor swap. Looks good in it's new home i think.

img_20191207_125630342.jpg


I also did some more sanding and I got the door mostly sanded down. Not sure if I'll keep going. Keep in mind I striped some of the original paint down to bare metal almost 20 years ago and sprayed bomb it with cheap Walmart primer paint. So I don't trust the red oxide primer but the original paint looks solid.

img_20191207_125644021.jpg


I kept stripping the Camaro down to be able to sand the jambs down and paint the underside of the trunk lid.
img_20191207_134041470.jpg


I enlisted my daughter's help in sanding some of the panel while I continued to strip the car. They didn't enjoy it, but they either get paid or got something at the store for helping so they aren't too bummed with helping.

img_20191207_180559632.jpg


But overall I was able to finish removing alot of the parts I needed to take off for the paint job with their help.

img_20191207_190834911.jpg


Now to order some parts and keep sanding, a boring task but an important one.

I did take the time to get the snowblower running, just needed to run the carb through the ultrasonic cleaner for 30 mins. Now with a basic lubrication and cleaning on the snowblower and it will be ready for snow fall!
 

bj383ss

Well-known member
Joined
Sep 29, 2011
Messages
3,166
Location
TX
Nice Progress!. So you started the project 20 years ago? It will be nice to get to the finish line.

I hope my 64' doesn't take that long but I am about to be on year 8 and I have absolutely no desire at all to work on it. Making sawdust in the woodshop is so much more relaxing for me.

Bret
 
OP
M

madison069

Well-known member
Joined
Nov 5, 2010
Messages
4,150
Location
Monroeville, PA
Nice Progress!. So you started the project 20 years ago? It will be nice to get to the finish line.

I hope my 64' doesn't take that long but I am about to be on year 8 and I have absolutely no desire at all to work on it. Making sawdust in the woodshop is so much more relaxing for me.

Bret

Yea life has a funny way of messing with ones plans.

I bought the car when I was 15. Started working on it cause it was worn out so I was rebuilding everything. Didn't get finished before college and so it sat with me only doing small things to it cause I wasn't making much money during college. Then I left Texas for work and the Camaro stayed with my parents in Texas. I always planned to go back to Texas til I married my wife and then I became a permanent Pa resident. Didn't get the Camaro here in PA until two years ago and finally decided to push the Camaro in high gear after this summer. So it's been a project for 22 years. My goal is to have it painted by Summer this year since the paint job is the biggest huddle of the project!

It will have to sit for the next week cause I'll be visiting family this weekend and I don't think my wife will work on it anytime soon.
 
OP
M

madison069

Well-known member
Joined
Nov 5, 2010
Messages
4,150
Location
Monroeville, PA
Nothing much to add other then I got some paint for the Camaro last weekend when I got my account setup.

img_20191221_155854868.jpg


The color of choice is the same red as my truck. Vermillion red F1 paint code.
img_20191221_155901284.jpg


I also painted the disc rotor and the drums for the Camaro with caliper gloss black. Hopefully I'll get the brakes done over the weekend.
img_20191222_101905120.jpg


My goal is to remove the rear glass, work on the brakes and sand some more on the Camaro.

Little by little I will get there!
 
OP
M

madison069

Well-known member
Joined
Nov 5, 2010
Messages
4,150
Location
Monroeville, PA
So the weekend plan changed some, as all plans tend to do.

I got to working on the rear brakes and since I had it apart I figured I'd change the axle seals while I got the chance. So that means I had to drain the rear axle pumpkin. Since the oil was good and had low hours I decided I'd collect it and reuse the oil, plus I had posi traction additives in this oil!
img_20191227_202252233.jpg


Then once I removed the c-clips and pulled the shafts out, I replaced the seals and rebuilt the brakes. Rebuilding drum brakes is a lot easier without the axle shaft!
img_20191228_090844686.jpg


I moved onto the transmission since I had the driveshaft off due to a weird leak from the transmission. It only leaked when I jacked the front up and let it sit I that position. Only thing I could find was the rear output seal was a little hard and not as tight around the yoke. So I replaced it and reinstalled the driveshaft. I didn't get any pics cause this was a messy process. I did get a picture of the fluid and kitty litter on the floor.
img_20191230_074619645.jpg


Then i moved to the front brakes. I found the driver side caliper had a slow leak on the connection between the hose and the caliper surface. Come to find out I didn't install a copper washer there! Some days I wondered what I was thinking as a kid when I first started working on this car.

But none the less i found some copper washers and was able to clean the caliper for paint and painted. Then reassembled the brakes properly. Took the time to bleed the brakes with my mityvac tool but I'll probably do it the old way later since I'm not sure all of the air is out still.

img_20191230_074556018.jpg


Then I cleaned the garage some, did a bunch of little stuff on the Camaro to get closer to running it. Surprising how much time is used to do just little things on the car. But I was able to get it running by using a piece of fuel hose until I make the final Hardline to the carb. It sounded good to have it running again but I ran out of gas before I could tune the new carburetor. Oh well, I'll get some gas and hopefully get the car back on the ground on New year's day! I want to drive it out of the garage to wash the body down good before I started sanding it all.
 
OP
M

madison069

Well-known member
Joined
Nov 5, 2010
Messages
4,150
Location
Monroeville, PA
So a little update on the camaro!

I finally got it where I could drive it out of the garage on New Years day!
img_20200101_140019273.jpg


Me and the youngest drove it out of the garage and took it up and down the driveway in front of my house. Being it was a cold day it was a little chilly to drive it without the front windshield!

Before I took it out of the garage though, I had a lay down a little rubber. Nothing extreme since I had my youngest in the car with me. She seems to enjoy the little drive!
img_20200101_140349103.jpg


Then it was time to wash it and get it ready to keep sanding the car.
img_20200104_192042715.jpg


Then during my free time last night I got the body mostly sanded down. I still got some jambs to finish and little spots I'm sure I missed.

img_20200111_203133828.jpg


img_20200111_203116151.jpg


Hopefully I'll get the little screw holes welded soon. Buddy of mine will bring his MIG welder over and we will fill in the hole before I do some basic body work and prime the whole car with high build primer!

My wife has been nagging me to do a house project like I'm not busy with anything. So we started on the kitchen remodel project. The idea is to knock out a wall and move a wall back to make the dining room and kitchen bigger.

So stage one was to remove the load bearing wall and install the appropriate steel beam as required.

img_20200104_194421028.jpg


img_20200104_194438267.jpg


BOOM, out with the old wall! The gas line is still there, which oddly they had it drop down from the ceiling. It will get relocated when I get the other wall moved back.

img_20200109_130531007.jpg


img_20200109_130551454.jpg


So like I said, just a small update since the beginning of the new year!

Hope everyone is having a good new year so far!
 
OP
M

madison069

Well-known member
Joined
Nov 5, 2010
Messages
4,150
Location
Monroeville, PA
So progress is slow on the camaro. It was planned to bring my buddy's mig welder over to my house to weld the holes up but he hurt his back so we put it off for sometime this week after work.

So since I wasn't able to work on the camaro I decide to make some progress on the kitchen remodel. In the hope of keeping the remodel from impacting all of the house I'm now building the new wall for the playroom. This wall is moved 6' away from the old wall that divided the kitchen and the playroom. The plan is to move the cabinets and counter 6' toward the playroom to give the kitchen more space and dining room more space. The end dimension for the playroom is roughly 16' by 11' so the room is still a big room.

While trying to determine the exact inches on where the wall would be built I started locating the floor/ceiling joists. Out of all of the houses I've worked on, I've never found a house that was perfectly squared. This house was no different as the measurements from corner to corner was off by 2.5", I mean how does someone get off that much when placing the floor joists??? The wall studs was within 2" of the floor joist so I had to line up the new wall with the floor joist and the wall studs to ensure the new wall was mounted on all four sides of the wall. In the end it was achieved and I got the wall framed and sheeted Saturday afternoon. I'll be putting some braces between the studs after I get the electrical boxes in placed and new wires ran in the wall. The plans are to put a tv mounted on the new wall and a floating shelf under the tv for the typical boxes for cable and such.

This is a picture of the old wall,

img_20200117_124556474.jpg


And now the new wall, the big gray entertainment center will disappear. Which is fine with me since it was just a junk collector to the kids.

img_20200118_143655236.jpg


img_20200118_130459290.jpg


Sunday afternoon I started moving the old door from the old kitchen wall to the new wall. I got it in place but didn't like how it was aligned. I was also having a difficult time moving this door up without the door racking on me. So I shot a few screws in just to hold it in place while I go to home depot for more shims.

img_20200119_154153044.jpg


I found these winbags.

img_20200119_185557429.jpg


With two of those winbags I was able to lift the door up in a squared position and kept the door from racking on me. Got it all squared and leveled and shoot 9 screws into the door frame and each point properly shimmed. Now the door closes with no effort. Success!

That was all I did really, along with cleaning the house and keeping a fire going in the fireplace as I spent time with the family.
 
OP
M

madison069

Well-known member
Joined
Nov 5, 2010
Messages
4,150
Location
Monroeville, PA
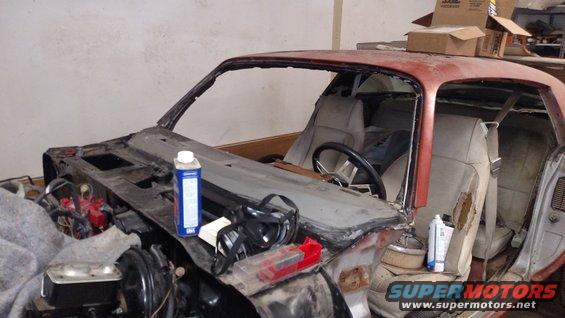
So over the weekend I had done some work on the Camaro, spent time with my youngest daughter at a car how, and did some work on the kitchen remodel.

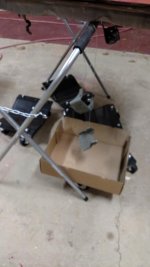
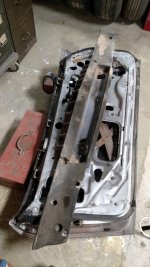
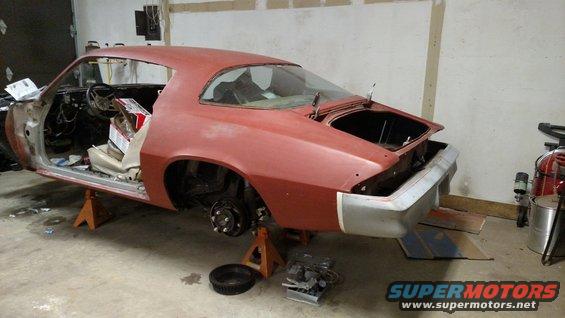
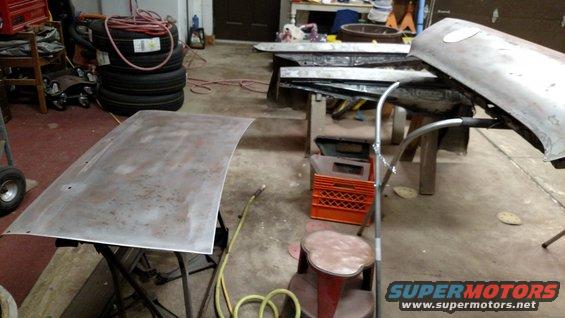
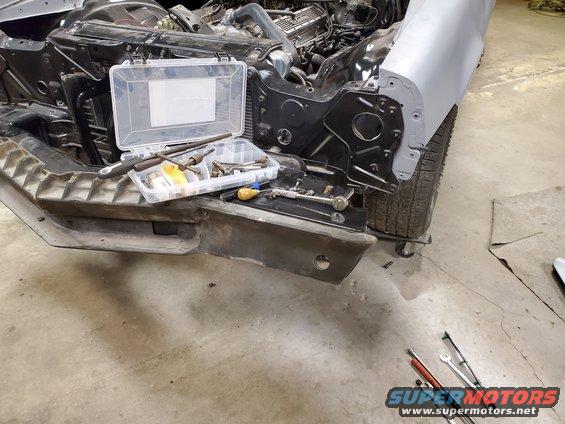
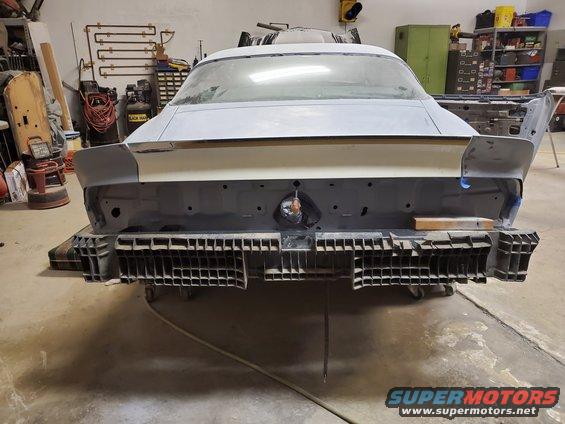
Buddy came over and filled in the holes with his mig welder,, I didn't get any pictures of the newly welded holes but I did get some spot weld studs work pictures. Now doing the stud gun job is a learning curve. Considering this is my first time using one I call it a success. Could someone do a better job then I did, oh yea I'm sure. But I'm happy with the results and it will result in less filler material compared to what I took out originally.

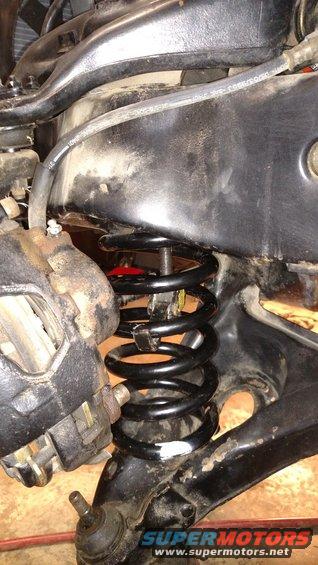
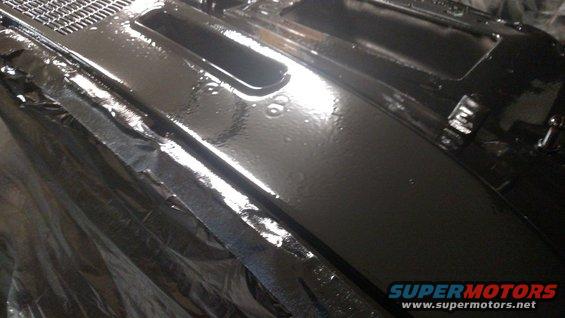
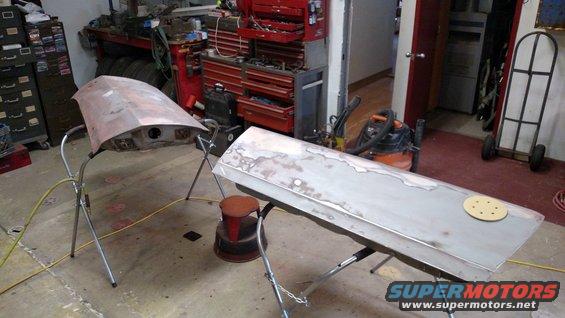
Some studs welded on a dent that was covered by Bondo.
img_20200123_190444011.jpg


Now it's not such a deep dent. One thing I learned is not to pull on the studs so hard or else you'll rip them out. Oops.

img_20200123_191555576.jpg


Easy to fix when you have access to a mig welder to fill the holes you created. I'll eventually use Everlast rage gold filler to get it smooth as possible.

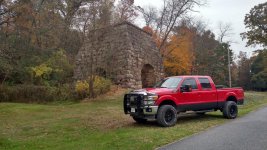
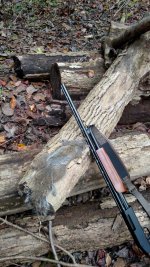
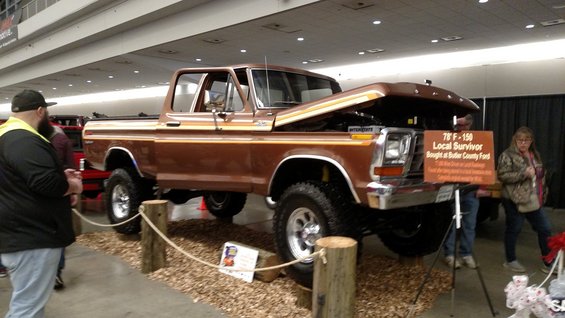
Then Saturday afternoon I took Charlotte to a car show and we saw some cool cars and truck.

My youngest liked this car the most.
img_20200125_172134249.jpg


I enjoyed this 56 Ford gasser since my dad has a 55 Ford car that he always wanted to turn into a gasser.

img_20200125_170322392.jpg


This was supposedly a original (minus the lift kit) the that was found in an old limestone mine shaft.

img_20200125_174014540.jpg


Of course got to take pictures of the classic grumpy car.

img_20200125_170245254.jpg


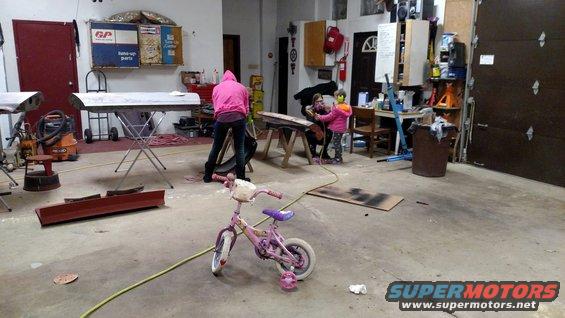
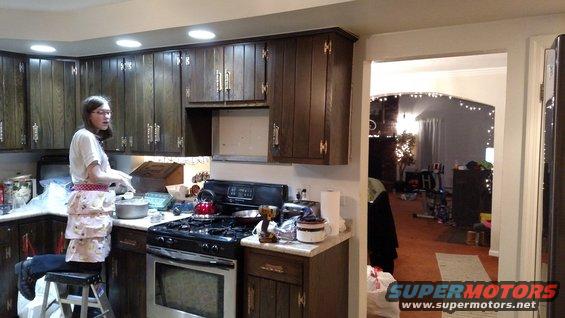
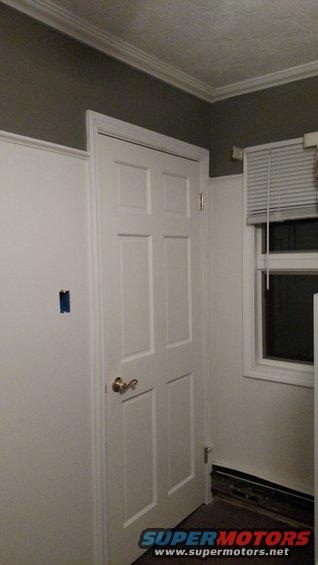
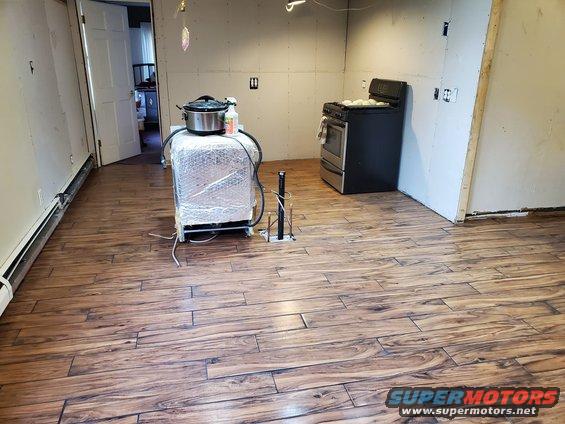
Sunday morning I was dealing with sinus headache but eventually it went away and I worked on on the kitchen remodel.

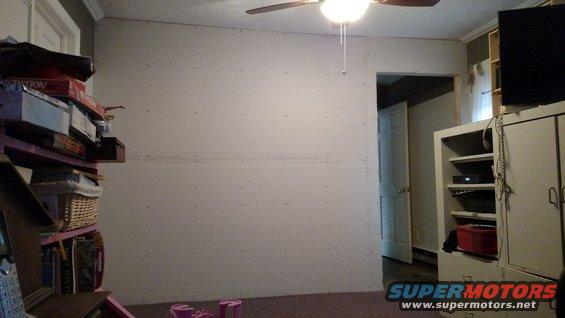
I didn't get pics but I did put up drop cloth to keep sanding dust down. Then I started sanding the first layer of joint compound so the high spots was knocked down. Then I wiped the surface down to prepare for the next coat of joint compound.

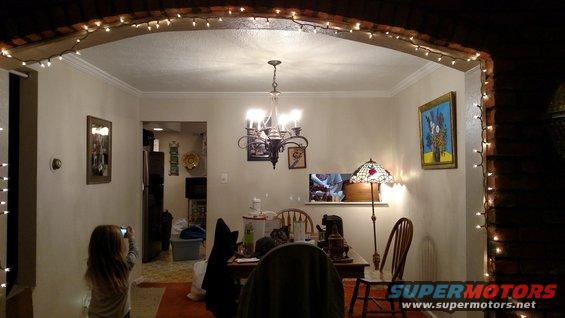
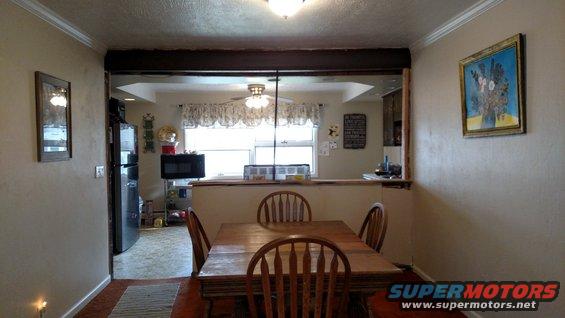
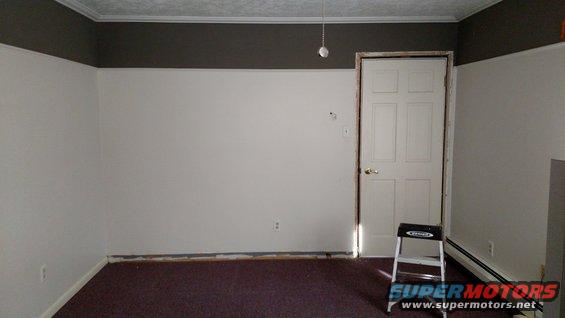
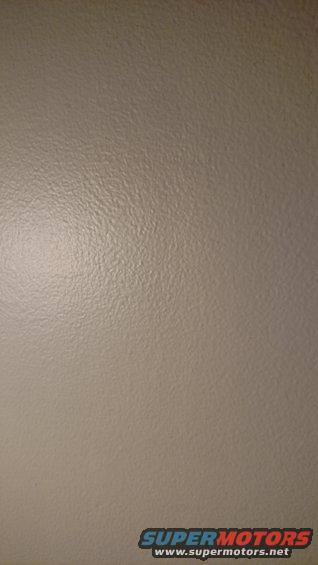
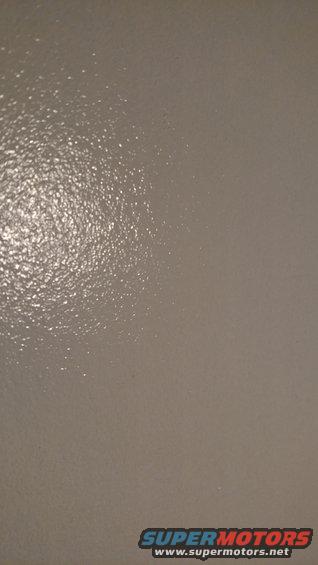
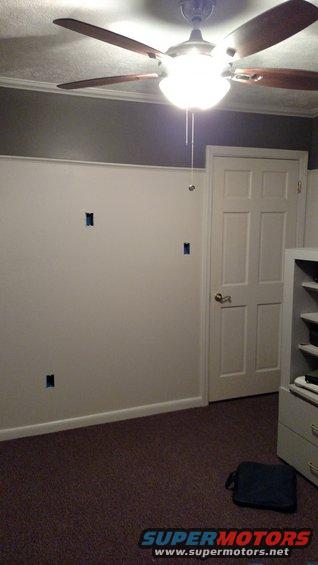
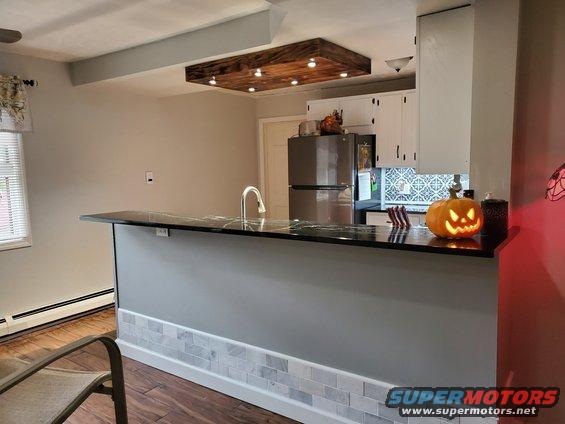
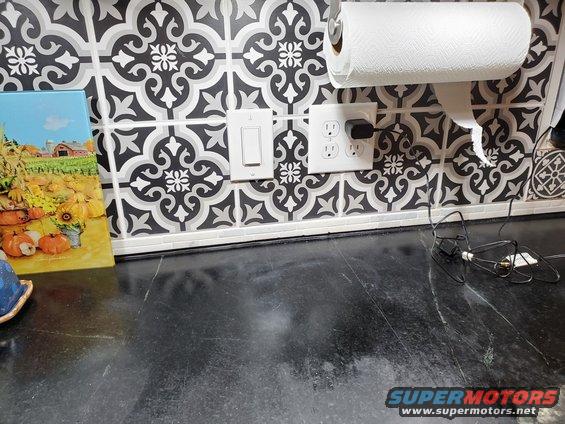
I also experimented and was finally able to get close to the orange peel surface that is found on the other tree wall of this room that I moved the wall inward. It was the result of a 3/4" nap roller. I suspect one more coat or paint would give me the result I'm looking for since it's making the previous orange peel coat a little bigger drops.

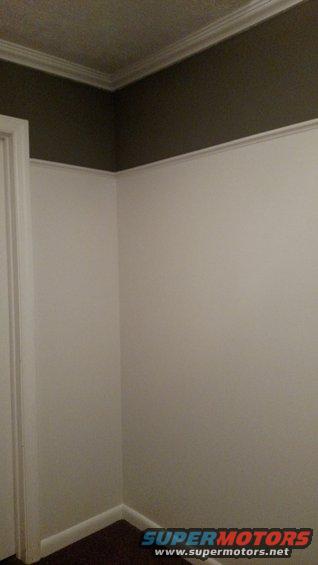
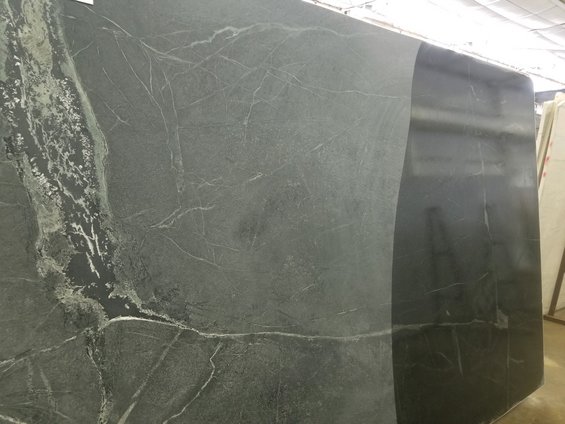
The original surface i'm trying to copy.

img_20200126_201040997.jpg


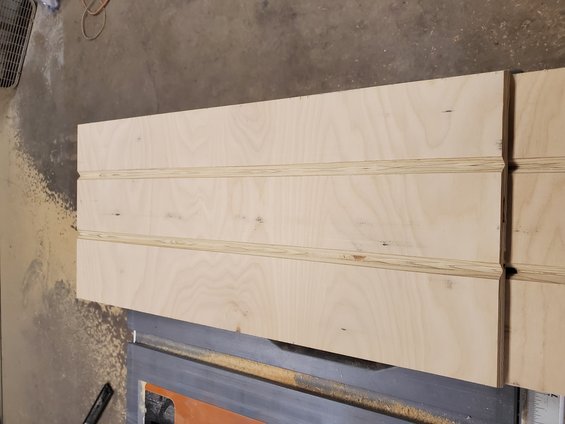
The results I gotten with a 3/4" nap roller.

img_20200126_201029238.jpg


So that's what I've been up to this past weekend and hope to get some more done in the kitchen remodel this week!
 
To avoid these ads, REGISTER NOW!

bj383ss

Well-known member
Joined
Sep 29, 2011
Messages
3,166
Location
TX
Looks like it was a good car show and you made some progress. The stud gun is kinda of one of those love hate tools. When it is working right you love it other wise it is a pain in the ***.

I used a nap roller on most of my garage cabinet doors I painted. The texture shows less wood dust.

Bret
 
OP
M

madison069

Well-known member
Joined
Nov 5, 2010
Messages
4,150
Location
Monroeville, PA
Looks like it was a good car show and you made some progress. The stud gun is kinda of one of those love hate tools. When it is working right you love it other wise it is a pain in the ***.

I used a nap roller on most of my garage cabinet doors I painted. The texture shows less wood dust.

Bret

You're right, love and hate relationship with that stud gun! But it did do the job at several spots on the car so I can't complain too much. Hopefully I'll get some work on the doors and fender since I'm waiting for the duraglass for the body spots that needs some help. I'll be using Evercoat Rage Gold filler on the doors and fender. Just trying to smooth out the dings on the door and fender is all.

I agree that the texture looks like an ideal thing to hide dust and such. I'm hoping it hides minor imperfections on the wall. I'm not done but I'm not a professional drywall installer. Tonight I hopeto sand the second coat of joint compound I put on last night. See if there are anymore area that needs attention. I did take the time to install the electrical boxes on the wall. Didn't run the wires since I haven't gotten to the stage of the project that I should be moving the power wires around. I also got the upper crown molding installed. I got some filling to do and nail heads to fill in so maybe that will happen today.

Either way, at least I'm staying busy!
 
OP
M

madison069

Well-known member
Joined
Nov 5, 2010
Messages
4,150
Location
Monroeville, PA
So Saturday was spent on finishing the playroom side of the wall. I was able to get it to match the other three walls pretty damn close! I felt proud of myself but at the same time it felt silly to move a wall that was perfectly fine. But it needed to be move to improve the layout of the kitchen.

img_20200201_201534319.jpg


img_20200201_201540972.jpg


img_20200201_201556614.jpg


img_20200201_201600661.jpg


All that's left is to mount the TV, build a floating shelf for the cable box and stuff, and wiring when I get to removing the old wall. Not sure how soon I'll get it done cause now I'd like to bounce back to the Camaro and get the bodywork going and shoot some primer on the whole thing.

Then Sunday it was a early morning drive to see the groundhog!

img_20200202_055706496.jpg


It was fun with the live music, entertainment, firework show, and happy crowd of people who were wearing groundhog costumes and stuff.

Then when we got back home it was a time to look at the material for the next step in the kitchen project. Just nailing down the exact shade of gray, countertop material, and flooring style. Needless to say I crashed in bed early yesterday.

Hope yalls weekend was good!
 
OP
M

madison069

Well-known member
Joined
Nov 5, 2010
Messages
4,150
Location
Monroeville, PA
Nothing much to add except I did some bodywork on the Camaro.

I had these dents along the back wheel wells and after discussing it with my body man he suggested a product called duraglass. Its basically fiberglass resin with short strands of fiber. Pretty tough stuff to sand but I was able to reshape the arch and it came out pretty good! I was able to get both sides of the car and now it's on to doing some filler to smooth out the dimples on the doors and fender.

img_20200204_185949337.jpg
 
OP
M

madison069

Well-known member
Joined
Nov 5, 2010
Messages
4,150
Location
Monroeville, PA
Just a short update, been really busy between work, Kitchen remodel, camaro, lawnmowers repairs, and general life.

Kitchen has been taking most of my time, but it has been a big improvement since we started.

Before,
img_20200104_194421028.jpg


After,

20200428_171141.jpg


20200428_171237.jpg


Still got drywall work, lighting, electrical, painting, cabinet repairing, and more to do but been taking a bite of the elephant each day as I can.

I've also been working with my middle daughter repairing lawnmowers and small equipments during the quarantine time since she's home all day. We will get up early, work on some stuff together and ill give her a list of things to do while I'm gone at work.
20200429_074506.jpg


If we keep this up, we will need to invest in a motorcycle lift so we can put the lawnmower up in the air easier!

Camaro has progressed but took a break from it while working on the kitchen floor. Still need to align body panels and get more parts on it before I disassemble it for paint.

I don't have a current picture of the camaro but envision a grey camaro with missing front bumper nose.

Hope everyone has been safe and healthy the past few months!
 
OP
M

madison069

Well-known member
Joined
Nov 5, 2010
Messages
4,150
Location
Monroeville, PA
Hello folks, it been awhile since I've updated my thread. Its been a busy summer and I just haven't been in the mood to post much about anything. I did post about a toolbox I found awhile back but thats been about it. So I figured I'd post some updated pics of the kitchen project since its been finally moving forward. Once we found the slab of our choice for the counter top its been a big motivator to get the kitchen finished! Unfortunately it's a lot of little stuff that takes most of the time when doing these types of projects and so not a lot to show for it all. But now with the alomst finished breakfast bar area, I figured its a good time to show off some of the project! So without further ado, here are some pictures!

So we took a drive down to the grinate and marble shop to see the slabs they had available, after walking around for an hour my wife was not really excited about any of the slabs. It wasn't until the sale person took a wet rag and wiped this soapstone down that she finally was happy with a slab.
20200818_1133321.jpg


I liked it enough also to say, let's go with it. So we will try to put that nice green vein in the breakfast bar area for that wow factor when walking into the kitchen. Still have to meet with the counter top people to do the layout and template making.

In the meantime I kept working on the kitchen. It seems like the cabinets took so long to get ready for paint due to repairs and sanding and so on. But eventually I got them painted and hung with new hardwares.

20200808_171228.jpg


20200814_184030.jpg


20200808_171237.jpg


We also decided on what the breakfast bar should look like finally and I was able to get it moving in the right direction. I already grouted the tiles last night and now need to finish the trim on it.

20200823_175242.jpg


So now the project is getting closer to the end, I still got to make the face of the drawers, trim work, finish the steps, and a bunch of little stuff. But I know without the garage to store everything while I was working on the cabinets and such, it would of been a disaster to complete this project!
 
OP
M

madison069

Well-known member
Joined
Nov 5, 2010
Messages
4,150
Location
Monroeville, PA
So in the course if the remodeling, I had to purchase a 24 in wide lower cabinet. For the price and my limited tools for wood working I just decided to buy the one cabinet. But the drawer face didn't match the old cabinets. So I decided to give it a shot on remaking the drawer faces to match the existing stuff.

So where is the old drawers,

20200825_204838.jpg


After setting up the table saw , I took some birch plywood since this face is going to be painted and ripped the faces to size. After multiple measuring and changing the angles on the table saw blade I finally found the exact setting to recreate the edge profile and grooves of the old drawers!

20200825_201523.jpg


20200825_201602.jpg


All thats left now is to sand the edges down so its not so sharp and prime the wood for the gray paint. Maybe I'll be able to get it painted today.
 
OP
M

madison069

Well-known member
Joined
Nov 5, 2010
Messages
4,150
Location
Monroeville, PA
So just a quick update, we finally got the counter top installed. Once it was installed the kitchen started moving paster and now all of the major items are in place. Its now down to the small details and touch up of paint to finish the kitchen so hopefully it will be done soon.

The vein of the slab that sold us on the soap stone.
20200917_195839.jpg


The light fixture that I built from scratch.
20201004_161940.jpg


The back splash my wife picked up.
20201004_171350.jpg


Last night I installed the outlet covers. Got them leveled as I could.

20201008_204220.jpg


On a side project I tried to get the bathroom functional in the garage. First thing I did was ran a new water line from the cellar of the house to the garage.

Here i am breaking the packed ground with a jackhammer,

20200920_134814.jpg


I came up through the floor in the bathroom and ran a line to the utility room above the trim. I didn't want to disturb the drain pipe and sink so this was the best route.

20200920_174908.jpg


Then I got the bathroom cleaned and looking decent. But then I noticed water coming up from the toilet area. So. I initially thought , no big deal it's probably clogged from not being used for a long time. Well I was wrong. Apparently the po never hooked the sewer up!! When I dug the sewer line up I found a ads pipe with a pvc cap on it and 4 holes drilled in the center. Needless to say I was pissed cause I was told the water line was just bad due to freezing.

20201003_145525.jpg


After careful measuring i determined i was just going to have to tap into the main line of the house. But since the main line is terra cotta pipe , I currently don't want to open that can of worms. So for now I put the sewer project on the back burner and will tackle it next year. I'll do my homework on whats needed to replace the sewer pipe from the house to the main sewer pipe. It should be an easy project since the sewer system is all in the gravel parking area. Also my estimate is the pipe is only 3-4' deep so a mini excavator will do the job. But I need to find out whats required for permits and so on before I start that project. Either way it will just have to wait and ill just use the water spigot in the utility room to wash the vehicles. If I can get the electrical figured out on the water heater, I will have access to heated water to wash the vehicles instead of using freezing water!

Oh and I'm still working on the camaro. Doing it right during reassembly is taking a long time! Here i am cleaning threads for the front bumper cover and enlarging holes on the aftermarket fender extenders.


20201008_063510.jpg
 
OP
M

madison069

Well-known member
Joined
Nov 5, 2010
Messages
4,150
Location
Monroeville, PA
So a little update on the garage projects! I was able to get the camaro assembled enough to see where I need some more work. The front and back bumper covers will need to be sanded back down due to cracking of the primer. Seems the flexible primer isn't as flexible as the paint representative made it out to be. But im glad I caught it now before sending it off for paint.

20201017_065737.jpg


Since my mother is in town, I set the camaro aside to put a family project together. We will be doing some Christmas decorations cutouts of plywood. Currently I got the Santa cut out, just got the snowman, snow woman, elf, and toy shop sign to go! Oh and the christmas lights and presents too.....

20201021_062008.jpg


20201021_065710.jpg
 

bj383ss

Well-known member
Joined
Sep 29, 2011
Messages
3,166
Location
TX
Nice update! That what I need to do send my 64' off and have a professional paint it. That is a good idea.

Bret
 
OP
M

madison069

Well-known member
Joined
Nov 5, 2010
Messages
4,150
Location
Monroeville, PA
Nice update! That what I need to do send my 64' off and have a professional paint it. That is a good idea.

Bret

Friend of mine is a bodyman, so working with him has taught me alot about bodywork. My biggest lesson is dont take on a project that wasn't properly disassembled and documented! Its been a pain getting this car back together, even though I was the one who disassembled it 23 years ago, I wasn't much of an organizer at that age and its been biting me the whole way through this project. The goal is to make sure the body is assembled as best as it can be, then block sand the whole car, sand all flexible primer off, shoot the covers again, block sand those, and then disassemble the car to paint color and clear in the door jambs, under hood, and under trunk. Then we will reassemble it and take it to his shop and he will lay the paint down with his 1000x better equipments then mine and hopefully have a beautiful car!!
 

Bob Heine

ALLIANCE MEMBER
Joined
Oct 24, 2009
Messages
10,705
Location
Boca Raton, Florida
Cody, I'm no expert on paint but I use Southern Polyurethane's epoxy primer on my automotive projects. I had a little left in a mixing cup and when it was completely cured it was like a thin hockey puck. I could bend it in half and it wouldn't split. Most recently used it on the PT Cruiser's urethane bumper. A little adhesion promoter and it stuck like it was part of the bumper. It dries to a semi-gloss that helps show the low spots when you sand it. A half-gallon (quart of primer + quart of activator) is a little over $80.
https://www.southernpolyurethanes.com/pricing
 
OP
M

madison069

Well-known member
Joined
Nov 5, 2010
Messages
4,150
Location
Monroeville, PA
Cody, I'm no expert on paint but I use Southern Polyurethane's epoxy primer on my automotive projects. I had a little left in a mixing cup and when it was completely cured it was like a thin hockey puck. I could bend it in half and it wouldn't split. Most recently used it on the PT Cruiser's urethane bumper. A little adhesion promoter and it stuck like it was part of the bumper. It dries to a semi-gloss that helps show the low spots when you sand it. A half-gallon (quart of primer + quart of activator) is a little over $80.
https://www.southernpolyurethanes.com/pricing

That sounds like a good solution! I might grab a quart of the two and try it out! Just need to make sure it's compatible with the paint system I'll be using for base/clear.
 

Bob Heine

ALLIANCE MEMBER
Joined
Oct 24, 2009
Messages
10,705
Location
Boca Raton, Florida
That sounds like a good solution! I might grab a quart of the two and try it out! Just need to make sure it's compatible with the paint system I'll be using for base/clear.
It shouldn't be a problem but for sure check with your painter. You might want to show him the prices on the SPI website. Five quarts of black or white single-stage goes for around $260 and needs two coats for a daily driver (3-4 coats for a restoration). Five quarts of red single-stage goes for around $350 and covers in three coats over a white sealer. If you want basecoat/clearcoat, add another $300 for two gallons of clear. If you like orange, it's the same price as the red in basecoat and you can also get a medium or dark red in basecoat. These vehicles have been painted with SPI colors. It isn't the most expensive paint system but it was good enough to cover the car that won Best of Show at the 2015 Concours at Pebble Beach.

SPI Black

attachment.php


SPI Red

attachment.php


SPI White

attachment.php


2015 Pebble Beach Winner
attachment.php


I have no connection to SPI but I have been very happy with their products.
 

Attachments

  • SPI Black.jpg
    SPI Black.jpg
    131.7 KB · Views: 509
  • SPI Red.jpg
    SPI Red.jpg
    114.2 KB · Views: 503
  • SPI White.jpg
    SPI White.jpg
    87.9 KB · Views: 501
  • SPI paint on Car n Driver photo.jpg
    SPI paint on Car n Driver photo.jpg
    94.2 KB · Views: 499
OP
M

madison069

Well-known member
Joined
Nov 5, 2010
Messages
4,150
Location
Monroeville, PA
Was able to get the two older girls and my cousin in the garage last night. We were able to knock a few things out.

Oldest one finally coated the pumpkin with BLO. It came out ok, kinda wish I did something different to fill in the nail head holes now but I wasn't sure how the filler would look just being coated with BLO.

20201021_212358.jpg


Then we also finish cutting out the big items of the Christmas decoration.

20201021_213032.jpg


Along with got the snow woman sanded and ready for primer. You can see the Christmas lights that still need to be cut out.

20201021_213036.jpg
 
OP
M

madison069

Well-known member
Joined
Nov 5, 2010
Messages
4,150
Location
Monroeville, PA
So just some progress in the garage.

Almost done with the Christmas decorations. Need some minor touchup and finish the elf. I'm not happy with the toy in the stocking so I'm planning to change it up some. Any ideas is welcome!
20201108_065343.jpg


Help a friend out with removing two cars from an abandoned garage and he gave me one of the traffic light out of the 25 traffic lights he got from the sell.

20201107_193758.jpg


What cars you ask that was removed? Just an 1974 corvette stingray convertible.

20201107_132256.jpg


20201109_093907.jpg


And a 1973 Porche 914

20201109_122834.jpg


The porche was a bear to remove. The center lift in the floor was just high enough under the car that the car was still sitting on it. The lift didn't want to go down anymore. Along with all 4 brakes was locked up. After lifting the car on wood, breaking loose each wheels, and then rolling it out of the garage before we could load it on the trailer it was a good 2 hours worth of extraction time.

The next 2 months is full of days off so hopefully I'll get the camaro ready for paint cause my buddy is ready for the camaro after I helped him pull those cars out of the garage! Lol
 
OP
M

madison069

Well-known member
Joined
Nov 5, 2010
Messages
4,150
Location
Monroeville, PA
Working on the camaro spoiler yesterday and today trying to get the gaps right. Well the passenger side had a wide gap that wasn't going to be fixed by alignment.

20201123_172159.jpg


So I built up some duraglass on the spoiler piece and waited for it to harden.

20201124_071125.jpg


Once hardened, I started shaping it and now the huge gap is gone and its consistent now!

20201124_080443.jpg


20201124_081020.jpg


Awhile back I got this green metal storage cabinet from a buddy for free. So I took the time and sorted out the toolboxes and cleaned the open shelves up. Put stuff inside the storage cabinet and cleaned this side of the garage up some. The garage is shaping up nicely and I currently have a lot of room in there since I've been organizing the place.

20201120_060022.jpg


Still selling stuff off and working on the projects but these are some of the noticeable stuff I've done recently.

Hope yall have a nice Thanksgiving day even though it might be virtual this year!
 

Bob Heine

ALLIANCE MEMBER
Joined
Oct 24, 2009
Messages
10,705
Location
Boca Raton, Florida
Cody, I'm partial to that spoiler. I liked it enough to glue one on the back of my '72 Vette. Luckily it doesn't have gaps to worry about.
:beer:
attachment.php
 

Attachments

  • Rear Spoiler and Exhaust.jpg
    Rear Spoiler and Exhaust.jpg
    114.6 KB · Views: 348
OP
M

madison069

Well-known member
Joined
Nov 5, 2010
Messages
4,150
Location
Monroeville, PA
Cody, I'm partial to that spoiler. I liked it enough to glue one on the back of my '72 Vette. Luckily it doesn't have gaps to worry about.
:beer:
attachment.php


That came out nice!

The factory workers wasn't particular about the gaps , so when they installed the studs they didnt center them in their little circle spot. This caused the spoiler to fit very poorly and in order to fix it I just went with another spoiler that just happened to have the studs aligned better,, but they weren't centered either. So a round file enlarged the holes in the right direction to line the three pieces up.

I have seen people making the three piece spoiler into one piece, but I wasn't a fan of the look when the trunk was opened. So I decided against turning mine into a one piece.
 
To avoid these ads, REGISTER NOW!
Top Bottom