OK...so let's get to answering some questions and make some remarks:
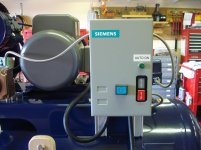
1. Compressor actually cuts out at 178 psi...but that could be a +/- error with the bourdan style gauge. Close enough for me not to mess with the pressure switch.
2. I haven't gotten any water out of the cooling tower because I haven't really taxed the system yet. The cooler does cool the air though...quite well actually...and you can feel the temperature gradient from the input to the output.
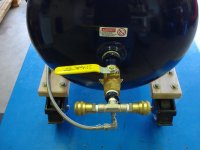
3. Coalescing filter is for water...
4. I have only seen what amounts to a few drops of water come out of my stainless steel drain line so far. But again, I haven't put any real load on the system yet.
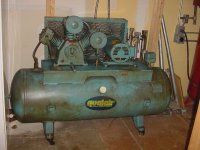
5. Budget: I would guess I have about $1200 or so in the motor, cooler, mag starter, pump overhaul components, hardware, counter, stuff like that. I will say this...I probably came close or broke even with the cost of a new 5HP, 80 gallon system. But for me it's all about the restoration process. It's what I like to do. I bought the compressor for $75 and now have a fantastic unit that will last me the rest of my life...
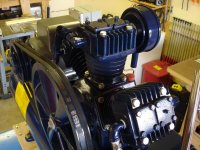
6. Once I had the compressor home I researched it and downloaded the appropriate documents from FS Curtis. I plotted the exploded parts view on a plotter at work do I could get a better picture of the pump for ordering parts. But essentially I just started tearing it down and bagging/tagging the parts. I've always been that way with mechanical things. The only real referencing I did was for the torque specs...
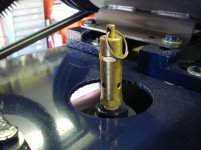
7. I didn't have any formal tests done on the tank. I did a visual test of the inside surfaces when all the ports and plugs were removed. Sans a bit of rust on the bottom, the tank basically looked new on the inside.
8. If any water does accumulate in the loop (i.e. when it is not running and air cools, I'm sure it will get dlown into the cooling tower at the next startup. Frankly, that doesn't even concern me.
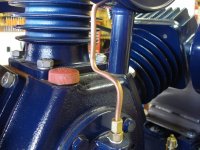
9. I got my SS lines from Swagelok. They are polytetrafluoroethylene (PTFE) hoses. They are 3/4" inside diameter with a 1" outside diameter. The highly flexible PTFE core is wrapped with a fiber braid and then the outside is a Type 304 stainless steel braid. Minimum bend radius is 3.5" which is great for me as I don't want any kinks...even though most loops will be in the 6" - 8" diameter range. These have an operating temperature range of -65ºF to +450ºF and the working pressure is 1,250 psi with a burst of 5,000 psi...
10. The belt gauge...I am still pondering the options. Stay tunes, though!!!
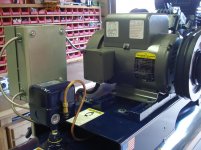
11. I bought the CX racing cooler on-line. I think Alan posted a link.
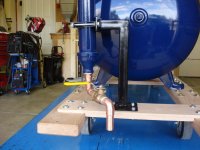
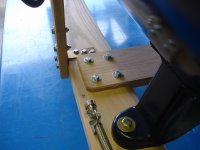
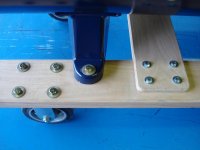
12. I thought about rubber isolation, but the rails are 1-3/4" old groth oak...that incidentaslly I felled and sawed years ago when I lived in NH...and if they do crack I have bigger issues. Frankly, the system has very little vibrations.
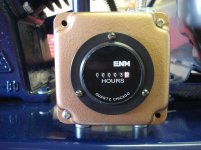
13. Oil change sticker: I have a maintenance log for all my vehicles, ATV, Harley, etc. It's in there...
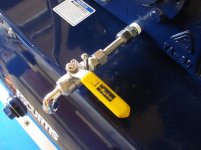
14. Everyone says the cooling tower needs to be closest to the output so it sees the greatest temperature differential to be effective. So far I have noticed significant temp reduction. Some people use a cooling fan, some a cooling tower...I fugured I'd try both in series. I will say that the braided homne that goes to the tank check valve is stone cold all the time.
It'll be interesting to see how all this stuff works when I use a lot of air. But for now, my fingers are tired...

 baldor 5hp motor.jpg141.3 KB · Views: 650
 cooling fan electrical.jpg140.9 KB · Views: 577
 cooler to coalescing filter.jpg139.9 KB · Views: 592
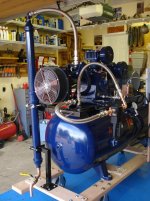 cooler setup.jpg146.2 KB · Views: 757
 cooler input and output.jpg144.5 KB · Views: 625
 coalescing filter.jpg136.7 KB · Views: 623
 coalescing filter bracket.jpg138.4 KB · Views: 618


 Damn, that thing can probably handle anything. You should get a jackhammer

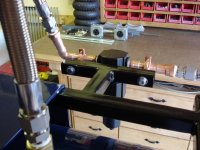
 . I was not expecting the muffler clamp to have two saddles instead of the saddle and u-bolt. That is a neat idea. If I would have seen that first, my mind would never have guessed it was a muffler clamp. Now I am liking that for a mount on my drill press column.