More
What mix did you use?
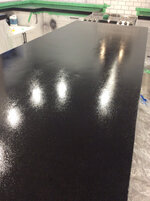
That's pretty close to the color/texture I want.


More
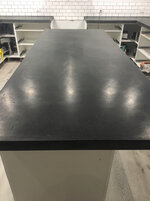
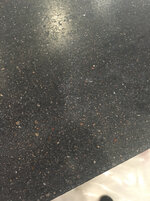
Sorry for the delay. Here are some pics. I used a cup grinder to smooth the surface bc I was too aggressive with the stick ******** and put a bunch of nicks in the melamine which left imperfecions. I then wet polished with 50, 100, 200, 400. Then I put 5 coats of U Seal from Fishstone on them. Then I burnished them with dry diamond pads up to 3000 grit.
More
Sorry for the delay. Here are some pics. I used a cup grinder to smooth the surface bc I was too aggressive with the stick ******** and put a bunch of nicks in the melamine which left imperfecions. I then wet polished with 50, 100, 200, 400. Then I put 5 coats of U Seal from Fishstone on them. Then I burnished them with dry diamond pads up to 3000 grit.
Sorry for the delay. Here are some pics. I used a cup grinder to smooth the surface bc I was too aggressive with the stick ******** and put a bunch of nicks in the melamine which left imperfecions. I then wet polished with 50, 100, 200, 400. Then I put 5 coats of U Seal from Fishstone on them. Then I burnished them with dry diamond pads up to 3000 grit.


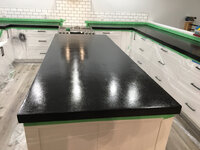
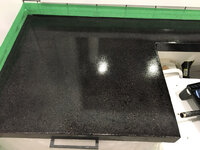
I used the charcoal Cheng mix. Mine wasn't as dark as I liked either but the sealer darkened it. Burnishing helped bring out the shine
I didn't read all the comments, and I have nothing helpful to add - but I would like to say that those countertops are going to look awesome when all done. It will be worth the elbow grease to polish them up.

I'm sort of late to the party but I made some tops a few years ago. Made molds using the Chin methods. I used a HF variable speed grinder. Zip tied a vinyl hose to the handle and one of their submersible pumps. It worked really well. We did every top in the house and was a lot of work. They turned out nice but not sure I'd do it again.
This is the kitchen island. It's about 4x7 poured in three sections.
Sent from my SM-G930V using The Garage Journal mobile app
I used hand diamond pads for hard to reach areas. Dry ginding will be a huge mess as well as a health hazard.
Oh i missed the hepa filter part. Im sure that will make a big difference.


Looks great!


Looks great! In your opinion, was it worth all the hassle and work for the end product?
Or maybe just buy some black granite instead?