To avoid these ads, REGISTER NOW!

Copperhead's Cage

chevy454hp

Active member
Joined
Jul 1, 2013
Messages
34
Location
Boise, Idaho
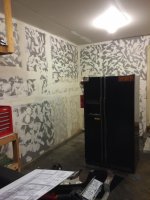
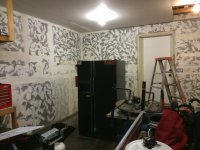
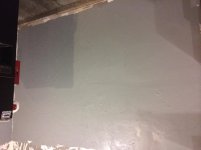
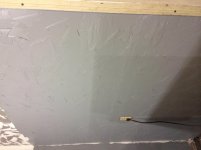
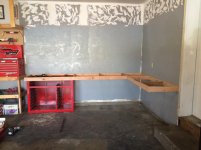
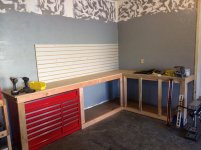
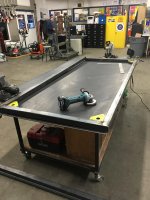
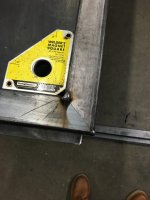
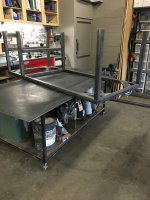
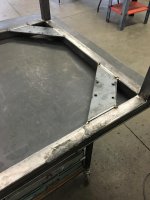
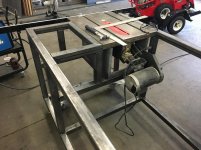
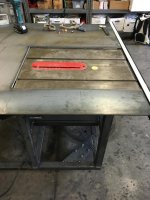
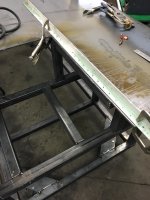
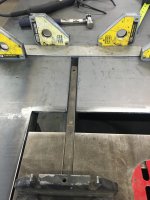
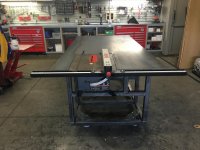
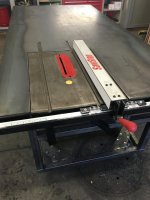
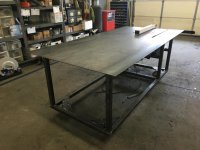
Hello Everyone, I have been following several builds throughout the site and have got so many great ideas for my own garage. I figured it was about time I started a build thread. I am nowhere close to being finished and have a lot more work to do so maybe you guys can help me more along the way. This is my first house and first garage build. I have been trying to find as many pictures of my progress but I can’t seem to find any from when I first started. The garage is nicknamed "Copperhead's Cage" because it houses my 1977 Chevy C10 truck, aka Copperhead. The garage is a very multipurpose shop; I do everything from work on vehicles, metalworking, woodworking, painting and just about anything in between. Here is the plan that I started with. Grizzly Tools has a pretty cool easy to use shop planner on their website. Garage is a two car 20x25.
 

Attachments

  • IMG_0114.jpg
    IMG_0114.jpg
    149.1 KB · Views: 134
To avoid these ads, REGISTER NOW!

theoldwizard1

Well-known member
Joined
Feb 22, 2011
Messages
43,109
Location
SE MI
Fill in your location in your profile.

Now is the time to start thinking about insulation and heat and cooling.
 
OP
C

chevy454hp

Active member
Joined
Jul 1, 2013
Messages
34
Location
Boise, Idaho
The center island is going to be a workbench with my table saw mounted on it. With the garage being multipurpose in mind, this will create another place to work when I'm not using my saw, just lower the blade and pull the fence off. It will measure ~ 3 1/2'W x 5'L x 3'T.
 
OP
C

chevy454hp

Active member
Joined
Jul 1, 2013
Messages
34
Location
Boise, Idaho
Here is what I came up with for the center island. It houses my Table saw, router and my mitre saw. I wanted to get this work station finished so i could start building my cabinets.

Also the garage was already insulated and for now I plan on a wall mount a/c unit and a small forced air propane heater for cooling and heating.
 

Attachments

  • IMG_0133.jpg
    IMG_0133.jpg
    135.2 KB · Views: 82
  • IMG_0132.jpg
    IMG_0132.jpg
    136.5 KB · Views: 95
  • IMG_0129.jpg
    IMG_0129.jpg
    138.5 KB · Views: 79
  • IMG_0084.jpg
    IMG_0084.jpg
    140.6 KB · Views: 67
  • IMG_0082.jpg
    IMG_0082.jpg
    135 KB · Views: 61
  • IMG_0081.jpg
    IMG_0081.jpg
    135.1 KB · Views: 64
  • IMG_0080.jpg
    IMG_0080.jpg
    136.9 KB · Views: 72
OP
C

chevy454hp

Active member
Joined
Jul 1, 2013
Messages
34
Location
Boise, Idaho
I mounted popup casters to the work station so I can move it around easily.
 

Attachments

  • IMG_0141.jpg
    IMG_0141.jpg
    134.5 KB · Views: 65
  • IMG_0140.jpg
    IMG_0140.jpg
    140 KB · Views: 77
  • IMG_0139.jpg
    IMG_0139.jpg
    137.7 KB · Views: 80
  • IMG_0138.jpg
    IMG_0138.jpg
    139.4 KB · Views: 87
OP
C

chevy454hp

Active member
Joined
Jul 1, 2013
Messages
34
Location
Boise, Idaho
So I didn't want to spend a ton of time and money taping and textureing the walls so I came up with this. Fast and easy, I just took a mud knife and a bucket of mud and slapped it on the wall and made my own pattern. No sanding and if a spot looked weird I could just scrap it off. After some paint and hanging the cabinets I think it will look pretty cool. I will be doing this one wall at a time and as $ allows me and that way I can still work in the garage.
 

Attachments

  • IMG_0001.jpg
    IMG_0001.jpg
    134.9 KB · Views: 153
  • IMG_0002.jpg
    IMG_0002.jpg
    135.9 KB · Views: 124
OP
C

chevy454hp

Active member
Joined
Jul 1, 2013
Messages
34
Location
Boise, Idaho
Here is a photo before I started and some up close after paint. Let me know what you think.
 

Attachments

  • photo 1.jpg
    photo 1.jpg
    145.6 KB · Views: 79
  • photo 3.jpg
    photo 3.jpg
    139.1 KB · Views: 86
  • photo 2.jpg
    photo 2.jpg
    144.7 KB · Views: 109
  • photo.jpg
    photo.jpg
    136.9 KB · Views: 81

HSpencer

ALLIANCE MEMBER
Joined
Nov 28, 2010
Messages
2,854
Location
South Central US
Hi and thanks for posting your work. The island work station for table saw and router table is really nice. Keeps those important items together and provides lots of valuable storage. Good that you made it mobile. That item will be a center piece of your shop.
The knock-down finish on the walls looks good. I am also no fan of finishing sheet rock, and the knock-down is one way to make it go faster. I will be looking forward to more progress, and am going to be interested in how you set up your shop.

Best Regards
Herb Spencer
 
OP
C

chevy454hp

Active member
Joined
Jul 1, 2013
Messages
34
Location
Boise, Idaho
Here is the start to my lower countertop and cabinets. I decided to mount my toolbox into the cabinet.
 

Attachments

  • image.jpg
    image.jpg
    135.4 KB · Views: 69
OP
C

chevy454hp

Active member
Joined
Jul 1, 2013
Messages
34
Location
Boise, Idaho
Picked up a good deal on a Drill Press, it was only $35. It is a harbor freight special so I'm not sure how long it will last. Should buy me some time until I can pick up a bigger one.
 

Attachments

  • image.jpg
    image.jpg
    141.7 KB · Views: 46
OP
C

chevy454hp

Active member
Joined
Jul 1, 2013
Messages
34
Location
Boise, Idaho
I also scored on a vise from Sears. Regular price was $99.99 and for some reason it was on the closeout rack 50% off! Got it mounted on the bench and was a nice upgrade to what i was using.
 

Attachments

  • image.jpg
    image.jpg
    139.1 KB · Views: 44
OP
C

chevy454hp

Active member
Joined
Jul 1, 2013
Messages
34
Location
Boise, Idaho
The casters are made by WoodRiver. I pick up the set of them from my local Woodcraft store. You can order them online too. They work great!
 

Attachments

  • image.jpg
    image.jpg
    42.3 KB · Views: 32
OP
C

chevy454hp

Active member
Joined
Jul 1, 2013
Messages
34
Location
Boise, Idaho
I found a really good deal on some slat wall and I just couldn't pass it up. I was originally planning on using peg board even though I wanted slat wall. The cost was interfering with my decision. I was able to get just enough to run it along the front of the garage. The pieces varied in size because they were left overs from a business that was going in next door to my job. I had to puzzle the pieces together but its wasn't to hard and i love the way it is looking. :rocker:
 

Attachments

  • image.jpg
    image.jpg
    136.5 KB · Views: 46
OP
C

chevy454hp

Active member
Joined
Jul 1, 2013
Messages
34
Location
Boise, Idaho
Sorry Everyone, I disappeared for awhile. It has been a crazy year for me. I haven't had much time to work in the garage but I want to show everyone what I have been working on lately. My first attempt at building my center island combo bench/saw was too flimsy and would always get high centered on everything. the functionality was a great idea but having I found myself fighting with it more than it was helping me. I decided to build a new one that I would never have to worry about breaking. I have been doing a lot more metal working and wanted to have a table that I could weld on also. this is what I have came up with... let me know what you guys think.:dunno:
 

Attachments

  • phone backup 074.jpg
    phone backup 074.jpg
    142.4 KB · Views: 57
  • phone backup 075.jpg
    phone backup 075.jpg
    141.2 KB · Views: 45
  • phone backup 076.jpg
    phone backup 076.jpg
    141.1 KB · Views: 49
OP
C

chevy454hp

Active member
Joined
Jul 1, 2013
Messages
34
Location
Boise, Idaho
Made from 2'' .120 wall square tube.
 

Attachments

  • phone backup 078.jpg
    phone backup 078.jpg
    139.5 KB · Views: 29
  • phone backup 083.jpg
    phone backup 083.jpg
    143.8 KB · Views: 37
  • phone backup 092.jpg
    phone backup 092.jpg
    140 KB · Views: 28
OP
C

chevy454hp

Active member
Joined
Jul 1, 2013
Messages
34
Location
Boise, Idaho
Corner braces I made for the casters.
 

Attachments

  • phone backup 088.jpg
    phone backup 088.jpg
    143 KB · Views: 28
  • phone backup 087.jpg
    phone backup 087.jpg
    141.5 KB · Views: 26
  • phone backup 082.jpg
    phone backup 082.jpg
    142 KB · Views: 21
  • phone backup 081.jpg
    phone backup 081.jpg
    138.5 KB · Views: 21
OP
C

chevy454hp

Active member
Joined
Jul 1, 2013
Messages
34
Location
Boise, Idaho
Getting the saw in position.
 

Attachments

  • phone backup 109.jpg
    phone backup 109.jpg
    144.3 KB · Views: 48
  • phone backup 108.jpg
    phone backup 108.jpg
    139.7 KB · Views: 26
  • phone backup 106.jpg
    phone backup 106.jpg
    139.7 KB · Views: 24
  • phone backup 105.jpg
    phone backup 105.jpg
    142.8 KB · Views: 24
  • phone backup 102.jpg
    phone backup 102.jpg
    142.5 KB · Views: 32
  • phone backup 093.jpg
    phone backup 093.jpg
    142.6 KB · Views: 35
  • phone backup 091.jpg
    phone backup 091.jpg
    144.5 KB · Views: 31
To avoid these ads, REGISTER NOW!
OP
C

chevy454hp

Active member
Joined
Jul 1, 2013
Messages
34
Location
Boise, Idaho
Cutting the top to fit. Top is a 4' X 8' sheet of 1/4'' thick steel. Plasma cutter made this easy and quick.
 

Attachments

  • phone backup 125.jpg
    phone backup 125.jpg
    140.9 KB · Views: 42
  • phone backup 124.jpg
    phone backup 124.jpg
    141.2 KB · Views: 46
  • phone backup 122.jpg
    phone backup 122.jpg
    144.1 KB · Views: 35
  • phone backup 115.jpg
    phone backup 115.jpg
    140.6 KB · Views: 36
  • phone backup 116.jpg
    phone backup 116.jpg
    142.8 KB · Views: 37
OP
C

chevy454hp

Active member
Joined
Jul 1, 2013
Messages
34
Location
Boise, Idaho
Thanks, I'm working on the bottom shelf right now. I decided to make the shelf out of expanded metal. I also have plans of some sort of a receiver style shelf that i can put my mitre saw or metal chop saw on. Maybe even a woodworking or standard vise.
 
OP
C

chevy454hp

Active member
Joined
Jul 1, 2013
Messages
34
Location
Boise, Idaho
Ran into a bit of a snag, I forgot about how my mitre gauge extended past the saw in order to make a full pass through the blade, so I used the plasma again to cut out two notches in the top for it.
 

Attachments

  • phone backup 136.jpg
    phone backup 136.jpg
    141.2 KB · Views: 17
  • phone backup 127.jpg
    phone backup 127.jpg
    143 KB · Views: 17
  • phone backup 126.jpg
    phone backup 126.jpg
    144.6 KB · Views: 15
OP
C

chevy454hp

Active member
Joined
Jul 1, 2013
Messages
34
Location
Boise, Idaho
I'm really liking how everything is turning out.
 

Attachments

  • phone backup 137.jpg
    phone backup 137.jpg
    139.1 KB · Views: 26
  • phone backup 138.jpg
    phone backup 138.jpg
    139.6 KB · Views: 26
  • phone backup 139.jpg
    phone backup 139.jpg
    139.2 KB · Views: 22
OP
C

chevy454hp

Active member
Joined
Jul 1, 2013
Messages
34
Location
Boise, Idaho
Well guys and gals, I was lucky enough to sell my old house and just purchased a new place with a 3 car garage and a 24x28 detached shop. Its now time to start designing and setting up my new work space. I'm pretty excited to have a dedicated shop to work in now!! Here is a couple photos of the new place.
 
OP
C

chevy454hp

Active member
Joined
Jul 1, 2013
Messages
34
Location
Boise, Idaho
Before moving anything in I wanted to get some color on the walls. I was lucky enough to have the walls finished by the previous owner. I decided to stick with the same base color as my other garage since I already had some left over paint. I have red tool boxes so decided to add a red stripe on the walls to give some flare:D
 
OP
C

chevy454hp

Active member
Joined
Jul 1, 2013
Messages
34
Location
Boise, Idaho
IMG_1293.JPG

IMG_1294.JPG

Getting ready for paint. I have a buddy that owns a painting business so I called in a favor[emoji3]


Sent from my iPhone using Tapatalk
 
OP
C

chevy454hp

Active member
Joined
Jul 1, 2013
Messages
34
Location
Boise, Idaho
IMG_1404.JPGIMG_1409.JPGIMG_1405.JPG

Really happy with how it turned out!! Red stripe was a bit challenging but it looks awesome.


Sent from my iPhone using Tapatalk
 
OP
C

chevy454hp

Active member
Joined
Jul 1, 2013
Messages
34
Location
Boise, Idaho
IMG_1401.JPGIMG_1402.JPG

Built a new rolling cart for my General tool boxes today. I got tired of the cheap casters that they came with so I purchased sone heavy duty ones from House of Wheels and decided to bolt the boxes together.


Sent from my iPhone using Tapatalk
 
To avoid these ads, REGISTER NOW!
Top Bottom