To avoid these ads, REGISTER NOW!

Craftsman Drill Press

bubinga

Well-known member
Joined
Jul 26, 2014
Messages
12,744
Location
Bridgeport Ohio. (Across River From Wheeling WV)
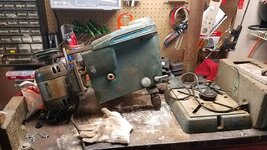
Could not get the middle pulley quite low enough to match the lowest front sheeve, Had to settle for the next one up. It has 4 groves in the center pulley.
I don't think the seller has that one any more, I'll find the seller and post it after.
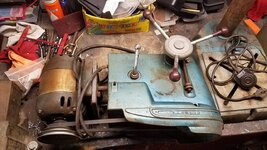
Like I said, I only have a single pulley on the motor, but It's a treadmill motor.
wanted to be able to run the motor faster(thinking more HP) yet have the spindle speed reduced . I am not done boring the motor pulley, (It's 1/2" ID, I need 5/8")
so really it's not all worked out yet.
 
To avoid these ads, REGISTER NOW!

Shiftless

Well-known member
Joined
Mar 9, 2014
Messages
14,479
Location
East Bay SFO
The original equipment half horse motor on my vintage Craftsman DP runs fine on a non-upgraded circuit but plugging it into a GFCI protected circuit pops the GFCI right away. The GFCI receptacle and all the 12ga. wiring back to the sub panel is less than one year old. Other motor driven tools don't cause any trouble including my half horse block grinder.

How should I proceed?
 

Outlawmws

Well-known member
Joined
Aug 9, 2011
Messages
39,123
Location
The Badlands
How is the DP grounded inside the terminal box?

Does the DP have a light and what leg i it running off of?

I had a factory DP that wed NOT wired properly, and while using a porta-band to cut a cyclone fence post on that circuit, I kept getting shocked (no GFIC there! Heck No double insulation on the Porta-band!

I opened it up and god what a mess inside. long story shot I rewired it and the issue went away...

In your case I would also do some polarity testing between the different winding and ground if nothing obvious surfaces during inspection.
 

454ragtop

Well-known member
Joined
Mar 24, 2008
Messages
5,011
Location
Carver, MA
Shiftless, I suspect the ground and the neutral are either switched, or tied together. Picked up a drill press once, tested fine at the PO house. When I got it home, same as you, popped the GFCI. It was wired wrong.
 

Shiftless

Well-known member
Joined
Mar 9, 2014
Messages
14,479
Location
East Bay SFO
454:
Another good possibility, thanks for the tip. Mine too ran fine at the PO's shop. Didn't notice if he had GFCI...being an older place maybe not.
 

Shiftless

Well-known member
Joined
Mar 9, 2014
Messages
14,479
Location
East Bay SFO
After disconnecting the equipment ground, the motor ran fine. Further exploration into the wiring is necessary. Stay tuned. (Thanks again)
 

Locker537

Well-known member
Joined
Sep 25, 2016
Messages
488
Location
Massachusetts
I've read through quite a bit of this thread, could someone point me to the best starting place for a disassembly guide? :cool:

I've got a couple parts that are stuck enough that I'm double checking things before forcing it...
 

Cruzan80

Well-known member
Joined
Jul 22, 2015
Messages
4,175
Location
Denver, CO
Re: The Classic Craftsman 100/150 Drill Press

Which model do you have? While most are similar, there are differences enough that it can trip you thru inadvertantly bad advice.

Sent from my Moto G (5) Plus using Tapatalk
 
OP
F

FrankLee

Well-known member
Joined
Sep 13, 2010
Messages
3,552
Location
seMI, 48317
I've read through quite a bit of this thread, could someone point me to the best starting place for a disassembly guide? :cool:

I've got a couple parts that are stuck enough that I'm double checking things before forcing it...

You need to help us with more information so we can help you. What is your model number? What parts are stuck? Pictures would help.
 
Last edited:

Locker537

Well-known member
Joined
Sep 25, 2016
Messages
488
Location
Massachusetts
It's an older Model 100, model number 103.23640. I say older because it has the non Safe-Lock style chuck. It's in really great shape overall. My plan is to give it a good cleaning, greasing, and replace anything that needs it.

The first stuck part is the thumb screw that locks the feed return spring adjustment knob. Given it's a thumb screw, I was expecting light pressure but had to gently use some pliers on it to get it to move. I didn't want to thread it all the way out yet since I'm not ready to fully disassemble.

The second issue is it looks like the set screw that secure the table lock handle to the bolt is stripped. I'll need to deal with that. Any advice is welcome.

I'll snap some pictures as I progress. After going through this thread, I'm pretty sure I bought this from another member, Tonellin. :cool: He was a pleasure to deal with.
 
Last edited:
OP
F

FrankLee

Well-known member
Joined
Sep 13, 2010
Messages
3,552
Location
seMI, 48317
It's an older Model 100, model number 103.23640. I say older because it has the non Safe-Lock style chuck. It's in really great shape overall. My plan is to give it a good cleaning, greasing, and replace anything that needs it.

The first stuck part is the thumb screw that locks the feed return spring adjustment knob. Given it's a thumb screw, I was expecting light pressure but had to gently use some pliers on it to get it to move. I didn't want to thread it all the way out yet since I'm not ready to fully disassemble.

The second issue is it looks like the set screw that secure the table lock handle to the bolt is stripped. I'll need to deal with that. Any advice is welcome.

I'll snap some pictures as I progress. After going through this thread, I'm pretty sure I bought this from another member, Tonellin. :cool: He was a pleasure to deal with.

Thanks for the update. The 103.23640 drill press is a 13-1/2" model. Early versions of the 13-1/2" DP like yours were 100's. Later versions of the same machine are 80's. Except for the feed handle and overall size, it is virtually identical to the 15-1/2" model.

There are several very good threads and posts regarding disassembly of the head frame. Here's my version: http://www.garagejournal.com/forum/showthread.php?p=5363344&post5363344

That is a common issue with the tension knob lock screw. I believe a thread locker was used on these from the factory. I often use a thin piece of rubber over the knurling and pliers to remove the screw.

IIRC, some table and head frame lock handles came equipped with a slotted head set screw. Others had a hex socket set screw. The hex socket set screws are likely hardened which may be difficult to drill out. Slotted screws MAY be softer which will be easier to drill out. I never had to deal with that situation.
 
Last edited:

Locker537

Well-known member
Joined
Sep 25, 2016
Messages
488
Location
Massachusetts
Thanks Frank :cool:

I'm able to turn the tension knob thumb screw using pliers and being cautious. How easy should the actual tension knob turn? It certainly feels caked with grease and I don't want to force it.

Regarding the potentially stripped table lock handle, if it is in fact stripped I might just leave it alone. It doesn't impede it's use at all.

How easy should it be to raise/lower the actual head frame? I was surprised that the quill and head frame lock levers hit either the frame or the tensioner knob when turning them. Interesting design.
 
OP
F

FrankLee

Well-known member
Joined
Sep 13, 2010
Messages
3,552
Location
seMI, 48317
Thanks Frank :cool:

I'm able to turn the tension knob thumb screw using pliers and being cautious. How easy should the actual tension knob turn? It certainly feels caked with grease and I don't want to force it.

Regarding the potentially stripped table lock handle, if it is in fact stripped I might just leave it alone. It doesn't impede it's use at all.

How easy should it be to raise/lower the actual head frame? I was surprised that the quill and head frame lock levers hit either the frame or the tensioner knob when turning them. Interesting design.

The tension knob itself should turn freely once the thumb screw is loosened even bit. I've had the knobs not move at all with the thumb screw removed. If you spray the area, inside and out, with WD-40, PBlaster or similar, it should loosen and unwind with the spring tension.

The head frame should also move freely on the column when all parts are cleaned. Use caution when loosening the head frame lock! The head frame can fall and crash to the table. That can cause run-out issues with the spindle.

On older machines with the separate lock handle, I will often suggest to buyers of my machines, that they remove the head frame lock handle once the machine is set-up in their shops. It can be installed on the tilt lock bolt for safekeeping.

I never understood that design of the quill lock handle. They all hit the tension knob.
The handle can be installed every 60 degrees on the quill lock bolt head, the quill lock nut can be rotated every 60 degrees in the lock cylinder, and the quill lock cylinder can be rotated 180 degrees in the head frame. So there are many possible positions for the handle. It takes a little experimentation when installing the handle to get it in the optimal position.
 
Last edited:

Tonellin

Banned
Joined
Oct 24, 2012
Messages
507
Location
Boston
It's an older Model 100, model number 103.23640. I say older because it has the non Safe-Lock style chuck. It's in really great shape overall. My plan is to give it a good cleaning, greasing, and replace anything that needs it.

The first stuck part is the thumb screw that locks the feed return spring adjustment knob. Given it's a thumb screw, I was expecting light pressure but had to gently use some pliers on it to get it to move. I didn't want to thread it all the way out yet since I'm not ready to fully disassemble.

The second issue is it looks like the set screw that secure the table lock handle to the bolt is stripped. I'll need to deal with that. Any advice is welcome.

I'll snap some pictures as I progress. After going through this thread, I'm pretty sure I bought this from another member, Tonellin. :cool: He was a pleasure to deal with.

Enjoy it! It should provide another half century of use no problem...hopefully you can rock that original craftsman belt for a while before replacing - that thing is very cool

Also glad to hear the quill lock handle was just a weird design flaw and not something replaced over the years because that machine looked very close to original everything to my untrained eye
 

Locker537

Well-known member
Joined
Sep 25, 2016
Messages
488
Location
Massachusetts
The tension knob itself should turn freely once the thumb screw is loosened even bit. I've had the knobs not move at all with the thumb screw removed. If you spray the area, inside and out, with WD-40, PBlaster or similar, it should loosen and unwind with the spring tension.

The head frame should also move freely on the column when all parts are cleaned. Use caution when loosening the head frame lock! The head frame can fall and crash to the table. That can cause run-out issues with the spindle.

On older machines with the separate lock handle, I will often recommend to buyers of my machines, that they remove the head frame lock handle once the machine is set-up in their shops. It can be installed on the tilt lock bolt for safekeeping.

I never understood that design of the quill lock handle. They all hit the tension knob.
The handle can be installed every 60 degrees on the quill lock bolt head, the quill lock nut can be rotated every 60 degrees in the lock cylinder, and the quill lock cylinder can be rotated 180 degrees in the head frame. So there are many possible positions for the handle. It takes a little experimentation when installing the handle to get it in the optimal position.

Thanks Frank! It's great to talk to someone who has this much experience with these. I'm excited to take it apart and really dig into this.

The head frame is pretty stuck right now. You can unlock it, try to move it, and it's not going anywhere. It's likely just a ton of grease and build up.

I suspect the one thing I'm going to "need" to replace is bearings. Any suggestions on where to source them?
 

Locker537

Well-known member
Joined
Sep 25, 2016
Messages
488
Location
Massachusetts
Enjoy it! It should provide another half century of use no problem...hopefully you can rock that original craftsman belt for a while before replacing - that thing is very cool

Also glad to hear the quill lock handle was just a weird design flaw and not something replaced over the years because that machine looked very close to original everything to my untrained eye

It's very likely it will outlive all of us. :thumbup:

It made it home safe by the way, no issues. I had to grab a neighbor to help me unload it. It's now safely sitting on a mover's dolly, waiting as I work through other projects.

If you come across another Craftsman block grinder or local vise, let me know. :cool:
 
Last edited:
OP
F

FrankLee

Well-known member
Joined
Sep 13, 2010
Messages
3,552
Location
seMI, 48317
Thanks Frank! It's great to talk to someone who has this much experience with these. I'm excited to take it apart and really dig into this.

The head frame is pretty stuck right now. You can unlock it, try to move it, and it's not going anywhere. It's likely just a ton of grease and build up.

I suspect the one thing I'm going to "need" to replace is bearings. Any suggestions on where to source them?


It's very likely it will outlive all of us. :thumbup:

It made it home safe by the way, no issues. I had to grab a neighbor to help me unload it. It's not safely sitting on a mover's dolly, waiting as I work through other projects.

If you come across another Craftsman block grinder or local vise, let me know. :cool:


You're very welcome.

Many of us get bearings from Accurate Bearing. Check my first post in this thread for links to bearing info. Bearings for the 13-1/2" drill presses should be identical to the 15-1/2" drill presses.

Because your press is sitting at the moment, you may want to hit it with some penetrating fluid while it waits it's turn. Remove the column lock bolt on the base and spray in there too. That's typically a difficult removal.
 
To avoid these ads, REGISTER NOW!

Locker537

Well-known member
Joined
Sep 25, 2016
Messages
488
Location
Massachusetts
Frank, great idea. I'll get some PB Blaster in all the right places.

I'll try to take a lesson from you and document as I go. Hopefully other's can keep learning from it.
 

bubinga

Well-known member
Joined
Jul 26, 2014
Messages
12,744
Location
Bridgeport Ohio. (Across River From Wheeling WV)
@ Locker537...........I didn't see it, Floor or bench model?
If well either really, why not let it soak a while, and place a Bottle Jack on the base, (Not table) and a 4 X 4 of proper length, and GENTLY NOW!! jack it up a pump or so,
Be careful, not too much pressure, don't want it to kick out, or break anything.
Put a little pressure on it, If it don't move, put another 1/2 pump maybe on it,
and tap the head area with a dead Blow. see if that don't get it to move.
gentle now, don't break nothing.
 

bubinga

Well-known member
Joined
Jul 26, 2014
Messages
12,744
Location
Bridgeport Ohio. (Across River From Wheeling WV)
Bubinga, does yours have three or four speeds on the center? Do the belt sizes match up with the front spindle so you can change to each size, or only have it set up to match for lowest speed possible? Thinking if you get a column cap, drill a hole and use a thread die on the end of the offset arm, you can install a bolt underneath to prevent it from pulling out. Then the pulley has the bearings already inserted, and you are good to go.

Link to the pulley on ebay?
Sorry I dropped the Ball, But he don't have any more right now.
Here is the seller if he gets any more, But IDK?:confused:
he's a pretty nice fellow, I did talk to him on the phone,
Not sure where I got the number, Don't have it now.

http://www.ebay.com/sch/woodworkertools/m.html?_nkw=&_armrs=1&_ipg=&_from=

IDK why this is doing this any more, I copy the E bay link at the top O the page,
and paste it here, and get the Vig Link. B/S.
Don't know why.
looks Like it was on my end.
attachment.php
 

Attachments

  • ViG Link.JPG
    ViG Link.JPG
    35.1 KB · Views: 824
Last edited:

Outlawmws

Well-known member
Joined
Aug 9, 2011
Messages
39,123
Location
The Badlands
The head frame is pretty stuck right now. You can unlock it, try to move it, and it's not going anywhere. It's likely just a ton of grease and build up.

Comming into this Q in the middle, so not sure what model you have...

Are the lock bolts/setscrews dead center on the post? Rr in line with the edge of the post?

If the latter it uses a cam/wedge to lock the head to the post and these can get stuck also.

Make sure the head is supported before doing this next, but remove the nut/lever/wing-nut, and tap the bolt out. This will expose the wedge "slugs" you should be able tpo get a narrow punch through the bold hole and tap the opposite wedge out from each side.

Then only rust/gunge should be preventing the head from moving. instead of direct pressure have someone steady the post and twist on the head to break it loose. then you should be able to work it off..
 

Locker537

Well-known member
Joined
Sep 25, 2016
Messages
488
Location
Massachusetts
Thanks all, great info and suggestions. I've got a couple other things before I break this guy down, but I'll make sure to report back!
 
OP
F

FrankLee

Well-known member
Joined
Sep 13, 2010
Messages
3,552
Location
seMI, 48317
Dp#29 and dp#30

5/3/2017


dp#29... model 103.23141 - Eaton Rapids


dp#30... model 103.24820 - Battle Creek


5/18/2017

dp#30 reconditioned and sold.


5/27/2017

I sold dp#29 today.
 
Last edited:

Locker537

Well-known member
Joined
Sep 25, 2016
Messages
488
Location
Massachusetts
Comming into this Q in the middle, so not sure what model you have...

Are the lock bolts/setscrews dead center on the post? Rr in line with the edge of the post?

If the latter it uses a cam/wedge to lock the head to the post and these can get stuck also.

Make sure the head is supported before doing this next, but remove the nut/lever/wing-nut, and tap the bolt out. This will expose the wedge "slugs" you should be able tpo get a narrow punch through the bold hole and tap the opposite wedge out from each side.

Then only rust/gunge should be preventing the head from moving. instead of direct pressure have someone steady the post and twist on the head to break it loose. then you should be able to work it off..

This is pretty much exactly what I ended up doing, with the ample help of some penetrating oil and rags. :cool:
 

Locker537

Well-known member
Joined
Sep 25, 2016
Messages
488
Location
Massachusetts
FrankLee, awesome!

I disassemble, cleaned, and lubed by first Model 100 yesterday. It went well overall. The quill slipped out of my hand and whacked the table, something that's probably happened countless times, but it make me nervous. :eek:

No damage done!

I have a question about the pinion shaft retaining screw and fiber washer. How does this screw line up and function? I have everything back together but I honestly can't tell what the retaining screw is...actually retaining. I'll need to double check if the fiber washer is there as well.
 
Last edited:
OP
F

FrankLee

Well-known member
Joined
Sep 13, 2010
Messages
3,552
Location
seMI, 48317
FrankLee, awesome!

I disassemble, cleaned, and lubed by first Model 100 yesterday. It went well overall. The quill slipped out of my hand and whacked the table, something that's probably happened countless times, but it make me nervous. :eek:

No damage done!

I have a question about the pinion shaft retaining screw and fiber washer. How does this screw line up and function? I have everything back together but I honestly can't tell what the retaining screw is...actually retaining. I'll need to double check if the fiber washer is there as well.

The dog point of the screw rides in the slot of the pinion shaft. The screw head should tighten onto the fiber washer. If it does, assembly is correct. However, if the screw is tightened too much, it may bottom out in the slot making quill feed difficult or impossible.
Also, if correctly installed, you will not be able to pull out the pinion shaft.

Below is a mechanical drawing of a Craftsman 80, but the concept is identical.

 
Last edited:

Locker537

Well-known member
Joined
Sep 25, 2016
Messages
488
Location
Massachusetts
Thanks FrankLee, that confirms what I expected. I'll have to look again after work, but the screw seemed to lack the dog point.
 

Locker537

Well-known member
Joined
Sep 25, 2016
Messages
488
Location
Massachusetts
Oh... that would be a problem. It should look like this (but with out the wear).


Yep, I'll check when I get home! Fortunately, it's not a completely necessary component. The press is running well right right.

Do you know of a place to source this type of fastener?
 
OP
F

FrankLee

Well-known member
Joined
Sep 13, 2010
Messages
3,552
Location
seMI, 48317
Is the dog screw supposed to not have the flat on it? Right?
Worse case, I can make you one.

Wrong. That screw in the photo is badly worn. It was the only picture I had of that part.

That's what I mean I think...................
IOW it's supposed to just be machined or ground round.


DOH! Sorry. I always scored poorly on reading comprehension. LoL!


Yep, I'll check when I get home! Fortunately, it's not a completely necessary component. The press is running well right right.

Do you know of a place to source this type of fastener?

What did you find out?
 
OP
F

FrankLee

Well-known member
Joined
Sep 13, 2010
Messages
3,552
Location
seMI, 48317
Dp#29

So here's the head frame from dp#29. Because the head frame trim panel is absent, I believe this machine is circa '52-'53. Also, the pieces that are normally chrome plated are all painted; feed handle hub, feed stop bracket, tension knob, and lock handles. Perhaps these downgrades are due to U.S. involvement in the Korean War (6/50-7/53).

I've had only one other drill press, dp#1, of this vintage.


This machine was also equipped with the common mud-dauber nest option.


5/22/2017

Progress on dp#29 is slow but steady.


This column & base is starting to confound me. I spent several hours, lots of PBlaster, a BFH, a homemade press, heat and it still won't budge.


5/25/2017

Dp#29 is back together on another base and column. It runs great!


The 1/2 hp, 1725 rpm, JAHCO (Jack & Heintz) motor would not start without manual assistance. I replaced the original 378-420 mfd, 110 vac Cornell-Dubilier start capacitor with a 378-455 mfd Packard capacitor. It works great now.

 
Last edited:

mercman1951

Well-known member
Joined
Apr 28, 2006
Messages
47
Location
Michigan
Re: The Classic Craftsman 100/150 Drill Press

A buddy's Father passed away, and he had some tools in his garage he was looking to sell. He had this drill press, and I said I would buy it from him...we loaded it up in my car and he said once I checked it out to let him know if I still wanted to give $100 for it. After getting it home, I see it's more rough than I thought. With the belt on, the motor hums, then trips the breaker. It spins ok with the belt off, but seems "tired". I wanted to do a cosmetic resto on this so it fit in with the rest of my vintage Craftsman woodshop tools...but how easy is it to rebuild the stock motor? I really don't want to invest in a modern motor for it. The model number badge is gone, so I'm not even sure what it is.78913f47de735dc251093268f2e4acbf.jpg5af64aceae5a02571caedd2c9aa45f84.jpgcb6296334dc89f1a07558fc8f19a6cd3.jpg21114fe014e54f84d8064f0aa335668a.jpg

Sent from my SM-G930P using Tapatalk
 

Attachments

  • 78913f47de735dc251093268f2e4acbf.jpg
    78913f47de735dc251093268f2e4acbf.jpg
    170.7 KB · Views: 2
  • 5af64aceae5a02571caedd2c9aa45f84.jpg
    5af64aceae5a02571caedd2c9aa45f84.jpg
    138.2 KB · Views: 2
  • cb6296334dc89f1a07558fc8f19a6cd3.jpg
    cb6296334dc89f1a07558fc8f19a6cd3.jpg
    155.2 KB · Views: 2
  • 21114fe014e54f84d8064f0aa335668a.jpg
    21114fe014e54f84d8064f0aa335668a.jpg
    95.8 KB · Views: 2

Outlawmws

Well-known member
Joined
Aug 9, 2011
Messages
39,123
Location
The Badlands
Well the motor has a date code for 1948. I suspect the DP is a model 100, likely of the same vintage as the motor. What is the diameter of the column? And can you shoot a pic of the table?
 
To avoid these ads, REGISTER NOW!
Top Bottom