Flickr was acting up much of the day and I was finally able to upload new pictures earlier this afternoon.
The drought is over!
Somehow you always manage to get nice bonuses.
Yes, finally.
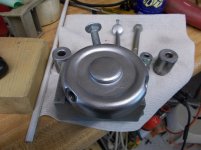
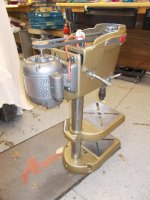
This is a very decent machine.
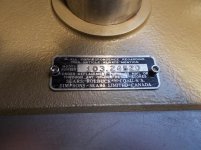
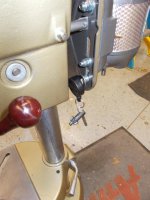
The original paint on the head frame is very good The paint on the table is ok and I think it'll clean up nicely.


It came with a 1/4 hp GE motor, but I've got a couple period-appropriate 1/2 hp Craftsman motors that will work well.
Besides the obvious heavy rust in areas, there are a few other issues. The chuck is very stiff, the feed stop collar is seized, and the pinion shaft on the Pressmate is seized. Those are all soaking now in penetrants.
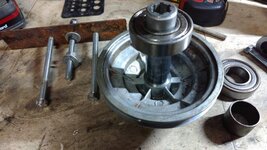
Despite the rust, it came completely apart for transporting at the seller's place with just a little difficulty.
Wow! I wish I had that headband.
This head frame panel is the nicest I've had.... barely a scratch on it.
We are all patiently awaiting pictures of the unexpected surprise.
Interested in hearing what the surprise is.
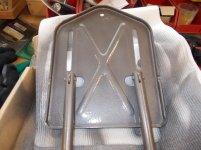
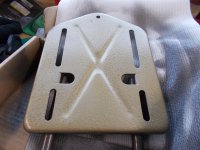
The base is the unexpected surprise... and not a good one. I've never seen anything like it.
When I brought the base down to the basement, I vacuumed out all the spider nests and cobwebs that usually accumulate underneath.

I thought the orange lines were cobwebs, but when they were not coming up with the vacuum, I discovered they were rusty cracks, major cracks. Five of the vertical ribs are cracked and ~8" on the left side of the horizontal surface is cracked.

I didn't see any other breaks or trauma that would indicate the unit fell. It could have been set down hard during a move. It also makes me wonder if these cracks occurred at the factory when the casting was cooling. It's such a strange pattern... nearly all the way around the column mount.
Regardless of how it happened, this base will be scrapped. I'm not going risk anyone getting hurt if it let go. Luckily, I have spare bases, so it's not a big deal.
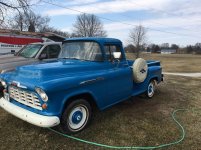
I was able to finally get out to the shed Friday and work on my DP. I always wanted a mid 50's Chevy pickup since I regrettably sold my 57 when I was 19 or 20. My brother convinced me to run over to Illinois and look at one that popped up on the internet. I made it back out yesterday and got some pictures of the base of my drill press going back together. I used Rustoleum Hammer Gold on most of the DP but some Hammered Bronze on the motor and one side of the mounting plate. I used Silverado Sparkle Silver on the handles and other pieces. It has so much metallic in it, I have a tough tome with sags. I have sanded them a couple times.
Here is a couple more pictures of the DP and the pick up I bought.
The drill press is looking great, but that Chevy is awesome!