Hey I just joined because of this thread, it's a great resource.
Thanks for your comments. I'm hoping your drill press and experiences can add to the database of information.
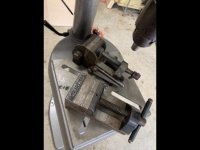
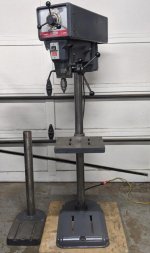
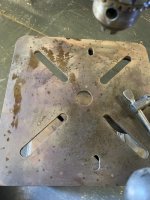
I picked up a Craftsman 100 yesterday, it looks to be a '53 model (103.23131) in pretty good condition. I got most of the table rust off of it with a Scotch-Brite pad and some WD40.
I usually use a finishing sander. It removes the rust quickly and leaves the factory milling marks. I feel it does no harm.
I did have some questions though and was wondering if people could help me out.
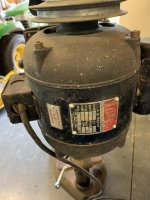
I replaced the cord with a newer grounded cord. What do people tie the ground wire into? Inside the motor there's a black metal plate holding down a cardboard wrapper dohicky, I used one of the screws holding down that plate as a mounting point for my ground wire.
I've used the plate screws in the past, but prefer to drill and tap the base for a ground screw. I don't think I ever posted a photo, so I'll have to work on that.
My Feed Return Spring Adjustment Knob seems to be frozen. I haven't cranked on it for fear of breaking it. Any tips on loosening it up? The lock screw for it is completely out, but the knob itself hasn't budged under hand pressure.
A penetrant may free up the tension knob. With the head frame upside down, spray into the lock screw hole and let it sit for a while. It may just free-up on its own, but a rubber strap wrench may assist the penetrant. It should be ok to crank on it with a rubber strap.
Worst case, you may need to remove the hub/pinion/spring assembly first. The issue doing that is that the spring is still under tension. You'll need to pry the tang of the spring from the prongs of the tension knob; not ideal, but it may be necessary. Then, knock out the tension knob from the hub side with a deep socket or short piece of pvc pipe or similar that is hollow to prevent breaking off the prongs.
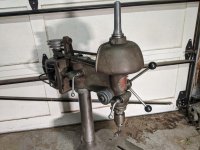
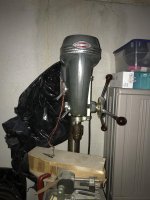
I took the motor mount plate off for cleaning. It's back on there and both the motor and spindle shaft look plumb to the eye (is that good enough?).
Yes, that should always be the case with the rigid motor mount. Pivoting motor mounts on later models require more adjustment.
However, the motor pulley seems to be about a 1/4" lower than the spindle pulley (so my belt slopes down a bit, front to back). Any tips on getting them co-planar? The mounting plate is high as it will go via the bolt slots, so I guess I'm looking at raising the motor pulley itself?
You may be able to simply raise the pulley on the motor shaft. Or raise the motor on the mount. If you cannot adjust the motor high enough on the mount to make the belt square to the spindle and motor shaft, try flipping the mount over and remount the motor.
Any recommendation on a link belt for this?
Many guys swear by link belts. I prefer AX cogged belts.
That's all I can think of for now, I'm sure I'll run into more later when I take apart the spindle for cleaning. I've only done the body stuff up until this point.