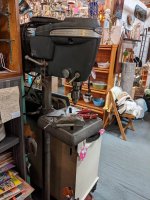
Dp#94
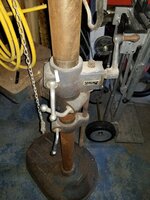
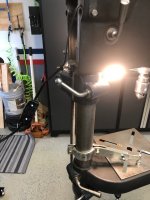
I picked up dp#94 this morning... a 4th-gen Emerson model 113.213710. It was originally a floor-standing machine, but a previous owner cut down the column. He did a very poor job. One side of the column is 43", the other side is 42-1/4".
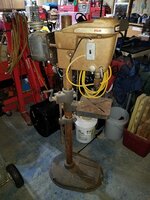
There are too many missing, fubar and replaced parts for a refurb. I can use a couple good parts and will part-out the rest.

12/1/2020
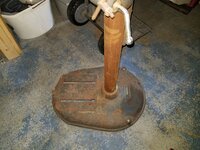
DP#94 is probably the dirtiest/grimiest machine I've had. It also has the worst table I've had. There are lots of divots, but surprisingly, none go all the way through the table.
This table, base and column will make a perfect grinder stand.

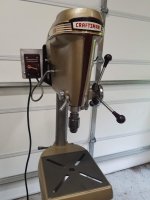
The side panels on this machine were also nasty. However, the original plastic protective film was still intact. After I peeled them off and cleaned the panels with cleaner wax, they shine like new!

Last one I parted did really well...
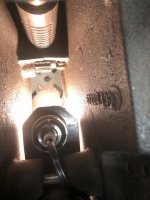
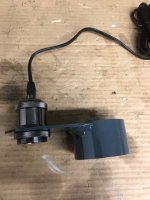
You don't see too many home made hubs, I wonder what they did to the stock one.
Even with it's poor condition, I think dp#94 will part-out well too.
Yeah, I've seen several homemade hubs and they are usually poorly welded. Your post prompted me to take a closer look at this one and compare it to an oe hub.
This hub was definitely overbuilt in stainless steel. The diameter is about the same, but it's much thicker. It attaches to the pinion shaft with the original pin, so it came apart quite easily.


It wasn't until I cleaned it up when I could really see just how nice the craftsmanship is. Whoever made this hub knew exactly what they were doing.
12/2/2020
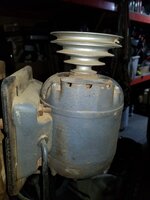
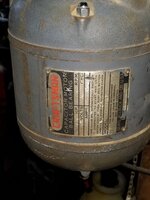
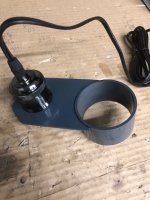
This morning, I cleaned the motor from dp#94. This motor is a model 113.12550, 1/2 hp, 1725 rpm with capacitor start. It has a date code of 4 78. It was just as dirty as the rest of the machine and took a while to remove the grime off the case.