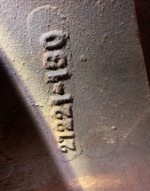
endangeredspecies, all Craftsman 100, 150 , and most Emerson Gen 1-4 drill presses use the same bearings. If you look at the diagram in the owner’s manual I linked in a previous post, Illustration number 3 is one of two spindle pulley bearings. The Craftsman part number is 18212; however, the actual bearing is a standard #6205 shielded single row ball bearing measuring 25mm bore x 52mm OD x 15mm tall. In this illustration both bearings are identified as #3.

Illustration number 23 from your owner’s manual is listed as Craftsman part 18211 Quill Bearing and is one of two ball bearings needed for the quill. This bearing is actually a NON-STANDARD #6202 single row ball bearing. There are two quill bearings 6202 5/8” bore. A standard 6202 bearing has a 15mm bore so you need a special bore bearing. The 6202 5/8” bore measures 5/8” bore x 35mm OD x 11mm tall. (Note- some of the part diagrams like the one below only identify one bearing but there are two). Both of the OEM bearings are double shielded, but you can use shielded or sealed bearings. As I said, I order my bearings from Accurate bearing, but you can get them anywhere as long as they are the correct measurements.

I am not sure why but the information on VM’s replacement bearing list page is so confusing, If you scroll to the bottom of the page, you should see the Bearing Quick Reference Specs and although the special 5/8 bore is not listed here it is repeatedly listed under the various drill press models.
In this screen grab from VM I have circled the relevant information.
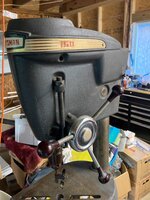
The information you noted for the R10LL pertains to the commercial Emerson models only. You do not have a commercial Emerson Model. Your drill press is a standard 15.5” floor standing King Seeley Craftsman 100 series drill press. I know its confusing and I will ask VM to update their list, so this information reflects the correct information.
In conclusion, as I previously said you will need two 6202 5/8” bore quill bearings and two 6205 spindle bearings. I hope this clears up you questions and does not confuse the situation further. As always, feel free to reach out if you have further questions.


 . I have a broken part of one but not a functional one. I am keeping my eye out!

.jpg")
.jpg")
.jpg")
.jpg")
.jpg")
.jpg")
.jpg")
.jpg")
.jpg")


")