To avoid these ads, REGISTER NOW!

Craftsman/Walker-Turner table saw brought back to service!

MayerMR

Well-known member
Joined
Feb 13, 2018
Messages
831
Location
Dallas, Texas
Hey gents,

I recently finished refurbishing my 1930s-era Craftsman-badged Walker-Turner 8'' table saw and thought you all might like to see the ole girl back in working condition!

I picked it up on eBay for a measly $50, but had to pay another $100 or so through a uship.com booking to get it delivered to me in Dallas. While there was some pretty serious looking rust on the table and elsewhere, overall it was in pretty great condition.
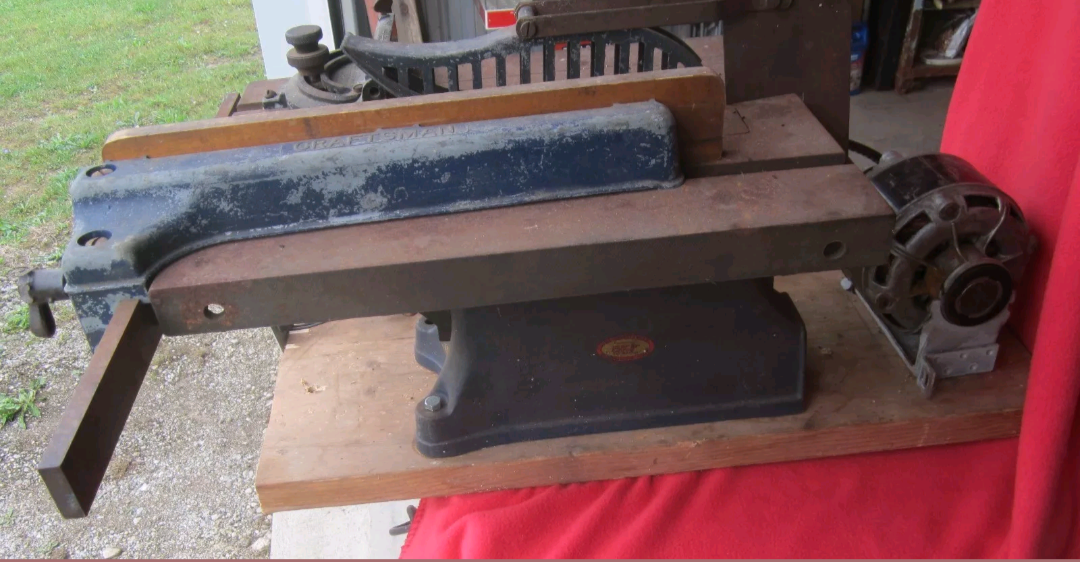
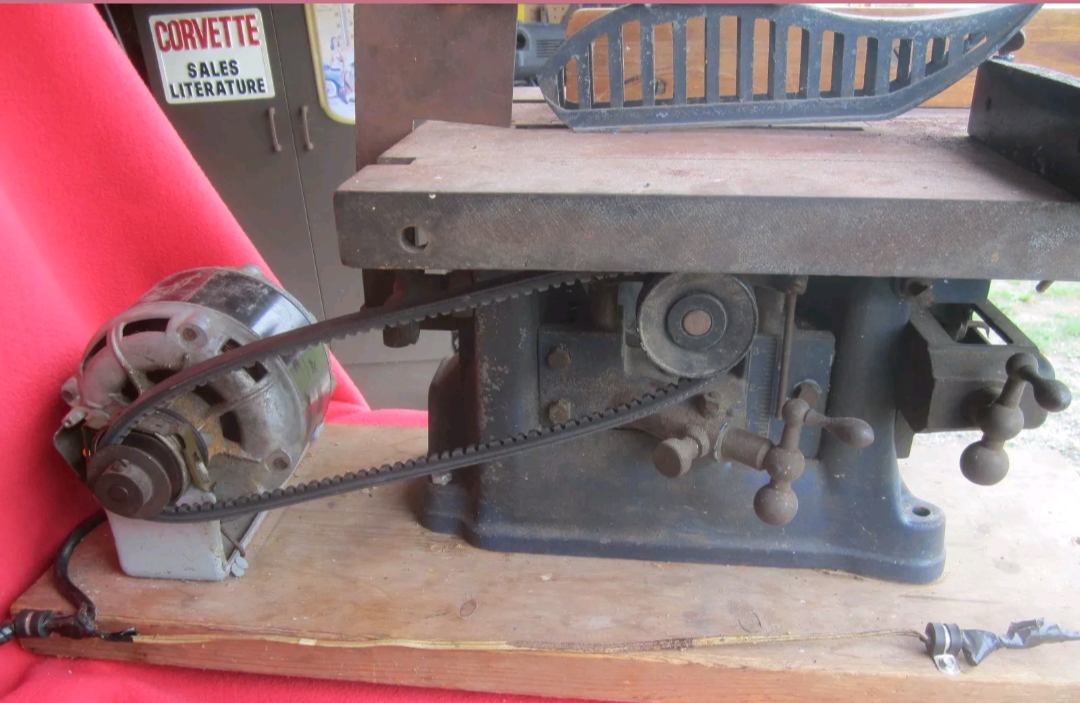
Screenshot_20171017-214120.png


Screenshot_20171017-214112.png


Screenshot_20171017-214109.png


With the one sad exception of the fence knob:
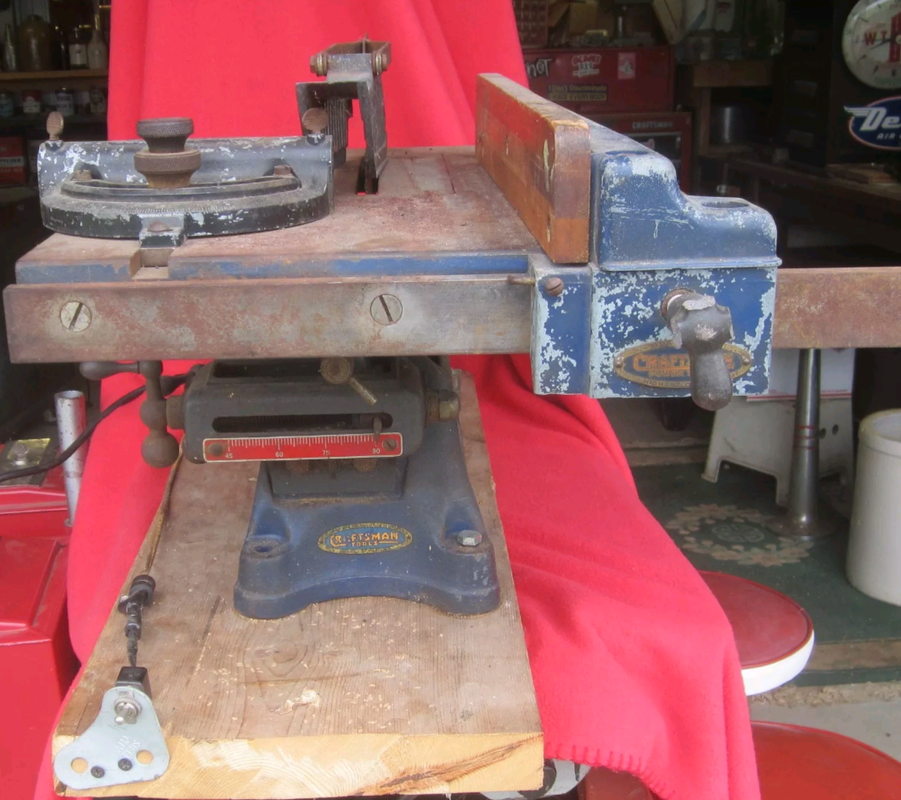
Screenshot_20171017-214105.png


That fence knob was a real shame - I looked and looked, but never could find a reasonably close replacement, so I did what any good sane person would do, and decided to make one.

I first had to make the pieces that were missing out of modeling clay that you bake in the oven to set. I purposely added some behind the remaining knob grips to add additional strength.
002.jpg


After that, it was time to make a mold - I used Plaster-of-Paris for this. Unfortunately, my release agent didn't work worth a darn so I had to crack the mold to break the piece free. Not too worried about that though.
003.jpg


Once I had the mold ready, I broke off the modeling clay from the knob and set it up in my mold. I used JB Weld 2-part epoxy as my replacement material (I don't exactly have an iron forge handy).
005.jpg


After letting it set up overnight, I broke it free from the casting, and it was rough as I expected:
011.jpg


Not to worry though, I chucked up a rotary rasping bit in my drill press and had it roughly smoothed to shape in short order:
012b.jpg


After that, it was on to finish sanding and filling:
017.jpg


And after a couple of coats of primer, a "metal colored" basecoat:
023.jpg


But since I wasn't doing a full restoration and polishing of the rest of the saw, I wanted the handle to roughly resemble the other rust-discolored metal components of the saw. My biggest problem he was that with all the sanding and filling, the "cast" look of my new handle was non-existent. Luckily though, they make brown/rust colored paint with a sandstone-type finish, and voila, now I have a good, strong, passable fence knob:
027.jpg
 
To avoid these ads, REGISTER NOW!
OP
M

MayerMR

Well-known member
Joined
Feb 13, 2018
Messages
831
Location
Dallas, Texas
After my knob situation was corrected, it was time to get the saw back into working order.

Surprisingly, while rusted, nothing was stuck. I lathered all the moving components up with CLP (Clean, Lubricate, & Protect) - this is something that we used while I was in the USMC to clean our rifles. It's really amazing stuff. If I were to really brush it on and go at it, much of that rust and discoloration would come up. But that isn't what going for. I really like to keep my machine original when they are in good enough shape, and this one, imo, was good enough to keep original.

I did, however, have my hands full with the table itself. It was quite rusty and the miter gauge was actually stuck in the channel. That took about 2 weeks of soaking with CLP and penetrate before I was able to free it. But after getting it out I was able to sand the table down and while it's still pitted and discolored in some areas, it did turn out well.
IMG_0323.jpg


Sharp eyes may notice that I had to do some sanding and re-lacquering of the fence guide as well. I'm thinking that I may need to replace it with a piece of thick aluminum though, as it warps right at the end and takes me off my 90 degree.
IMG_0320.jpg
 
OP
M

MayerMR

Well-known member
Joined
Feb 13, 2018
Messages
831
Location
Dallas, Texas
It was then time to get her mounted onto a table, which I did with the GE motor that came with it.
IMG_20180519_174326.jpg


You can see my temporary wiring job - just wanted to make it was all working properly!

But after getting it mounted, I realized that the table was just so small that it would be very difficult to properly cut anything wider than about a 2x12 board. Since I purchased the saw I have been keeping my eyes open for some table wings but haven't been able to locate any in the proper odd-ball length of 19''.

But luckily, on bulk trash day, I did see someone was tossing out an old Powr-Kraft table saw that was badly rusted and just plain past saving. I decided that I could scavenge the wings from this saw, even though there were only about 17'' long and badly rusted.
IMG_20180519_094450.jpg


After a de-rusting bath in some Evaporust for a couple of days I had to figure out how to mount them. I *really* didn't want to drill additional holes in my old Craftsman saw, so I had to think of a way to attach these wings using the original mounting holes. What I decided on was to get some square stock and make it into an adapter of sorts. I had to rather unelegantly use my angle grinder to cut access holes in the top of the tubing to access the nuts used to secure the Powr-Kraft wings.
IMG_20180519_212702.jpg


Not the most beautiful solution, but they do hold the wings up flat and true!
IMG_20180519_212649.jpg


Now it was time to repaint them to match the original blue of my Craftsman:
IMG_20180520_172416.jpg


And after they were mounted, it was time to fill in those ugly gaps. I decided to use some nice oak hardwood and used the saw to rip the stock to the appropriate size - the saw cuts great, btw!
IMG_20180520_173732.jpg


And after a nice coating of boiled linseed oil:
IMG_20180521_202705.jpg


And finally, installed!
IMG_20180521_223920.jpg


I also re-wired the saw with appropriate wiring and used a lighted switch, which I like to do with all my power equipment - always nice to know if something that can kill me has power...
IMG_20180523_193625.jpg

IMG_20180523_193604.jpg


I hope you all enjoyed seeing another ole gal brought back into service!

S/F,

-Matt
 

Jolomite

Well-known member
Joined
Oct 6, 2011
Messages
163
Location
Detroit, Michigan
Wow! You do great work, sir. The work on the handle was impressive and I really like what you did with the oak trim. Congrats! I'd be proud to cut on that saw any day.
 

Packard V8

Well-known member
Joined
Mar 16, 2009
Messages
7,380
Location
Spokane, WA
Nice work.

If you ever need a replacement fence, I think I've still got one in the random parts bin.

jack vines
 
To avoid these ads, REGISTER NOW!
OP
M

MayerMR

Well-known member
Joined
Feb 13, 2018
Messages
831
Location
Dallas, Texas
Wow! You do great work, sir. The work on the handle was impressive and I really like what you did with the oak trim. Congrats! I'd be proud to cut on that saw any day.

Thank you Jolomite! Darn thing cuts great too!

Nice work.

If you ever need a replacement fence, I think I've still got one in the random parts bin.

jack vines

Hey Jack, thanks for the offer! While I'm proud of the replacement fence knob that I made, if the parts fence has a good knob I'd sure be interested in it!
 
OP
M

MayerMR

Well-known member
Joined
Feb 13, 2018
Messages
831
Location
Dallas, Texas
Well, I decided I needed to fix two more things on the ole Craftsman. First, I needed to replace that original wooden fence because it was warped and made it impossible to cut straight. The other issue was that the bracket that holds the blade protector was pretty badly rusted and it transferred rust/oil to any wood that I was cutting.

I took the brackets apart and wire-wheeled the rust off the surface. And while some areas were pitted, surprisingly much of the nickel plating remained. I was planning on using a cold-bluing on the entire bracket, but decided I'd leave the original nickel visible and just threw a light coat of clear coat on it. I did, however, cold-blue all the hardware to help with future corrosion.

IMG_20180526_083427.jpg


IMG_20180526_083734.jpg


My other issue was the warped wooden fence guide. With the heat and humidity I experience here in Texas in the summer, and the relatively cool temps I experience in the winter, I figure that using wood again would just cause the same issue to repeat itself. I decided to go with a material that won't be affected by these things and picked up a piece of 1/2"x2-1/2"x17" piece of aluminum. I had to spend a surprising amount of time plotting out where drill the holes - kind of a one shot deal with metal. However, I was able to successfully get those holes drilled - kind of sweated that one out a bit though, I'll be honest. :)

After getting it all set up and lined up properly, I drilled and countersunk the bolt holes and rounded off the corners for aesthetic purposes. I then spent an inordinate amount of time sanding and polishing the little ****** until most of the dings and scratches were out.

Anyway, with that warped wood removed I was able to get non-square fence problem fixed and it doesn't look too bad if I do say so myself!

IMG_20180525_232653.jpg


IMG_20180525_232640.jpg
 
To avoid these ads, REGISTER NOW!
Top Bottom