To avoid these ads, REGISTER NOW!

Cutting RaceDeck Free Flow and Edge placement question

AaronTTRS

Well-known member
Joined
Nov 27, 2012
Messages
141
Location
South Bend, IN
So I think the answer is get a friend with a table saw, but figured i'd ask.

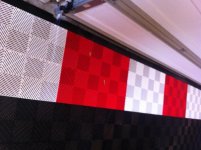
Is there any decent non-power saw or similar (not looking to lose a finger) that I can use to cut RaceDeck Free Flow tiles? If not, I can get help but wanted to ask in case there are any suggestions.

Also for the edging - that goes behind the closed garage door, not under it- correct?

Thanks!
Aaron
 
To avoid these ads, REGISTER NOW!

scoobers

Active member
Joined
Feb 22, 2013
Messages
41
I've heard of people using a jigsaw at low speed.

I plan on using a circular saw.

Jorgen will chime in w/ directions in the morning... I'm sure. If I recall correctly, you have to cut it upside down with some equipment.

EDIT: Just found this quote from Jorgen:


"You can use any number of ways to cut RaceDeck when installing.
Most installers use a table saw with a fine blade ( like a formica blade) and cut the tiles upside down which creates the cleanest cut on the top surface.
A hand saw will also work, but be sure to set the depth just shy of 1/2" deep and you must cut along the topside surface."
-Jorgen Miller, CEO of Racedeck/Snaplock


I plan on using this: I think someone on here said to turn the tile upside down when using this.

Picture1_zpsac6c9b5c.png
 
Last edited:

93TOY

Well-known member
Joined
May 15, 2006
Messages
110
Does anyone have any input on Aaron's question about the location of the edging?

I realize you start with your longest wall of the garage and the wall that runs along the garage door. That would place the edging slightly under the garage door unless you notch the tiles at the garage door. Is that necessary? Or do the edging tiles lie slightly underneath the garage door?
 
OP
A

AaronTTRS

Well-known member
Joined
Nov 27, 2012
Messages
141
Location
South Bend, IN
Now that my install is done I can help.

I left about 3/4 of an inch but also notched the trim at the garage door rails (with a jigsaw) since they are not going to move and I was afraid of buckling tiles after seeing a few posts about them.

From the day I put it in to today there has been a 40 degree swing and I can say for sure, 1/2 inch to move when expanding due to heat is absolutely necessary.

In this pic you can see how mine has moved back due to today's 25 degree temp.

Aaron
 

Attachments

  • photo-1.jpg
    photo-1.jpg
    140.1 KB · Views: 475

93TOY

Well-known member
Joined
May 15, 2006
Messages
110
So you're saying you did notch the tiles at the door before installing the edging? What do the edges lock into now? I know you left the 3/4 as recommended, but how much did you notch into the tiles?

I hope my questions make sense. Thanks for your help!
 
OP
A

AaronTTRS

Well-known member
Joined
Nov 27, 2012
Messages
141
Location
South Bend, IN
I notched the leading edge side that points out to the driveway on the trim pice only. That way the trim still snaps in normal (upper left in the pic I posted). I figured when its really hot, the tiles that got too far forward would just go under the door if they really moved too much.
 
OP
A

AaronTTRS

Well-known member
Joined
Nov 27, 2012
Messages
141
Location
South Bend, IN
We found for free flow, table saw was best on large cuts, but if trimming close the pieces flew like projectiles so we used a jigsaw for the close (trim an inch stuff) cuts. Unlike most people discuss, we got cleaner results tile face up.
 

dubber

Well-known member
Joined
Dec 31, 2012
Messages
5,326
Location
Canada's Capital
Table saw would be ideal if you have it for sure. I however just had a Skill saw and exacto knives for trimming and it worked out perfectly for myself. I also notched out the trim piece at the garage door opening to help out as well. I think the Free Flow may suffer from less expansion due to the air flow properties inherent in the design.
 

scoobers

Active member
Joined
Feb 22, 2013
Messages
41
Table saw would be ideal if you have it for sure. I however just had a Skill saw and exacto knives for trimming and it worked out perfectly for myself. I also notched out the trim piece at the garage door opening to help out as well. I think the Free Flow may suffer from less expansion due to the air flow properties inherent in the design.

Was it a circular saw you used Dubber? If so, did you cut the tile face up or upside down?
 

TigerGA

Well-known member
Joined
Nov 25, 2011
Messages
81
Location
Georgia Coast
Table saw was so much easier. If you don't have one, consider renting one. Regarding the tile edge strip at the garage door....I set my edge so the garage door makes contact with the edge and overlaps about an inch. You don't want the edge sticking out so far that it can be seen from outside with the door down.
 

dubber

Well-known member
Joined
Dec 31, 2012
Messages
5,326
Location
Canada's Capital
Was it a circular saw you used Dubber? If so, did you cut the tile face up or upside down?

Sorry just saw this now. Yes i used a circular saw, and we cut tiles both ways and had a similar result. I wasn't using a specialized blade so i had to trim some "debris" with an exacto knife after my cuts.
 

bush438

Member
Joined
Apr 29, 2013
Messages
14
Just for clarification but I am about to start my install with RaceDeck as well. For the edging at the garage door should we also be leaving that so called 3/4 inch spacing due to expansion? If the edging is installed with no spacing and contact is made then what happens on really hot days when the garage door is closed, wouldn't that cause buckling? Sorry if this is a redundant question, just don't want to mess this up. Also, when you designed your floor, did you take into account the edging pieces as well?

Thanks
 
To avoid these ads, REGISTER NOW!

RaceDeck1

Well-known member
Joined
Oct 8, 2007
Messages
3,001
Location
Salt Lake City , Utah
Hi
When you start your install at the garage door, set the edges just inside the door ( 1/4" from the rubber threshold) and you should be good. Do not have the edges go outside when the door is closed.. As always, you can call us with questions.
 

dubber

Well-known member
Joined
Dec 31, 2012
Messages
5,326
Location
Canada's Capital
Just for clarification but I am about to start my install with RaceDeck as well. For the edging at the garage door should we also be leaving that so called 3/4 inch spacing due to expansion? If the edging is installed with no spacing and contact is made then what happens on really hot days when the garage door is closed, wouldn't that cause buckling? Sorry if this is a redundant question, just don't want to mess this up. Also, when you designed your floor, did you take into account the edging pieces as well?

Thanks

Yes, leave some expansion room. And as Jorden mentioned above the trim/threshold piece should end just before the door. I had to slightly notch the trim where the rails hit the ground. I've also heard of other notching the actual rails which is what i wish i had done.
 

MSG C5

Well-known member
Joined
Jan 11, 2011
Messages
193
Location
Sarasota Area
Hi
When you start your install at the garage door, set the edges just inside the door ( 1/4" from the rubber threshold) and you should be good. Do not have the edges go outside when the door is closed.. As always, you can call us with questions.

I watched your installation video online and just wanted to clarify...

I plan to install a 30' wide and 22' length floor. I plan to use the trim edging along the width on both the open garage doors side as well as the inside width section as I am keeping some of the garage floor exposed on the far inside. The sides will not have any trim edging as the actual wall-to-wall width is about 1 and 1/4" wider than the 30' planned tile area which should allow enough for expansion.

My question is whether the door rubber seals should rest on top of the trim edging at the front of the garage? If I understand you explanation above, the trim edging should be inside of the garage so that the door rubber seals should close and rest on top of the uncovered garage floor. Correct?
 

RaceDeck1

Well-known member
Joined
Oct 8, 2007
Messages
3,001
Location
Salt Lake City , Utah
I watched your installation video online and just wanted to clarify...

I plan to install a 30' wide and 22' length floor. I plan to use the trim edging along the width on both the open garage doors side as well as the inside width section as I am keeping some of the garage floor exposed on the far inside. The sides will not have any trim edging as the actual wall-to-wall width is about 1 and 1/4" wider than the 30' planned tile area which should allow enough for expansion.

My question is whether the door rubber seals should rest on top of the trim edging at the front of the garage? If I understand you explanation above, the trim edging should be inside of the garage so that the door rubber seals should close and rest on top of the uncovered garage floor. Correct?

The door seal can rest on top, but no part of the RD floor should be exposed outside of the door. Also a trick with a clean look for garage door openings... Instead of trimming the tiles around the door rails, simply lop off just over 1/2" on the bottom and the floor will go under it. ( the wheels never go that low so it will have no negative effect on mechanics of the door)
 

MSG C5

Well-known member
Joined
Jan 11, 2011
Messages
193
Location
Sarasota Area
The door seal can rest on top, but no part of the RD floor should be exposed outside of the door. Also a trick with a clean look for garage door openings... Instead of trimming the tiles around the door rails, simply lop off just over 1/2" on the bottom and the floor will go under it. ( the wheels never go that low so it will have no negative effect on mechanics of the door)

That's a good idea on the trimming the door rails. Since they are solid steel, any recommended tool without having to remove the door rails?

Also, for large parking pad designs, do trim pieces come in both male and female?

Lastly, based on the L-Pattern installation procedure which starts at the top corner near the garage door rails, when you reach the other side wall/back corner, do you recommend removing the female loops on the last row of tiles that get installed near the wall for a cleaner look? It seems that the loops may take up the planned for expansion space.
 

dubber

Well-known member
Joined
Dec 31, 2012
Messages
5,326
Location
Canada's Capital
I recommend just using an old school hack saw. I recently used one to trim the top of my railings and it worked great.
 

Zeke

Well-known member
Joined
Aug 13, 2009
Messages
17,176
Location
Long Beach CA, the sewer by the sea.
Door rails need a solid contact point. You can cut them with a sawzall and a long blade, but I would simply loosen them, raise them, slide the RD under and lower the rails tight.

You can guide the blade with some wood, the bottom piece being the height you want to cut. The top piece holds the blade flat and straight. You can even cut a kerf in a block to get started on the straight.
 
Last edited:

MSG C5

Well-known member
Joined
Jan 11, 2011
Messages
193
Location
Sarasota Area
Door rails need a solid contact point. You can cut them with a sawzall and a long blade, but I would simply loosen them, raise them, slide the RD under and lower the rails tight.

You can guide the blade with some wood, the bottom piece being the height you want to cut. The top piece holds the blade flat and straight. You can even cut a kerf in a block to get started on the straight.

Thanks. Considering the rails are already installed flush with the floor, I don't know how much room I would have to play with in loosening them and adjusting them down on top of the Racedeck edging trim.
 

SteveCh

Well-known member
Joined
Dec 21, 2012
Messages
1,051
Also, for large parking pad designs, do trim pieces come in both male and female?

Couple days ago, I was perusing the RD site and saw edging in both male and female options. Or, it might've been on their Duragrid.com site.... One of the sites had them pictured. So, "yes" is the answer.
 

MSG C5

Well-known member
Joined
Jan 11, 2011
Messages
193
Location
Sarasota Area
Couple days ago, I was perusing the RD site and saw edging in both male and female options. Or, it might've been on their Duragrid.com site.... One of the sites had them pictured. So, "yes" is the answer.

Thanks!

In terms of making the edging and tiles fit near the garage door rails/doors, I'm thinking of just moving the edging inside 1" and go from there. That way I don't have to mess with cutting the tile/edges in around the rails. I'll just start the edging at the rails (and allowing the 1/4" expansion).
 

SteveCh

Well-known member
Joined
Dec 21, 2012
Messages
1,051
Thanks!

In terms of making the edging and tiles fit near the garage door rails/doors, I'm thinking of just moving the edging inside 1" and go from there. That way I don't have to mess with cutting the tile/edges in around the rails. I'll just start the edging at the rails (and allowing the 1/4" expansion).

I installed my tiles a few days ago, and I did what you propose. This left a four-inch or so space of concrete in the doorway in front of the tile edging. In my case, by doing this, I ended up with full, uncut tiles at the far back wall instead of buying and cutting tiles to finish off a four-inch space against that wall...much nicer.
 

MSG C5

Well-known member
Joined
Jan 11, 2011
Messages
193
Location
Sarasota Area
I installed my tiles a few days ago, and I did what you propose. This left a four-inch or so space of concrete in the doorway in front of the tile edging. In my case, by doing this, I ended up with full, uncut tiles at the far back wall instead of buying and cutting tiles to finish off a four-inch space against that wall...much nicer.

The way I have it measured, if I add the front edge trim, it should lay 1/4" from where the door bottom sits when closed instead of having the door rest on the edging when closed. Close enough for me to avoid having to cut the tiles/trim around the rails etc.

If I decide after a few tiles, it's not the way I want to go, I can always cut in the edges vs. the actual tiles around the door rails. I have enough room to play with and adjust on the backwall area of the garage.
 

SteveCh

Well-known member
Joined
Dec 21, 2012
Messages
1,051
Yes, it is simple to move the tiles around up until the mat is too big and heavy [and depending, probably, on how smooth the concrete is]. I was about a third of the way done putting down my tiles when I decided to move the whole thing a few inches in one direction. I had no trouble doing that. Very easy to realign or try it moved a bit like you might end up doing. Once I had them all down, no way I could move it, which is good. My concrete is level but not "glass" smooth. I could tell that if I'd have a few more tiles snapped in place, I would have had to split off some of them to move it.
 
To avoid these ads, REGISTER NOW!
Top Bottom