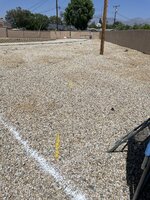
Thanks, Your guess is as good as mine. I'll do some research and find out. Its pretty old. It belonged to my dad. I think he got it off craigslist back in the day. ITs heavy AF It about killed me trying to get it up on my trailer when I transported it to the shop. The damn thing was empty. The top boxes are old snap on boxes. They've seen better days. I doubt ill be replacing any of these.I really like that lower Mac rollaway you have.What year is it?
Jay

You are using an out of date browser. It may not display this or other websites correctly.
You should upgrade or use an alternative browser.
You should upgrade or use an alternative browser.
Between 705 & 1200 SQ/FT DeeDubz Powerstroke shop
- Thread starter DeeDubz
- Start date
Workspaces between 705 and 1200 squarefeet.
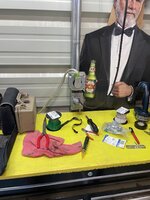
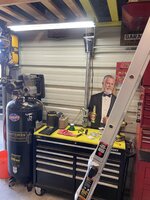
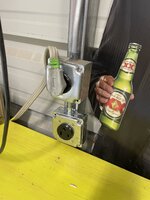
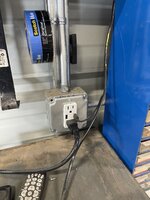
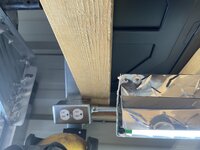
The weekend was too short. We had some friends over an I didnt really get much time in the shop. I got the wife car back from the dealer. They only had it for a day. I got some time in the shop this afternoon. I have a couple of shop lights that Ive been meaning to hang. I figured for now I could hang them over my tool boxes. I didnt have a 110 outlet so with some left over parts I was able to sub into the 220 box.
This morning I got to visit the snap on man. I had a couple of ratchets that were slipping. He replaced one, the other will be repaired but he had to order the parts. I couldn't walk away empty handed so I bought a screw driver and some long needle nose pliers. Also The other day I went to home depot and replaced my old safety glasses.
This morning I got to visit the snap on man. I had a couple of ratchets that were slipping. He replaced one, the other will be repaired but he had to order the parts. I couldn't walk away empty handed so I bought a screw driver and some long needle nose pliers. Also The other day I went to home depot and replaced my old safety glasses.
Attachments




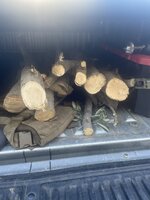
Last week I was running low on fire wood. My buddy does a lot of property clearance which gives him access to trees. I filled up my truck bed with 6ft rounds of eucalyptus. The only problem is I had to buck them up. I got about half way done when my blade became trash. I had to wait a day to finish it.
I replaced my blade and bar from a local saw store a few miles away. It amazes me that they're still in business. The owners daughter is a pill. I feel like Im an inconvenience to them anytime I go there to get something. The wife talked me into going there. She brought up the fact I didnt finish the rounds. I replied that I needed to switch blade/bar and was going to get it off amazon. She told me we should support small business which I agree with. So after my homeport trip I headed over to the lawnmower/saw shop. I walked into the parts section, no one was behind the counter. So I go look through the shop where they have new stihl chainsaws bar oil and fuel. Didnt see anything I needed so I went back to the parts counter... waited for 5 min. Went and found the owners daughter at the cash register doing paper work. I asked her if I could get some help. She rolls her eyes and lets out a sigh... At this point I should have walked out. The parts guy showed up I asked for my parts he found em and I paid. I won't be going back there.
I hit up home depot got a new pipe bender for EMT. I need to add a breaker to the panel for another circuit. In the future im going to add some outdoor lights some more outlets and later down the road a door opener.
Ive been at work for 6 days straight should be home tomorrow. I'll have a few days off to catch up around the house. I have to replace the struts in the wifes explorer. Its gonna give me another reason to visit the snap on man. I need a couple of metric wrenches and sockets...
I replaced my blade and bar from a local saw store a few miles away. It amazes me that they're still in business. The owners daughter is a pill. I feel like Im an inconvenience to them anytime I go there to get something. The wife talked me into going there. She brought up the fact I didnt finish the rounds. I replied that I needed to switch blade/bar and was going to get it off amazon. She told me we should support small business which I agree with. So after my homeport trip I headed over to the lawnmower/saw shop. I walked into the parts section, no one was behind the counter. So I go look through the shop where they have new stihl chainsaws bar oil and fuel. Didnt see anything I needed so I went back to the parts counter... waited for 5 min. Went and found the owners daughter at the cash register doing paper work. I asked her if I could get some help. She rolls her eyes and lets out a sigh... At this point I should have walked out. The parts guy showed up I asked for my parts he found em and I paid. I won't be going back there.
I hit up home depot got a new pipe bender for EMT. I need to add a breaker to the panel for another circuit. In the future im going to add some outdoor lights some more outlets and later down the road a door opener.
Ive been at work for 6 days straight should be home tomorrow. I'll have a few days off to catch up around the house. I have to replace the struts in the wifes explorer. Its gonna give me another reason to visit the snap on man. I need a couple of metric wrenches and sockets...
Attachments



Klokwerk
Well-known member
I try supporting local as often as I can. But many times I ask the same thing: "how are these guys still in business?" because of how poorly they treat people. But then there are shops that go out of their way, above and beyond what I expected. Not all the time, but they're consistantly good. So, I go there as often as I can!
The old guy that helped me with the parts was super helpful. He didnt have the exact bar that i needed to replace. It was for an MS251 not an MS251 wood boss. I assumed that it was the same bar but he made sure by taking a bar off a new saw and compared the two. I think ill avoid buying parts from them.I try supporting local as often as I can. But many times I ask the same thing: "how are these guys still in business?" because of how poorly they treat people. But then there are shops that go out of their way, above and beyond what I expected. Not all the time, but they're consistantly good. So, I go there as often as I can!
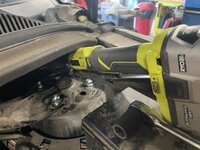
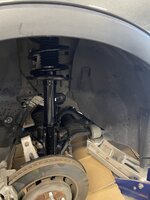
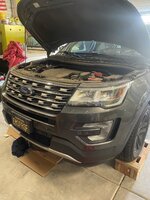
My wifes ford explorer need new struts. Theres been a vibration in the steering wheel the last couple of weeks*after we had some warranty work done on the car at the deal*. You notice it at slow speeds turning to the right. The wife said there were a few times that the steering wheel lost power and felt hard to turn. I should have suspected it was something related to the steering sys and not the struts. Well the car is just shy of 80k and out of warranty. So far its been a good little car.
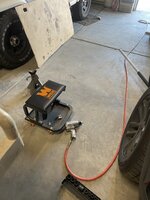
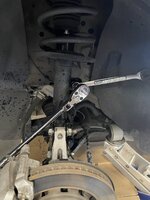
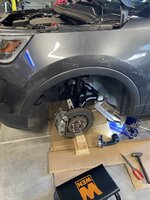
Having a two post life would have been worth its weight in gold.. but I dont have one. I used two jacks and lifted the tires off the ground. My wifes lug nuts have seen better days. A couple of leg nuts got stuck in the impact socket. The others looked fine. I ordered a new set for the car it should show up tomorrow. Taking the bolts/studs to get to the knuckle wasn't bad. I sprayed some penetrating oil on them. The thing That really pissed me off is to get the stud off from the link assembly the end is a 10mm and the bolt is a 21mm. One of the studs the knuckle didnt come out that easy. I was trying to hit it flush with a cross pein hammer. The end of one stud had a small lip. Enough to where the nut wouldn't thread. No worries just fired up the little bench grinder and made it flush again.
Having a two post life would have been worth its weight in gold.. but I dont have one. I used two jacks and lifted the tires off the ground. My wifes lug nuts have seen better days. A couple of leg nuts got stuck in the impact socket. The others looked fine. I ordered a new set for the car it should show up tomorrow. Taking the bolts/studs to get to the knuckle wasn't bad. I sprayed some penetrating oil on them. The thing That really pissed me off is to get the stud off from the link assembly the end is a 10mm and the bolt is a 21mm. One of the studs the knuckle didnt come out that easy. I was trying to hit it flush with a cross pein hammer. The end of one stud had a small lip. Enough to where the nut wouldn't thread. No worries just fired up the little bench grinder and made it flush again.
Attachments




After I got the new struts in place the wife came and told me that her facility manger dropped a couple of eucalyptus trees. I assumed it was a large pile. I was in the middle of fixing the wifes car but at a point I could take a break. Im glad I did too. The pile of wood was just enough to fill the bed of the F250. The campus was pretty empty we had the truck half way loaded when two dudes pulled up in a golf cart. They loaded 10 small pieces and took off. I thought it was weird to load up the cart... maybe they didnt have a truck.
After I unloaded the wood I got right back to the strut. Getting the knuckle back into place wasn't bad. Which brings me back to the link assembly. The stud is connected to the link, to hold it in place you use a 10mm socket and use a 21mm wrench to tighten it... It was hard AF to torque it. In the process I broke a 10mm snap on socket. It cracked down the side. It was an 8 point deep socket. Oh well Ill get it replaced by the snap on man. Once everything was torqued and the wheels were put back on I took it out for a test drive. At first it seemed to be fixed. However after doing some slow sharp turns I could still feel a clunk in the steering wheel. **** this car lol. It seems to be less of a clunk than before but I was worried that it might not be the struts and being the steering assembly.
I did some research and it looks like its the rack and pion that needs to be replaced. Work has been pretty busy for me lately. I dont think im going to have the time to replace it myself... I have a family friends who owns a shop 30 mins away from the house. Hes gonna fix it for me. The wife told me that she thinks ford f ed up the steering system the last time we took the car to the dealer. Two weeks ago we dropped her car off at the dealer for some warranty work. They replaced a rear suspension component. She thinks they dropped her car or something. After we picked it up she noticed the vibration in the steering wheel. I dont wanna go back and deal with ford. Im gonna probably be paying 2k out of pocket. Good thing the wife works lol.
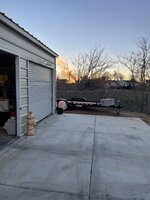
After all the bs I sat down and had a cigar. Also I noticed something was on fire in the distance.
After I unloaded the wood I got right back to the strut. Getting the knuckle back into place wasn't bad. Which brings me back to the link assembly. The stud is connected to the link, to hold it in place you use a 10mm socket and use a 21mm wrench to tighten it... It was hard AF to torque it. In the process I broke a 10mm snap on socket. It cracked down the side. It was an 8 point deep socket. Oh well Ill get it replaced by the snap on man. Once everything was torqued and the wheels were put back on I took it out for a test drive. At first it seemed to be fixed. However after doing some slow sharp turns I could still feel a clunk in the steering wheel. **** this car lol. It seems to be less of a clunk than before but I was worried that it might not be the struts and being the steering assembly.
I did some research and it looks like its the rack and pion that needs to be replaced. Work has been pretty busy for me lately. I dont think im going to have the time to replace it myself... I have a family friends who owns a shop 30 mins away from the house. Hes gonna fix it for me. The wife told me that she thinks ford f ed up the steering system the last time we took the car to the dealer. Two weeks ago we dropped her car off at the dealer for some warranty work. They replaced a rear suspension component. She thinks they dropped her car or something. After we picked it up she noticed the vibration in the steering wheel. I dont wanna go back and deal with ford. Im gonna probably be paying 2k out of pocket. Good thing the wife works lol.
After all the bs I sat down and had a cigar. Also I noticed something was on fire in the distance.
Attachments



Yesterday I over did it at the gym and working on the wifes car. My legs were pretty sore. I decided I take it easy to rest up for the weekend. I received a message from the snap on man that my ratchet was ready to be picked up. I met up with him at his yard. I couldn't go home empty handed so I picked up a couple of things. The ratchet was rebuilt, the needle nose pilers were replaced. My old ones had a bent tip. The 10mm deep socket was also replaced. I saw a pair of flush cut pliers and had to get them. I also bought a regular pair of pliers and a short 10mm socket. I figured that was enough damage for one day.
On the way home. I dropped my hold husky 50 chainsaw off at the saw shop. I was having a hard time getting parts for it. I couldn't get it to run. It would start and just die. I figured it was a carb issue. I couldn't find a replacement. I went through it and cleaned it. Hopefully they can get it going.
Later on that day a buddy of mine offered cigars and beers at his pad. One of our mutual friends came by. My buddy had to show off his new pizza oven. The thing is pretty cool. Wife wants one but were gonna wait until my our back yard is finished.
Today im gonna replace the lugs on my wife car and probably chill the rest of the day till the UFC fights.
On the way home. I dropped my hold husky 50 chainsaw off at the saw shop. I was having a hard time getting parts for it. I couldn't get it to run. It would start and just die. I figured it was a carb issue. I couldn't find a replacement. I went through it and cleaned it. Hopefully they can get it going.
Later on that day a buddy of mine offered cigars and beers at his pad. One of our mutual friends came by. My buddy had to show off his new pizza oven. The thing is pretty cool. Wife wants one but were gonna wait until my our back yard is finished.
Today im gonna replace the lugs on my wife car and probably chill the rest of the day till the UFC fights.
Attachments


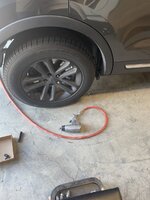
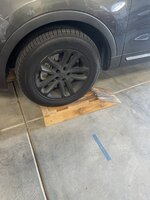
The wifes new lug nuts showed up in the mail yesterday. I had a couple of hours to kill. Right when I got in the car to start it the oil light came on. I made sure I had a filter and some oil and changed the oil while im home. The more you do it the better you get. To give myself some more room I have these wooden ramps built out of 2x6. My dad built them for me many yrs ago. After all of that It was time to have a beer.
Cheers
Cheers
Attachments

Klokwerk
Well-known member
What ended up being on fire?
Regarding pizza ovens, if you don't have a preference, I'd suggest a gas burning one. Or one that can do both.
Wood is great, but takes for every to get going. You might end up only using it a couple times a year.
I use my Roccbox once a week because it's so easy to heat up to 900F.
Regarding pizza ovens, if you don't have a preference, I'd suggest a gas burning one. Or one that can do both.
Wood is great, but takes for every to get going. You might end up only using it a couple times a year.
I use my Roccbox once a week because it's so easy to heat up to 900F.
It was a structure fire in the next city over. Last I heard no one was hurt. I think im going to go with wood. I know it takes longer but thats fine I really like cooking like that. We ll probably use it once every other month. We still need to get my backyard finished up before we even think about a pizza oven. We're a few yrs down the road from that.What ended up being on fire?
Regarding pizza ovens, if you don't have a preference, I'd suggest a gas burning one. Or one that can do both.
Wood is great, but takes for every to get going. You might end up only using it a couple times a year.
I use my Roccbox once a week because it's so easy to heat up to 900F.
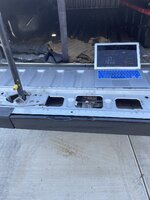
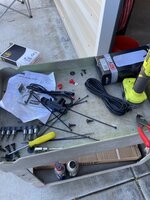
My 2011 F250 didnt come with an automatic lock for the tailgate. To lock the tailgate you have to use the key for the ignition. After yrs of this first world problem I broke down and purchased a poplock for my tailgate. I watched a couple of youtube videos on how to install. It didnt look that hard. Most people that installed said they did it around 30min. It took me 1 1/2 hours... Amazon prime package showed up early. The box it came in was beat to ****. I made sure that all the contents of the pop lock were in the box. I pulled the cover off the tailgate. The PIA were these 1/4in black plastic clips. I broke dame near all of them getting them out. Another amazon purchase for replacement black clips was in the future.
It took me a few mins to figure out how to get the lock mechanism inside the tail gate. It made things easier when you insert it from the farthest opening on the tailgate. Next was the wire that game of the lock needed to go through a small hole in the tailgate. I had to used a flexible metal pipe to get the wire through the opening. I taped it to the end of the pipe and had to profile it get it out the hole. After that was using wire ties and running the wire along the frame.
The wire came in from underneath the passenger side by the seat belt. After that It was just splicing into wires. I probably made 5 different splices before I got the lock to work. The directions were pretty vague on wire color. The youtube videos didnt show what color wire they used. The two wires were a grey wire with a brown or tan stripe... the next was a purple wire with a gray stripe. Everything's installed and working great. Its nice to get into my tailgate without having the key.
It took me a few mins to figure out how to get the lock mechanism inside the tail gate. It made things easier when you insert it from the farthest opening on the tailgate. Next was the wire that game of the lock needed to go through a small hole in the tailgate. I had to used a flexible metal pipe to get the wire through the opening. I taped it to the end of the pipe and had to profile it get it out the hole. After that was using wire ties and running the wire along the frame.
The wire came in from underneath the passenger side by the seat belt. After that It was just splicing into wires. I probably made 5 different splices before I got the lock to work. The directions were pretty vague on wire color. The youtube videos didnt show what color wire they used. The two wires were a grey wire with a brown or tan stripe... the next was a purple wire with a gray stripe. Everything's installed and working great. Its nice to get into my tailgate without having the key.
Attachments

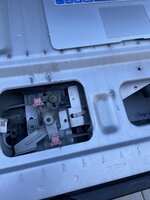
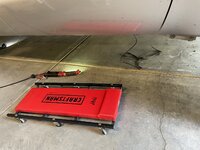


I took my Husky ranch 50 to the saw shop in town. Ive tried to get the thing running without any success. Its pretty hard to find parts for it so I wasn't sure if they'd be able to get it running. I dropped it off and a few days later they called and said they cant do anything for it. My kids barber might be able to take a look at it. I installed a new carb last yr along with new fuel lines/filter and spark plug.
My Poulan needs a new carb. I tore into that the other day Amazon primed a replacement.
My Poulan needs a new carb. I tore into that the other day Amazon primed a replacement.
Attachments
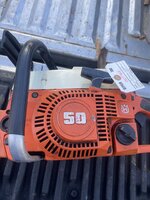
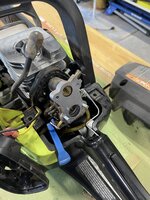

Yesterday I picked up two of these off FB marketplace. The wife wanted a few things covered up using these barrels. The first thing was my electrical conduit coming out of the ground. The other place was to cover up the plumping for the fire pit. We probably won't be getting that installed for another year. To make the holes I used a hole saw and my sawsall.
Attachments

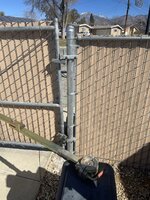
Just the other dayyyyyy My chain link gate wouldn't close all the way. The winds have been pretty had the past few days. We typically dont get winds that often here. Theres about a 1 ft gap inbetween the gate and the end of the fence. Its more annoying than anything. The wife an I tried to fix it. We thought we could adjust the u clamps on the post to get it to close... Nope the gate would drag on the concrete. Going back and fourth we ended right where we started only to find out that the small slab that the opener sits on had moved... moving the gate. I guess were stuck with a gap for awhile. Ill post pictures later.
Another swing an a miss was trying to get my POS poluan 3314 chain saw running. I put in a new carb and plug. The saw starts and idles fine. however the throttle linkage doesn't move the carb to increase RPM. Hopefully its a simple fix, adjustment on the carb. we ll see
Another swing an a miss was trying to get my POS poluan 3314 chain saw running. I put in a new carb and plug. The saw starts and idles fine. however the throttle linkage doesn't move the carb to increase RPM. Hopefully its a simple fix, adjustment on the carb. we ll see
Wife an I made another attempt to fix the gate. Im pretty sure the only way to fix this would to move the slab which the gate motor sits on. I reset the limits on the gate hoping it would close completely. I think the wind pushed on the gate with so much force that it pushed the slab leaving a 3-6 inch gap in-between the fence. If anyone has any other suggestions on how to fix this im all ears.
Attachments


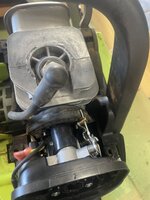
The wife took my oldest to his best friends basketball game. While they were gone I had a few hours to spend in the shop. I fix the poluan chainsaw. I adjusted the throttle on the carb. The linkage moves freely. It starts and runs fine. Everything Ive heard is that this saw is a POS. I get it. It won't replace my Stihl but its nice to have a secondary saw when you need it. A buddy of mine offered to pressure test my husky 50. If it fails the pressure test its pretty much parts at that point. Since they dont make parts for this model anymore.
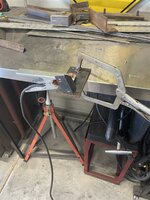
I have a air filter that Ive been meaning to install on my compressor. I found some spare metal to make a bracket. My mig welds on the bottom were dog ****. The welds on the other side turned out wayyyy better. I need to use it more often. I rattle canned some black paint and installed.
I have a air filter that Ive been meaning to install on my compressor. I found some spare metal to make a bracket. My mig welds on the bottom were dog ****. The welds on the other side turned out wayyyy better. I need to use it more often. I rattle canned some black paint and installed.
Attachments



jon72vega
Well-known member
What about adding a swivel caster wheel on the end of the gate?Wife an I made another attempt to fix the gate. Im pretty sure the only way to fix this would to move the slab which the gate motor sits on. I reset the limits on the gate hoping it would close completely. I think the wind pushed on the gate with so much force that it pushed the slab leaving a 3-6 inch gap in-between the fence. If anyone has any other suggestions on how to fix this im all ears.
racer-john
Well-known member
Adding a caster might be a good idea but it doesn't need to be a swivel.
With DD's suggestion of the movement of the motorbase. I would concur: remove the original base, increase the size of the hole by 6" on three sides and 3-6" deeper. That bad boy won't move again unless a tank hits it. Lol.
With DD's suggestion of the movement of the motorbase. I would concur: remove the original base, increase the size of the hole by 6" on three sides and 3-6" deeper. That bad boy won't move again unless a tank hits it. Lol.
Last week I called the fence company to see if they could come out and try to fix it. Everything my wife an I tried seemed to make it worse. The owner of the company showed up. After a few mins he had the gate fixed no charge. He asked how the gate got like this, I told him the wind was pushing on it pretty bad for a few days. It seemed to have moved the hinges. The gap is fixed and it doesn't drag anymore. I tired to pay the owner for his time he declined.Adding a caster might be a good idea but it doesn't need to be a swivel.
With DD's suggestion of the movement of the motorbase. I would concur: remove the original base, increase the size of the hole by 6" on three sides and 3-6" deeper. That bad boy won't move again unless a tank hits it. Lol.
After being stuck at work for quite a while I finally got some time to get in my shop. Yesterday was cold and rainy but better day to work inside. I've been wanting to add some outlets in the shop. To do this I needed to add a breaker. Im not every good at electrical or i should say I dont really like doing it. So I shut the main breaker off at the panel on the house. Thus cutting all the electricity to the shop. I made sure 100% by using a volt meter. I pulled the panel cover off and exposed the wires on the buss bar. Connected a neutral and ground to the panel. Then the hot wire to the breaker. Ive never really bent any EMT. The emt coming out of the panel going up needed to be bent in two place to make it run along side the steel stud.
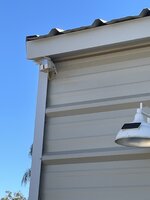
I added an electrical outlet in the top corner of the garage. This is where im going to add an wifi extender and my wifi router. The metal building is like an iron dome. My wife from my house doesn't penetrate through the sheet metal very well. My goal is to mount a wifi extender to the outside corner. Connect an Ethernet cable to it then to a router. Hopefully this will solve my wifi issue. After that I connected more wire toward my shop bench and tool box. I have a set of led shop likes I would like to connect power to. Also going to run another two possibly 3 outlets. One next to the work area, one in the top corner of my 10x10 door for a future door opener. Then an outside outlet. This is all 110 on a 20amp breaker. Im not going to be using anything big off this circuit. Maybe at the most a miter saw. I would have finished but I ran out of parts. So today Im gonna hit the local hardware store and get the supplies I need hopefully to finish before I head back to work for extended period of time.
To be continued...
I added an electrical outlet in the top corner of the garage. This is where im going to add an wifi extender and my wifi router. The metal building is like an iron dome. My wife from my house doesn't penetrate through the sheet metal very well. My goal is to mount a wifi extender to the outside corner. Connect an Ethernet cable to it then to a router. Hopefully this will solve my wifi issue. After that I connected more wire toward my shop bench and tool box. I have a set of led shop likes I would like to connect power to. Also going to run another two possibly 3 outlets. One next to the work area, one in the top corner of my 10x10 door for a future door opener. Then an outside outlet. This is all 110 on a 20amp breaker. Im not going to be using anything big off this circuit. Maybe at the most a miter saw. I would have finished but I ran out of parts. So today Im gonna hit the local hardware store and get the supplies I need hopefully to finish before I head back to work for extended period of time.
To be continued...
Attachments


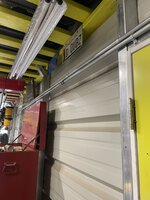

I sorta finished up my electrical project for the time being. I still need to add an outlet to the exterior of the shop but ill do that later down the road. The main goal of this project was to improve my wifi and add power by my garage door. Now that theres power maybe someone day soon ill get an opener. I did fab a bracket to hold my wifi extender. Ill take pictures of it when I get home. All I have to do now is drill holes for power and e cable then mount my router on the inside. I probably won't be able to hit this for a week or two. Im now back at work for a bit. Which is good... we have bills to pay
- Update on my wifes car. Yesterday the mechanic told us we need to come pick up my wife car. They are unable to find a rack and pinion for our explorer. Our mechanic was going to get one at a pick a part but these things are tied to the vin number... he said he couldn't get one. They have no idea when they will get the part... The mechanic called ford to try and find the part suggested we just get a new car.... Ford would offer us what its worth as if the rack and pinion weren't removed. The car is paid off we dont wanna get another new vehicle.
I get a call this am from my wife saying a ford dealer about an hour from us found the part back east. Its a refurbished part. To ship it will cost us 1800. It sounds like it will show up next week sometime. So this weekend were gonna go pick up the wifes car... The fun part is that im going to have to trailer it....
- Update on my wifes car. Yesterday the mechanic told us we need to come pick up my wife car. They are unable to find a rack and pinion for our explorer. Our mechanic was going to get one at a pick a part but these things are tied to the vin number... he said he couldn't get one. They have no idea when they will get the part... The mechanic called ford to try and find the part suggested we just get a new car.... Ford would offer us what its worth as if the rack and pinion weren't removed. The car is paid off we dont wanna get another new vehicle.
I get a call this am from my wife saying a ford dealer about an hour from us found the part back east. Its a refurbished part. To ship it will cost us 1800. It sounds like it will show up next week sometime. So this weekend were gonna go pick up the wifes car... The fun part is that im going to have to trailer it....
Attachments


Lifes been pretty chaotic lately. Ive been working a **** ton. To the point where Im getting to know my co workers better than my family. My one day off last week I was able to pick up some fire work from the wifes work. There were a bunch of piles a few days prior but thats all that was left when I got to it.
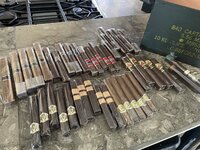
- Yesterday My shipment of cigars show up woohoo. I was able to get some stuff done in the shop. I mounted my repeater and my router for the shop. It was getting late and I wasn't able to get the router set up. Ill probably work on it this weekend. Weeds have been popping up in the yard. In the morning I went to tractor supply and picked up RM43. That stuff works great. Keeps weeds from growing back.
- Yesterday My shipment of cigars show up woohoo. I was able to get some stuff done in the shop. I mounted my repeater and my router for the shop. It was getting late and I wasn't able to get the router set up. Ill probably work on it this weekend. Weeds have been popping up in the yard. In the morning I went to tractor supply and picked up RM43. That stuff works great. Keeps weeds from growing back.
Attachments

Friday we finally got the wifes car back from ford. 2500 bucks to replace the rack and pinion. That was a homie discount. Our mechanic *a family friend* quoted us 4k. My mother in law knows a guy that owns a ford dealer. Between the family I think theres at least 10 vehicle purchases at his dealer. Just to ship the part was 1800 bucks.
With the wifes car returned to the fleet I needed to do some maintenance on the F250. It was time to replace the rear differential fluid. I checked the front, it still looks like new. While the fluid was draining I replaced the Map sensor an added a space for it. The spacer is suppose to keep soot from entering the sensor. The part isn't carb compliant. I had to ship it to family member out of state... I noticed a crack around the diff cover. The fluid didnt have any metal flakes as well as the pumpkin. Im going to have to replace the cover soon. The bottom of the pumpkin had a couple of uneven spots. I guess something had hit the bottom of the pumpkin.
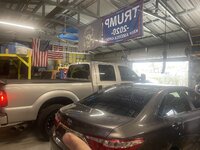
Our family friend that loaned us a car doesn't need it back till monday. The wife had just got it washed. So I figured id make some room in the shop and park it inside. It was the first time Ive had 3 vehicles in the shop.
With the wifes car returned to the fleet I needed to do some maintenance on the F250. It was time to replace the rear differential fluid. I checked the front, it still looks like new. While the fluid was draining I replaced the Map sensor an added a space for it. The spacer is suppose to keep soot from entering the sensor. The part isn't carb compliant. I had to ship it to family member out of state... I noticed a crack around the diff cover. The fluid didnt have any metal flakes as well as the pumpkin. Im going to have to replace the cover soon. The bottom of the pumpkin had a couple of uneven spots. I guess something had hit the bottom of the pumpkin.
Our family friend that loaned us a car doesn't need it back till monday. The wife had just got it washed. So I figured id make some room in the shop and park it inside. It was the first time Ive had 3 vehicles in the shop.
Attachments
-
 0EDA6F7B-934D-42A0-9EDC-9D44DA4CEA63.JPG358.3 KB · Views: 48
 -
 7AB06B58-0E96-474A-91D2-A618DFCE002E.JPG365.7 KB · Views: 44
 -
 1393781F-9245-43D9-8ECD-5117E059220F.JPG429.7 KB · Views: 44
 -
 50415033-DCFD-4CF4-ABC9-3B43883956CD.JPG307.6 KB · Views: 44
 -
 IMG_3754.JPG445.5 KB · Views: 44
 -
 IMG_3755.JPG441 KB · Views: 52
 -
 IMG_3756.JPG342.6 KB · Views: 57
 -
 IMG_3758.JPG361.4 KB · Views: 70
Finally got my wifi working in my shop. The only way I was getting internet in the garage is if i kept the door open. The metal reflects the wifi single. I had an old net gear wifi extender I tried to set up as a access point. The extender was pretty old. I tried to up date it but it wouldn't do it. I purchased a new one from amazon. I thought the models were pretty much the same and I could use the same bracket I fabricated. The new extender was a little wider. I was dead set on building another one but I was able to push the extension cord through the hole toward the inside of the shop, holding the extender in place. Now I have wifi inside the shop. Now I can use my tv for music and youtube. I was using a blue tooth rock speaker for tunes in my garage. It took up a lot of space on my work bench. I relocated it back to my wifes garage.
Attachments



Ive been meaning to rotate my tires but with work and other stuff I haven't been able to. Yesterday I had some time to get some things done in my shop. Got the tires rotated. I was in the process of making a shelve for a couple of bottle jacks when from friends of mine came by. My buddy who let my wife barrow his car for a month came over so we could swap out the heat shield for his hood. A rat got to it and made a mess of it. IT didnt chew any wires in the engine compartment. The shield cost me almost 200 bucks lol. Oh well he did solid letting us barrow his car. Today Ill finish up the shelve and see what else I get too.
Attachments


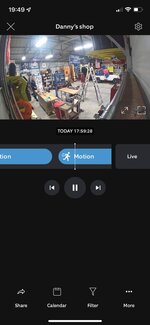

The gate wouldn't open in the morning. Wife was sorta late getting to work. We've been having issues with it for the last week. Ive been having to reprogram the open and close limits to get it to work. After I had it programed again I tested it with a remote. The gate would open fully, then when I close it it would stop half way. It was throwing an error code. I googled it and it mentioned the sensors in front of the gate could need to be cleaned or miss aligned. I cleaned the photo sensor and found the sensor was misaligned. The gate is fully functional. The last couple of days we've been getting a lot of wind. I think the wind pushed the sensor.
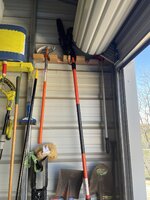
Finally finished up a shelve I made for my bottle jacks. After that I made a little yard tool holder. Im trying to get as much as I can off the ground. I even found a spot for my creepers. My kids like to play on them. Most of the time they leave them out. Ive ran one over before. But now I finally found a place for them.
Finally finished up a shelve I made for my bottle jacks. After that I made a little yard tool holder. Im trying to get as much as I can off the ground. I even found a spot for my creepers. My kids like to play on them. Most of the time they leave them out. Ive ran one over before. But now I finally found a place for them.
Attachments
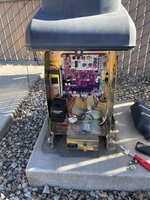


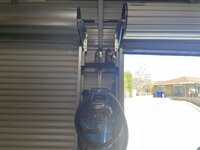
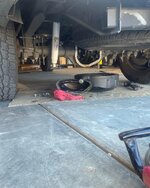
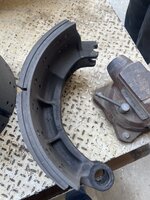
Ive been at work the last week. It ***** not being able to go home sleep in your own bed or see the fam. Needless to say I haven't spent much time in my shop. However I did come across something interesting the other day at work. Which brings me to the brake shoes. Im an Engineer *not the smart kind* I drive what is called a Tractor drawn aerial. Its a sorta like a semi truck with a huge ladder on the top. Theres a guy that sits in the back and steers... anyway i noticed several weeks ago that the brakes on the tractor were wearing down or so I thought. The shoes looks like they were tapering at the corner or wearing down. I brought this up to the mechanics. They agreed and went ahead and scheduled a complete brake job.
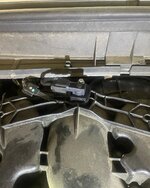
This week the mechanic showed up and pulled the old brakes *photo2* off. He took the old shoes and went to the part warehouse to get new shoes. Well come to find out the new shoes *photo1* were about the same size as the old shoes. The mechanic an I were pretty surprised that the shoes were tapered like that. The mechanic who has several decades of experience had never seen that before. Ive done brake jobs back in the day with my dad. He owned a trucking company. Most of the weekends Id be helping him get his trucks fixed for the next week of work. We did brake jobs on trailers tractors ect. I remember the shoes looking wayyyyy thicker and even across the pad.
My only day off consisted of smoking drum sticks and hanging out with the family. The drum sticks turned out really good. We used a Kansas city rub with BBQ sauce. The last photo was taken from my wife. The view of our hot tub with a nice sun set. Ill get into my shop this week.
This week the mechanic showed up and pulled the old brakes *photo2* off. He took the old shoes and went to the part warehouse to get new shoes. Well come to find out the new shoes *photo1* were about the same size as the old shoes. The mechanic an I were pretty surprised that the shoes were tapered like that. The mechanic who has several decades of experience had never seen that before. Ive done brake jobs back in the day with my dad. He owned a trucking company. Most of the weekends Id be helping him get his trucks fixed for the next week of work. We did brake jobs on trailers tractors ect. I remember the shoes looking wayyyyy thicker and even across the pad.
My only day off consisted of smoking drum sticks and hanging out with the family. The drum sticks turned out really good. We used a Kansas city rub with BBQ sauce. The last photo was taken from my wife. The view of our hot tub with a nice sun set. Ill get into my shop this week.
Attachments



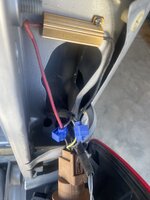
I had quite a few days off the last week. I had a few days in the shop didnt really do a whole lot. I mounted my old SCBA tank mock bomb. It had been laying down in the shop floor. I got tired of moving it all the time. I was able to find a fitting that matched the threads in the front. I welded a washer to it. I attached a piece of stripped flagging to make it look like its pined. Once I was done with that I got a phone call from my buddy saying he had just been in a motorcycle crash and was being flown to the hospital. I dropped what I had going on and hauled *** the trauma center. Its about a 30 min drive. My buddy is fine just some road rash. The bike isn't too bad couple hundred bucks and it will be running. On the way back to the house I noticed my taillights were hyper flashing. The resistor was bad. I swapped it out with a new one yesterday. Ended the day with a Davidoff Cigar. Id never had one. Its a good cigar but I dont know if its worth how much I paid for it. Ive had better cigars that are wayyy less expensive. Wife an I went to vegas over the weekend. Our hotel had a Davidoff cigar shop. I spent a couple hundred dollars on cigars. Surprised the wife wasn't tripping about the price. I picked up 3 david offs and a couple of acids. Two of the david offs are going to friends.
Attachments


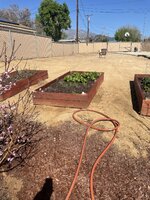
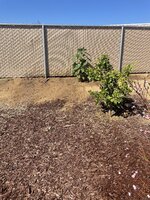
The wifes garden is starting to take off. I planted some more corn, pumpkin and sun flower. The strawberries and lettuce are starting to take off. Still no tomatoes or peppers yet.
Attachments


I added a single post tandem circuit breaker. I had just enough wire to run a out let for a future attic fan. My pipe bending skills are starting to get better. I might add another tandem breaker in the future to make some more room in the panel.
Attachments


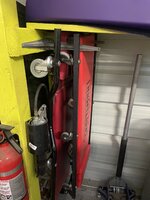
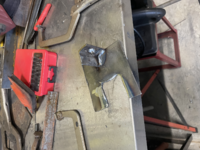
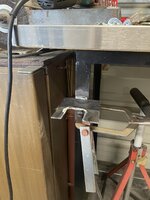
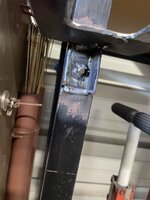
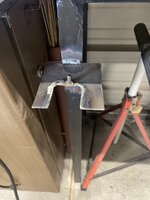
Ive been meaning to make or buy a fire extinguisher bracket. I could of bought one but I got tired of the tank on my welding bench. I found some spare metal laying around. Wire wheeled it a bit to get some of the rust off then fired up the miller spectrum. I ended up welding the bracket to the leg of the welding bench. Its out of the way and I wont hit it while im working. I think my welds are starting to get better. Now all I have to do is rattle can it black.
Attachments




Bob Heine
ALLIANCE MEMBER
@DeeDubz, those tandem breakers are a lifesaver when you want one more circuit in an already full breaker panel. With two of them I was able to free up space for a 240v breaker for the garage. Saved me from having to have the whole panel replaced/upgraded. I don't think I exceeded the panel's capacity. One lug of the buss-bar was destroyed when a breaker failed to trip. Had to shuffle one leg of the panel to get around that.
It appears you have a fire extinguisher mount that will still be there through the next millennium, with or without paint.
It appears you have a fire extinguisher mount that will still be there through the next millennium, with or without paint.
I had no idea tandem breakers were a thing.... whats funny is that my panel on my house I had replaced and my electrician put a couple of tandem on there. I was talking to a co worker about replacing my panel. Then he mentioned the tandem breakers. done deal. I think im going to add a couple more.
The extinguisher bracket is all done. I threw on some black spray paint to finish it off. Ive had this bench grinder sitting on my drill press stand. I figured It would be nice if I made something I could clamp it down in one of my vises. So I took a sheet of steel Measured it out and cut it. I started off with my plasma cutter but I kept blowing the breaker. Good thing I have my acetylene torch. IT made quick work of it. After getting it cut I took the angle grinder to it to smooth it out. Next fired up the mig and glued the angle iron to the bottom of the steel. Finished set up in the vise. I need to look into repairing the on off switch to the bench grinder. You can turn it on using needle nose pilers.
Attachments


Before it gets too hot Im going to install an attic fan in the same. The other day before I went to work I made frame for it. This week ill be cutting a hole in the side of the shop. I bought a few things the other day at home depot. Got a new pair of welding gloves an a outside storage cabinet for all the floats for the pool.
Attachments
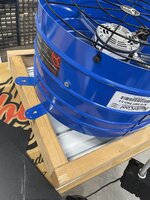

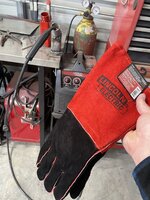


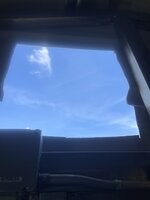
Yesterday I was able to spend some time in the shop. I figured Id get a jump start on the gable vent. I have a cordless ryobi angle grinder with a metal cutting disk to make the square hole. I put the frame up where I wanted it on the inside. Then I took my sharpe and make an outline where the vent would be inserted. After that I began to cut the hole. The cuts came out ok. Towards the end I was running out of blade. I had to cut a few spots on the outside to get the vent flush to the side of the building. I Have some spare metal I might use to clean up the outside. Today Im going to finish it and hopefully add the van on the other side.
Attachments


I forgot to mention the other day I helped my son build this lego. He tried several times to build it himself but the directions were pretty confusing. There were a few times I had to go back and start over again. It took me almost an hour lol. I told him that if it breaks he ll have to fix it.
Attachments


Finished up the Attic fan. It was a freaking ***** lifting it up there. ITs not so much heavy but awkward. I ended up using bigger bolts instead of the ones that came with the fan. The shutter sticks a bit. I guess the frame I made is a little on the tight side. Oh well I figure out a way to fix that. I have a piece of sheet metal left over from the square I cut. Im going to cut two sections to fill the gap on the top. I filled the gap on the sides I might screw some foam in there to seal it up. My angle grinder blade was toast and I had no replacements. Amazon is sending a 5 pack tomorrow. Also added a couple of chop saw blades.
Wife called me at work last week and told me she could hear water running where our water coming into our house. It seems theres a leak somewhere from the house to the pool equipment... I assume its under concrete and its at a joint. Im not sure who's to blame. 3 different people have touched that water pipe. Me, the pool builders... and the guys that built my shop. Im 100 sure that its under the freshly poured concrete. Luckily its not that big of a deal but it forces me to fix it as well as add another project. The wife wanted to get our water line from the meter - to the house replaced. I had a guy quote me last yr. It seemed a little high. Im going to trench about 150 ft from the main to the house and put in some black ploy pipe. Im going to tench an extra 30ft to the pool/ shop water line and tie in. A buddy of mine is a plumber he can help me connect it to the main and the meter.
Wife called me at work last week and told me she could hear water running where our water coming into our house. It seems theres a leak somewhere from the house to the pool equipment... I assume its under concrete and its at a joint. Im not sure who's to blame. 3 different people have touched that water pipe. Me, the pool builders... and the guys that built my shop. Im 100 sure that its under the freshly poured concrete. Luckily its not that big of a deal but it forces me to fix it as well as add another project. The wife wanted to get our water line from the meter - to the house replaced. I had a guy quote me last yr. It seemed a little high. Im going to trench about 150 ft from the main to the house and put in some black ploy pipe. Im going to tench an extra 30ft to the pool/ shop water line and tie in. A buddy of mine is a plumber he can help me connect it to the main and the meter.
Attachments


The gas company came out and marked my gas line. The areas where it intersects my trench I dug down without finding the gas line. Leading me to believe that its pretty deep. Im only going to be trenching about a foot. Thats whats required where I live. I have a retaining wall in between my house. The meter sits down about 4-5 ft from the top of my retaining wall. Im going to guess that its pretty deep. Now I have to find where the sewer line runs. It runs along my property but I think that too is pretty deep. Hopefully next week I can trench.