To avoid these ads, REGISTER NOW!

Delta DP600 Restoration Progress

Davefr

Well-known member
Joined
Jan 7, 2010
Messages
11,868
Location
OR
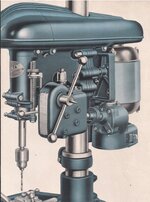
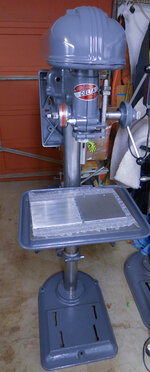
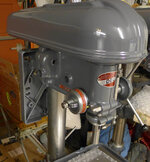
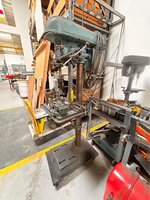
So, I recently picked up this old Delta drill press for a "fun" restoration project. It's from 1946 and I believe it originally came with power feed based on the odd L shaped motor mount and a few other differences. It spend its most recent life as a dedicated tapping machine.
462373591_1550078482549398_3149380698509850071_n.jpg462403249_1528375211895185_5150086602507533625_n (2).jpgdeltapowerfeed.jpg


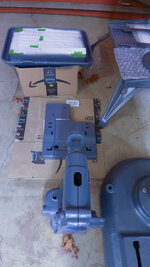
Phase one was complete disassembly. It was actually in pretty decent mechanical shape and the only part I needed to source was the three spoke quill feed handle. The most miserable part is the cleaning and paint stripping. I used Citri Strip. I learned that the key to using Citri Strip is to ignore their instructions and use it in colder weather. I coated all the parts and threw a tarp over them. 48 hours later most of the old paint was curdled up and fairly easy to remove. It took another application to get what was left.

Here are most of the parts after stripping and painting. The column was sanded from 80 grit to 600.P1110537.jpgP1110538.jpgP1110539.jpg
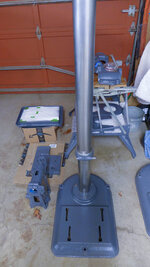
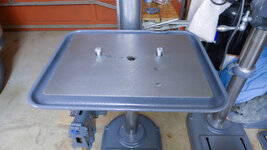
The large production table only had a few holes that I filled with JB weld. As some point two additional holes were drilled and tapped to 1/2-20 and blocks were mounted under the table. The blocks included open ports to clear out debris. I decided to leave them. They might come in handy for clamping arrangements.
P1110541.jpgP1110542.jpg
 
To avoid these ads, REGISTER NOW!
OP
D

Davefr

Well-known member
Joined
Jan 7, 2010
Messages
11,868
Location
OR
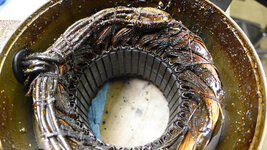
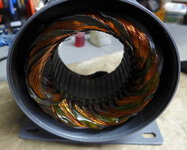
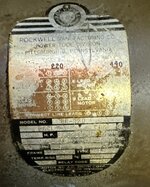
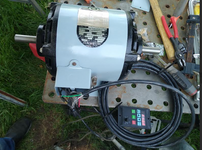
I decided to use a 3 phase 1HP Delta 86-920 and VFD. The motor was filthy buy cleaned up nicely. I has Bayphoto print a new aluminum nameplate.
P1110515.jpgP1110517.jpgP1110521.jpgP1110532.jpg
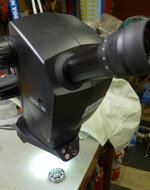
The quill/spindle assembly/and motor bearings were all rebuilt. Ultrasonically cleaned inspected and packed with Mobil Polyrex EM grease. The DP bearings were New Departure and the motor bearings were Hoover. All were in perfect condition once cleaned. I refuse to replace these quality bearing as long as they are good.

P1110544.jpgP1110545.jpgP1110546.jpg

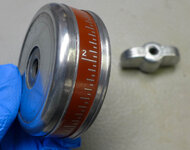
I was able to restore the depth guage dial and nameplate.

P1110535.jpg
 

aquinob

Well-known member
Joined
Oct 7, 2014
Messages
240
Location
Portsmouth, VA
Thats a cool old Delta 17". Heavy buggers, I don't see too many of them pop up compared to the 15" machines. That press has a 6" stroke IIRC, that is very unusual for most machines, old or new. Looks like a great restoration. Curious how you open the bearings to clean and regrease them?
 
OP
D

Davefr

Well-known member
Joined
Jan 7, 2010
Messages
11,868
Location
OR
Curious how you open the bearings to clean and regrease them?
 

Hoorn

Well-known member
Joined
May 19, 2020
Messages
1,142
Location
Glendora, CA
@Davefr can you post your DP on the Delta thread. That is a magnificent restoration, one of the best I've seen on a 600. Your bearing shield removal process is second to none, I simply can not get my shields off while looking hardly touched like yours. My removed shields look like crumpled up tin foil.
 
OP
D

Davefr

Well-known member
Joined
Jan 7, 2010
Messages
11,868
Location
OR
Beautiful restoration! What kind of paint are you using, spray or brush?
Thank you. I used charcoal gray Rust Oleum spray for the DP. For the motor, I used Rustoleum Satin Black and Krylon Rust Tough Battleship Gray.

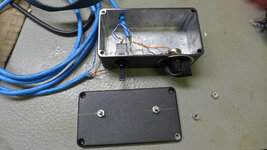
I'm almost done. The VFD is a Teco L510. It's programmed to display actual spindle speed at the highest speed belt setting. I also set max. frequency to 90 Hz which can overclock the motor 50%. (The bearings can easily handle a 50% overclock.) I added a remote control panel for start/stop and speed control. There's also a main power switch and pilot light. The switch has three positions REV, OFF, FWD. (Rev might come in handy for L.H. drill bits.). I just need to add a chuck and legend plate for the switch. P1110554.jpgP1110566.jpg
 

grannyknot

Well-known member
Joined
Feb 13, 2021
Messages
84
Location
Toronto
Thank you. I used charcoal gray Rust Oleum spray for the DP. For the motor, I used Rustoleum Satin Black and Krylon Rust Tough Battleship Gray.

I also set max. frequency to 90 Hz which can overclock the motor 50%. (The bearings can easily handle a 50% overclock.)
So you are talking rattle can paint?

When you set the parameters on the VFD, instead of punching in 60hz, you put in 90hz? I agree the bearings won't have a problem with 2600 rpm and I guess they are the only point of contact, but won't that extra 50% burn something out?
My knowledge of electric motors is limited, don't mean to second guess you.
Thanks
 
OP
D

Davefr

Well-known member
Joined
Jan 7, 2010
Messages
11,868
Location
OR
So you are talking rattle can paint?

When you set the parameters on the VFD, instead of punching in 60hz, you put in 90hz? I agree the bearings won't have a problem with 2600 rpm and I guess they are the only point of contact, but won't that extra 50% burn something out?
My knowledge of electric motors is limited, don't mean to second guess you.
Thanks
Yes, all painting was rattle can.

Yes, VFD parameter 00-12=90 allows up to 90 Hz controlled by the potentiometer. (default is 60 Hz). From all my research overclocking a 1750 RPM motor to 2X is considered OK. I chose a more conservative 50% overclock. That gives me a usable spindle speed from 150 to 3300 RPM all using the highest speed belt setting. At 150 RPM torque is pretty low but at that point you can always get more torque and even a lower speeds by moving the belt down from the highest speed position. (there are 4 lower speed/higher torque belt settings to choose from)

The motor draws between 3.5 to 4.0 no load amps between 150 RPM and 2200 RPM spindle speed as reported by the VFD. When I run it at 90 Hz/3300 RPM amps actually drop to about 2.4. (Not sure the theory of why?)

These are all my VFD parameters:
L510VFDParameters.jpg
 

Beerhippie

Well-known member
Joined
Oct 13, 2023
Messages
10,213
Location
Far NE Oregon
So you are talking rattle can paint?

When you set the parameters on the VFD, instead of punching in 60hz, you put in 90hz? I agree the bearings won't have a problem with 2600 rpm and I guess they are the only point of contact, but won't that extra 50% burn something out?
My knowledge of electric motors is limited, don't mean to second guess you.
Thanks
If anything is going to damage the motor using a VFD, it's running it slowly because the cooling fan of the motor is also running slowly. There are motors made specifically for use with VFDs, which have enhanced cooling (TEFC VFD-rated motors usually have external cooling fins). However, we use non-VFD-rated TEFC motors on almost all of our brewery pumps. We almost always run them at less than full speed--mostly about 50%--and have never burned one out.
 
To avoid these ads, REGISTER NOW!

RTM

Well-known member
Joined
May 13, 2019
Messages
13,329
Location
SF Bay Area
When you set the parameters on the VFD, instead of punching in 60hz, you put in 90hz? I agree the bearings won't have a problem with 2600 rpm and I guess they are the only point of contact, but won't that extra 50% burn something out?
Almost 30 years ago, we would set all of our brewery bottling and canning conveyor motors to over run to (I think) 75Hz, just as routine. These were on-demand speeds, so ramping up and down on certain conditions was not unusual, and others ran at fixed speeds all the time, dialed in for best product flow across the line.

Certain other motors had higher or lower max speeds, depending on the load.

Not sure how many we ran much under speed, as beerhippie was mentioning
 
Last edited:
OP
D

Davefr

Well-known member
Joined
Jan 7, 2010
Messages
11,868
Location
OR
If anything is going to damage the motor using a VFD, it's running it slowly because the cooling fan of the motor is also running slowly. There are motors made specifically for use with VFDs, which have enhanced cooling (TEFC VFD-rated motors usually have external cooling fins). However, we use non-VFD-rated TEFC motors on almost all of our brewery pumps. We almost always run them at less than full speed--mostly about 50%--and have never burned one out.
Thanks, I have heard of the cooling concern at low RPM. I have another DP with the same setup and the motor never even gets warm at low RPM. These vintage 3 phase motors were built like "brick shithouses". In addition a DP is typically a very low duty cycle machine vs. continuous operation.
 

Beerhippie

Well-known member
Joined
Oct 13, 2023
Messages
10,213
Location
Far NE Oregon
Thanks, I have heard of the cooling concern at low RPM. I have another DP with the same setup and the motor never even gets warm at low RPM. These vintage 3 phase motors were built like "brick shithouses". In addition a DP is typically a very low duty cycle machine vs. continuous operation.
I think the low-speed problems from using a VFD are mostly with TEFC (Totally Enclosed, Fan-Cooled) motors as they're a bit cooling-limited to begin with. I doubt that old motors with the air flowing through the windings would be as touchy. Still, our TEFC non-rated motors don't seem to have problems.

As for the bearings, I'm willing to bet a beer that the motors rated for 1750rpm use the same bearings as those that run at 3500 @60cps.
 

DesertDan

New member
Joined
Nov 25, 2024
Messages
2
Very nice restoration Dave. I'm in the process of completing such on a 1943 variation that I recently picked up. You sure got the internals of that motor clean! Would you mind sharing the process you used to do that? I've yet to disassemble my motor, were the bearings difficult to remove?

I'm also really interested in the new motor plate you had printed up. Did you create an artwork file for them to print from? I'm assuming the Delta nameplate was done the same way?
 
OP
D

Davefr

Well-known member
Joined
Jan 7, 2010
Messages
11,868
Location
OR
Very nice restoration Dave. I'm in the process of completing such on a 1943 variation that I recently picked up. You sure got the internals of that motor clean! Would you mind sharing the process you used to do that? I've yet to disassemble my motor, were the bearings difficult to remove?

I'm also really interested in the new motor plate you had printed up. Did you create an artwork file for them to print from? I'm assuming the Delta nameplate was done the same way?
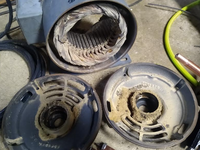
For the motor, I used a combination of CRC QD Electronics cleaner spray and mineral spirits with a toothbrush. It took a while but worked pretty well. Don't use anything stronger or you risk damaging the windings insulation coating. The bearings came off pretty easily with a gear puller. These three phase motors are very easy to work on since there's no centrifical starter to get in the way. I rebuilt the original Hoover bearings. (I prefer to keep quality OEM bearings whenever possible). Vintage DP's almost never have worn out bearings.

I found a generic Delta motor nameplate image online that was a pretty close match and used Photoshop to modify it with the actual data/wiring diagram from my original motor. (vintagemachinery.org has a large collection of images in their wiki). I used Bayphoto to print on aluminum with their direct on metal printing process.

Hope this helps.

motor tag.jpgScreenshot 2023-07-28 214952.jpgoriginal motornameplate.jpg
 

DesertDan

New member
Joined
Nov 25, 2024
Messages
2
Very helpful info Dave. Thank you!

Another question: you mentioned that you restored the depth gauge and nameplate, what did you find worked best for this without damaging the paint?
 
Last edited:

ching0n

Well-known member
Joined
Jul 21, 2016
Messages
1,496
I decided to use a 3 phase 1HP Delta 86-920 and VFD. The motor was filthy buy cleaned up nicely. I has Bayphoto print a new aluminum nameplate.
P1110515.jpgP1110517.jpgP1110521.jpgP1110532.jpg
The quill/spindle assembly/and motor bearings were all rebuilt. Ultrasonically cleaned inspected and packed with Mobil Polyrex EM grease. The DP bearings were New Departure and the motor bearings were Hoover. All were in perfect condition once cleaned. I refuse to replace these quality bearing as long as they are good.

P1110544.jpgP1110545.jpgP1110546.jpg

I was able to restore the depth guage dial and nameplate.

P1110535.jpg
OP, are these motors just held by the 4 bolts and pressure @ the endcaps? I'm prying one apart to clean but am afraid if the shaft or rotor is captured some other way or if something is catching inside. Do you have a trick to split open?
 
OP
D

Davefr

Well-known member
Joined
Jan 7, 2010
Messages
11,868
Location
OR
OP, are these motors just held by the 4 bolts and pressure @ the endcaps? I'm prying one apart to clean but am afraid if the shaft or rotor is captured some other way or if something is catching inside. Do you have a trick to split open?
The 4 bolts is the only thing holding on the end caps. Just tap around the perimeter of the end cap seams and they'll gradually separate. There might be a little get started notch. A screwdriver will work just fine. Once you have a gap, use a puller to pull the end cap off the rotor's shaft.
 

ching0n

Well-known member
Joined
Jul 21, 2016
Messages
1,496
The 4 bolts is the only thing holding on the end caps. Just tap around the perimeter of the end cap seams and they'll gradually separate. There might be a little get started notch. A screwdriver will work just fine. Once you have a gap, use a puller to pull the end cap off the rotor's shaft.
yeah, figured I needed a puller so ordered one. I think I'll use the the three threads for the shaft caps to pull from. FWIW: I think an 18$ steering wheel puller from HF could work here w/long machine screws.

I ordered something like this w/a few more bits:
 
Last edited:
OP
D

Davefr

Well-known member
Joined
Jan 7, 2010
Messages
11,868
Location
OR
yeah, figured I needed a puller so ordered one. I think I'll use the the three threads for the shaft caps to pull from. FWIW: I think an 18$ steering wheel puller from HF could work here w/long machine screws.

I ordered something like this w/a few more bits:
That might work but I used a large 2 jaw puller that grabbed the inside edges of the end caps. I'd estimate the diameter of the end cap is about 10" or so. It doesn't take extreme force. You might even be able to gradually tap the shaft out if you can secure the end caps.
 

ching0n

Well-known member
Joined
Jul 21, 2016
Messages
1,496
That might work but I used a large 2 jaw puller that grabbed the inside edges of the end caps. I'd estimate the diameter of the end cap is about 10" or so. It doesn't take extreme force. You might even be able to gradually tap the shaft out if you can secure the end caps.
I tried tapping and had actually gotten some space in between end caps but stopped & came here for answers, I think this motor is very good condition and tighter than expected. I did not consider a larger jaw puller until you brought it up in prior post but I need a bearing puller of some sort anyway. I may end up making studs if I can't find long enough machine screws and/or weld bolts head to head for the kit I bought to work.
 

Provincial

Well-known member
Joined
Sep 21, 2011
Messages
6,879
Location
Near Salem, OR
Many times I've used threaded rod ("all thread") from the hardware store to make puller rods. You can get alloy steel threaded rod from industrial supply sources if needing higher strength. Both coarse and fine threads are available if you hunt around.
 

ching0n

Well-known member
Joined
Jul 21, 2016
Messages
1,496
Many times I've used threaded rod ("all thread") from the hardware store to make puller rods. You can get alloy steel threaded rod from industrial supply sources if needing higher strength. Both coarse and fine threads are available if you hunt around.
I ended up mig welding 3 flat head SAE screws (motor cap) onto m10 bolts (puller) I ground flat, worked a treat....except I didn't pay attention to the fan and ended up pulling it through the wrong side :mad:. Luckily it bent back into shape. I re-enameled any nicks in the wiring that seemed suspect:

1749676386921.png1749676442530.png1749676488075.png
After a coat of paint and 2nd tear down because one bearing was shot....I had some new spare 6204's chicom from a lawn mower fix...Threw it on a 25$ aliexpress VFD & left over mini split chord:
1749676508454.png
 
To avoid these ads, REGISTER NOW!
Top Bottom