To avoid these ads, REGISTER NOW!

Demetri's Projects

demetri94

Active member
Joined
Feb 13, 2012
Messages
29
Location
Ontario, Canada
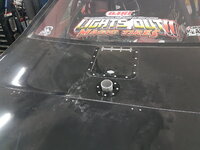
Hi everyone, I have been a long time subscriber but haven't posted too much. Here are some random projects and things I have worked on over the years. Hope you enjoy. Here is my old race car I built in 2008. Wolfe racecraft roll cage I installed, 408ci turbo, C4. Car went 9.40@150 in 2009.
 

Attachments

  • 20201021_193255.jpg
    20201021_193255.jpg
    260.7 KB · Views: 157
  • 20201021_193251.jpg
    20201021_193251.jpg
    266.6 KB · Views: 90
  • 20201013_213502.jpg
    20201013_213502.jpg
    340.8 KB · Views: 80
  • 20201013_213424.jpg
    20201013_213424.jpg
    267.7 KB · Views: 78
To avoid these ads, REGISTER NOW!
OP
D

demetri94

Active member
Joined
Feb 13, 2012
Messages
29
Location
Ontario, Canada
Some more interior pics and engine bay pictures.
 

Attachments

  • 20210125_171918.jpg
    20210125_171918.jpg
    252.8 KB · Views: 68
  • 20210125_171856.jpg
    20210125_171856.jpg
    335.3 KB · Views: 64
  • 20210216_163720.jpg
    20210216_163720.jpg
    379.5 KB · Views: 55
  • 20210216_163745.jpg
    20210216_163745.jpg
    346.7 KB · Views: 62
OP
D

demetri94

Active member
Joined
Feb 13, 2012
Messages
29
Location
Ontario, Canada
A friends car I have done some work on over the years. 5" Intake pipe I built for his new procharged combo. This is a water tank I built a few years back. Now he is running methanol and not using water so I have modified it to be the puke tank in case things go wrong in up front.
 

Attachments

  • 20210504_211405.jpg
    20210504_211405.jpg
    482.1 KB · Views: 60
  • 20210520_215303.jpg
    20210520_215303.jpg
    449.4 KB · Views: 58
  • 20210520_215357.jpg
    20210520_215357.jpg
    278.9 KB · Views: 52
  • 20210529_165142.jpg
    20210529_165142.jpg
    286.5 KB · Views: 61
OP
D

demetri94

Active member
Joined
Feb 13, 2012
Messages
29
Location
Ontario, Canada
Aluminum fuel cell I built for the same car, holds 4 gallons.
 

Attachments

  • 20210531_220207.jpg
    20210531_220207.jpg
    384.6 KB · Views: 48
  • 20210601_214333.jpg
    20210601_214333.jpg
    324.9 KB · Views: 46
  • 20210602_200936.jpg
    20210602_200936.jpg
    308.4 KB · Views: 46
  • 20210602_220526.jpg
    20210602_220526.jpg
    397.8 KB · Views: 41
  • 20210602_201045.jpg
    20210602_201045.jpg
    381.8 KB · Views: 51
OP
D

demetri94

Active member
Joined
Feb 13, 2012
Messages
29
Location
Ontario, Canada
Here is a few pictures of the fuel cell installed on the car with the charge pipe finished. I also grafted the upper rad support back in to clear the charge pipe. I added a heat shield to the passenger side header as the fuel cell was fairly close.
 

Attachments

  • 20210605_152938.jpg
    20210605_152938.jpg
    350 KB · Views: 53
  • 20210605_135451.jpg
    20210605_135451.jpg
    200.3 KB · Views: 53
  • 20210605_152943.jpg
    20210605_152943.jpg
    434.1 KB · Views: 70
OP
D

demetri94

Active member
Joined
Feb 13, 2012
Messages
29
Location
Ontario, Canada
Thanks. I believe he was right around 30lbs of boost, pictures must make it look bigger than it is. It's actually a small block...4xx cubic inch motor(dont remember exact). Big cylinder heads lol:) He runs no time events, locally here in Canada and has been to a few events in the US as well
 
Last edited:
OP
D

demetri94

Active member
Joined
Feb 13, 2012
Messages
29
Location
Ontario, Canada
A current project I am working on. Its a 1945 Studebaker M15. Started replacing the floor pans. The lower sections are production pieces, the upper floor pan area are not available. I had to fabricate those and the transmission inspection cover from scratch. If anyone is interested you can follow the build on my youtube channel, link is in my signature. I will post some more pictures of the other areas I am working on. I have started repairing the box as well. Thanks for loooking!
 

Attachments

  • 20211118_084405.jpg
    20211118_084405.jpg
    314.6 KB · Views: 47
  • 20211118_084334.jpg
    20211118_084334.jpg
    289 KB · Views: 39
  • MVI_2602_Moment.jpg
    MVI_2602_Moment.jpg
    175.9 KB · Views: 38
  • MVI_2607_Moment (2).jpg
    MVI_2607_Moment (2).jpg
    210.4 KB · Views: 46
OP
D

demetri94

Active member
Joined
Feb 13, 2012
Messages
29
Location
Ontario, Canada
Here are some pictures of the box repairs. both sides needed attention, the front crossmember and the floor of the box also needed to be repaired. I also made up the 2 lower apron pieces that bolt to the box as well as new mounts for the aprons. I will try and get some more pictures to show some of the other work.(my computer and picture skills aren't great, I forget to take pictures as I work:), hopefully that improves)The other neat thing about this truck is that it is a dump box.
 

Attachments

  • box.jpg
    box.jpg
    249.7 KB · Views: 35
  • box4.jpg
    box4.jpg
    210 KB · Views: 36
  • box2.jpg
    box2.jpg
    154.8 KB · Views: 36
  • box5.jpg
    box5.jpg
    152.6 KB · Views: 35
  • box6.jpg
    box6.jpg
    154.4 KB · Views: 35
  • box 3.jpg
    box 3.jpg
    139.7 KB · Views: 49
To avoid these ads, REGISTER NOW!
OP
D

demetri94

Active member
Joined
Feb 13, 2012
Messages
29
Location
Ontario, Canada
Some other pictures, this is a picture of the drivers side stake pocket I repaired. I also remade the bracing under the floor. and around the transmission tunnel were the inspection cover bolts up to.
 

Attachments

  • stake.jpg
    stake.jpg
    180.8 KB · Views: 31
  • stake 2.jpg
    stake 2.jpg
    219.7 KB · Views: 29
  • bo.jpg
    bo.jpg
    309 KB · Views: 29
  • tru.jpg
    tru.jpg
    280.8 KB · Views: 39
Last edited:
OP
D

demetri94

Active member
Joined
Feb 13, 2012
Messages
29
Location
Ontario, Canada
Front panel of the box made from piece of sheet, broke both ends and welded on a piece of 1.250 tube across the top. Welded 2 passes across the top and ground down to blend in. The tube had a slight bow to it after all the welding so I used my tig torch to run a pass across the opposite side(no filler or melting of metal) just heated red to shrink the tube back straight. Also fabricated the floor pan of the box from scratch as well.
 

Attachments

  • box floor.jpg
    box floor.jpg
    192.3 KB · Views: 31
  • box1.jpg
    box1.jpg
    200 KB · Views: 50
OP
D

demetri94

Active member
Joined
Feb 13, 2012
Messages
29
Location
Ontario, Canada
Found some more pictures of the mustang I was working on a while ago, here is a picture of the tube I added in place of the factory radiator support and also welded in a bumper support to keep the bumper from caving in at speed.
 

Attachments

  • rad support.jpg
    rad support.jpg
    422 KB · Views: 51
OP
D

demetri94

Active member
Joined
Feb 13, 2012
Messages
29
Location
Ontario, Canada
Truck cab is primed and painted, also primed the box as well. Don't mind the dates in the picture, they are incorrect(not set).
 

Attachments

  • box4.JPG
    box4.JPG
    257.1 KB · Views: 31
  • box3.JPG
    box3.JPG
    167.7 KB · Views: 27
  • box.JPG
    box.JPG
    222.7 KB · Views: 29
  • box2.JPG
    box2.JPG
    272 KB · Views: 30
  • MVI_3561_Moment.jpg
    MVI_3561_Moment.jpg
    201.5 KB · Views: 39
To avoid these ads, REGISTER NOW!
Top Bottom