To avoid these ads, REGISTER NOW!

Between 485 & 705 SQ/FT Denver MCM garage expansion

Workspaces between 485 and 705 squarefeet.
OP
K

kwyjibo

Well-known member
Joined
Apr 8, 2008
Messages
743
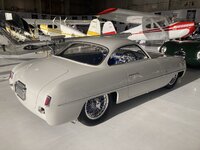
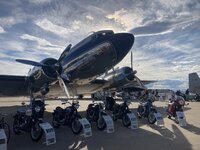
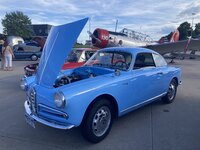
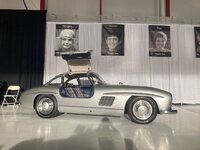
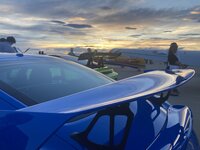
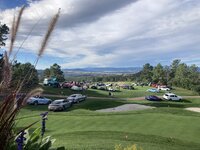
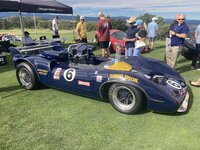
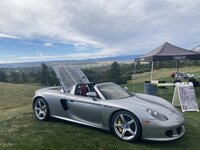
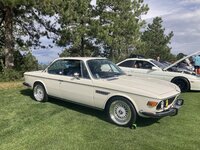
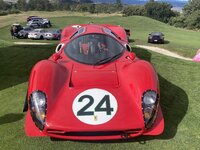
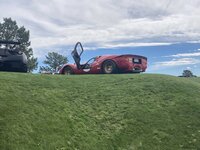
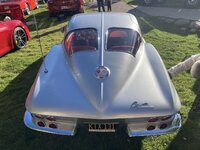
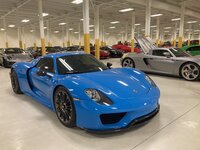
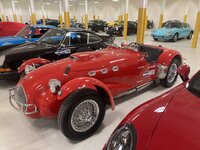
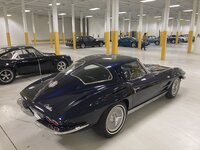
A pleasant surprise disrupted my recovery weekend from the Tacoma to Denver drive - a friend had an extra ticket to the Morgan Adams Foundation Concours d'Elegance, a wings and wheels event benefiting a local children's cancer foundation. One of my all-time favorites made an appearance and is pictured below. Hint: not the DC-3.

IMG_6808 copy.jpgIMG_6800 copy.jpgIMG_6798 copy.jpgIMG_6804 copy.jpg
IMG_6815 copy.jpgIMG_6806 copy.jpgIMG_6826 copy.jpg
 
To avoid these ads, REGISTER NOW!
OP
K

kwyjibo

Well-known member
Joined
Apr 8, 2008
Messages
743
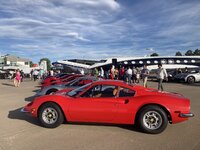
The concours was held Saturday night, this morning I further lucked out and was invited to hitch a ride into the more informal cars and coffee. Some of the same cars made an appearance at the golf course, but it was nice to be able to get a better look, away from the previous night's crowd. Overall, a great and unexpected couple of weekend automotive events

IMG_6834 copy.jpgIMG_6867 copy.jpgIMG_6865 copy.jpgIMG_6840 copy.jpg
IMG_6852 copy.jpgIMG_6855 copy.jpgIMG_6892 copy.jpg
 
Last edited:
OP
K

kwyjibo

Well-known member
Joined
Apr 8, 2008
Messages
743
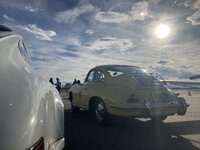
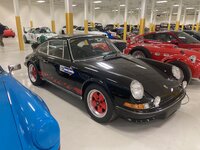
I stopped by the Vail Concours last weekend. I haven't been in a couple years so I was willing to travel into the mountains to check it out. My impression was that it had lower attendance and that they didn't take advantage of the setting and place the cars throughout the village. (like they did the last time I was there). here are a few photos
IMG_6918 copy.jpgIMG_6952 copy.jpgIMG_6946 copy.jpgIMG_6930 copy.jpg
a nice selection from a local Porsche collection made an appearance
IMG_6934 copy.jpgIMG_6933 copy.jpgIMG_6938 copy.jpg
But my favorite car of the day was a street parked 1968 softwindow targa
IMG_6911 copy.jpg
 

Thirdyfivepickup

Well-known member
Joined
Nov 15, 2016
Messages
1,953
Location
Portage, Indiana
A pleasant surprise disrupted my recovery weekend from the Tacoma to Denver drive - a friend had an extra ticket to the Morgan Adams Foundation Concours d'Elegance, a wings and wheels event benefiting a local children's cancer foundation. One of my all-time favorites made an appearance and is pictured below. Hint: not the DC-3.

IMG_6808 copy.jpg

that is about the only angle that 1100 looks good. This shot looks really nice.
 
OP
K

kwyjibo

Well-known member
Joined
Apr 8, 2008
Messages
743
that is about the only angle that 1100 looks good. This shot looks really nice.
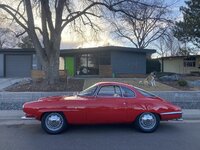
I have to agree. IMHO, the frontend really lets the whole design down. I understand the whole jet age design trend at the time, but I don't think this was the best interpretation of it. My first car was a '64 Karmann Ghia and it was very interesting to see the ideas (especially from the windshield back) that gave rise to my car a few years later
Here are the other photos of it from that event
IMG_6819 copy.jpgIMG_6817 copy.jpg
and, from the first time I saw the car at the 2021 Automezzi show
IMG_0279 copy.jpgIMG_0269 copy.jpgIMG_0268 copy.jpg
 
OP
K

kwyjibo

Well-known member
Joined
Apr 8, 2008
Messages
743
update on projectconda
I stopped by the paint shop yesterday to check out the paint sample and gave the go-ahead for the order. Another step closer to paint.
Here is the primered body
IMG_2219.JPG
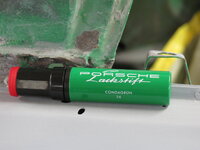
and a shot with a condagreen paint pen prop
IMG_2222.JPG
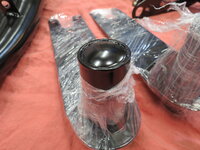
also finally got around to fitting an endcap to the spring plates. I had to pop these off to get to the rusted-in torsion bars. They're actually Dorman freeze plugs for a Ford Econoline engine. They were just a couple mm too large so a bit of filing was required to fit them into position
before IMG_6968.JPG afterIMG_6969.JPG
They're now at the powdercoater along with the trailing arms (post #1018)
 
OP
K

kwyjibo

Well-known member
Joined
Apr 8, 2008
Messages
743
IMG_6985.JPG

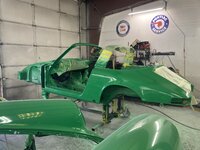
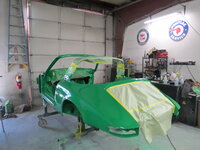
the removable panels have been taken off of ProjectConda in preparation for paint!!! It should be in the booth next week. I've been waiting for this for a long time.

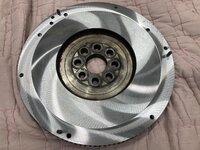
On the other end of the spectrum, I had a BMW flywheel resurfaced while I waited. I fear the end is near for the '91 e30 so I'm finally getting the motivation to swap in the 5-speed manual into the e12. Typical me to wait until the return of ProjectConda is within sight to put another project on the list
IMG_6990.JPG
 

Blackbyrd

Well-known member
Joined
Nov 28, 2020
Messages
1,170
Location
TN
Being stuck in the sheet metal phase on one of mine, I can only imagine how excited you are to be so close to painted!

That's awesome, I've been a around here a few years and you've been working in it for quite some time.
 
OP
K

kwyjibo

Well-known member
Joined
Apr 8, 2008
Messages
743
Being stuck in the sheet metal phase on one of mine, I can only imagine how excited you are to be so close to painted!

That's awesome, I've been a around here a few years and you've been working in it for quite some time.
You have a lot of patience to stick around, thanks!

Part of the reason for this thread is to help me keep track of info, including dates. I went through the earlier posts and was surprised at how long I really have been waiting. I tell myself that the extra time allows me to get things right but the reality is that I let shop #2 string me along for almost two years before I woke up and moved on.

I'm nothing if not persistent. it may take a while, but ProjectConda will get done.
 
OP
K

kwyjibo

Well-known member
Joined
Apr 8, 2008
Messages
743
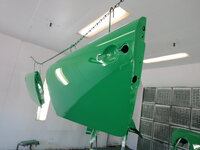
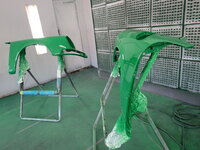
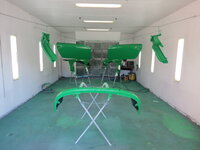
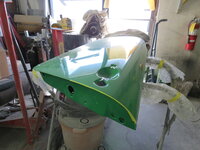
Jim, the painter, has been great to work with, always answering my many questions and putting up with my requests. One is that I've never seen painting in action... Well, I got a call yesterday (Monday) from him - if I could come over, I could see him paint. Unfortunately I couldn't make it over to the shop until this morning but this is what I saw:
IMG_2245 copy.jpg
IMG_2233 copy.jpg
IMG_2230 copy.jpg
IMG_2242 copy.jpg
IMG_2254 copy.jpg
The tub is next but he should have all the paint sprayed by the next time that I can make it in on Friday.
 
OP
K

kwyjibo

Well-known member
Joined
Apr 8, 2008
Messages
743
quick updates
as of this morning projectconda is waiting for the paint booth, so the painter has started to color sand the panels from earlier this week
IMG_2264 copy.jpg
also, the last (at this point) batch of powder coating is complete
IMG_2279 copy.jpgIMG_2283 copy.jpg
these are the spring plates that got new endcaps a few posts back and the trailing arms that had the pivot pin installed
 

hewey

Well-known member
Joined
Sep 5, 2014
Messages
1,681
Location
Blue Mountains, Australia
Great to see some paint being laid down! Huge milestone.

I hadn't seen that Fiat 1100 before. When you compare it to the standard offerings from the mainstream American manufacturers of the time, it's pretty damn sleek for 1953.
 
OP
K

kwyjibo

Well-known member
Joined
Apr 8, 2008
Messages
743
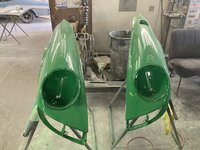
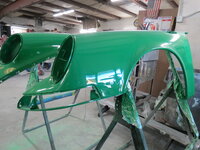
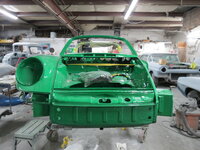
The tub was sprayed on Friday (WooHoo!). I stopped by on Tues morning and they had already color sanded most of it. it was magnificent! I'm very excited
IMG_7073 copy.jpg
IMG_2304 copy.jpg
IMG_2291 copy.jpg
The sanding of the panels that were painted previously is now complete and they are ready to be mounted. The next step will be to spray black paint in the wheel wells and engine compartment once the fenders are on. The final polishing of the green paint will be the last step but I was already impressed by the shine of the color sanded paint
IMG_2307 copy.jpg
IMG_7080 copy.jpg
IMG_2308 copy.jpg
The other thing that I noticed is just how different the color looks in different light conditions
IMG_2302 copy.jpg
 
OP
K

kwyjibo

Well-known member
Joined
Apr 8, 2008
Messages
743
progress... but a step back, too.
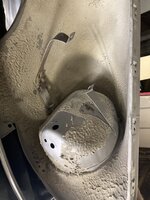
I didn't notice that the replacement fender from Porsche did not have a strap for mounting the fuel expansion tank. You can see it on the old fender, welded to the back of the headlight bucket
IMG_7144 copy.jpg
So, the newly painted fender is back at the metal shop to get a strap. It should only need a small paint touchup since it's attached to the backside of the headlight bucket
Here is how ProjectConda's frontend is paused until the fender is back
IMG_2321.JPG kinda sad.
the passenger door will get fitted in the meantime.
IMG_2314.JPGIMG_2319.JPG
And here's a follow-up photo to one posted just before painting
IMG_2327.JPG
 
OP
K

kwyjibo

Well-known member
Joined
Apr 8, 2008
Messages
743
quick turnaround by Jon at the MetalSurgeon to get the straps onto the fender. I stopped by Jim's paint shop as he was fitting the fender. Once it's on, the wheelwells and engine compartment will get a coat of black paint. Then after the trunklid and driver door are mounted, Jim will give it a finishing polish. ProjectConda should be back in the garage soon!

IMG_2343.JPGIMG_2331.JPGIMG_2330.JPG
 
To avoid these ads, REGISTER NOW!
OP
K

kwyjibo

Well-known member
Joined
Apr 8, 2008
Messages
743
Exciting times! Just a “few” more steps and it will back on the road! Great progress!!
just a few!

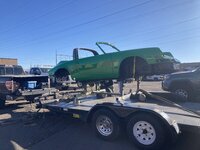
Yesterday was a huge milestone - ProjectConda was on the road, unfortunately it was on a trailer.
IMG_7271 copy.jpg
But, this also means that it is back in the garage and ready for reassembly.
IMG_7279 copy.jpg
I don't know how much I'll get done in the next few days because of Thanksgiving but I'm aiming to get some of the new seals installed to give them a headstart on compressing to seat better and to give some protection to the painted edges.
But first I did feel the need to test fit the trunk emblem for a photo
IMG_7286.JPG
 
OP
K

kwyjibo

Well-known member
Joined
Apr 8, 2008
Messages
743
No updates on the targa but I did have some of the guys over for a Sunday morning coffee and viewing of the fresh paint. I forgot to warn my neighbors so I'm sure they were wondering what was going on.
IMG_7291 copy.jpg
IMG_7288 copy.jpg
IMG_4374 copy.jpg

Also, my wife recently had a business trip to Japan and other than a few photos of her meals, she sent me this:
IMG_4206.JPG
Her hosts took her to the Toyota museum where she recognized my favorite Japanese car, the 2000GT
 
OP
K

kwyjibo

Well-known member
Joined
Apr 8, 2008
Messages
743
Always great getting caught up on your builds and adventures! Thanks!
Great to see the car back home, and that you're stoked with the quality of their work.
thanks for following along. it's been a long wait

I need to get to my friends' shop to press various bushings and bearings into the suspension components before I can mount them. In the meantime I've been cleaning and rebuilding a bunch of parts, most of which don't make interesting photos. I've also been installing some of the more delicate parts to keep them safe. For example, the aluminum foil decals show even the smallest bends. Once they're stuck, they're safe
IMG_2472 copy.jpg
and some of the emblems
IMG_7323 copy.jpg
I just received in the mail a CDI unit that I had Ashlocktech rebuild for me. The unit looks brand new
IMG_7319 copy.jpg
I just rebuilt the original door stops because the new, current versions that were installed were too stiff and made a loud knocking sound. Here's a photo showing the new parts to the left, the rebuilt in the middle, and the old on the right. Below are the bars that move between the spring-loaded rollers, the bumps on the bars provide the resistance to keep the door partially open. You can see that the original on the right has nearly worn away the bumps. I'm glad to report that the rebuilt unit works perfectly and, more importantly, silently.
IMG_7316 copy.jpg
Lastly, I got an early Xmas present: a Camel GT-inspired banner where Joe is driving a green targa
IMG_2498 copy.jpg
 
OP
K

kwyjibo

Well-known member
Joined
Apr 8, 2008
Messages
743
I promise to post updates on Projectconda soon. In the meantime....
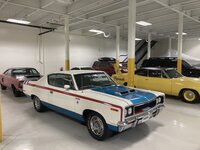
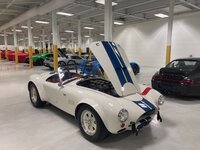
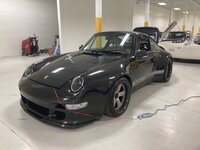
Rather than freeze outside the usual Sunday morning bakery hangout, this morning we got to enjoy our bagels and coffee here:
IMG_7435 copy.jpgIMG_7469 copy.jpgIMG_7438 copy.jpgIMG_7427 copy.jpgIMG_7425 copy.jpgIMG_7415 copy.jpgIMG_7416 copy.jpgIMG_7407 copy.jpgIMG_7430 copy.jpgIMG_7408 copy.jpg
um... wow!
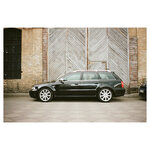
Is it wrong that I probably spent most of the time by the RS4 Avant
 

the lab

Well-known member
Joined
Mar 26, 2024
Messages
127
Location
Latvia, Europe
That’s awesome! The B5 RS4 is such a legend—proper widebody, twin-turbo V6, and just the right mix of raw and refined.

Assuming this year and next year there will appear more of those in stateside as they turn 25 years old this year.

I am itching to get mine back on the road once the weather improves!


003726700009.jpg
 
OP
K

kwyjibo

Well-known member
Joined
Apr 8, 2008
Messages
743
Here's the start of getting caught up on targa updates
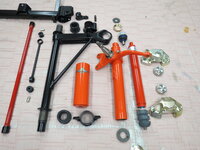
The major slowdown for the suspension has been the lack of a press which I needed to install the bushings and bearings. But they finally got done thanks to my friends at the local Porsche shop, Eisenbuds. They've been great with advise and letting me use the tools and equipment that I can't afford or have room for.
Also helpful: laying out the parts to know exactly what is missing - in this case I seem to have lost the brake caliper mounting bolts, otherwise the frontend looks complete.
IMG_2545 copy.jpg
The brake calipers, front disk/hubs, dampener/struts are all back together. Once the A-arm bushings were pressed on, the last larger pieces could be bolted together
IMG_2565 copy.jpg
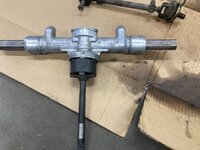
The steering rack is also ready to install, before and after:
IMG_7379 copy.jpgIMG_7382 copy.jpg
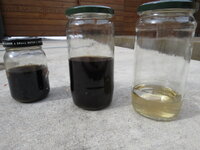
But... I'm waiting to finish the install of the new brake system, fuel lines and electrical harness before the suspension and steering go on because access is tight once the steering rack is in. The brake lines have been fitted and are ready to tighten. The electrical is mostly done - waiting on a few rubber grommets and plastic bits that didn't survive the previous 50years. The backordered fuel hoses took a while to get here but that was fine because it gave me time to flush the central tunnel fuel line. This car was forgotten in the mid90s so the fuel had turned to varnish by the time I found it. It took a can of lacquer thinner for each line (supply and return, the two open tubes above the master cylinder) to flow clean. The first few flushes came out thick, dark, smelly and sticky. By the end, the thinner came out the other end as clear as it went in.
IMG_7399 copy.jpgIMG_2567 copy.jpg
I've also recreated the fuel venting system and windshield washer system which I'll post when I work on the trunk. The last thing that needs to be done is to make new brake fluid feed lines. These are hard plastic lines between the reservoir and master that for some reason Porsche charges an insane amount of money for.

This is the view looking across to the garage from the dining table. My wife keeps tabs on me by looking for my head to pop up occasionally so she knows that the various fumes haven't knocked me out.
IMG_2557 copy.jpg
 

LaCorski

Well-known member
Joined
Oct 11, 2013
Messages
62
Location
Central Washington
Thanks for the extra pics above! Such a cool car, a bit overdone maybe but like that every detail of the car has been enhanced. Luv the project you are working on, the car (and the color) as well as all the house upgrades are just awesome! Thanks for sharing with us throughtout the years...
 
OP
K

kwyjibo

Well-known member
Joined
Apr 8, 2008
Messages
743
Amazing collection! One owner or a shared storage joint?

Conda is coming along nicely. Do you have a target completion date?

:beer:
That space is a commercial storage facility - anybody willing to pay can get space. But, the majority of the value in there is held by a couple key individuals. I wasn't sure how much to show but apparently they want the exposure. Their site is bluechipfleet.com

I'm hoping to drive the car this summer, but I'm not pushing for a particular date at the cost of getting it done right. I always laugh at the "we need to get this car done for next week's [show/auction/etc]" in every car restoration or customization series. I guess that I generally go by a modified version of the saying - good, fast or cheap: pick one.
 
OP
K

kwyjibo

Well-known member
Joined
Apr 8, 2008
Messages
743
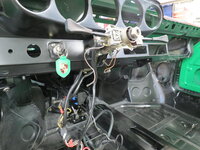
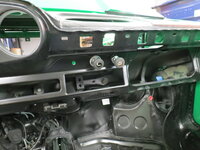
I had some time today to work on the steering column. At this point the breakaway security bolts are finger tight until I'm sure that everything is correct. Good thing because I had to loosen the column a couple times: first, to get a couple electrical connectors through the same dash opening and the second time to get the ignition switch/steering lock positioned. Then I took a couple hours to clean and lube the column stalk switches before installing - they now move smoothly and have a satisfying 'click'. Oh, and replaced the rubber paddles on the ends because both had hardened and one had chew marks from a mouse.
One problem that I'm finding is that some of the wire labels are missing. I'm actually surprised that more of the tape labels didn't fall off in the years of sitting, media blasting, body and paint work. And, I didn't take many backup notes.
IMG_2607 copy.jpg
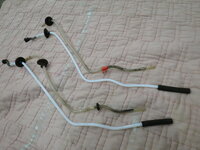
The braking system is now complete up to the hardline attachment points. The last step was making new brake fluid feed lines using the originals to recreate the bends.
IMG_2590 copy.jpg
You can see them as the two white tubes coming through the body and attaching to the master cylinder.
IMG_2594 copy.jpg
After cutting across the driver's footwell, the other ends go into the trunk and connect to the brake fluid reservoir (not yet in place in the photo)
IMG_2597 copy.jpg
The remaining brake components - hose to calipers - are waiting to be installed... but the suspension needs to go on first. Actually, I think my priority will be focused on the electrical system because I'm afraid that it will take longer to sort out than I originally thought.
 
OP
K

kwyjibo

Well-known member
Joined
Apr 8, 2008
Messages
743
So cool to see this project nearing completion!

You might want to consider skipping the breakaway bolts on the column. Removing them is such a pain, if you ever have future electrical issues.
yup, I was thinking that the bolts are generally hidden but easy to get to so either I wouldn't snap them until I was absolutely certain everything was ok (like after driving for a year) or use regular bolts. We'll see how much trouble this car gives me - remember, it wasn't functioning when I bought it so I have no idea if it already had any electrical gremlins. The wiring is in good condition but I have found some cut or split insulation that needed repairing. But I can say with certainty that I've never had a need to open up the red Carrera in the 17 years that I've owned that car so it gives me confidence to snap the bolts if this car performs as it should.

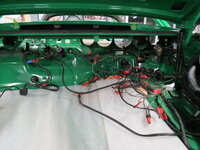
ProjectConda update: I'm slowly getting the electrical back together
IMG_2617 copy.jpgIMG_2614 copy.jpgIMG_2613 copy.jpg
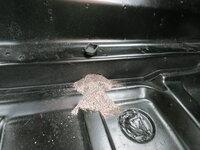
And lastly, I found a plug that I missed before sending it out for body work. There was quite a pile of blasting media stuck behind it!
IMG_2611.JPG
 
OP
K

kwyjibo

Well-known member
Joined
Apr 8, 2008
Messages
743
A friend stopped by last evening with his latest purchase:
IMG_7546 copy.jpg
I'm curious, how many out there know what it is?

The funny thing about this is now I'm one of the last of my group of friends without an Italian classic. Despite the fact that I've been a proponent of small, often weird Italian cars. Maybe one day.
 
To avoid these ads, REGISTER NOW!
Top Bottom