To avoid these ads, REGISTER NOW!

Between 485 & 705 SQ/FT Denver MCM garage expansion

Workspaces between 485 and 705 squarefeet.

bdbecker

ALLIANCE MEMBER
Joined
Nov 18, 2015
Messages
5,580
Location
Iowa
...I'm still debating on the color for the door. The door directly across, going into the house, is orange. The future door that will secure the area between the house and garage will be lime green. I'm thinking the door into the garage should be yellow or red, any comments on this are appreciated...

Since you are using secondary colors on your other doors, switching to a primary color for your garage door could be a little off-putting. Teal blue pops up on a lot of color pallets with orange and lime green.

View media item 105604
 
To avoid these ads, REGISTER NOW!

smschriefer

Well-known member
Joined
May 28, 2009
Messages
842
Location
Yorktown, VA
I agree with bdbecker on not doing red. I'm a uniformity guy. Orange for the main entrance into the house and if you are going lime green for the door between the house and garage, I'd do a dark gray to indicate it is not a door into the main house. I'd want people drawn to the house entry and not distracted by other door options. I say this as I have a main house entry and a mudroom entry in close proximity. It is impossible to get people to just use one entrance, or for package delivery. Both of my doors are the same color (almost the blue above). I think if one was more neutral I could resolve the issue as the brighter door would lead people to the primary entrance.
 
OP
K

kwyjibo

Well-known member
Joined
Apr 8, 2008
Messages
743
Thanks for the comments - gives me some things to think about. One thing is that my wife wants me to use the leftover paint from either the front door (orange) or the brick front wall (dark grey).

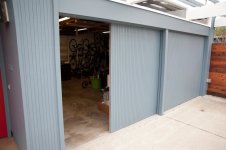
The exterior of the new wall is now compete, no photo because it looks a lot like it did in the last one. I've been working on the interior side for the past couple days. It's basically done but I'm waiting on a backordered slatwall which will go into the unfinished section in the photo. I have pre-painted T1-11 boards to finish above the slats once they arrive. Next on the list is to paint the wall on the left
attachment.php
 

Attachments

  • DSCN6230.jpg
    DSCN6230.jpg
    133.4 KB · Views: 1,638

Arclitgold

Well-known member
Joined
Dec 20, 2017
Messages
317
I love the way that T111 looks inside! I’m considering doing the same


Sent from my iPhone using Tapatalk
 
OP
K

kwyjibo

Well-known member
Joined
Apr 8, 2008
Messages
743
Thanks arclitgold! I'm happy with how it turned out. But if I had known that the lumberyard was going to change suppliers I would have waited until the exterior was completely finished before using any on the interior so that the exterior walls wouldn't have any change in finish.
I have a couple of quick updates
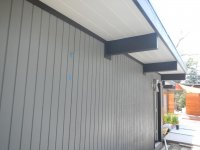
Started prepping for paint. I really don't enjoy painting and prep work is probably the worst part for me. My old arms don't like working above my head all day. The eaves and beams are done. I'm working on fascia now. I did give the beams a quick coat of paint to give a little protection from the daily afternoon thunderstorms
attachment.php


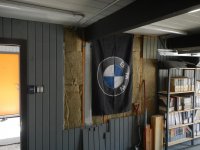
The slat walls are still back ordered but now I have a shipping date: first week of Sept. My wife asked if there was something I could do about the exposed insulation:
attachment.php


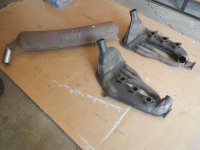
The targa should be coming home soon so I'm starting to drag out more 911 parts to inspect and repair/clean. These are the original 911 heat exchangers and exhaust. I shook and blew out the leaves, dead moths and grit from them. I'll check them for leaks and, if ok, get them blasted for repainting.
attachment.php
 

Attachments

  • DSCN6234.jpg
    DSCN6234.jpg
    146.6 KB · Views: 1,499
  • DSCN6236.jpg
    DSCN6236.jpg
    134.4 KB · Views: 1,494
  • DSCN6238.jpg
    DSCN6238.jpg
    116.7 KB · Views: 1,497
Last edited:

Griff79

Well-known member
Joined
Jun 9, 2018
Messages
584
Location
Denver
Very nice work! I am in Arvada, what part of the city are you in? Monaco and Cherry ish?
Griff
 
OP
K

kwyjibo

Well-known member
Joined
Apr 8, 2008
Messages
743
Very nice work! I am in Arvada, what part of the city are you in? Monaco and Cherry ish?
Griff

Close - There are two mid-century modern neighborhoods southwest of Monaco and Cherry. We're in the one near Holly and Jewel.
I need to get up to Arvada. I have a friend living in the MCM neighborhood just northwest of Olde Town. I never knew those houses were there until he told me that he lived in one.

No updates. I took a few days off. Slacker
 
OP
K

kwyjibo

Well-known member
Joined
Apr 8, 2008
Messages
743
Ever have one of those weeks?
attachment.php

At least the neighborhood gas station is having fun with everything
attachment.php

The exterior of the new wall is completely done. I'm still waiting on the slat wall to finish the interior. And, I still need to paint the door. The tape on the wall is the beginning of laying out the wall between the house and garage.
attachment.php
 

Attachments

  • DSCN6243.jpg
    DSCN6243.jpg
    115.3 KB · Views: 1,271
  • IMG_0579.jpg
    IMG_0579.jpg
    148.1 KB · Views: 1,262
  • DSCN6241.jpg
    DSCN6241.jpg
    129.7 KB · Views: 1,257

LaCorski

Well-known member
Joined
Oct 11, 2013
Messages
62
Location
Central Washington
Ever have one of those weeks?
attachment.php

At least the neighborhood gas station is having fun with everything
attachment.php

The exterior of the new wall is completely done. I'm still waiting on the slat wall to finish the interior. And, I still need to paint the door. The tape on the wall is the beginning of laying out the wall between the house and garage.
attachment.php

Ouch! Yep, been there, done that! House is looking great. Save the dinosaurs!! Ha!
 

Arclitgold

Well-known member
Joined
Dec 20, 2017
Messages
317
Oof sorry about the tire! Glad everything else is going well!


Sent from my iPhone using Tapatalk
 
OP
K

kwyjibo

Well-known member
Joined
Apr 8, 2008
Messages
743
Success! Unfortunately it probably won't roll back out under it's own power for a couple years....
attachment.php

attachment.php
 

Attachments

  • DSCN6251.jpg
    DSCN6251.jpg
    135.1 KB · Views: 1,195
  • DSCN6253.jpg
    DSCN6253.jpg
    147.4 KB · Views: 1,199
OP
K

kwyjibo

Well-known member
Joined
Apr 8, 2008
Messages
743
Wahoooo!!! It’s home!!
Indeed! But I need to ignore it and focus on finishing the house projects. So what did I do this afternoon? (answer: start working on the car)

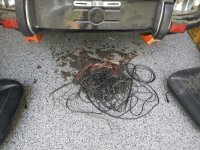
I started going through the trunk and noticed some non-OEM wiring. Never a good sign. It seems that the car previously had a cell phone, in addition to an aftermarket alarm and stereo. At least this now solves the mystery of the extra hole at the top of the decklid: cellular antenna. It's amazing that the installer thought it was a good idea to roll the excess wiring into a ball the size of a small melon and zip tie it to the back of the wiring cover. Anyway, here's a photo of the cell phone wiring. I'll yank the alarm next but that will take some thought as I try to piece the circuits back together
attachment.php

I also love when they use a can opener to make holes in the bodywork. I'm wondering if there's enough material for me to bend the flap back and weld it shut
attachment.php

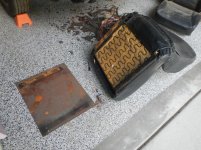
When I pulled the seats, they seemed heavier than I remembered... the homemade adapter (the seats are probably from a late 70s car with a narrower bolt pattern) was a solid steel plate!
attachment.php

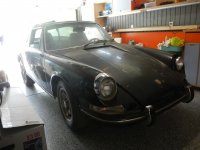
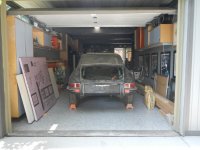
What a difference a day makes. Just 24 hours before the garage was housing a shiny E9, not a dusty mouse nest that smells like varnish. Goal for tomorrow morning - get the varnish-filled gas tank out to see how badly it's rusted
attachment.php
 

Attachments

  • DSCN6247.jpg
    DSCN6247.jpg
    131.4 KB · Views: 1,086
  • DSCN6258.2.jpg
    DSCN6258.2.jpg
    150.3 KB · Views: 1,083
  • DSCN6266.jpg
    DSCN6266.jpg
    158.3 KB · Views: 1,080
  • DSCN6268.jpg
    DSCN6268.jpg
    157 KB · Views: 1,078
OP
K

kwyjibo

Well-known member
Joined
Apr 8, 2008
Messages
743
Thanks guys
I didn't work on the car so the varnish tank will have to wait. I started on the front gate instead. I didn't get as far as I had hoped because I had to squeeze saw-time into the few minutes between my wife's zoom meetings. First I propped the longitudinal 4x4 that acts as the top rail connecting the house to the garage onto temporary cleats. Then I could measure and cut the posts. I also made a few cuts to the posts to make the 'exterior' stops for the frosted panes. This was actually a pain because of the bowing and twisting of the posts.
attachment.php

attachment.php
 

Attachments

  • DSCN6269.jpg
    DSCN6269.jpg
    143 KB · Views: 1,031
  • DSCN6271.jpg
    DSCN6271.jpg
    156.2 KB · Views: 1,024
OP
K

kwyjibo

Well-known member
Joined
Apr 8, 2008
Messages
743
I just got back from a quick trip out to the PNW. The trip was to visit the inlaws, but also squeezed in a visit to a Porsche supplier and some camping. We went to the Olympic National Park for a couple days. But it didn't matter that I was surrounded by nature, I seem to gravitate towards finding interesting roads to drive.
attachment.php

I picked up the slat wall from Home Depot a few minutes after getting home yesterday. It was an easy install and was on the wall by mid-morning today. I still need to finish some painting of the siding around it but the it was ready to start hanging stuff on. If anyone is thinking about the Proslat wall, here's a couple things that I learned: 1) the current HomeDespot price is the best. And, unlike Costco that only sold white slats, HD sells white, grey and charcoal. and 2) because of the way that the panels overlap, the bottom panel will be unsupported across the bottom. I made spacers that supported the bottom panel from panel cutoffs (I only wanted a 4'x7' section) but you can use anything that fills the area between the panel and the studs. The hanging system has a reasonable load rating, but the PVC panels seem a little flimsy. We'll see how they hold up over time
attachment.php
 

Attachments

  • IMG_0622.jpg
    IMG_0622.jpg
    148 KB · Views: 882
  • IMG_0669.jpg
    IMG_0669.jpg
    148.2 KB · Views: 890
Last edited:
OP
K

kwyjibo

Well-known member
Joined
Apr 8, 2008
Messages
743
I spent the last couple days working on the front gate. I still need to make the bottom rails, but I think you'll get an idea of my plan from the photos. The door and posts have been off and on more than a few times to get the fit right. Almost there...
attachment.php

attachment.php

I need to make a few adjustments to the framework. For example, I was too conservative in calculating the gaps around the door. The gap is so large that the latch doesn't catch the strike plate. ****. Also, a couple of the post brackets need to be rotated. Once I get the window frames aligned I can get the glass guy over to measure.
attachment.php
 

Attachments

  • DSCN6390.jpg
    DSCN6390.jpg
    118.4 KB · Views: 769
  • DSCN6392.jpg
    DSCN6392.jpg
    61 KB · Views: 767
  • DSCN6393.jpg
    DSCN6393.jpg
    150 KB · Views: 768

Arclitgold

Well-known member
Joined
Dec 20, 2017
Messages
317
Nice work! It’s shaping up though! I’m sure you’ll figure it out


Sent from my iPhone using Tapatalk
 
To avoid these ads, REGISTER NOW!
OP
K

kwyjibo

Well-known member
Joined
Apr 8, 2008
Messages
743
I made some progress on the frontgate, despite the fact that I didn't feel like doing anything in the heat and smoke here. It's been in the 90's and there's a red tint to the sky with all the smoke from the nearby fires. Nice sunsets though. We're getting occasional ash snowing down but amazingly real snow is predicted for tomorrow along with a greater than 50 degree drop in temperature. So I put the temporary downspout back up.
attachment.php

I painted the parts last week after I was satisfied with the fit of the joints. The bottom rails are sitting in notches and held in place with pocket screws. These should have no problem supporting 1/4" thick glass.
attachment.php

Arclitgold - I fixed the door gap by widening the notch in the top beam and tapping the post over. There's just a small gap in the window stop that needs to be filled.
attachment.php
 

Attachments

  • IMG_0681.jpg
    IMG_0681.jpg
    137.4 KB · Views: 1,458
  • IMG_0680.jpg
    IMG_0680.jpg
    92.2 KB · Views: 1,460
  • IMG_0678.jpg
    IMG_0678.jpg
    149.6 KB · Views: 1,474
Last edited:

Arclitgold

Well-known member
Joined
Dec 20, 2017
Messages
317
So gorgeous! Maybe I missed it, but what color are those posts painted? It’s perfect


Sent from my iPhone using Tapatalk
 
OP
K

kwyjibo

Well-known member
Joined
Apr 8, 2008
Messages
743
By the looks of your neighbors house, you must be in a MCM enclave.....
Yes! In fact, they house across the street is a mirror image of ours. You can see the original garage layout when built: single garage with attached carport.
So gorgeous! Maybe I missed it, but what color are those posts painted? It’s perfect
Thanks, I probably spent way too much time to find the colors so I appreciate it. The darker trim color is Benjamin Moore Nightfall #1596 and the body is Shaker Gray #1594. Speaking of which, I'm trying to decide on the color for the garage doors. The MCM keep-it-simple scheme usually tries to blend the garage doors in with the rest of the structure. Here's an example of an Eichler garage that has the door and it's trim matching the body.
attachment.php

So in keeping with this idea, for the garage door and it's trim, I can
1) paint the doors and the trim gray to match siding, beam and fascia remain black, or
2) doors, trim, beam and fascia painted black, siding is gray.
I'm leaning towards the black doors because it could help hide the patterns on the garage door panels.
It is freezing and snowing today, but I hope to have the front gate/wall ready for te glass guy to measure by the end of the week. I plan on finishing the paint on the front of the building while I wait for the glass.

As per the promise to my wife, I haven't put much work time into the targa while home projects are still ongoing. But I am spending time online to find parts that I will need later. You might remember that I picked up the engine grill a while back. Today a pair of H1 headlights, to replace the horrid sealed beam bulbs that were OEM back in 1970, showed up in the mail
attachment.php
 

Attachments

  • _EAS7979.jpg
    _EAS7979.jpg
    132.5 KB · Views: 1,351
  • IMG_0682.jpg
    IMG_0682.jpg
    154.5 KB · Views: 1,360

gearhead1960

ALLIANCE MEMBER
Joined
Mar 21, 2019
Messages
1,862
Location
Manassas, VA, a small blot in history
Today a pair of H1 headlights, to replace the horrid sealed beam bulbs that were OEM back in 1970, showed up in the mail
I remember those days when you prayed the inspector wouldn't pay attention to the illegal non-sealed beams. Every car I had back in the 80's and 90's that came with the conventional sealed beams got Hellas or Cibies Halogen headlight replacements. Then I had to find the "off-road" bulbs, like 75/100w. Nothing like blinding the oncoming traffic....:lol:
 
OP
K

kwyjibo

Well-known member
Joined
Apr 8, 2008
Messages
743
I got the framework measured for the glass, which means that I have a week to make sure everything is ready for the glass install. First thing was to finally hook up the Ring doorbell. I bought this almost a year ago and never installed it. The doorbell wiring is all new so I had to crawl under the house, drill holes and feed wiring. on the outside, I cut a shallow groove about 3/8" behind the front stop to leave room for the 1/4" glass. It goes behind the bottom 4x4 and connects with the slot cut for the post bracket.
attachment.php

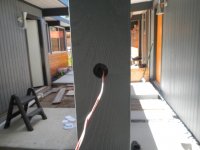
Here's where the wire comes out for the Ring unit
attachment.php

Next up: cut the inside stops

quick last-minute teaser...
attachment.php
 

Attachments

  • DSCN6400.jpg
    DSCN6400.jpg
    97.5 KB · Views: 1,246
  • DSCN6402.jpg
    DSCN6402.jpg
    101.6 KB · Views: 1,246
  • IMG_0689.jpg
    IMG_0689.jpg
    147.8 KB · Views: 1,245
OP
K

kwyjibo

Well-known member
Joined
Apr 8, 2008
Messages
743
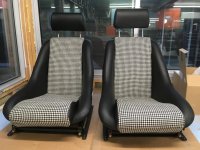
Thanks for the comments on the seat. I would love to post a photo of the pair, but the second one is still lost somewhere out in UPSland. :sad:

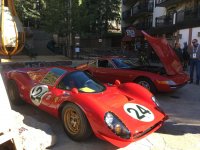
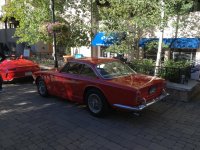
The car show as part of the Vail Automotive Classic was yesterday. The Colorado Grand wasn't held this year so the lack of the leakover participation meant that the show was smaller compared to last year. Nevertheless, here are a couple of my favorites
a very nice P4 replica
attachment.php

and the Maserati Sebring
attachment.php

I swear that not all cars there were red, it just appears that way in my two photos
 

Attachments

  • IMG_0707.jpg
    IMG_0707.jpg
    152.8 KB · Views: 1,133
  • IMG_0699.jpg
    IMG_0699.jpg
    155.9 KB · Views: 1,136

smschriefer

Well-known member
Joined
May 28, 2009
Messages
842
Location
Yorktown, VA
If I owned the P4 replica, I would have it on a rotating pedestal. Place a chair at a good viewing distance and just watch it rotate. After a few hours I would lift the engine cover and watch it some more. To me it is the perfect sports car body. I know Ferrari thought the E-Type was a beautiful shape, but the P4... mmmph!

Of course not all cars were red - they had some in rossa too!
 
OP
K

kwyjibo

Well-known member
Joined
Apr 8, 2008
Messages
743
Couple of quick updates
The other seat arrived!! I haven't checked it out yet because I was busy painting. Which brings me to the second update...
The front gate/door has it's first coat of paint
attachment.php

Clearly I need to work on my technique, but the first coat is on. The color is not quite what we were hoping but we'll live with it for a while before making any decisions. Also in the photo you can see that the Ring doorbell is installed (and working) even though you can walk right through the fence. And lastly, I dug up the French drain and added another catch basin because I made a last-minute decision to change the flow of the (future) downspout.

EDIT
update to the update: unboxed the second seat. It looks great. Very happy with them
attachment.php
 

Attachments

  • IMG_0723.jpg
    IMG_0723.jpg
    147 KB · Views: 1,072
  • IMG_0728.jpg
    IMG_0728.jpg
    152.7 KB · Views: 1,056
Last edited:

Arclitgold

Well-known member
Joined
Dec 20, 2017
Messages
317
The front entryway is looking killer. Oh and those seats are ok too. ;)


Sent from my iPhone using Tapatalk
 
OP
K

kwyjibo

Well-known member
Joined
Apr 8, 2008
Messages
743
The front entryway is looking killer. Oh and those seats are ok too. ;)

Thanks! Apparently one of my neighbors agrees. They're having their house painted and decided on a green door, too. Oh, and they also recently had a cmu wall with a black pergola built.:wtf:

No real updates because I've been screwing around. I did test out the MCM escutcheon that I bought years ago for this door. I'm glad I bought this when I did because the guy stopped making these a couple years ago. I put on another coat of paint after I took this photo so the green is more consistent now
attachment.php

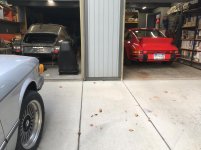
One of the more fun things I did was that I grabbed the Carrera from storage and the next morning took at "garages at dawn" photo
attachment.php

And had a good mountain road drive before meeting a few friends for breakfast at the base of Mt. Evans
attachment.php
 

Attachments

  • IMG_0731.jpg
    IMG_0731.jpg
    150.1 KB · Views: 962
  • IMG_0742.jpg
    IMG_0742.jpg
    146.2 KB · Views: 954
  • IMG_0747.jpg
    IMG_0747.jpg
    149.3 KB · Views: 959

bdbecker

ALLIANCE MEMBER
Joined
Nov 18, 2015
Messages
5,580
Location
Iowa
Thanks! Apparently one of my neighbors agrees. They're having their house painted and decided on a green door, too. Oh, and they also recently had a cmu wall with a black pergola built.:wtf:

That's pretty annoying. Something similar happened to my daughter's babysitter. She painted their front door teal and put in some mustard colored planters on each side of the door. Within a few weeks, the neighbor directly across the street has a teal door and mustard colored planters. Some people...
 
OP
K

kwyjibo

Well-known member
Joined
Apr 8, 2008
Messages
743
That's pretty annoying. Something similar happened to my daughter's babysitter. She painted their front door teal and put in some mustard colored planters on each side of the door. Within a few weeks, the neighbor directly across the street has a teal door and mustard colored planters. Some people...

The worst part is that I talk to them all the time and I have to pretend that I don't see what's going on over at their place.

Today was a real back breaker. It started yesterday when I started cutting the last paver. Because the pavers were poured before I repaired/moved the wall, this one wouldn't fit in it's planned location. So it was poured a few feet over. Unfortunately they didn't measure correctly so I have to cut about 8" off one side (red line in the photo). Once it's trimmed, I can move it over and set it in place (blue arrow). I finished cutting the paver this morning and started the slow process of moving it over using a digging bar, lumber scraps and conduit.
attachment.php

After a couple hours, here it is in it's final location. The next step is to move some of the topsoil piled in the front yard in to level the grade. That means that I'll finally be able to rent a dumpster and remove the remaining dirt and construction debris from the front yard. The neighbors will be ecstatic
attachment.php
 

Attachments

  • IMG_0679 copy.jpg
    IMG_0679 copy.jpg
    152.5 KB · Views: 872
  • IMG_0755.jpg
    IMG_0755.jpg
    151.7 KB · Views: 885

5280 JB

Member
Joined
Dec 1, 2017
Messages
13
Those seats are awesomesauce. Oh, and your recent work on the house is looking fantastic, too!
 
OP
K

kwyjibo

Well-known member
Joined
Apr 8, 2008
Messages
743
Those seats are awesomesauce. Oh, and your recent work on the house is looking fantastic, too!
always a pleasure to read and see the work dont on this home. solid work sir.
Thanks for the comments, I appreciate the encouragement

Here's an example of the way that my projects go. I bought a MCM-inspired door knob escutcheon a few years back because I remember the Eichler houses that I grew up near had them and I thought they looked cool. Of course if I wanted to use it the knob would have to have an increase backset of 5". So without even having a place to install it yet I picked up a solid core door blank. I've been storing and moving it around the garage for a couple years. This door and lockset were central to the design and building of the front gate. The main inspiration that led me to moving the garage wall when I was making repairs was so that the proportions of the glass panels would look better next to the door. Basically I think what I'm saying is that I went through a lot of work so that I could use the escutcheon. Anyway, here's a comparison of the knob with vs. without the escutcheon.
attachment.php


I was happy that the glass was delivered early on Friday so I could get to work on the install
attachment.php


A few hours later it looked done! I'm still hand planing and sanding the stops on the courtyard side to get them flush with the framing, but the install is complete. It's amazing how the feel of the space was transformed by visually blocking off this end of the courtyard. The hole next to the boulder is for a Japanese maple but I will wait until spring to plant it
attachment.php
 

Attachments

  • knobs.jpg
    knobs.jpg
    146.6 KB · Views: 666
  • IMG_0771.jpg
    IMG_0771.jpg
    122.8 KB · Views: 670
  • IMG_0781.jpg
    IMG_0781.jpg
    119 KB · Views: 671
To avoid these ads, REGISTER NOW!
Top Bottom