To avoid these ads, REGISTER NOW!

Between 485 & 705 SQ/FT Denver MCM garage expansion

Workspaces between 485 and 705 squarefeet.
OP
K

kwyjibo

Well-known member
Joined
Apr 8, 2008
Messages
743
I cannot believe I missed this thread until now, but definitely subscribed. Always looking for more Porsche content. Good luck with the restoration. :)

welcome! and thanks for reading along

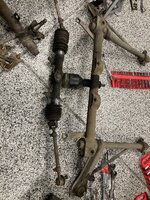
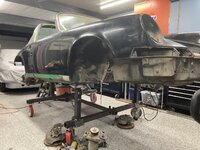
I got a couple hours of garage time in this morning and was able to drop the front suspension from the tub
IMG_1163.JPG
The steering rack is still there with the tie rods held up with rope
IMG_1158.JPG
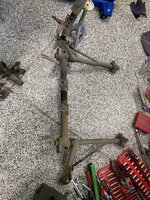
Control arms and crossmember on the ground!
IMG_1152.JPG
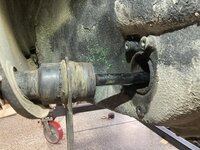
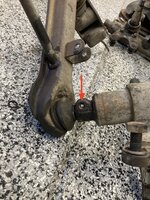
But, at the top of the photo you can see the driver's side strut is still attached (leaning against a jack stand). I had to drop this assembly with the strut attached because the bolt that secures it to the ball joint snapped. I had a pretty long detour to try to extract the bolt. Didn't work.
Here's a close-up image of the bolt. The bolt acts as both a cotter pin and a pinch bolt to hold the strut housing to the ball joint. I drilled a hole as close to center as I could (red arrow) and the extractor got a good grip... and then it snapped, too. I'll get back to it later when I have the patience to deal with it
!%*#bolt.jpg
up next: steering and rear suspension
 
To avoid these ads, REGISTER NOW!

Bakafish

Well-known member
Joined
Feb 7, 2017
Messages
478
Location
Tokyo
The only thing extractors extract, is money from your wallet. It ***** that the only effective ways require big boy tools, tig welding a nut, high heat from an Oxy/Acetylene torch, or precision milling it out. The only hand tool method that ever seems to have a chance is using a punch to hammer rotate it out, but that's still low success rate. Good luck!
 

slik560

Well-known member
Joined
Oct 5, 2009
Messages
787
Location
Kansas, USA
So are you going to do the Elephant Racing thing & replace suspension parts or are you going to rebuild / refurb what came off the car? My '99 C2 has a good upgraded suspension, but I'm glad it was the previous owner that did it! Way beyond my garage capabilities.
 
OP
K

kwyjibo

Well-known member
Joined
Apr 8, 2008
Messages
743
The only thing extractors extract, is money from your wallet. It ***** that the only effective ways require big boy tools, tig welding a nut, high heat from an Oxy/Acetylene torch, or precision milling it out. The only hand tool method that ever seems to have a chance is using a punch to hammer rotate it out, but that's still low success rate. Good luck!
I don't disagree. I probably have a less than 50% success rate with them. But I keep using them as the first attempt before moving on to other methods. What makes me mad is that the bolt was moving and snapped with only a few (maybe 5) threads left before being free.
So are you going to do the Elephant Racing thing & replace suspension parts or are you going to rebuild / refurb what came off the car? My '99 C2 has a good upgraded suspension, but I'm glad it was the previous owner that did it! Way beyond my garage capabilities.
My plan is to bring the car back to stock. Mostly. I want it to appear stock (to most people) but certain upgrades will be made for better driving, like higher compression pistons, H1 headlights, bucket seats, rear antisway bars, etc. My goal is to make it a reliable GT and not push too hard against the fact that it's a 50 year old, open top base model.

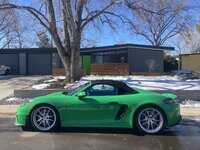
I didn't get very far on the rear suspension this morning because I couldn't find my 30mm socket for the rear axle. It doesn't fit in the socket rack so it's usually rolling around the drawer. At least that's how I remember it. Now that I need it, it's no where to be found. I was going crazy checking every drawer... again... and again when I heard a sporty exhaust pull up in front of the house
IMG_1172.JPG
Almost a match for my door. My friend's new Spyder is probably my favorite current production car. But not quite the first green-Porsche-in-front-of-the-house photo that I wanted to take.
 

Klokwerk

Well-known member
Joined
Jan 1, 2010
Messages
205
Location
Spokane, WA.
Your friend has good taste! I day dream about repainting my car to something like python or signal green. Oh, to dream!

Also, agree on the extractor. I've thrown all of mine out. Now a days I drill them out if I can and retap or like Bakafish mentioned, welding on another bolt and using that to turn it out. Good luck!
 

grant00

Well-known member
Joined
Feb 12, 2011
Messages
205
Location
Littleton, CO
Been following along for a while, but wanted to reach out and say if you want to use a TIG welder for that bolt I'd be happy to help give it a shot. I've got a TIG at my house in Littleton.
 
OP
K

kwyjibo

Well-known member
Joined
Apr 8, 2008
Messages
743
Been following along for a while, but wanted to reach out and say if you want to use a TIG welder for that bolt I'd be happy to help give it a shot. I've got a TIG at my house in Littleton.
I really appreciate the offer! But the bolt remnant is inset on both ends so there isn't access to it. My friend with a shop told me not to F it up and just bring it to him. I may ultimately do that, but I'm stubborn so I'll give it another go before caving in!

I did get back into the garage on Sunday and pull the steering rack
IMG_1180.JPG
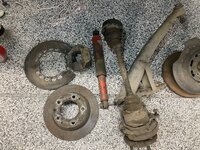
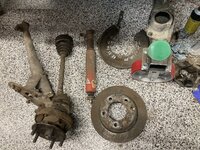
and get started on the rear end. Here's the passenger side with just the spring plate remaining.
IMG_1189.JPGIMG_1191.JPG
I hope to get the driver's side apart later today... Then I can get back to the broken strut bolt
 
OP
K

kwyjibo

Well-known member
Joined
Apr 8, 2008
Messages
743
Quick update: I did pull the driver side rear suspension off this evening
IMG_1193.JPG
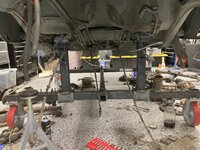
So, just the torsion bars/spring plates and some lines left on the rear end
IMG_1198.JPG
 

nicholam77

Well-known member
Joined
Dec 18, 2016
Messages
2,676
Location
Minneapolis, MN
IMG_1172.JPG

The house and Spyder are perfection!
 
OP
K

kwyjibo

Well-known member
Joined
Apr 8, 2008
Messages
743
I only have a small update for the week. Thanks to a couple friends who loaned me 1) the big socket for the ball joint nut and 2) a more powerful impact wrench, I was able to get the ball joints out of the control arms. The strut in the photo is the one with the broken bolt so the ball joint is still attached - I'm bringing it to my friend's shop when I bring him back his socket.
img_1220.JPG
 
OP
K

kwyjibo

Well-known member
Joined
Apr 8, 2008
Messages
743
Mixed day for the targa project

First the good news: I got unofficial notification that the engine and transmission are original to the chassis. Green Spyder Guy put me in touch with someone who knows another guy with access to the Porsche archives who confirmed that the numbers match their records. Knowing this, I may actually pay for official Porsche certification when the car is complete.

Now for the bad:
IMG_1238.JPG
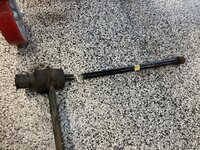
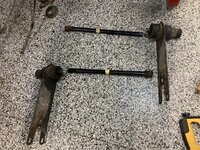
For anyone that has worked on rear torsion bars in an old 911, this is not what you want to see. The torsion bars are splined on both ends with the inboard end engaging a fixed mount while the outboard end mounts to the rotatable spring plate. The spring action comes from the memory of the twisted bar (ie: compressed suspension) returning to the relaxed state. The photo shows the spring plate with a stuck torsion bar - in other words: the outboard splines are rusted to the spring plate. The passenger side is the same. This means a lot more work to get them out, probably involving cutting... the torsion bars weren't reusable anyway.
 
Last edited:
OP
K

kwyjibo

Well-known member
Joined
Apr 8, 2008
Messages
743
I made a near-closing time run to the Home Despot last night so that I could get an early start this morning on the torsion bars. After about an hour of the cut-off wheel and hacksaw, I finally got it cut
IMG_1243.JPG
That is some hardened steel. I would hate to have to go through that again... oh yea, the other side.
Looking into the torsion tube you can see that rust has eaten away most of the lip that restricts the inward movement of the bushings. The outer sheet metal showed no signs of rust. Add this to the list for the bodyshop.
IMG_1247.JPG

Which brings me back to this:
So are you going to do the Elephant Racing thing & replace suspension parts or are you going to rebuild / refurb what came off the car?
I still plan on going somewhere between the two alternatives. I'm still aiming for a restoration back to mostly stock so I'll reuse what I can, but certain changes (slight increase in spring rates, lower ride height, add a rear sway bar, etc) will be made to improve the handling. I'll have the shop inspect the spring plates once/if I get them separated, but I'm not liking what I see. The Elephant Racing catalog is very tempting....
 

grant00

Well-known member
Joined
Feb 12, 2011
Messages
205
Location
Littleton, CO
Bad news about all that rust in the torsion tubes! Not fun! I would say now would be the time to go to those elephant racing rear coilovers and heim spring plates but they are a lot more expensive than torsion bars.
 

slik560

Well-known member
Joined
Oct 5, 2009
Messages
787
Location
Kansas, USA
Oy. It's things like this that have steered me away from restorations. Not enough energy any more. :) I probably jinxed you with the Elephant Racing comment.
 
OP
K

kwyjibo

Well-known member
Joined
Apr 8, 2008
Messages
743
Oy! is right. I cut the other torsion bar yesterday. My old shoulders are sore but I'm still having fun
IMG_1270.JPG
The tube on this side has some rust but is much better. If you compare to the photo a couple posts up, this side still has the flange intact. We'll have to wait for what the body guys say about how to fix the driver's side (ie: for structural reasons the entire tube is replaced vs local repair to the rusted area).
IMG_1264.JPG
 

jbrentd

Well-known member
Joined
Jul 8, 2015
Messages
1,039
Location
Northeast Oklahoma
So much awesome eye candy in one thread! Love the house, yard, garages...oh and the cars! I really enjoyed reading through the restoration work so far on the 911. Keep up the great work!
 
OP
K

kwyjibo

Well-known member
Joined
Apr 8, 2008
Messages
743
Sorry for the lack of updates - I got busy with other projects which I'll update once they get going
My place in line for the body and paint work keeps getting pushed back but here's a few targa updates.
Gratuitous photos of new parts, in this case: new Koni rear dampener.
IMG_1295 copy.jpg
I have now collected boxes of various rubber seals but they're not so interesting to look at.
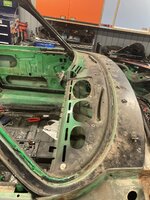
Ever wonder what's hiding under the shiny (or on later cars, black) targa bar?
IMG_1265 copy.jpg
not much to look at
IMG_1308 copy.jpg
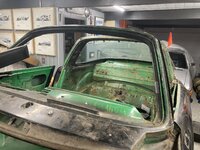
Here's how the car sits currently
IMG_1326 copy.jpg
I still need to remove the glass, but I've been putting it off until the last minute because I don't have a lot of storage space and to keep the glass safe. Also, to lessen the chance of damaging the wiring harness, I'm leaving it in and hoping that there isn't an issue that I need to track down later. Keep in mind that the car was partially disassembled for many years and I don't know if it had any previous electrical problems.
 
OP
K

kwyjibo

Well-known member
Joined
Apr 8, 2008
Messages
743
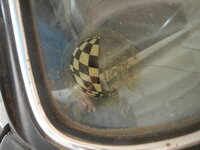
I'm still waiting for my spot in the bodyshop to come up. In the meantime I decided to clean up the work area. Once the space was open, there was no reason not to continue stripping the body, like finish removing the glass. First up was the windshield. Based on the sun-yellowed decal, I think this is the original glass. The glass itself is cracked and the aluminum trim is scratched up so I won't be reusing either.
DSCN4434 copy.jpg
The rubber was brittle in spots but the glass and trim came out without much drama. Although I picked up a new dash top, I wanted to get the old one out as carefully as possible. Everyone who's bought one in recent years has complained about how the new dashes don't fit right. If I'm unhappy with the new Porsche Classic part I'll get the original one repaired and recovered.
IMG_1359 copy.jpg
IMG_1353 copy.jpg
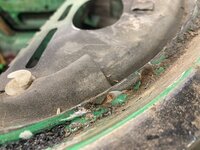
here's a close-up photo of the only sign of rust found under the windshield rubber seal. This is basically nothing, so I'm very happy about it
IMG_1361 copy.jpg
 

slik560

Well-known member
Joined
Oct 5, 2009
Messages
787
Location
Kansas, USA
Wow. That is GREAT that there was not more rust under the windscreen seal area. From what I hear, that's usually a big OH HELL moment in Porsche restoration.
 
OP
K

kwyjibo

Well-known member
Joined
Apr 8, 2008
Messages
743
Wow. That is GREAT that there was not more rust under the windscreen seal area. From what I hear, that's usually a big OH HELL moment in Porsche restoration.
Exactly! I've seen this area completely rusted out with little sign of problems before taking the windshield out.

Before I forget again - Nice weather made an appearance last weekend, so a few of us met at the local cars and coffee
IMG_1346 copy.jpg

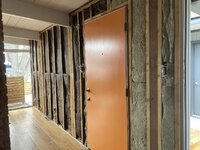
Here's a quick peek at the current project while the targa and I wait for the body shop
IMG_1371.JPG
IMG_1374.JPG
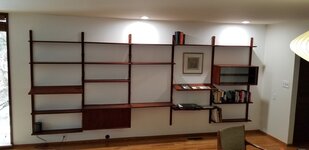
We bought a Poul Cadovius wall unit for this wall and I wanted to replace the painted paneling. The original mahogany panels were partially skim coated with drywall joint compound (?!?) and painted white by a previous owner. You can see the rockwool insulation that I installed to the right of the front door when I replaced the exterior siding a couple years ago. The other insulation is about 60 years old and disintegrates when you touch it. I'm not looking forward to the next steps.
 
To avoid these ads, REGISTER NOW!
OP
K

kwyjibo

Well-known member
Joined
Apr 8, 2008
Messages
743
Skim coating and painting mahogany panels :/ what were people thinking!?
I had some choice words when I figured out what it was. The problem is that it looks like during one of the remodels someone did the entire interior like that. All the gaps between panels were filled. And in some places they filled in between the tongue and groove boards of the ceiling. Did I mention that most of these are now cracking?
Awesome!! Pics of this when you have it installed please. What are you replacing the painted paneling with?
I was going with walnut to match the wall unit. The one we have is like Klokwerk's but there's another version of the Cadovius that comes with panels rather than/in addition to (?) the vertical rails. I like the way it looks like a true built-in system. So I'm trying to mimic that look
I've been wanting to do something about all the painted panels so this is probably just the beginning.
We've got a wall unit which I'm sure is a Poul Cadovius. Lots of fun installing it last year. I'll look great on your wall!
Nice! Ours is only three sections wide. It has two drawer units and one sliding door cabinet (and some number of shelves that I forget).
Did you lower your outlet? The one on our wall is right where I want one of the drawer boxes to hang. I think that now is the opportunity for me to move ours
 

Klokwerk

Well-known member
Joined
Jan 1, 2010
Messages
205
Location
Spokane, WA.
Did you lower your outlet? The one on our wall is right where I want one of the drawer boxes to hang. I think that now is the opportunity for me to move ours
Fortunitely our outlets were low enough. Perfect reason for you to relocate them now!
Can't wait to see yours on the wall.
 
OP
K

kwyjibo

Well-known member
Joined
Apr 8, 2008
Messages
743
The wall is ready to re-panel: electrical is done, rockwool is in place and new wall sconce was delivered. I'll post photos later

Garage Journal loves photos, so here's a few from the past week
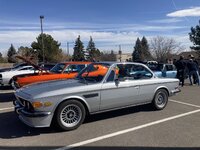
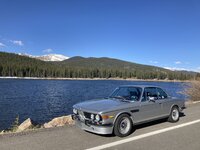
My E9 has a new friend
IMG_1437.JPG
Here's a couple from the Sunday morning pastry run.
IMG_1446.JPG
this one's not my photo, but it's too bad the blue car wasn't one spot ahead for better contrast
4424.jpg
 
OP
K

kwyjibo

Well-known member
Joined
Apr 8, 2008
Messages
743
Progress has been very slow lately,

Targa project - still waiting for space to open up in the body shop.

Wall paneling/shelving unit - I picked up the 1/4" Walnut MDF core sheets a couple weeks back but didn't start working on them until last week. The test fitting of the first sheet went well
IMG_1480.JPG
But I'm not so happy with the finish. There are patches of lighter stain going across the grain. I'm using gel stain from General Finishes but I think that the light patches came from some kind of mill artifact (I was working in a perpendicular pattern). If anyone has any tips to avoid or correct this, I'd really appreciate any advice.
IMG_1499.JPG
The next panel over came out fine
IMG_1501.JPG
The General Finishes topcoat is going on now (3 coats) and I'm hoping that trimming and finishing of the remaining sheets happens soon.
One question: Does anyone have a favorite product to fill in the countersunk 1-1/4" finishing nail holes?

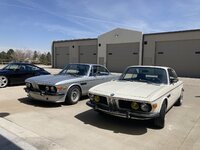
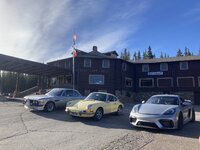
I did get the E9 out last weekend to grab coffee and pastries with the guys. Of course it was another Munich invasion of a Stuttgart meeting.
IMG_1474.JPG
Left to right: E9, 911 turbo, 991 turbo, 996 turbo, 1967 912 and 1968 911L
 

nicholam77

Well-known member
Joined
Dec 18, 2016
Messages
2,676
Location
Minneapolis, MN
I've only used it a few times but there's a product called Wunderfil Wood Filler (Rockler carries it) that comes in different colors including walnut and is supposedly stainable.

The trouble is wood filler rarely 100% matches the color of your wood, and depending on how close the match it will still stand out on close inspection.

I feel like you'd need a lot of nails to secure a panel like that... I have no idea how this is usually done but if you're not worried about easy demolition maybe there is some sort of construction adhesive or something you could use without nails.

But if you do nail it and they are a little bit visible at least having that Cado unit on the wall will take your attention from it :ROFLMAO:
 

Klokwerk

Well-known member
Joined
Jan 1, 2010
Messages
205
Location
Spokane, WA.
lot of nails or glue and a few nails. The panels don't look thick enough, but some kind of z-clip or french cleat system would be nice.
No holes.
Sorry, can't help on the filler. My experience with them is like Nick's. I'm always disappointed by them.
 
OP
K

kwyjibo

Well-known member
Joined
Apr 8, 2008
Messages
743
Thanks for the suggestions! The panels will be "permanent" so I went with nails and adhesive. I still need to fill and apply another coat to the panels, but here's the wall:
IMG_1529.JPG
The seams aren't great but two of them will be covered by the rails for the shelving unit. The guys at Woodcraft suggested Quikwood epoxy putty. I'll test it out on the holes that will hide under the rails before moving on to the exposed ones.
The beams and trim will be black. New walnut outlet and switch plates are in the mail. Ignore the exposed wires!
 

bdbecker

ALLIANCE MEMBER
Joined
Nov 18, 2015
Messages
5,584
Location
Iowa
That looks really good.

We've been toying with the idea of doing something similar on the wall behind our TV so I'll be looking forward to seeing how your project turns out.
 
OP
K

kwyjibo

Well-known member
Joined
Apr 8, 2008
Messages
743
I took a break from the walnut paneling and went back to the targa. I got the doors off
IMG_1530.JPG
and will next tackle the steering column which is held on by three shear bolts. The under dash area is in great shape so I'm hoping that the bolts won't give me much trouble.
 
OP
K

kwyjibo

Well-known member
Joined
Apr 8, 2008
Messages
743
I've been trying to take advantage of the nice spring weather so I drove up to the base of the Mt Evans toll road (which is still closed) on Friday morning. Here's the favorite pullout near the peak
IMG_1532.JPG
and at Echo Lake
IMG_1544.JPG
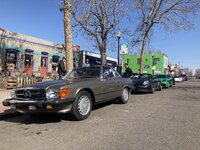
The usual Sunday morning coffee and pastries with the guys has been moving locations because a farmers' market takes over the street by the bakery for the summer months. This week we met at a friend's house to check out his LeMons race car. But first, a few of us took the long route, back up through the foothills, before getting our donut fix
IMG_1554.JPG
And the usually quiet street taken over by a bunch of middle-aged hooligans with their loud, smelly cars
IMG_1561.JPG
 
OP
K

kwyjibo

Well-known member
Joined
Apr 8, 2008
Messages
743
After dealing with five shear bolts, the ignition switch and steering column are out. I discovered that the two holding the ignition switch didn't need to be drilled+extracted. I loosened the upper left bolt, then started on the lower right.
IMG_1580.JPG
Once I removed the bolts, I saw machined slots on the threaded ends. I'm guessing that they're there to loosen the head-less bolts. Now I know.
Here's a view of the stripped dash
IMG_1594.JPG
 

nicholam77

Well-known member
Joined
Dec 18, 2016
Messages
2,676
Location
Minneapolis, MN
The walnut paneling turned out great. Do you do something for trim where the beams meet the plywood cutouts? Or how about the corner (on the right looking at the pic) where the wall wraps around? I've always wondered how details like that should be handled when you have varying materials and a modern aesthetic to adhere to.
 
OP
K

kwyjibo

Well-known member
Joined
Apr 8, 2008
Messages
743
Hi Nick, the entire interior originally had mahogany trim (and wall panels) at the corners. The same trimming technique was used on the exterior. Here's a photo of the garage wall where you can see the ~1/2"x2" trim around the beams and top of the wall. I plan on re-using most of the interior trim - it'll be the dark charcoal to match the rest of the house, including the beams
DSCN6242 copy.jpg
I finished the fourth (and last) coat, installed the new fixture, outlet and switches. And, mounted the rails for the shelves. I test mounted a couple of the shelves and drawer units to confirm that the rails were level and spaced correctly. One thing that stood out is how washed out walnut unit looks compared to the walls. I think that the difference is amplified in the photo by their matte finish, but I'm considering a darker finish
IMG_1617.JPG
I did lower the outlet so that the drawer box could be hung at a more normal height. I thought that I left more wiggle room...
IMG_1618.JPG
I'm painting the trim nowand hope to have them mounted by the weekend
 

legenddc

Well-known member
Joined
Aug 19, 2012
Messages
1,076
Walnut lightens with age so if it was in a sunny place it could have lightened up that much. Almost looks like walnut without any finish on it in the pictures.
 
OP
K

kwyjibo

Well-known member
Joined
Apr 8, 2008
Messages
743
Walnut lightens with age so if it was in a sunny place it could have lightened up that much. Almost looks like walnut without any finish on it in the pictures.
Thanks for the comment. It looks raw to me, too, but the seller says that the wood is "lightly oiled". We'll see how much it bothers me before I get more heavy-handed with the finish.
 
To avoid these ads, REGISTER NOW!
Top Bottom