To avoid these ads, REGISTER NOW!

Desert Oasis

norsea

Active member
Joined
Mar 25, 2010
Messages
25
We bought our "Desert Oasis" (a home in Palm Springs, California) in late 2010 after traveling on our motorcycles for seven years following that by traveling with a truck and travel trailer for three years. All this after we retired in 2000. We consider ourselves full time RV'ers who now have a place to drop anchor in the winter months. More about this later.

Since taking possession of the house in October of 2010 we have been remodeling extensively; the main reason this is just my 6th post since joining the forum in 2010 - and this is the second post today and the third one this week; wooo hoooo!

We, my wife and I, each had our own reasons for liking the house/property. For me, there was an air conditioned 11'x18' storeroom that could be the shop, the two car garage could be widened by 7' and an additional bay added behind one of the bays; that addition would make that section of the garage 45' deep and there was sufficient parking space alongside the garage for the travel trailer.

We have been working non-stop on remodeling since we took possession of the property. Given that we can only be in the state for six months and maintain our non-resident status this somewhat limits our progress. But, progress has been made.

Stay tuned for further adventures...

But, like our travels, future posts will come slowly - and yes, my avatar is a hint about how we like to travel...

Jim
 
To avoid these ads, REGISTER NOW!

Omphaloskeptic

Well-known member
Joined
Oct 11, 2008
Messages
2,346
Location
Ultima Ratio, Wa.
Dang, it sounds to me like you two could start your own 'travel blog'!

A (belated) welcome to TGJ, and please post some pics of the 'rest stop' you get to visit for 6 months out of the year.
 
OP
N

norsea

Active member
Joined
Mar 25, 2010
Messages
25
Dang, it sounds to me like you two could start your own 'travel blog'!

A (belated) welcome to TGJ, and please post some pics of the 'rest stop' you get to visit for 6 months out of the year.

Ya; funny you should mention it. I just added our web site to my sig line.

And yes, photo's will be posted; working on getting some of the many we have taken during the build to a size that is appropriate. I will also be doing a section for the house on the web site that will have much more detail than that which will appear here.

I have to say that I have enjoyed the process. I've done lots of little stuff over the years but never taken on a project a large as this remodel.

More on that in another post...

Jim
 

CNGsaves

Well-known member
Joined
Sep 26, 2012
Messages
13,233
Location
KS and OK
Your Palm Springs house is just down the road from Desert Hot Springs . . . the town with all the windmills . . . right ?? Been through there once when I bought CNG pickup in Los Angeles and drove it back across country.

How has water supply and pricing been in last few years with drought??
 
OP
N

norsea

Active member
Joined
Mar 25, 2010
Messages
25
Re: Desert Oasis - The water and thermal living...

Your Palm Springs house is just down the road from Desert Hot Springs . . . the town with all the windmills . . . right ?? Been through there once when I bought CNG pickup in Los Angeles and drove it back across country.

How has water supply and pricing been in last few years with drought??

Actually, we are at the southern end of Palm Springs, just off of CA Hwy 111 after it turns east once Hwy 111 is through downtown Palm Springs. The majority of the homes in the area were built in the mid 1950's. Our was built in 1965 and we bought it from the daughter of the original owners. It had not had much done to it since it was built other than a new stove/oven; no hacks to the structure and nothing that was done without permits.

As for the water, this is one of the few desert areas with water that does not cause the residents much concern. But it should; the valley is starting to sink, much like the California central valley did when all the agricultural interests pumped their aquifer to nearly full depletion in the 1930's+. Desert Water Agency (DWA) is the water utility for the Palm Springs area. It provides service to outlying county areas, Desert Hot Springs, part of Cathedral City and most of Palm Springs.

This from the DWA web site:

"The majority of our water comes from our underground aquifers. The Agency has wells around the service area that pump water from the groundwater basin into our system. DWA replenishes the underground aquifers, in cooperation with Coachella Valley Water District, with water imported from the Colorado River, which comes to the valley via exchange with Metropolitan Water District of Southern California through the Colorado River Aqueduct.

DWA also gets water from mountain streams: Chino Creek, Snow Creek and Falls Creek."

One of things we are doing with our construction project is working very hard to create a very energy efficient home. While we do have the obligatory swimming pool our yard is going to be very low maintenance desert scape. I have just recently been able to begin using one half of the new water system we have installed; new piping from the street to the house and throughout the house/yard and pool.

As for cost of our water, our bill is usually quite small. With just two of us and flora and fauna from the desert we don't use much water with our drip system irrigation.

Probably the most important issue from my perspective in this here part of the world for a home can be summed up in one word. Insulation.

We have not had air conditioning since we bought the house because we gutted the place shortly after taking possession. you can either pay for insulation or pay the electric utility. It is not uncommon for the 1950's home that have not been upgraded/remodeled to have $1,200+ a month electric bills for 6 months of the year (assumes full time residents).

While we are not normally present in the summer, our house has not gotten above 84 degrees since we installed the insulation; more on this in a future post...

Jim
 
Last edited:
OP
N

norsea

Active member
Joined
Mar 25, 2010
Messages
25
Forget AC out there, Use a swamp cooler, I used to run mine 24/7 for about $20/month & it about froze the windows shut :)

Right you are about the swamp cooler; pennies per hour vs. dollars for air conditioning. And that works up to ~105, in my experience. After that a swamp cooler is not worth much. Also pretty worthless when the monsoon hits and the humidity goes through the roof. We have already had several 110+ days this year and the summer is anticipated to be hot. As you know, most folks don't even think about temperatures in the range we can experience.

In the bad old days you could run both a swamp cooler and an AC unit through the same duct system. Not so these days; each must have its own duct system. For a swamp cooler that's not too big a deal if you are willing to position it such that it is located where it can blow through most of the house AND you are willing to leave a window/door open at the other end to give the air and humidity that is blowing in some place to exit.

Given our mid century modern building style - meaning a flat roof - we are limited in what we can do for ducting. We are also not willing to leave the building vulnerable by leaving windows/doors open when we are not present.

Combine this with our not being here for the majority of the hot weather and the need to keep the temperature in the interior at a level at which food will not perish the AC becomes the only viable solution for us. Hence the focus previously mentioned on insulation. I hope to have the first of the two (yes two) HVAC systems installed in the next week or two. Interesting technology out there these days; variable speed units are just now coming on the market and we are going to install a Lenox sytem that is variable speed.

I think that the insulation we installed will more than pay for itself in the first few years. And, given the amount of sun we get annually solar power is a definite maybe. We are waiting to see what our electrical consumption will be once the house is completed and everything is functioning 100%. As a part of the build I installed all new electric including an upgrade from a 150A service to a 400A service; this will make the shop a much nicer place to be; more on that later as well as how the extreme heat we experience can impact electrical requirements...

Jim
 
OP
N

norsea

Active member
Joined
Mar 25, 2010
Messages
25
Re: Desert Oasis - It's just a gas man...

You can get combined solar/hot water deals these days. Friend of mine works for the company in LA, just can't remember the name of it...

Ya; I've installed one of my two in-line tank-less gas water heaters - works a treat. For two years we had nothing that used gas. Southern Cal Gas (SCG) started calling last year trying to understand why we were not using any gas. This year they sent someone out to "check us out". As soon as we opened the front door and he saw all the bare studs he understood what was going on. Such fun living in the house while you have it in pieces.

When I first started the planing for the house and was working on the isometric gas drawings for the plans I talked with the planners at SCG and they sent out the meter truck to replace my gas meter with something that normally is sized for a small restaurant. All this because of a 400K BTU gas pool heater, two 200K BTU tank-less water heaters, two HVAC systems, an outdoor gas barbeque, gas fireplace, a gas clothes dryer, a gas stove that when fully lit is capable of heating the house and twin gas ovens in the kitchen. Did I mention that SWMBO likes to cook/bake?

I have one inch and a half gas line feeding the pool heater and one inch and a half line feeding the west side of the house (HVAC, BBQ, fireplace, WH - kitchen, laundry, and bath) and a one inch line feeding the east side of the house (HVAC WH - three baths). Volume is the key to success.

We thought about doing solar hot water for the pool but found that it would only give us about three weeks on either side of the season that would not require a heater so we opted out of that there particular equipment.

Solar electrical intrigues me...

Jim
 

Bib Overalls

Well-known member
Joined
Dec 4, 2006
Messages
3,318
Location
Jonesboro, Arkansas
$1,200 a month for electric.:shocking:

July and August are our worst months here. About $220 for the house on a ground source heat pump. This will be the first year with the shop AC on line and it will be interesting to see what that adds.

:needpics:
 
OP
N

norsea

Active member
Joined
Mar 25, 2010
Messages
25
Re: Desert Oasis - Patience is a virtue...

$1,200 a month for electric.

July and August are our worst months here. About $220 for the house on a ground source heat pump. This will be the first year with the shop AC on line and it will be interesting to see what that adds.

Patience Grasshopper, er Bib Overalls.

All will become clear in the future...;)

And yes, those 1950 houses with single pane glass and not much, if any, insulation combined with temperatures that are above 105F quite frequently and you get a big bill in the 21st Century. Electricity was cheap in the 1950's - remember "Ready Kilowatt" in the TV commercials in the 1950's?

Oh, oh, I just dated myself...

Jim
 
Last edited:

Az Scooter

Well-known member
Joined
Dec 30, 2009
Messages
1,500
You are on the right track with the insulation. In the Phoenix area, you don't see a lot of Swamp over AC houses anymore. It was all the rage about 20 years ago.

As for me, I lived in a swamp cooled house until I was 13, and my mom got AC put on. If I remember right, it cost nearly as much to add it then as it costs to replace it now.
 
OP
N

norsea

Active member
Joined
Mar 25, 2010
Messages
25
Re: Desert Oasis - In the beginning...

In the beginning there was a house; ya, that's me in the driveway. In the area to the right of the garage you can see the clothes line. We had enough space in that area to bump the garage out in that direction seven feet. More on this later.

House front before small.jpg
House_front_before_small.jpg


and that's my beloved truck in the driveway, below.

House front small.jpg
House%20front%20small.jpg
House_front_small.jpg


Inside the garage in the photo below, from the center, looking to the left rear of the garage it looked like this with the double doors into the storage room (future site of the shop) and the door to the right of that going into the house. Note the small bump out room between the door going into the house and the cabinets.

The remodel of the garage called for a rather large glue laminate beam to go above the wall where the door is located with a huge footer at the corner of the room where the cabinet with the open door is located. When we opened up the wall and got our temp wall up so we could take the wall out (it was load bearing - all the garage rafters in that area as well as all the rafters from there to the rear of the house) we broke open the floor to dig for the footing. We found that that wall was built on 4" of garage floor concrete (no reinforcing rod and no foundation). In a way this was a good thing. working with the engineer we decided to relocate the 6"x6" post that was to support the glue lam beam and reclaim the space those two walls created for the garage.

And yes, the engineer had to get involved; this here is earthquake country and nothing gets approved without engineering stamps on it. My advice, buy stock in Simpson - their stuff costs a fortune and in this here part of the world you use a lot of it.

Garage_East_Wall_small.jpg


Looking to the right (below) from the same location you get a better understanding of the cabinets that were on the wall with the grill in the center cabinet for the swamp cooler that was hanging on the outside rear wall of the garage; it had not been functional for some time - went to its reward at the metal recyclers.

The door went into the back yard.

Note the vent high up on the wall to the right. There was another of these at the same height closer to the front of the garage. I have no idea what they were thinking when they put these in. All they did was let in the heat and, of course, more sand than could be used to build a castle when the wind blew. These went with the swamp cooler to the metal recyclers.

The fellow that owned the house dispatched his company vans from an area just inside the door going into the house. The wire you see coming from the cabinet in the photo below was connected to an antenna on the roof and the radio that was just inside the door; a radio for use in a vehicle, not a base station. In order for the radio to operate he needed a 12 VDC source. The battery was in the cabinet with the door ajar in the photo above. The inside of the cabinet was charred, as in it was a miracle the house did not burn when the battery did!

The extension cord with the garage door opener was also a nice touch.
Garage_South_Wall_small.jpg


And then there was the storeroom itself, below. The room with the single door housed the furnace and water heater for the west side of the house. The walls for that room were definitely an after thought; note the sheet rock above the top plate. The two walls were held in place by four (yes, count them, four) nails.

The "equipment room" walls were pulled down and the room has been relocated within what is now the shop. Note the air conditioning ducting and cold air return on the left side of the wall. When I saw this I knew I could convert this room into a shop that I could work in year round.

Shop_with_old_furnace_room_smal.jpg


My wife and I both liked the traditional three bedroom layout of the house with the bedrooms (one master with bath, two bedrooms and a hall bath) all on the east side of the house with the living/family room in the center and the dining/kitchen/breakfast room plus another full bath on the west side of the house with the garage entrance to the house entering the kitchen. It is very nice to have a bathroom so close to the shop; and not having to go to the other side of the house is really nice.

We began work by pulling everything but the olive tree and an ocotillo bush out of the front/rear/side yards. We started this after we submitted the plans to the city for plan review in December 2010. Due to the heat in this here part of the world we have garbage pick-up twice a week; Tuesday and Friday. On Wednesday they come by again and pick up any (as in unlimited amounts) of yard waste. For the two months my wife and I worked on clearing the property we had up to 18 trash cans at the curb on Wednesdays. This saved us a huge amount in dump fees.

In early February 2011 the plans returned, approved, and we began demolition. I have to say that our architect knew his stuff. The only corrections on the plans were associated with my isometric drawings for the electrical.

By this time I had also pulled out all the old electrical, gas and plumping for the swimming pool, hired a fellow to build some stone walls and then my father in law and I installed the new plumbing/gas/electrical for the pool in a new area. This involved filling in the old crypt that housed the pool equipment underground. This was quite common here; putting the equipment below ground kept it cooler and was much easier on the pump. But, it was a haven for Black Widow Spiders so that pit/crypt is now filled in with construction debris and sand.

I found two of the best people you could ask for to work with me on the framing. I also hired a young man to work on the demolition. Single handed, he pulled out all the drywall. I lent a hand when necessary when he took on the removal of the exterior doors and windows. He also removed all the stucco. He and I pulled all the old tar and gravel roof off and he took up all the floor tile. For the entire summer of 2011 the neighbors called our place the "crack house" because the only thing on the outside was oriented strand board (OSB).

We worked from March straight through to mid September to get the demo completed and the new construction completed. This gave us an enclosed building with new windows and doors and stucco.

At this point we were back to just my wife and I to continue with the electrical, plumbing and a tad more framing in areas like the west side bath that we continue to use today as we have been living in the house while doing the remodel.

We'll get into the result of all our hot summer work...

Jim
 
Last edited:
OP
N

norsea

Active member
Joined
Mar 25, 2010
Messages
25
You are on the right track with the insulation. In the Phoenix area, youth don't see a lot of Swamp over AC houses anymore. It was all the rage about 20 years ago.

As for me, I lived in a swamp cooled house until I was 13, and my mom got AC put on. If I remember right, it cost nearly as much to add it then as it costs to replace it now.

Ya, it's hard to communicate to people what it is like to live in a climate where temperatures can actually reach 120F.

I have a neighbor who tells me he can work outside up to 110F. He's a better man than I and he's in his late 70's. Once it hits 106F I'm a dead man walking.

Today, it reached 114F in this here part of the world. We do NOT have air conditioning or a swamp cooler. But, we have gone to great lengths to install insulation that works extremely well.

As a result of our combining spray foam and traditional (well, it is a product of recycled materials) fiberglass (like) insulation the temperature in our house never got above 85F. Not bad; more on what we have done later.

So, I don't think the use of air conditioning will have that great an impact on our electric bill when we only want to get the temperature inside the building down 5 to 8 degrees; we find coming into an 80F environment from something in excess of 105F works very well.

Jim, who hopes to have the first of two HVAC systems installed within the next 2/3 weeks...
 
Last edited:
OP
N

norsea

Active member
Joined
Mar 25, 2010
Messages
25
Re: Desert Oasis - The remodel begins

The remodel added a new master bedroom, an office, expanded the size of the garage, combined the family/living room into a great room and dining room, converted the breakfast room into a laundry and combined the kitchen and dining room into a large kitchen.

The photo below shows the location for the new office - where the original front door is located.

New_pour_from_outside_small.jpg


The new front door will be to the right of the existing front doors set back from the OSB that is covering the opening by approximately four feet. This can be seen in the photo below which also shows the window for the office and the floor to ceiling window for the dining room after the initial framing was completed.

Office,_entry_and_DR_framing_small.jpg


The photo below shows the framing for the new master bedroom. This room was a bit of a challenge in that the framing for the clear story windows called for lots of 6"X6" lumber which can be seen in that wall.

The entry door (on left) to the bedroom and the closet to the right of the entry door required mere 4"X4" supports.

Clerestory_window_framing_small.jpg


The building had a significant amount of water damage as can be seen in the stucco under the window at left. When we opened up that wall all of the timber below the window was completely dry rotted; no structural support at all. This was not an isolated occurrence. Eventually we realized that it was just going to be easier to pull all the stucco off in order to repair/restructure all the water and termite damage. The good news is that we suspected that this might be necessary when we initially looked at the property. And yes, we found live termites as well as remnants of a previous infestation.

Termites are a real problem in this here part of the world. I can understand why. They like moisture and the majority of homes that were built in the 1950/60's had the earth pushed right up against the stucco where it met the slab foundation. You can see the line where the earth was up against the stucco before we pulled it back. And then, they installed sprinkler systems to water their grass several times a day with the water running all over the stucco wall.

The new master bedroom will have a 10'X10' sliding glass door that can be seen in photo below after we finished the framing of the new master bedroom. That window faces west and will have a view of the mountains on which we get to watch the sun wash down every morning as the sun rises.

Also note the antenna sticking up in the background of the photo above and below. This is what the cable I mentioned above in the garage was connected to on the end opposite the radio. I learned that the city has a record of every antenna in town. Who'd a thunk?

West_Wall_completed_small.jpg


The water damage at the rear of the house where this is located was exacerbated by the slope of the land; the property to the rear of the photographer for the above photo is higher in elevation than this lot. For forty five years when it rained the water would collect along the foundation of the house. We hauled seven dump trucks of earth out of the back yard in order to get the property properly sloped. This we had not suspected but, all things considered, it was not a difficult or overly expensive task.

We had sever water damage to the concrete slab in many locations; the worst being under one of the support posts for the garage door header.

More on this in a future post...

Jim
 
Last edited:
To avoid these ads, REGISTER NOW!
OP
N

norsea

Active member
Joined
Mar 25, 2010
Messages
25
The Garage - At Last...

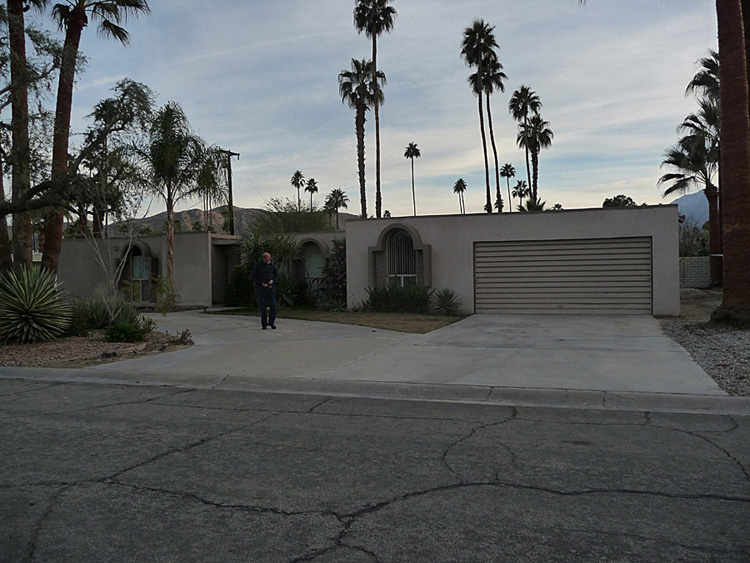
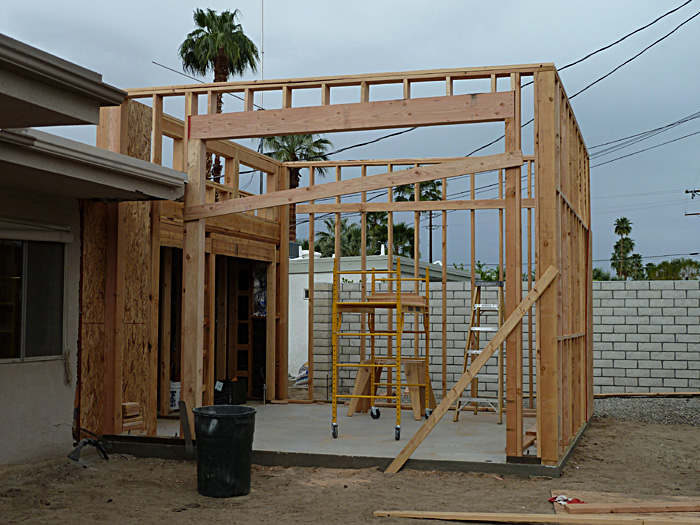
One of the things I liked about the house was the space that was available to expand the garage. The photo below is taken from the rear of the house, where a portion of the garage can be seen in the rear of the photo. The existing garage was approximately 20'X20'.

This portion of the property was covered in concrete which needed to be removed. The was the very first work that was done on the property.

Side_yard_to_become_garage_small.jpg


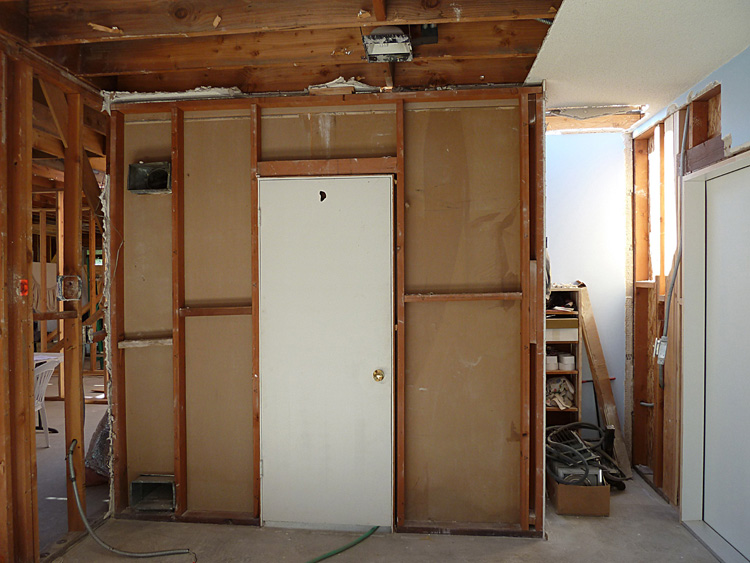
The door that can be seen in the wall on the right went into a small hallway that contained the clothes washer and a small cupboard. The cupboard was located where a clothes dryer would normally be placed; there was an electrical outlet inside the cupboard for a clothes dryer. The owner/builder of the home had never had a dryer; not all that unusual when you consider the weather in this here part of the world. The two posts in the foreground connected sections of a fence that enclosed the swimming pool which is located to the right of where the photographer is standing.

The large window in the wall was for the breakfast room. This window faces west. You can also see the 5 ton air conditioning (AC) unit on the ground below a small window beyond the door to the laundry/hall. The window is for a small bath with a shower.

In the afternoon, between May and mid October, it was impossible to keep the breakfast room cool in the afternoon. They had tried to reduce the impact of the sun by putting a film on that 4'X5' window but the AC unit just could not cope with the extreme heat. The same issue existed on the other side of the house for the bedroom that was on that side of the house. With the morning sun on the east wall of the bedroom it was impossible for the 4.5 ton AC unit on that side of the house to keep that room cool.

As a result of the heat/cooling issues we knew we would have to redo all of the ducting as well as install more efficient AC units. Given that the two AC units were top of the line when installed we are happy that the technology for AC has improved, but more importantly, we knew that we really needed to focus on insulation in order to be able to keep our cooling costs at a minimum.

On the left side of the above photo you can see small square raised concrete block structure located just off the concrete. Note the metal grating for a cover. This was the "pit" for the pool equipment. It was quite common practice in the 1050/60's to locate the pool equipment below ground. It was cooler and there was not as much "head" for the pump to contend with at start-up. Truth be told, all it really did was provide an excelent environment for Black Widow Spiders. Removing the pit and relocating the pool equipment was the next thing that was done after the concrete was removed.

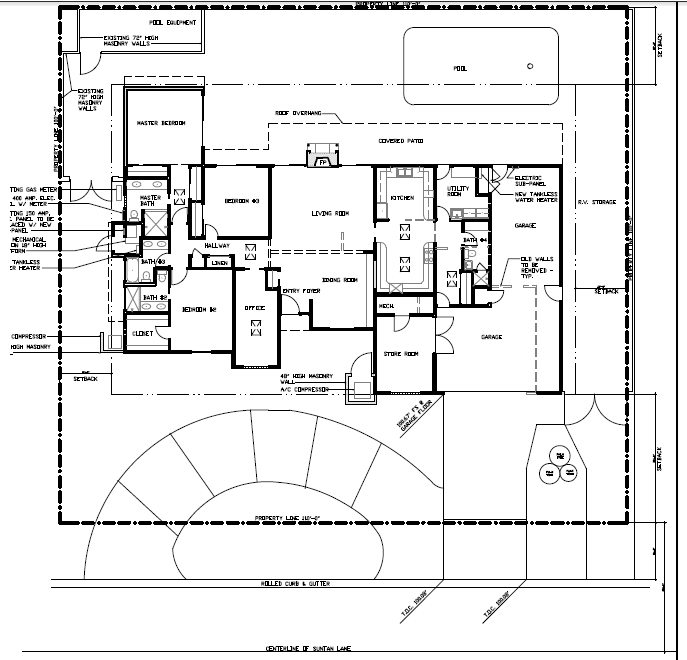
The photo below shows the plot/floor plan for the remodel. This gives a much better view of what we were starting. At the top left corner of the plan you can see an area that has a wall around it that is the new location for the pool equipment. To the far right of that is the swimming pool itself. The above photo was taken from the right side of the pool, facing towards the front of the property. The concrete in the above photo continues all the way around the pool.

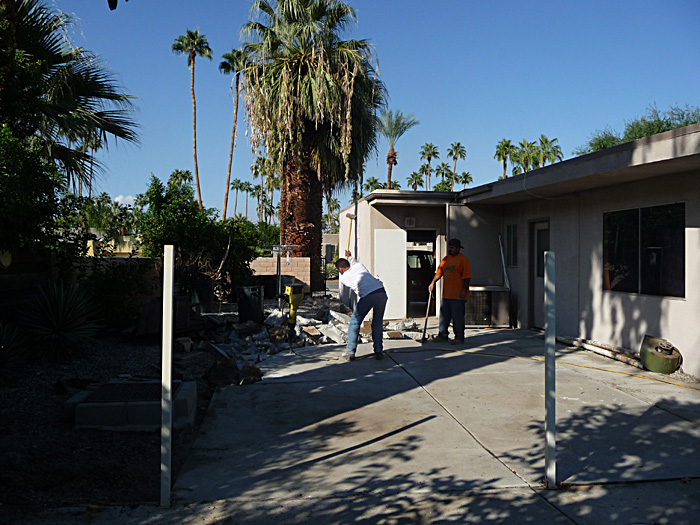
I hired the two lads in the above photo to break up the concrete while my wife and I worked on removing a considerable amount of debris/trash that was along the opposite side of the house. We removed three dumpsters full of concrete, each piece of which my wife and I picked up and loaded into the dumpsters. The project had begun!

Plot_Plan.jpg


The plan also shows the other changes we were about to make to the structure.

Starting with the third bedroom at the upper left of the plan, we changed that room from a bedroom to a bath for a new master bedroom that was shown it a previous post. This will give us two master suites; the old master will become the guest room. The third bedroom will become SWMBO's sewing room which will also have a Murphy Bed.

The area where the office is located at the middle front of the building is where the front door used to be located.

The dashed lines between the Living/Dining room shows the location of a wall that separated a formal living room and family room. That wall is now a huge glue laminated beam that runs more than 22' across that portion of the building and ties into another beam that picks up the load at that end (more on this later).

We combined the old dining room with the kitchen. The old kitchen was located in the area where the existing kitchen is located at the rear of the building. The portion of the kitchen that abuts the mechanical room in the store room (about to become shop) was previously the dining room.

The area at the top right of the plan is now a laundry room; previously a breakfast room.

We expanded the small bath on that side of the house to include the hallway that led to the outside door referenced in the above photo.

And last, but not least was the area in the hallway to the garage. We were going to make the area where the radio dispatch station was located into a closet (more on this later too).

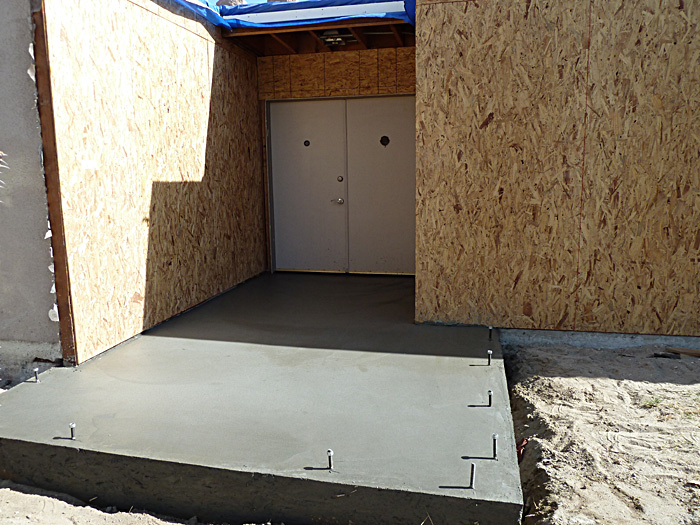
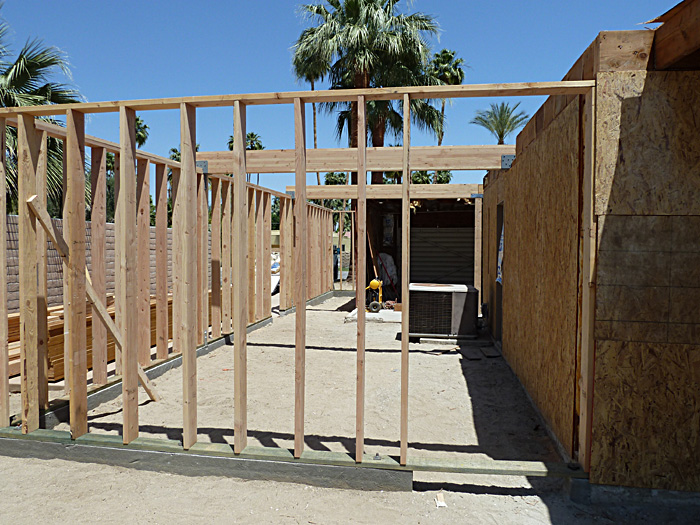
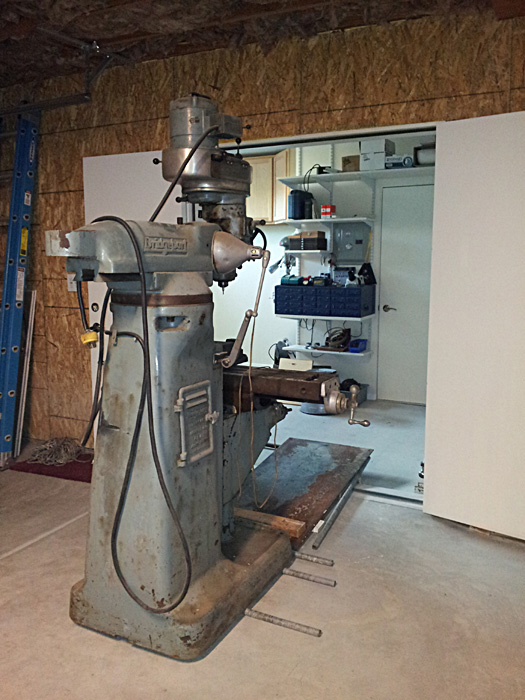
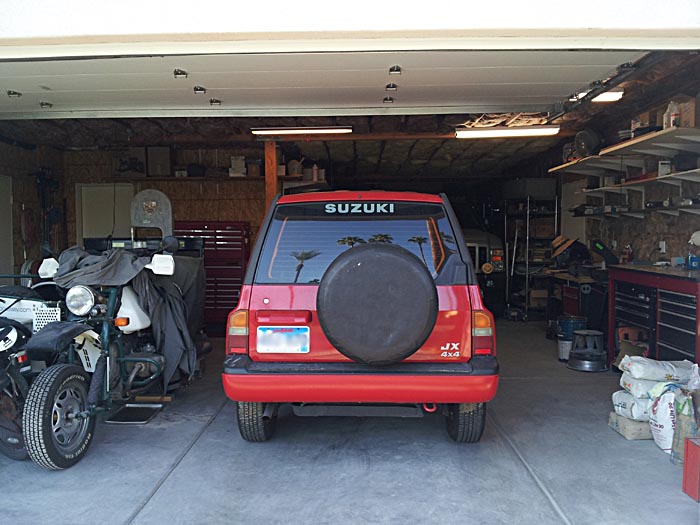
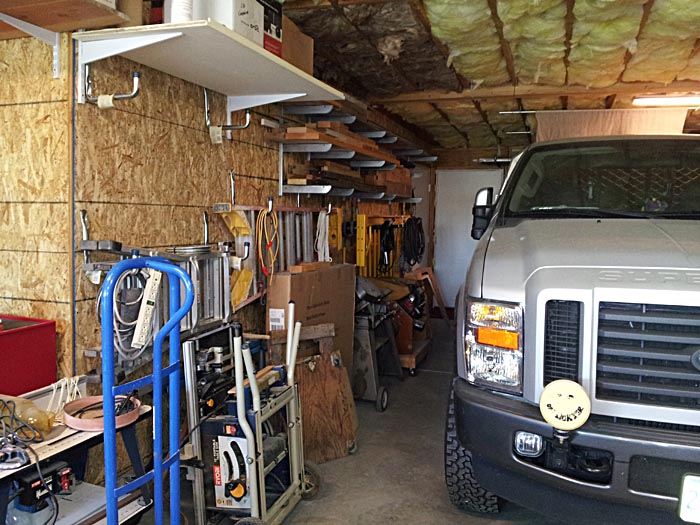
And then there was the garage. The plan was to widen the garage by seven feet and bump the bay on the west side of it out to the rear. This would provide one bay that was 45' deep; long enough to park the truck in the new portion of the building at the rear of the garage such that the door to the west side yard, when open, would be against the front bumper of the truck. The area in the front portion of this bay would hold a small room for my compressor at the very front (street side) of the garage with a work bench along the outside wall. The parking bay itself will hold our daily driver.

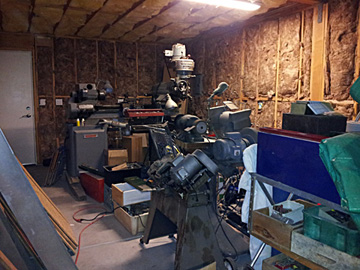
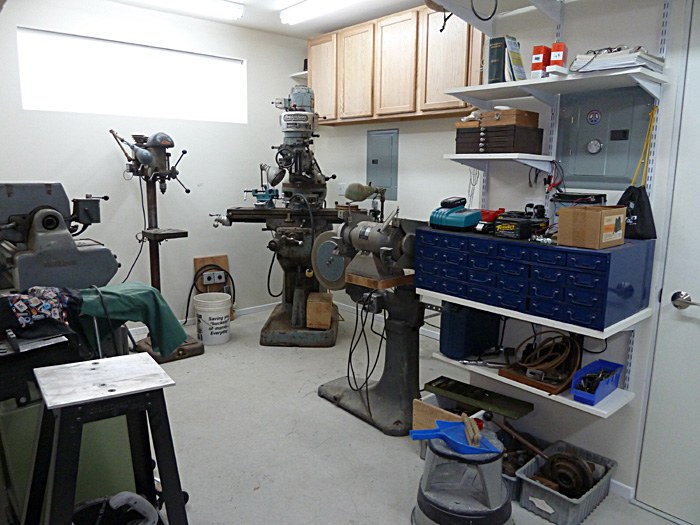
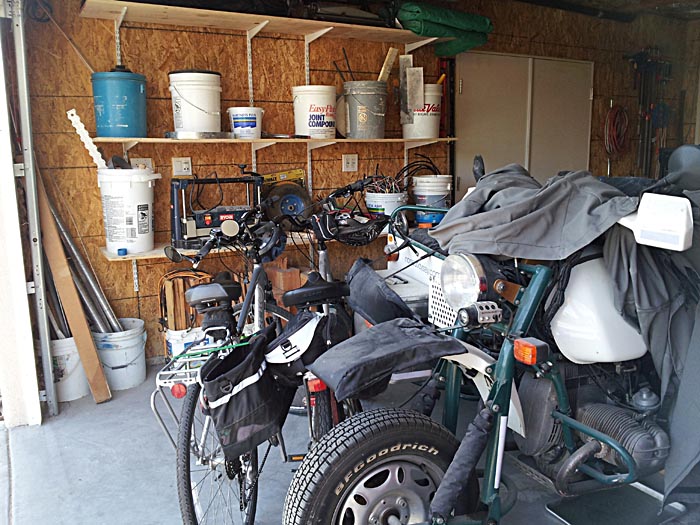
The other bay of the garage will hold my motorcycles and moto/sidecar rigs.

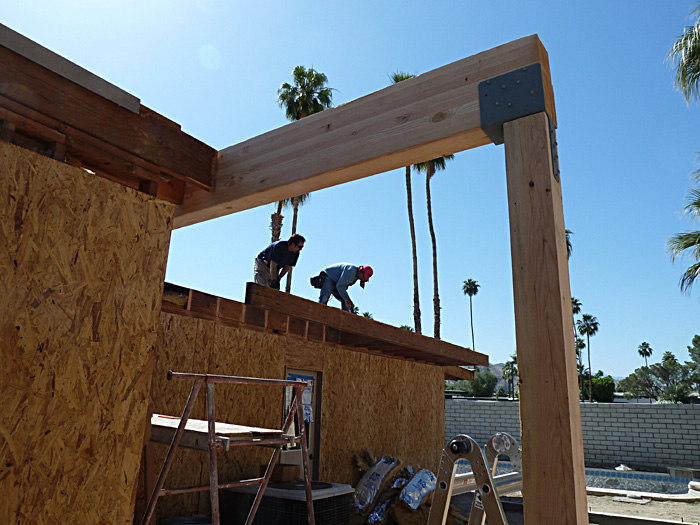
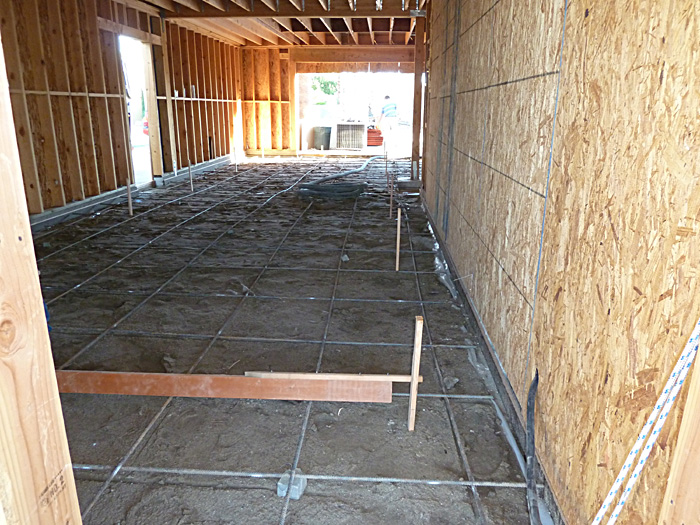
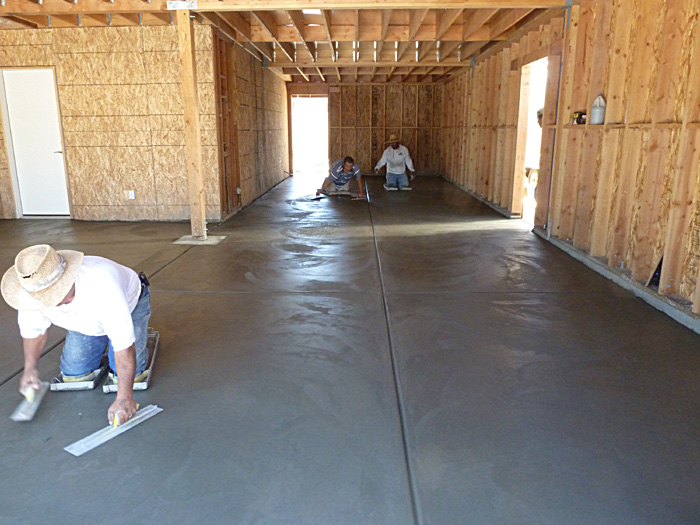
Once we got the various sections of foundation for the additions poured we could begin the work on the garage itself. The photo below shows one of the three glue lam beams that went into the construction of the garage.

New_post_and_beam_small.jpg


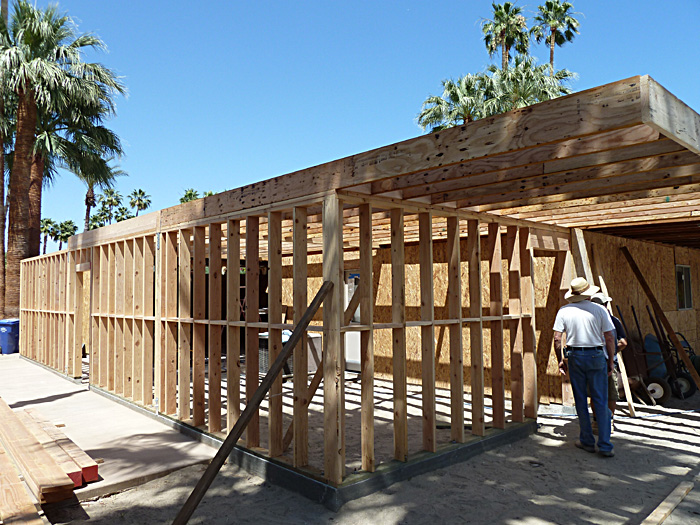
We could have reduced this to two beams but I was too cheap to put out the cash for a steel beam. By using two beams instead of a steel beam this meant we would have to have a post in the garage. This was not a problem given that the post was to be located in the corner of the small room that sticks into the garage from the hallway that goes into the house from the garage. This can be seen in the plan, above.
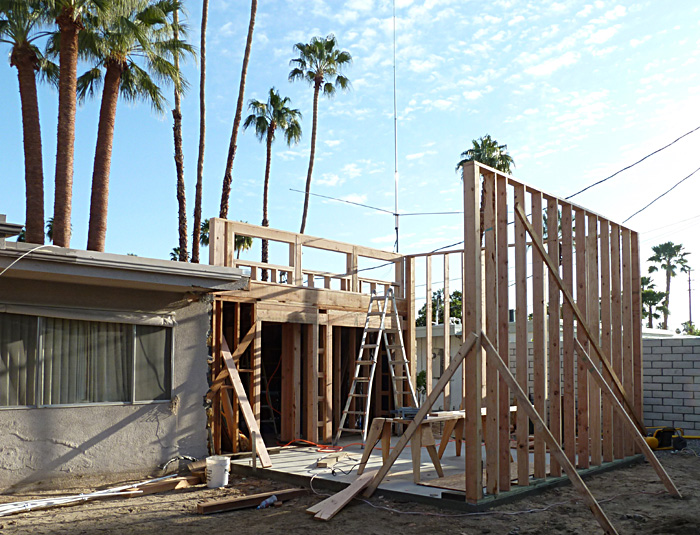
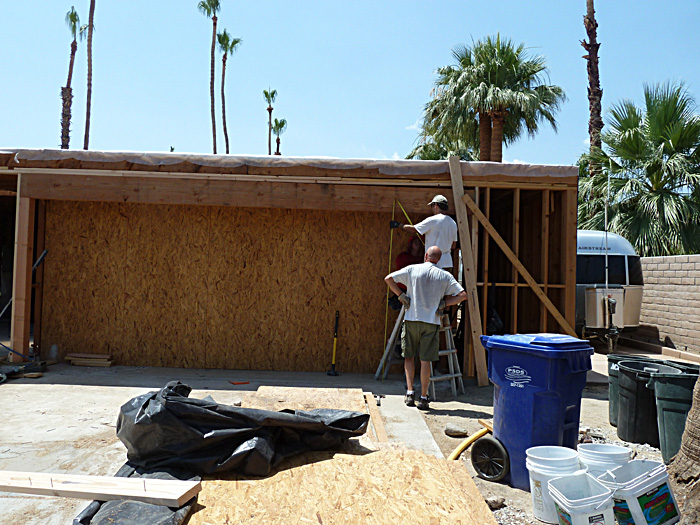
New walls went up.

New_walls_are_up_small.jpg


And the rafters went up, below. The cantilevered area runs along the entire back side of the house. This provides excellent shade in the summer.

Also, note that there are no windows on the west side of the garage. there are two personnel doors in/out of the garage that lead to the yard.

Note that all new construction is 2"X6" and that we "furred" out all the existing exterior 2"X4" construction to 2"X6" to allow for additional insulation.

The concrete pad to the left of the photo below provides ample parking space for our travel trailer.

Rafters_for_roof_small.jpg


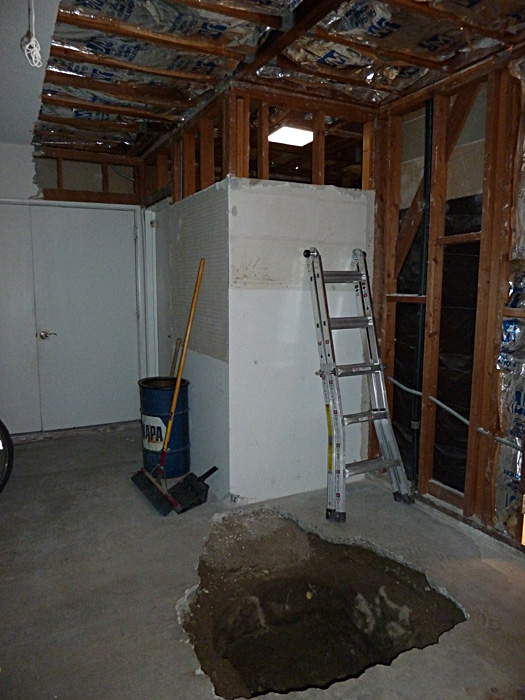
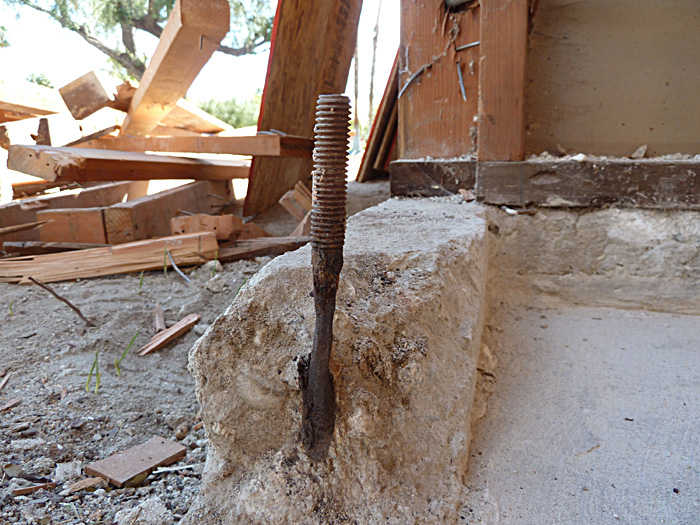
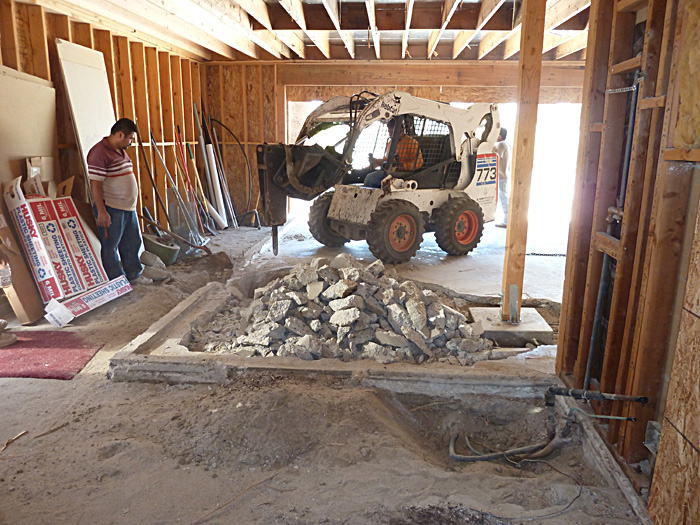
But, as is always the case, reality entered the picture. While it was nice that we found a copy of the original plans in the house we did not know when we had the plans made was that the foundation did not match that which was on the plans. The area where the small room is located turned out to be an after thought by the original owner/builder. While wall of that room that is closest to the garage door was in fact supporting the rafters for the garage and the interior of the house it was sitting on top of only four inches of concrete. Given that we were about to put a rather large glue lam beam across the top of this using the "foundation" to carry the load of a 6"X6" post something had to change.

We discovered this when we broke out the concrete in that area of the garage floor as can be seen in the photo below. Also shown in the photo below is the hole that we created for the new location of the post that would support the two beams that were needed to span the garage. And yes, this is what the engineer required us to do in order to create a footing to support the beam. We actually had to do this in several locations. Another footing was poured inside the house for a 6"x6" post to support the small beam that picked up the load of the large beam that replaced the wall between the living/family room.

Hole_for_footing_small.jpg


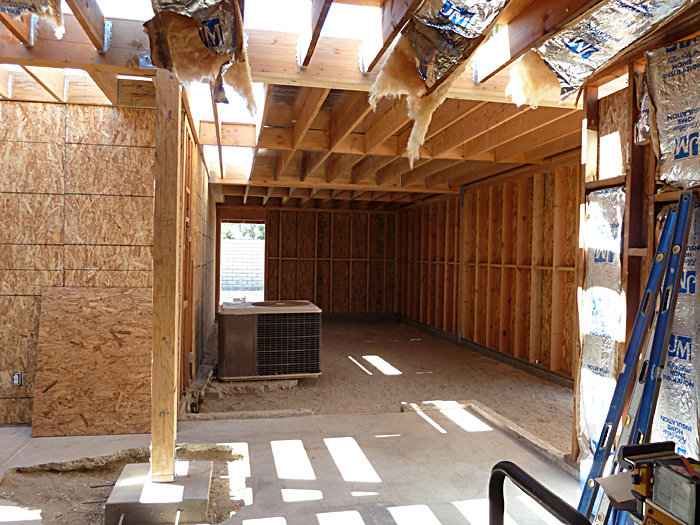
Here's what the garage looked like after the walls/ceiling were mostly completed. We decided it made no sense to keep the small room/closet as we were working to install the glue lam beams so we decided to reclaim the space for the garage; given there was never any foundation for the area it made more sense to put it back to the way it should have been when constructed.

Inside_new_garage_small.jpg


I know, who wants a beam in the middle of their garage. Well, if you look at the location it is exactly in line with the center of the garage as it relates to the areas where vehicles can be parked. In reality it really does not come into play. It will be a good place for an air chuck, among other things.

At this point we were ready to install the new header for the expanded opening for the garage door which will be the next topic for discussion...

Jim
 
Last edited:
OP
N

norsea

Active member
Joined
Mar 25, 2010
Messages
25
The Garage - At Last...(Continued)

At this point we were ready to install the new header for the expanded opening for the garage door. Once again, this became an exercise in flexibility. We encountered a small problem. When we opened the wall on the side of the garage that was the existing structure for the house to replace the old header support post we found the post "swinging" (technical term) in the breeze; meaning that there was not concrete between it and the ground.

Over the past 52 years the sprinkler system had watered that wall and it had also watered the wood structure within the wall. All of the concrete had crumbled under the support post for the garage door header.

The photo below shows just how bad it was. Once again we were off to the engineer and architect to get plans modified and a new design. I can take some credit for what we did to solve the problem because the engineer agreed with what I suggested and the city approved our change to the plan.

Rotten_bolt_small.jpg


After we made the repair to the foundation we were able to erect the post/header.

Garage_Beam_installed_small.jpg


As you can see in the photo above we had not yet gotten the header up to full height. We were quite lucky in that the beam we purchased for the header was long enough to be used. This was an issue because part of the solution was to increase the width of the door opening so we could mount the post on the existing foundation which was intact. This meant that all the calculations for the header had to be redone by the engineer. We were lucky because the beam at the new length passed the load calculations with the additional percentage for safety that is required for the calculation; but it just barely passed. If the opening was any wider we would have had to purchase a beam that was taller (stronger) in order to cover the span. This saved us considerable additional expense.

So we now had an oversize door opening at the expense of giving up some of the space on the wall to the left of the door that could have been used for storage. Given the cost trade off this was the only way to go.

The next thing on the agenda was to get the old garage floor out. While we had done all the concrete work ourselves, with significant assistance from our friend Ron up to this point, I was ready to bring someone in to do the garage floor and we found just the guys to do it. The price they gave us to remove the old floor and install the new one was too good to refuse so we gave them the job.

Louis is supervising at left in the photo below. The BobCat made short work of breaking up the garage floor and saved us the work of doing it with an electric jack hammer, sledge and pick-axe.

Removing_garage_floor_small.jpg


The old foundation proved to be a tad tougher to get out and that was part of the reason we were willing to sub this work out. The compressor room will go in the corner at the upper left of the photo, to the left of the door, above.

Once the concrete was out all that was left was to get rebar in...

Garage_ready_for_concrete_small.jpg


And pour the new floor.

Finishing_new_floor_small.jpg


This was all completed by September of 2011 which meant that the new doors and windows were in, the new roof completed and stucco on the building. Now we could start on the interior. And, more important, take a few weeks off. We had been working 7 days a week since February when the plans had been approved. We were happy to finally have a building that could be secured. For all the time between February and September one of us had to always be at the house in order to ensure tools and materials did not "grow legs" and go for a walk.

At the minute I am working on getting the shop set up. I apologize for the quality of the following photo but it is what it is; a good portion of the equipment that has to go into a space that is smaller than 11'X18'.

Equipment_to_go_in_shop_small.jpg


In the back is the Bridgeport mill (circa 1955) and the Sheldon Lathe (not sure about its age but probably form the same era). There is a large pedestal with three different grinders/polishers, vertical and horizontal band saws (the vertical band saw started life as a meat saw; now slightly re-purposed), the cart in the foreground with the blue box holds a portion of the tooling for the mill and lathe (vertical band saw not shown). Also not shown is an OLD Atlas full size drill press.

All of this "stuff" is sitting in the rear of the garage. You can see that we have insulation installed now as well.

Getting this into the tiny area that is the shop (11'X18' minus the equipment room space) such that it is usable is going to be a challenge. :)

That will be the subject of another post; as I type the mill is "standing in the door" to the shop ready to be rolled into the shop.

Jim
 
Last edited:
OP
N

norsea

Active member
Joined
Mar 25, 2010
Messages
25
starting to look good only wish I could have a garage that size!!

I understand completely. I lived near Ipswitch for three years, Dublin, Ireland for two years and in Germany for two years.

My wife and I spent seven winters in Spain in the Malaga area - all while traveling about Europe as our retirement gift to ourselves for seven years on our motorcycles/sidecar rig.

But on the bright side you have a garage; based on my experience in Europe that can be considered a luxury that most folks don't get. After looking at your GJ page I understand your desire for more space. :)


thats a lot of HARD work, especially in your heat. looking good so far.:thumbup:

Thanks for the kind words.

This project is something that I have always wanted to do. While I have done lots of little stuff around the house over the years I have never taken on a project of this scope. Personally I don't find the work to be difficult even with the heat; perhaps I am just motivated!

I find this project to be fun because I enjoy the process and expect to encounter difficulties. A big part of the fun for me is the problem resolution when you find things that are not as they should be, like the rotted concrete under the post for the garage header.

If you can "remain flexible" about things I think a project like this is fun. If, on the other hand, you are driven by a date to get things done it probably will cease to be fun very quickly.
 
OP
N

norsea

Active member
Joined
Mar 25, 2010
Messages
25
The Shop...

In the photo below you can see the Bridgeport Mill "standing in the door" waiting on me to come up with a better idea than the piece of steel as a ramp to get it over the threshold.

Mill_with_ramp_small.jpg


Fortunately for me divine intervention came through and we employed the same tools the ancient Egyptians used to construct the pyramids; more rollers and a big lever.

I replaced the ramp with three 1.5" lengths of pipe to pick up the load when the mill came into the shop on the 3/4" lengths of pipe it is sitting on in the photo. Once we got enough of it into the doorway it was a simple matter of rocking it forward onto the 1.5 in pipes, twisting it to the left and moving it back into its new home. And yes, we did have to spin the head such that the motor cleared the header for the door.

Next on the agenda was getting the lathe into the shop. I was more concerned about moving the mill than the lathe and it turned out that the mill was a "piece of cake" and the lathe was a pain in the back side.

Lathe_entering_shop_small.jpg


The lathe took a bit more ingenuity but once we came up with the idea to use the 4"X4"'s it was just a matter of time. Lots of raising and lowering each end to keep things balanced and moving smoothly. The pry bar that can be seen in my hand, above, is 1.25" thick; a monster. I don't know how they did it but someone managed to put a slight bend in it previously.

At the time we poured the garage floor the question came up about making the concrete in the garage slope up to the floor of the shop. At first I was not sure I wanted an angle such as this but one of the guys who was helping us asked what I was going to put in the shop. When I told him about this equipment he suggested that I do the ramp so I could just roll things in rather than have to go through several exercises with jacks and blocks. He was right. Being able to roll things in made the job much easier.

After getting the mill and lathe positioned and leveled I was able to get the rest of the equipment that will fit into the shop.

Lathe_Mill_Grinders_Drill_Press_in_place_small.jpg


For those that are curious, the box on the bottom right of the mill base contains an electric motor. Both the mill and the lathe are three phase power. The motor combined with the electrical "stuff" on the wooden board leaning against the wall sitting on the floor to the left of the mill operate in conjunction with each other so that the three phase motors will spin up and then run on 220V AC. I need to make the cord for the hardware on the wooden board longer so I can position the board on the wall between the mill and lathe. The outlet for it is located behind the mill; this way I don't have to touch the cords on the mill or lathe.

The area to the left where the trash can and belt sander sit will be taken over by my welding table once I can come up with a piece of metal that will fit the space, about 4'X3'.

The drill press under the window is an old Atlas. The photo below gives a better view of the grinders.

Mill_Grinders_small.jpg


The heavy stand (weighs at least 150 pounds) has a grinder on the right, a large polishing wheel and behind it are a wire wheel and a small polishing wheel; it is rock solid with one, two or all three machines running. While all the motors for the three on the large stand are rated at either 110V or 220V they are wired for 110V. The grinder against the wall with the large wheel is wired for 220V.

To the right of the double doors going into the shop is a work bench whcih can be seen in the photo below. Yes, a Sears Craftsman purchased on sale as was the metal top for it. I was shopping for some metal that I could put on another work bench that I have when I ran across the information about the sale. The price of both the top and the work bench were less than what I was being quoted for just metal to cover the existing work bench. Making this purchase was a no brainer.

Work_Bench_small.jpg


The small drawer units in the middle of the work bench between the large black doors were given to me by a neighbor across the street. They are really nice units with divided compartments that are great for screws/nuts/bolts, etc. I have managed to get a coat of primer on the frame for the bottom unit; I need to do the upper and the drawers. I think I'll just do them red with black drawers to match the work bench.

The small drill press to the right of the work bench is no longer there; it is for sale without the stand. I should get it on Craig's list this afternoon/evening for anyone interested.

Storage space comes hard in a small space such as this. I was able to reuse some brackets that I had and put some shelves on the walls as can be seen in the photo below which is taken from the garage looking into the shop. The door is the access to the mechanical room where the heater for the west side of the house will be located to the right of the door. The wall to the right of the door will get an AC duct from the plenum and a cold air return will be at the lower portion of the same wall between the door and the work bench. To the left of the door inside the mechanical room I will build a floor to ceiling cabinet that will house portable tools.

East_Wall_and_Workbench_small.jpg


The blue box with all the drawers needs to be cleaned out. It has lots of miscellaneous junk in it. I plan on using it to hold as much of the small tooling for the mill/lathe as possible given the weight concerns. The good news is that all of the anchors for the brackets are into studs and the top plate with 4" screws. Same for the shelves above the work bench.

Oh yes, the cabinets that can be seen on the other walls were also one of those things we found on sale; pretty nice stuff for a shop but the price was too good to refuse.

While we have been working on the house for 2.5 years, we just finished the paint and baseboard in the shop last week. It has taken three days to get all of this installed and I am more than happy to see the backside of getting things in place.

Now all I have to do is learn how to use all this here stuff. ;)

Jim
 
OP
N

norsea

Active member
Joined
Mar 25, 2010
Messages
25
Shop Dog...

Say "Hi" to Tater the wonder dog!


Shop_Dog_small.jpg


And his Indian name: He's So Cute...

Tait_in_Shady_Cove.jpg


What, me Worry?

You got somethin' in your pocket for me?

We goin' somewhere?

Jim
 

Press_Corpse

Well-known member
Joined
Jul 23, 2012
Messages
54
Location
Lemont, Illinois
Your progress looks phenomenal. Any reason you chose batten insulation vs spray foam? Doesn't seem like, from reading your thought process, cost isn't a huge concern as long as your monthly bills reflect it for the better. I love the use of 2x6, especially if there is room for it. You are going to have a wonderful home once this is complete. I'm sure you are grateful (in a way) that you can only work a few months out of the year... especially in this heat!
 
OP
N

norsea

Active member
Joined
Mar 25, 2010
Messages
25
Spray Foam vs. batten insulation...

Your progress looks phenomenal. Any reason you chose batten insulation vs spray foam? Doesn't seem like, from reading your thought process, cost isn't a huge concern as long as your monthly bills reflect it for the better. I love the use of 2x6, especially if there is room for it. You are going to have a wonderful home once this is complete. I'm sure you are grateful (in a way) that you can only work a few months out of the year... especially in this heat!

Thanks for the kind words.

This project does have a life of its own; living in chaos is one of the by products of a project where you live in the building while you are doing the work. And your right about getting a break from it being nice.

As for the reason for battens over foam the reason is...

Cost...

While we did put spray foam 1" thick on the inside of all the exterior walls and will do so in the walls between the house and garage, we just could not afford to do a full 6" (5.5" really) in the exterior walls. The difference in cost is more than significant; like a factor of 4 or more.

But the spray foam did provide an excellent seal keeping cold/hot air out and vice versa depending on the season.

Our roof is also spray foam which provides an excellent thermal break and also gives us an additional 7.2 R factor for each of the two inches of foam that comprises the roof. Our roof is flat and the rafters are 2"x10". No way we could afford to spray foam all of that. R30 battens plus R14 spary foam gives us a roof insulation factor of R40+. And, the OSB 7/16" material that comprises the roofing sheathing has a specially designed aluminum foil/craft paper laminate. It is installed foil side down facing into the building. My testing showed OSB without the foil laminate was 11 to 15 degrees F hotter than the OSB with the foil laminate.

The battens are called Ecobatt which "contains a minimum of 61.9% post-consumer recycled content" and is combined with sand. You can find info about it here: http://www.ecobatt.us/eco_batt.html

This using the spray foam as a "butter" coat did not do anything to improve our R factor; it would be the same given that some of the batten insulation had to be removed in order for it to fit in the stud bays with the spray foam. It was the sealing effect that we were after.

The 2"x6" studs for the exterior walls did not remove that much interior space. And, given the trade off for the provision of extra insulation it pretty much was a no-brainer.

There are two things I would do differently. One is spend more time looking for a company that could have provided Styrofoam 2" thick that we could have used on the exterior walls over the OSB sheer wall material to provide a thermal break. I looked all around the area and could not find anyone who could provide the material and/or the labor. I would have put it on myself if I could have located the material. In retrospect I just did not look long/hard enough; we found a development the year after we put the stucco on the building that had Styrofoam nailed onto the exterior walls prior to stucco being applied.

The second is use the foil laminate OSB on all of the exterior walls rather than the OSB without the laminate. At the time we did this the cost difference between the two products was not that great. Now both have gone up significantly in price.

Thanks for taking the time to check out the build...

Jim, who is curious as to where Lemont, Illinois is located. I spent 4.5 years of my youth in a small town north of Kankakee...
 
Last edited:
OP
N

norsea

Active member
Joined
Mar 25, 2010
Messages
25
Garage Organization...

Some photo's of the garage after we managed to get the equipment into the shop which cleaned out a lot of stuff that was taking up space all over the garage.

We managed to get the vast majority of stuff off the floor and onto shelves on the wall or suspended from the ceiling.

First, a view of the garage from the driveway.

Full_garage_with_car.jpg


Turning slightly left.

East_Wall.jpg


Looking to the right.

West_wall.jpg


The wall to the right of the tool chest, to the left of the truck.

Far_back_east_wall.jpg


Last but not least, the west side mechanical room where the main water line comes into the house and then feeds all of the outside water for the back of the house, the west side of the house and the west side of the front yard. This room is to the left of the truck and at the rear of the wall in the photo, above. Also shown is the water filter that is the first thing water for the interior of the house passes through after which it goes through water softener which consists of the two black tanks on the floor and the salt tank immediately to their right. Softened water also goes to the outside yard where there is a connection for the RV. There is a line that runs under the back yard to the mechanical room on the east side of the house that feeds water for the three bathrooms located on the east side of the house. To the right of the salt tank is the 1.5" gas line which feeds the appliances/heater on the west (this) side of the house.

I have to say this, "I love working with PEX for water supply lines.". Those with a discerning eye will note that the PEX on the wall to the right and feeding everything up to the water softener is Viega PEX; everything coming out of the water softener and feeding the tank-less water heater on the wall to the left and the interior of the house is Uponor PEX. We got a deal some time ago on the Viega PEX which was used to plumb my father-in-laws house. What was left did the initial work for this house. The Uponon crimp system is much easier to work with than the Viega PEX so we migrated to it.

And, I need to pour some concrete around the PVC pipes that the PEX go through coming up into the room to seal it.

Water_works.jpg


The good news is once the garage was more organized I could find things again. The bad news is that it will all have to come down in order to get sheetrock installed. Something to do this next winter/spring after I get the east side bathrooms operational, and the kitchen installed and operational and the laundry room completed and the west side bathroom gutted and re-framed/plumbed.

Never a dull moment...
 
Last edited:
OP
N

norsea

Active member
Joined
Mar 25, 2010
Messages
25
Desert Oasis - The "other" Water Works

When we returned this fall I finally got around to getting the water works on the east side of the house plumbed for the three bathrooms on that side of the house and the sprinkler controller installed.

Waterworks_East_completed_small.jpg


Inspections have passed for plumbing and insulation and drywall starts next week. Then it is show pans, paint and tile.

This marks a major milestone for the project. Once this is completed all I have left is the kitchen, laundry, yet another bath on the west side of the house and the garage.

Not shown in the photo is the HVAC system behind the wall on the left where the refrigerant and condensation lines for the AC can be seen.

Also not seen is the 200 Amp electrical panel just out of the photo to the left which services the east side of the house. With the requirements for Arc Fault Interrupters on all outlets not requiring GFCI outlets in this here part of the world it is really a pain in the backside to get sufficient circuits installed. I had to put two 125 Amp panels off this one in order to have enough slots for the AFI breakers which take up a full slot. I opted for the two smaller panels because they could be fairly easily hidden behind pictures; it is not permitted to put electrical panels in closets these days.

Waterworks_East_completed_small.jpg
 
To avoid these ads, REGISTER NOW!
Top Bottom