To avoid these ads, REGISTER NOW!

Dewalt 1400 RAS

maverick18

Member
Joined
May 13, 2016
Messages
10
point me in the right direction. I picked this up for $40 and it runs great. I don't want to screw up this beautiful tool, so im asking you what should I do and where I should start? My plan is to clean it up and do the maintenance on it first, but I plan on using it.

683815c8d506144d8c7c8b0a239069d8.jpg
83b8bcf60a4ee4d14a8eea8d3ebe86df.jpg
cc318a1e44fef413b1a89c2270c14083.jpg

Sent from my SAMSUNG-SM-N920A using Tapatalk
 
To avoid these ads, REGISTER NOW!

Cruzan80

Well-known member
Joined
Jul 22, 2015
Messages
4,258
Location
Denver, CO
Step 1: Take a wet rag, and remove all oil/sawdust/grease residue from the machine.

Step 2: Inspect the power cord at any point that it takes a hard turn (motor to arm, arm to cord, cord to plug) for any damage.

Step 3: Download manual and figure out how to true the saw to the table top.

Looks like most of the pieces are there, including the anti-kickback pawls and blade guard. Probably missing the leaf guard (if there was one, as well as the way to hold the table down. If it is similar to the Rockwell (Rockwell/Delta) 12-RAS, I have a couple of spare brackets that hold the table rod on. May be similar to custom fabricate something rather than tracking down OEM parts though.
 

7th Kahuna

Well-known member
Joined
Aug 4, 2012
Messages
1,704
Location
Los Angeles, CA
Welcome to Garage Journal.

That is a nice machine. I have one just like it that I need to finish setting up. You are missing a few parts but nothing critical that I see. Are you missing the table mounting brackets or did you take them off for transport? Please be aware that it has an inappropriate blade on it. Radial arm saw blades should have a neutral to slightly negative tooth pitch in order to prevent the blade from 'rushing' the operator. To learn more, search for Mr. Sawdust's "How To Master The Radial Arm Saw". The late Mr. Kunkal worked for DeWalt for many years and was an authority on their saws. His family still maintains his website.
 
Last edited:
OP
M

maverick18

Member
Joined
May 13, 2016
Messages
10
I noticed that about the blade. Is there a place I can buy parts? How do I get the blade off?

Sent from my SAMSUNG-SM-N920A using Tapatalk
 

7th Kahuna

Well-known member
Joined
Aug 4, 2012
Messages
1,704
Location
Los Angeles, CA
Getting the blade off is fairly easy. You need a wrench for the nut and an allen key for the arbor. If you look at the end of the arbor you will see the hole where the key is inserted. I believe it is 1/4 inch. If you don't have an allen key, a garbage disposal key may work as well. Be aware, I believe you will find the arbor to be reverse threaded. One of the blades I have seen recommended for it is the Onsrud MTR-10-098-60. I really need to get one ordered myself. They are (or were) available online.

As for parts, eBay may be your best bet. Where are you located? I may be able to help. You didn't say whether you had the table or not. Mr. Sawdusts' book, and several online videos, discuss construction of a 'Mr. Sawdust table'. Of course, while nice, the extra work is not required, any flat surface will do, depending upon your intended use. That saw also originally came with a fold up table extension in the front. The extension is nice if you are working in a tight space but unnecessary.
 

7th Kahuna

Well-known member
Joined
Aug 4, 2012
Messages
1,704
Location
Los Angeles, CA
Here is mine before I picked it up:

IMG_2522.jpg


You can see the fold down table and the opening in the end of the arbor for the allen key.
 

7th Kahuna

Well-known member
Joined
Aug 4, 2012
Messages
1,704
Location
Los Angeles, CA
I am a firm believer in using the radial arm saw as originally intended, that is as a cross cut and dado saw. What makes a radial arm saw a 'Power Shop' however were all the accessories that were available. You have probably already made note of these, but if not, here is an excerpt from an old ad.

dwaccess.jpg


These parts too often come up on eBay as well as Craigslist in my neighborhood.
 

7th Kahuna

Well-known member
Joined
Aug 4, 2012
Messages
1,704
Location
Los Angeles, CA
Finally, if you haven't already found your way over to the Vintage Machinery website, here's a link:

http://vintagemachinery.org/mfgindex/detail.aspx?id=252

The model 1400 and it's sister model 1200 date from around 1962/63 as I recall. The Vintage Machinery site contains copies of original literature, company histories, photos, etc.

The model 1400 is arguably the last of the 'quality' homeowner grade DeWalt saws. The model 1450 which followed, moved the controls to the front of the arm. While in theory making the saw safer, it also resulted in an arm which flexed under stress. As I understand it, the change was made in answer to Sears' redesign of the Craftsman RAS and their subsequent marketing campaign. Competing with Sears was bad news. DeWalts were superior saws.
 
Last edited:
OP
M

maverick18

Member
Joined
May 13, 2016
Messages
10
First thing I need to do is replace the cord

Sent from my SAMSUNG-SM-N920A using Tapatalk
 
To avoid these ads, REGISTER NOW!

Cruzan80

Well-known member
Joined
Jul 22, 2015
Messages
4,258
Location
Denver, CO
I would agree with that assessment. You may also want to protect the black/green connection in your last wire photo (I saw reds had a wire nut, but the black/green was soldered together but left unshielded).
 
OP
M

maverick18

Member
Joined
May 13, 2016
Messages
10
Any recommendations on how to go about doing this. (Power Cord)

Sent from my SAMSUNG-SM-N920A using Tapatalk
 

7th Kahuna

Well-known member
Joined
Aug 4, 2012
Messages
1,704
Location
Los Angeles, CA
First question is are you going to run it on 110 volts or 220 volts? It appears that it is currently wired for 220v though it is not entirely clear in the photo. The next question is are you going to be able to / comfortable soldering the soldered connections? It is a fairly easy job, just copy what is currently there, but crimping and soldering requires tools and skills you may not have. My guess is you wouldn't have asked the question if you had the experience. Folks here can walk you through the process but ideally it would be nice for you to have a buddy there with you who had some experience. If I miss read your question, please clarify.
 
OP
M

maverick18

Member
Joined
May 13, 2016
Messages
10
First question is are you going to run it on 110 volts or 220 volts? It appears that it is currently wired for 220v though it is not entirely clear in the photo. The next question is are you going to be able to / comfortable soldering the soldered connections? It is a fairly easy job, just copy what is currently there, but crimping and soldering requires tools and skills you may not have. My guess is you wouldn't have asked the question if you had the experience. Folks here can walk you through the process but ideally it would be nice for you to have a buddy there with you who had some experience. If I miss read your question, please clarify.
It's currently running 110 volts and will probably keep it that way. I have a buddy that's a licensed electrician, so he will help. Where and what type of cord should I buy?

Sent from my SAMSUNG-SM-N920A using Tapatalk
 

7th Kahuna

Well-known member
Joined
Aug 4, 2012
Messages
1,704
Location
Los Angeles, CA
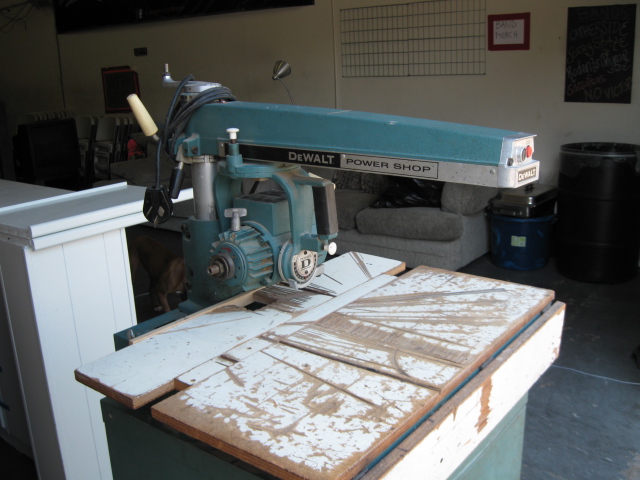
I believe it is currently wired with a 14 gauge cord. If you inspect the old cable you should see it imprinted into the side. It would say either 12/3 AWG or 14/3 AWG. The 3 indicates the number of conductors, in this case (for 110v), positive (black), negative or neutral (white) and ground (green). Simply put, the gauge is the diameter of the wire, the lower the number the greater the diameter and the greater the capacity. 12 gauge carries more amps than 14 gauge. If the cord is currently 14 gauge then you could replace it with either 14 or 12. If it is 12, replace it with 12. There is one other consideration. If you are using the saw in your garage, with an outlet near by, then no worries. If you are planning to haul it to a job site or outbuilding and power it with an extension cord, then I would suggest 12 gauge. It may not be necessary but it does help to protect the motor. Using an undersized cord will burn out a saw motor before it's time.

As for where to buy, any hardware store, Home Depot, Lowes, etc. will carry it. You may also want to buy a new plug. The one you have there is kind of a pain to wire. The final variable is the thickness of the outer jacket of the cord. Again, unless you are dragging it around a lot, any will do.

So figure out the gauge, the length you need / desire, and hit the store. They should be able to point you in the right direction. As an option to buying actual cord, you could also buy an appropriate gauge extension cord and cut the female end off.
 
OP
M

maverick18

Member
Joined
May 13, 2016
Messages
10
Getting the blade off is fairly easy. You need a wrench for the nut and an allen key for the arbor. If you look at the end of the arbor you will see the hole where the key is inserted. I believe it is 1/4 inch. If you don't have an allen key, a garbage disposal key may work as well. Be aware, I believe you will find the arbor to be reverse threaded. One of the blades I have seen recommended for it is the Onsrud MTR-10-098-60. I really need to get one ordered myself. They are (or were) available online.

As for parts, eBay may be your best bet. Where are you located? I may be able to help. You didn't say whether you had the table or not. Mr. Sawdusts' book, and several online videos, discuss construction of a 'Mr. Sawdust table'. Of course, while nice, the extra work is not required, any flat surface will do, depending upon your intended use. That saw also originally came with a fold up table extension in the front. The extension is nice if you are working in a tight space but unnecessary.
I'm in the process of building the table. However I'm starting from scratch. First thing I'm doing is making the table mounts out of angle iron. Any help will appreciated.


Sent from my SAMSUNG-SM-N920A using Tapatalk
 
OP
M

maverick18

Member
Joined
May 13, 2016
Messages
10
What I noticed is how it's not square. To square it up I will have to raise the left side of the table almost 3/8th of an inch. Is this normal?97b369ed5306ee444bf4742e31779443.jpg

47b46467b588f75eb10e7063769d70f2.jpg

Sent from my SAMSUNG-SM-N920A using Tapatalk
 
OP
M

maverick18

Member
Joined
May 13, 2016
Messages
10
I even took the bladed off and used the front edge of the motor to check square

Sent from my SAMSUNG-SM-N920A using Tapatalk
 
OP
M

maverick18

Member
Joined
May 13, 2016
Messages
10
b2fa3f9168b64b874fd09a80ca648281.jpg

Turned out to be an easy fix. Loosened the hen bolts and made the small adjustment and tightened them back up.

Sent from my SAMSUNG-SM-N920A using Tapatalk
 

cutstraight

New member
Joined
Aug 13, 2023
Messages
2
I have a vintage dewalt Radial arm saw from the 1960’s. Thank you for posting the pictures in 2016.
A friend of mine tore the electrical apart to fix a short to the motor without noting how the klixon. (Red button) was wired. I have a new klixon Would you kindly take and post more pictures of your electrical connections to the klixon? I don’t want to make a mistake. The pictures above under the motor plate are good but there are 3 posts to the klixon
Thank you
 

RTM

Well-known member
Joined
May 13, 2019
Messages
13,208
Location
SF Bay Area
Would you kindly take and post more pictures of your electrical connections to the klixon? I don’t want to make a mistake. The pictures above under the motor plate are good but there are 3 posts to the klixon
Thank you
the OP hasn’t been here since 2019, so may not want to put all your eggs in one basket waiting.
 
To avoid these ads, REGISTER NOW!
Top Bottom