I checked and both of my GL boxes have provisions for the double slides on the big drawers. I may be interested in this. Can you elaborate more -- or maybe a step-by-step for someone who's never had a drawer out before?
Adam
Sorry I didn't think to take any photos as I was installing mine or I would gladly provide them. Installing the second set of drawer slides is really quite easy. Here's a step-by-step description: (Be sure to read all of the following steps before starting.)
1) Order the appropriate drawer slides for your GL unit from Sears Parts. Note that the left and right side slides have different part numbers. The drawer slides for my unit were Sears part # 27827 (left slide) and 27828 (right slide) and cost $13 each when I purchased them earlier this year. You will need one left slide and one right slide for each drawer ($26 per drawer).
2) Upon receiving your new slides, note that each slide is actually a separable assembly of has two pieces: one piece that attaches to the cabinet (the "outside" piece) and one piece that attaches to the drawer (the "inside" piece). Separate the two pieces of each slide by gently pressing the black plastic tab as you pull them apart all the way (like opening the drawer all the way).
NOTE: be sure to keep the two pieces of the left slide together and the two pieces of the right slide together so that you do not mix them up.
3) You will need to use an old straight blade screwdriver to carefully pry off the griplatch tab from the "outside" piece of each slide (the piece that attaches to the cabinet) -- both left and right. I found it useful to start with a smaller screwdriver first, then switch to a larger one to finish the job. The griplatch tab is attached to the slide like a staple (this will make more sense when you actually look at one in person) and with a bit of careful effort you will be able to pry them off without damaging the bearing race.
Be sure to wear your safety glasses! After removal, you may discard the griplatch tabs as they are not needed.
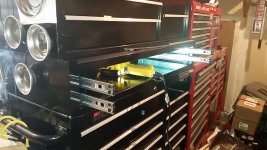
4) Empty the drawer which is to receive the additional slides and remove it from your tool chest using the black plastic tabs identified in step 2 above. (See the owner's manual that came with your tool chest for more information on drawer removal if needed.)
5) Apply the "inside" piece of the left and right slides to the drawer. (See the instructions that came with the slides for more info if needed.)
NOTE: before snapping them into place, double-check to make sure you have each one on the correct side and that it is right side up. (You could remove the slide from the drawer if you have to, but you may scratch the drawer in the process.) I found it helpful to turn the drawer upside-down on my workbench for this.
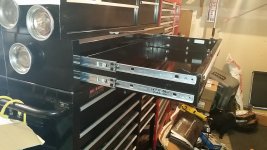
6) Apply the "outside" piece of the left and right slides to the cabinet by following the instructions that came with the slides as needed.
NOTE: before snapping each "outside" piece of the slides into place, double-check to ensure you have them on the correct side and right-side-up, and that they are in the correct vertical location by matching them up with the "inside" pieces of the slides that you already installed on the drawer. (Again, they could be removed if necessary, but better to double-check first.)
7) Install the drawer back into the cabinet by pulling all four "outside" slides on the cabinet out to their full extent, then carefully lining up the four "inside" slides on the drawer and pushing the drawer fully closed. Open and close the drawer several times to verify that it operates smoothly and opens/closes fully.
NOTE: You will notice that two ball-bearing slides do have more friction than one, so the empty drawer may not open and close as smoothly as it did with just one pair of slides. This will go away when you load up the drawer. You can also apply some Vaseline (the clear jelly stuff) to the bearing races in the slides to smooth things up a bit.
That's it! Other than prying off the griplatch tabs in step 3 above, this is exactly the same process you would follow to replaced a normal slide if it somehow became damaged. And other than the screwdriver(s) needed in step 3, no tools are necessary to accomplish this.


") Found it on Craigslist. Made in 2004. But I did not have enough weight in the drawers to justify adding slides.
Found it on Craigslist. Made in 2004. But I did not have enough weight in the drawers to justify adding slides.