To avoid these ads, REGISTER NOW!

Dipper's 20x22 Build Update

dipper

Well-known member
Joined
Jun 27, 2007
Messages
759
Location
Rochester, NY
A few weeks ago I was home as my wife gave birth to our 2nd son. This also gave me some quality time to get some work done in the garage.

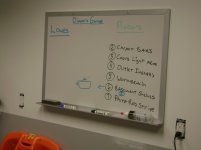
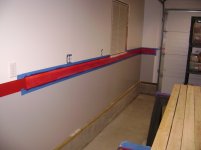
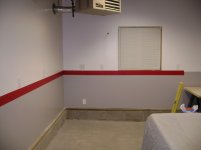
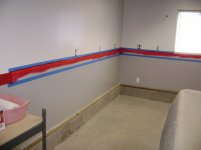
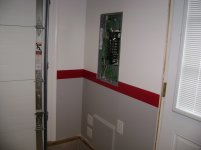
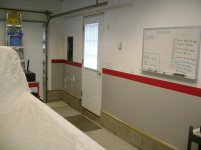
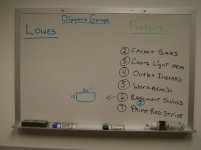
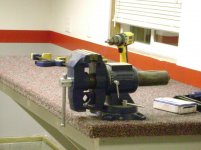
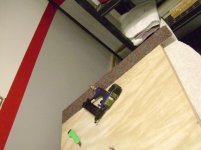
I got the stripe painted and tried to get stuff organized a little. I installed the dry erase board as well too. I also
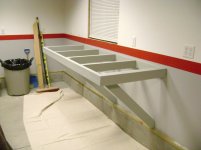
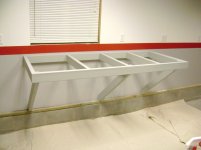
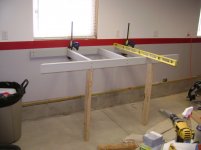
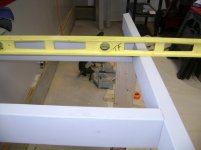
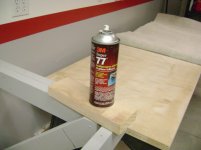
started working on the workbench and finished that up last weekend.
The workbench cost me about $25 to build.
 

Attachments

  • DSC03750.JPG
    DSC03750.JPG
    77.3 KB · Views: 106
  • DSC03777.JPG
    DSC03777.JPG
    81.9 KB · Views: 93
  • DSC03774.JPG
    DSC03774.JPG
    73.3 KB · Views: 93
  • DSC03769.JPG
    DSC03769.JPG
    71.7 KB · Views: 99
  • DSC03755.JPG
    DSC03755.JPG
    85.2 KB · Views: 744
  • DSC03752.JPG
    DSC03752.JPG
    111.5 KB · Views: 96
  • DSC03751.JPG
    DSC03751.JPG
    80.7 KB · Views: 116
To avoid these ads, REGISTER NOW!
OP
D

dipper

Well-known member
Joined
Jun 27, 2007
Messages
759
Location
Rochester, NY
workbench details:
I started with a few 2x4's leftover from the build. The top is a 1-3/8" solid core Birch door ($3.00 with discount from Grossmans Bargain Outlet). I wrapped it with some leftover carpet from GBO that I got last year for just this purpose. The dark gray and red goes well with the theme. That was a freebie as it was the end of the roll. $10 for some spray adhesive and a bunch of staples and it was done.
 

Attachments

  • DSC03786.JPG
    DSC03786.JPG
    114.4 KB · Views: 58
  • DSC03785.JPG
    DSC03785.JPG
    110 KB · Views: 52
  • DSC03783.JPG
    DSC03783.JPG
    86.6 KB · Views: 43
  • DSC03782.JPG
    DSC03782.JPG
    87.8 KB · Views: 36
  • DSC03780.JPG
    DSC03780.JPG
    80 KB · Views: 34
  • DSC03778.JPG
    DSC03778.JPG
    65 KB · Views: 43
Last edited:
OP
D

dipper

Well-known member
Joined
Jun 27, 2007
Messages
759
Location
Rochester, NY
more workbench pics, finished with Wilton Bench Vise installed. I like the idea of carpet on the bench for durability, ease of cleaning/vaccuuming, and keeping small parts from the RC cars bouncing onto the floor.


Future projects for this spring/summer:
VCT Flooring (have flooring, just have to install)
Interior window trim
 

Attachments

  • DSC03799.jpg
    DSC03799.jpg
    81.6 KB · Views: 102
  • DSC03797.jpg
    DSC03797.jpg
    73.1 KB · Views: 100
  • DSC03796.jpg
    DSC03796.jpg
    71.3 KB · Views: 66
  • DSC03793.jpg
    DSC03793.jpg
    71.5 KB · Views: 56
  • DSC03792.JPG
    DSC03792.JPG
    140.5 KB · Views: 50
  • DSC03791.jpg
    DSC03791.jpg
    67.5 KB · Views: 49
  • DSC03789.JPG
    DSC03789.JPG
    116.4 KB · Views: 52

Orange72

Active member
Joined
Feb 27, 2006
Messages
35
Location
MN
Very nice! I like the idea of using the carpet on the bench for that kind of work. Although I'm wondering about that huge vise. Maybe lag screws would be better to fasten the back 2x4 to the studs so it won't work itself loose over time.
 

Kevin54

MEMBER EMERITUS
Joined
Jan 12, 2005
Messages
29,341
Location
Urbana, Ohio
A few weeks ago I was home as my wife gave birth to our 2nd son. This also gave me some quality time to get some work done in the garage.

Now that is being a dedicated Garage Journal member. She's having a kid and you are working in the garage. "Give me a call honey and let me know how things went. I'll be out in the garage" :lol_hitti

A kidding aside.....what is the square area under the panel box?

BTW...CONGRATS on son #2!!!!!!

attachment.php
 
To avoid these ads, REGISTER NOW!

bowanna03

Well-known member
Joined
Mar 2, 2009
Messages
111
do you have any measuremnets for the workbench awesome idea I am in cicero just north of cuse. Garage looks great keep up th good work and pics.
 
OP
D

dipper

Well-known member
Joined
Jun 27, 2007
Messages
759
Location
Rochester, NY
the top is 32"x80". It's about 40" off the floor or so. The frame is about 30"x75" so there is a lip underneath of about 2" for attaching bar clamps to the edge.
 
OP
D

dipper

Well-known member
Joined
Jun 27, 2007
Messages
759
Location
Rochester, NY
Kevin- ha ha it wasn't quite like that. most of the week i was out there from 10pm to 1am painting and such while the boys were sleeping. there was one day that my 2 year old didn't make it down for a nap so I took him out to the garage. He proceeded to empty most of the tools out of one of my tool boxes and set them on the floor. He then put them all back in..too; he's a big helper.

The square is what I call my little "chase" for the conduit. Since the foundation was 8" block, then stepped down to 6"; the conduit is centered in the 8" i believe; but one of them is 1-1/2 or 2" for the gas line and there just wasn't enough room to have all be concealed inside the 2x4 wall.
I probably could have had it come up closer to the outside edge of the wall when it came through the block but oh well.
here's a better pic-
 

Attachments

  • DSC03239_1.jpg
    DSC03239_1.jpg
    105.2 KB · Views: 82
To avoid these ads, REGISTER NOW!
Top Bottom