To avoid these ads, REGISTER NOW!

DIY Concrete countertops

branimal

Well-known member
Joined
May 31, 2016
Messages
1,942
I need about 38 sq ft of countertop for my kitchen project. I was originally thinking quartz. But a quick google search - I'm seeing 65-70+ a sq ft installed. Thats going to run me $2500+.

I saw some videos on DIY concrete countertops. The type that you make right on top of your kitchen cabinets. It requires :

- installing 1/2" - 5/8" cement board on top of the cabinets
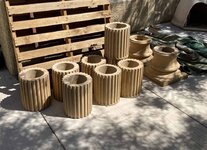
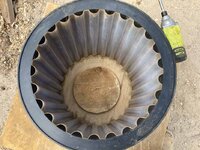
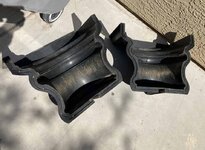
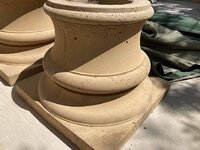
- installing plastic tear away forms that create the profiled edge of the countertop. When the concrete is cured you tear away part of the form. The remaining piece of the plastic form isn't visible
- installing reinforcement mesh
- mixing countertop powder with Sakrete or Quikcrete and water.
- pour, level and trowel the mix
- sand, polish, seal - no heavy duty sanding required.

Back of the envelope calculation - it will cost me $500 plus labor. I might need a helper on pouring day to mix, but the rest is a one man operation.

Does anyone have any experience with this? Thoughts?


Manufacturer's website:

Somewhat annoying but quick overview video:

Long & insightful video:

Picture of one style of plastic tear away form:
 

Attachments

  • Screen Shot 2021-08-28 at 6.27.26 PM.png
    Screen Shot 2021-08-28 at 6.27.26 PM.png
    816.7 KB · Views: 142
To avoid these ads, REGISTER NOW!

loganb

ALLIANCE MEMBER
Joined
Dec 29, 2011
Messages
5,532
Location
Omaha, NE
I've helped once, but we did not pour in place. Built the forms up in the garage and poured there/then stripped, polished and moved into place. Worked out well and looked good in the space, they were shorter runs so moving them wasn't as big of a deal.
 
OP
B

branimal

Well-known member
Joined
May 31, 2016
Messages
1,942
I've helped once, but we did not pour in place. Built the forms up in the garage and poured there/then stripped, polished and moved into place. Worked out well and looked good in the space, they were shorter runs so moving them wasn't as big of a deal.

I've seen videos on that. Did you use melamine forms? Did the polishing create a lot of dust? I'm working in a finished workspace. No furniture stuff yet, but everything is brand new in here (cabinets, floors, bathrooms, etc).

I'd need some big buys to move my pieces into place. Which I could hire out for. I can template & build the forms myself. I'd need an extra pair of hands to help mix while I pour.

Thanks
 

jkeyser14

Well-known member
Joined
Dec 19, 2008
Messages
1,819
Location
(rural) Maryland
I have poured concrete countertops into a form. I mixed 6 ksi mortar in 5 gallon buckets. I used flow control to help the concrete pour easier. I used a sawzall without blade to vibrate the form. It turned out excellent except that mixing was too slow and the previous bucket's pour would start setting up before the next one was poured (even with a helper). Also, each bag turned out with a slightly different color which looks bad since the pour was done in sections. The surface was super smooth though and had zero voids and needed no polishing.

My biggest lesson learned: Rent a concrete mixer to even out the color and reduce the time crunch of hand mixing smaller pours.
 

rlitman

Well-known member
Joined
Oct 18, 2010
Messages
24,609
Location
Long Island
I polished and ground my own granite countertops. There was hardly any dust, because I did everything wet. I could not remotely imagine doing the job dry, or doing the job wet indoors. Especially over a finished floor and cabinetry.
 

rayra

Well-known member
Joined
Dec 1, 2014
Messages
4,724
Location
Escaped from Los Angeles
I'm very interested in using the Z-form this winter to pour an outdoor grill counter. Along with a silicone insert which puts detail on the edge of the slab -


I've been working on a backyard pergola project, casting concrete greco-roman column segments, with integral dye in the mix. And a combination of other techniques to make the cast pieces lighter and mostly hollow (the columns won' tbe structural, just have to hold themselves up.
The follow-on project(s) will be the outdoor grilling counter / island, with embedded stainless / propane grill, a 22" Weber charcoal grill and a domed pizza oven, all in a large L-shaped counter. I intend to cast that countertop in place. So looking for all the info on the process I can find. There are some good youtube videos and the z-form looks very straightforward to use.

I also purchased the Harbor Freight mixer for ~$220 and it has been working great. (2) 60# bags is about its limit though, more and you'll get a lot of spillage even at the steepest tilt angle setting. But it mixes quite fast, so you will be able to mix and pour a counter with a continuous wet pour, if you get everything organized ahead of time to get it mixed and cast in the least amount of time.
Too, try to buy all the bagged concrete off the same full palette, ought to be all the same batch and come out the same. Last tip on that, don't pour it all out of the mixer, just keep adding and pouring, to try and blend them all together and reduce the variation in the coloration.
But you can bypass that if you go with an integral dye mix and go heavy on the dye.
I'm having success with both integral and surface-applied dye powders from WaltTools. Which can also be purchased via Amazon.
Been doing some surface texture stamping on some custom-sized pavers, as well.

eta one caution on the Harbor freight mixer. The motor enclosure has no air circulation, only the bottom of the enclosure is open. There's no grills or louvres. I'm working in Vegas heat, in summer, and concerned about letting the magic smoke out of the motor. So I partially unbolted the clamshell about the motor and have it wedged partially open so hotter air can escape the enclosure. And I'm only working in the less-hot morning hours. I'm pretty much done for the day before temps hit 100F
 

Attachments

  • sparta columns stockpile.jpg
    sparta columns stockpile.jpg
    103.1 KB · Views: 89
  • sparta columns round10 cast.jpg
    sparta columns round10 cast.jpg
    82.7 KB · Views: 80
  • sparta columns 68 pillar stacked.jpg
    sparta columns 68 pillar stacked.jpg
    69.2 KB · Views: 76
  • sparta columns 62 siberia.jpg
    sparta columns 62 siberia.jpg
    130.2 KB · Views: 107
Last edited:

Ralphxj

Well-known member
Joined
Mar 25, 2008
Messages
413
Location
NE Ohio
I did the z-form counters in my kitchen and the wife and I love them!! Depending on where you are located, I still have a bunch of the forms left from my project. I used their white mix and additives.
 

Boilerhouse

Well-known member
Joined
Mar 20, 2012
Messages
1,320
Location
Muskoka
I'm very interested in using the Z-form this winter to pour an outdoor grill counter. Along with a silicone insert which puts detail on the edge of the slab -


I've been working on a backyard pergola project, casting concrete greco-roman column segments, with integral dye in the mix. And a combination of other techniques to make the cast pieces lighter and mostly hollow (the columns won' tbe structural, just have to hold themselves up.
The follow-on project(s) will be the outdoor grilling counter / island, with embedded stainless / propane grill, a 22" Weber charcoal grill and a domed pizza oven, all in a large L-shaped counter. I intend to cast that countertop in place. So looking for all the info on the process I can find. There are some good youtube videos and the z-form looks very straightforward to use.

I also purchased the Harbor Freight mixer for ~$220 and it has been working great. (2) 60# bags is about its limit though, more and you'll get a lot of spillage even at the steepest tilt angle setting. But it mixes quite fast, so you will be able to mix and pour a counter with a continuous wet pour, if you get everything organized ahead of time to get it mixed and cast in the least amount of time.
Too, try to buy all the bagged concrete off the same full palette, ought to be all the same batch and come out the same. Last tip on that, don't pour it all out of the mixer, just keep adding and pouring, to try and blend them all together and reduce the variation in the coloration.
But you can bypass that if you go with an integral dye mix and go heavy on the dye.
I'm having success with both integral and surface-applied dye powders from WaltTools. Which can also be purchased via Amazon.
Been doing some surface texture stamping on some custom-sized pavers, as well.

eta one caution on the Harbor freight mixer. The motor enclosure has no air circulation, only the bottom of the enclosure is open. There's no grills or louvres. I'm working in Vegas heat, in summer, and concerned about letting the magic smoke out of the motor. So I partially unbolted the clamshell about the motor and have it wedged partially open so hotter air can escape the enclosure. And I'm only working in the less-hot morning hours. I'm pretty much done for the day before temps hit 100F
Those are awesome. I am curious what weight saving techniques did you use to reduce the mass of the concrete pieces.
I replaced a crumbling stone pillar on the property with a new structure to house outdoor plumbing and an electrical outlet. Everything was DIY except the light fixture and the hose reel. (cast the cap/ blocks and turned the post)
I would like to do more of this as I find these type of projects fashionable, functional and durable.
 

Attachments

  • end result1.jpg
    end result1.jpg
    857.2 KB · Views: 97

couch67

Well-known member
Joined
Mar 18, 2016
Messages
1,403
Location
Ontario Canada
About 9 years ago I did our countertops, 4 separate pieces. I made melamine forms in the shop and poured them there. The forms are such you are making them upside down, so the bottom of the form is the top of the countertop. I followed the Cheng concrete method, and used his products for the mix (colourant, plasticizer, fiber reinforcement). In all it took about 3 weeks. One weekend for the form build and pour, then a few weeks on and off doing the polishing. This was a messy stage with a wet polisher, I could corner off the shop but could not imagine doing this in place in the kitchen.

One thing I would do different - use an epoxy or 2 part polyurethane finish on the counters. I did a sealant - wax finish on the main countertops, and they are ready now for a re-finish due to different stains. The wax finish is finicky and requires very frequent redoing. I did the bartop with a 2 part poly (3 layers) and it looks like it did in 2012.

full
 

PCustoms

Well-known member
Joined
Jul 23, 2011
Messages
22,919
Location
VT
I did mine in forms, flipped and wet polished.

To echo some comments:

Form: 3/4" OSB covered with a fresh $8 sheet of white hardboard. Sides were whatever 1.5 smooth scrab I had laying around, for hidden eyes any stick worked. Sealed seems with latex caulk. When I poured I tapped the air out with a rubber mallet. It worked, but I screwed up a smaller test so new what to look for. Use a sander, OMT or sawzall

Consistent mix and pour:
I used rapid set mortar. I would pre-measure all my liquid (water, color(s) and 2x flow control) into a bucket and stage the bag next to it. Dump, mix, pour, repeat. Still can tell where I poured. Takeaway: don't use rapid set. It also sets too fast to trowel

Polish: wet polish with diamond pads. Slurry/water everywhere. I wore a raincoat and did it in the driveway

Sealer: I used a food grade sealer, followed by wax. I get rings from almost everything, most fade over time.

I made an error in my template and didn't polish my edges the same. I've contemplated pouring a new counter in place, but question if I can vibrate and trowel enough to not have to polish
 

TriumphFan

Well-known member
Joined
Feb 4, 2019
Messages
584
Location
North Georgia
I did ours in our mudroom. I made the form out of melamine and flipped it. It's not perfect but it's just the mud room so...
Watch a few you tube videos and plan on doing it twice. If you have a sink be advised it can get a little fragile without reinforcement. IMG_0510.JPG
 

plout99

Well-known member
Joined
Apr 8, 2012
Messages
288
Location
Ohio
I did mine in forms, flipped and wet polished.

To echo some comments:

Form: 3/4" OSB covered with a fresh $8 sheet of white hardboard. Sides were whatever 1.5 smooth scrab I had laying around, for hidden eyes any stick worked. Sealed seems with latex caulk. When I poured I tapped the air out with a rubber mallet. It worked, but I screwed up a smaller test so new what to look for. Use a sander, OMT or sawzall

Consistent mix and pour:
I used rapid set mortar. I would pre-measure all my liquid (water, color(s) and 2x flow control) into a bucket and stage the bag next to it. Dump, mix, pour, repeat. Still can tell where I poured. Takeaway: don't use rapid set. It also sets too fast to trowel

Polish: wet polish with diamond pads. Slurry/water everywhere. I wore a raincoat and did it in the driveway

Sealer: I used a food grade sealer, followed by wax. I get rings from almost everything, most fade over time.

I made an error in my template and didn't polish my edges the same. I've contemplated pouring a new counter in place, but question if I can vibrate and trowel enough to not have to polish

This sums up the way I did ours, I to can’t imagine wet polishing inside. I bought a wet polisher on Amazon and a diamond profile cutter for the polisher to give the countertops a custom edge. If I did it over I would use one of the lightweight countertop mixes. I used 5000 psi quickrete with extra Portland cement added to it.
 

Walkers

Well-known member
Joined
May 17, 2021
Messages
3,912
Location
Cave Creek Az
My biggest recommendation is that you do a test piece at least 4’ long outside first. You can always use it for an outdoor table. It let’s you get any form, mixing, color, polishing errors out of your system. Worse thing happens you break it up and pitch it, which is much harder to do when there is 20’ of it in your kitchen.
 

Mandres

Well-known member
Joined
Jun 22, 2006
Messages
1,157
We're looking into this option for our kitchen too. I like the z form kits, and the pour in place approach. Is wet sanding / polishing totally necessary? Can you just apply a few coats of urethane as a clear coat?
 

rayra

Well-known member
Joined
Dec 1, 2014
Messages
4,724
Location
Escaped from Los Angeles
Those are awesome. I am curious what weight saving techniques did you use to reduce the mass of the concrete pieces.
I replaced a crumbling stone pillar on the property with a new structure to house outdoor plumbing and an electrical outlet. Everything was DIY except the light fixture and the hose reel. (cast the cap/ blocks and turned the post)
I would like to do more of this as I find these type of projects fashionable, functional and durable.

Besides making them mostly hollow, I added a lot of vermiculite to the mix. 20cups to the 60# bag. Worked fine in the volume of the pieces, not sure I could recommend it for a fine finish of a kitchen countertop. I don't have exact weight, I estimate I saved about 15% of the weight using the the vermiculite as a filler / expander. Just under 2 bags for the hollowed base pieces, <1 bag for the column pieces. The overage I slopped in buckets to make stepping stones for my garden planters revamp this Fall.
The base / capital pieces weight over 100#, the 4 column pieces in each pillar weight 50-55# each. Call it well over 400# for each column. They're going on a patio slab. I intend cut 12"x12" holes in the slab at each pillar location and dig out a large footing under each, which will also extend under the slab a few inches. iirc the pillar bases are 18"x18".
I'm setting a simpson stirrup bracket for a 4x4 posts at the center and those posts will support the pergola beams. The concrete pillar sections are being stacked over the wood post. They'll hold nothing up but themselves. The pillar pieces will be bonded together and look dry-stacked from the outside.

One other thing on using sonotubes to make the pieces hollow - the concrete is supposed to go on the INSIDE of a sonotube, the inside is waxed. The outside is highly absorbent. The first pieces I cast with the tubes, their cardboard got soggy and collapsed. I'd also tried slicing an 8" tube and compressing it down to 7"dia for a little mor ewall thickness in the column pieces, but there too, the compression of tamping the concrete again collapsed the hollow core. So the first three pieces will get repurposed. Cost for each was ~$15 in materials, small loss.
After that I took to wrapping the sonotubes in foil as a moisture barrier. I may or may not cut the cardboard out, haven't decided.
 

Attachments

  • casting molds 04.jpg
    casting molds 04.jpg
    101 KB · Views: 61
  • casting molds 06.jpg
    casting molds 06.jpg
    95.3 KB · Views: 44
  • casting molds 11.jpg
    casting molds 11.jpg
    90.3 KB · Views: 41
  • casting molds 12.jpg
    casting molds 12.jpg
    79.6 KB · Views: 40
  • casting molds 13.jpg
    casting molds 13.jpg
    97.7 KB · Views: 65
To avoid these ads, REGISTER NOW!

rayra

Well-known member
Joined
Dec 1, 2014
Messages
4,724
Location
Escaped from Los Angeles
melamine-coated particle board makes a good mold surface for counters / flat parts, but you must seal any penetrations or joints, as with side walls, or the particle board will swell right up. But it will give you nice finish.

I also used cooking spray / canola oil as a mold release, without any noticeable discoloration or staining. But that might cause one trouble if you intend to apply other finishes to your countertops. I suggest a test piece, as mentioned above. test your methods and choices before you go for the final piece.

There's a youtuber I'm pretty sure is a member here, Man About Tools, I also used his design ideas to create some raised garden bed concrete panels, but didn't try any of his later lightening techniques. But that's when I decided to try vermiculite in the later works. And I wish I'd bought the mixer back in March / April, when I mixed all those panels by hand in a wheelbarrow.
I was in a desperate hurry to cast the garden panels and truck in some garden soil and get things in the ground ahead of the summer heat and barely made it.
I modified his planter panel design a bit, simplifying the mold somewhat and built them to include handles so I could lift and bang the mold around a bit.
I also did a bunch of custom pavers with a stamped texture, primarily to make a walk alongside the driveway, but made even more for a path in the backyard, ultimately putting the best pieces out front.

I know this is somewhat afield from countertops, but there's a lot of overlap in materials and techniques, so figure the info might be helpful.
 

Attachments

  • sparta backyard planter 37.jpg
    sparta backyard planter 37.jpg
    89.9 KB · Views: 67
  • sparta backyard planter 40.jpg
    sparta backyard planter 40.jpg
    119.4 KB · Views: 65
  • sparta concrete casting 08.jpg
    sparta concrete casting 08.jpg
    46.8 KB · Views: 65
  • sparta concrete casting 09.jpg
    sparta concrete casting 09.jpg
    55.9 KB · Views: 64
  • sparta concrete casting 13.jpg
    sparta concrete casting 13.jpg
    111.9 KB · Views: 71
  • sparta concrete casting 56.jpg
    sparta concrete casting 56.jpg
    165.9 KB · Views: 76

couch67

Well-known member
Joined
Mar 18, 2016
Messages
1,403
Location
Ontario Canada
We're looking into this option for our kitchen too. I like the z form kits, and the pour in place approach. Is wet sanding / polishing totally necessary? Can you just apply a few coats of urethane as a clear coat?
Polishing is not necessary, but the result looks more like an unfinished concrete slab and you would not expose any of the aggregate in the slab. If this is your desired finish, you would skip the bulk of the overall work :thumbup:

Not too sure of applying a urethane. The most common topical countertop coatings are two part epoxies and polyurethanes, for their durability.
 

misterfixit

Well-known member
Joined
Feb 9, 2013
Messages
199
Location
Kaufman Texas
FWIW- I had planned to do the countertops in our kitchen when we added on a few years ago. I bought a concrete ******** from Harbor Freight and after trying it and the palm sander and sawzall I have to say the ******** works much better and easier. I tried one test piece upside down, and one test right side up. The upside down pour (countertop on bottom against mold forms) was SOOOOOOOO much easier to get a smooth finish on top. The rightside up pour left the top of the countertop uneven looking and rough. I didn't like it and my wife would would never approve. If you do the upside down pour, you will have some air pockets, but those are easy to fill with a thin cement mix. I also used the silicone edge molding to make it look like rough cut stone edge which I liked.

In the end, we ended up going with Granite and having someone come do it for us. I will say I will be building a sink area in my shop and am thinking this is the way to go for that.
 

NC Fabricator25

Well-known member
Joined
May 28, 2010
Messages
193
Besides making them mostly hollow, I added a lot of vermiculite to the mix. 20cups to the 60# bag. Worked fine in the volume of the pieces, not sure I could recommend it for a fine finish of a kitchen countertop. I don't have exact weight, I estimate I saved about 15% of the weight using the the vermiculite as a filler / expander. Just under 2 bags for the hollowed base pieces, <1 bag for the column pieces. The overage I slopped in buckets to make stepping stones for my garden planters revamp this Fall.
The base / capital pieces weight over 100#, the 4 column pieces in each pillar weight 50-55# each. Call it well over 400# for each column. They're going on a patio slab. I intend cut 12"x12" holes in the slab at each pillar location and dig out a large footing under each, which will also extend under the slab a few inches. iirc the pillar bases are 18"x18".
I'm setting a simpson stirrup bracket for a 4x4 posts at the center and those posts will support the pergola beams. The concrete pillar sections are being stacked over the wood post. They'll hold nothing up but themselves. The pillar pieces will be bonded together and look dry-stacked from the outside.

One other thing on using sonotubes to make the pieces hollow - the concrete is supposed to go on the INSIDE of a sonotube, the inside is waxed. The outside is highly absorbent. The first pieces I cast with the tubes, their cardboard got soggy and collapsed. I'd also tried slicing an 8" tube and compressing it down to 7"dia for a little mor ewall thickness in the column pieces, but there too, the compression of tamping the concrete again collapsed the hollow core. So the first three pieces will get repurposed. Cost for each was ~$15 in materials, small loss.
After that I took to wrapping the sonotubes in foil as a moisture barrier. I may or may not cut the cardboard out, haven't decided.
Perhaps I missed it, but will you share where the forms (molds?) were obtained for your pillars? Very nice work btw. Would love to see more pictures.
 

rayra

Well-known member
Joined
Dec 1, 2014
Messages
4,724
Location
Escaped from Los Angeles
Perhaps I missed it, but will you share where the forms (molds?) were obtained for your pillars? Very nice work btw. Would love to see more pictures.
Thx and I forgot to mention them. historystones.com
I also got the optional insert sheet that lines the column mold to create the fluting.
Total was about $300 shipped. And they were very well packaged in two boxes that were bound together with plastic strapping. They also provide all the machine screws and wingnuts (and a few extra) to assemble the mold halves.
Decent instruction sheet for casting them in halves. Which in hindsight I probably should have done, but I came up with a different way and jumped right into casting pieces, rather than get bogged down making support frames / jigs to support the molds in halves.

They have a few 'how to' videos and are using mortar to stack solid pieces and their joint work looks very messy, but would be ok if the pillars are going to be painted or coated.

You can cast every 24hrs if you have the time / availability. I've got about 5 column pieces left to make, but I'm swamped with other demands on my time, probably be end of October before I get the footings done and can actually start stacking / bonding my pieces. I'll try and do a more detailed dedicated topic on that, then.
 

rayra

Well-known member
Joined
Dec 1, 2014
Messages
4,724
Location
Escaped from Los Angeles
Those are awesome. I am curious what weight saving techniques did you use to reduce the mass of the concrete pieces.
I replaced a crumbling stone pillar on the property with a new structure to house outdoor plumbing and an electrical outlet. Everything was DIY except the light fixture and the hose reel. (cast the cap/ blocks and turned the post)
I would like to do more of this as I find these type of projects fashionable, functional and durable.
Just added a lot of vermiculite to the mix. In my case about 20cups to a 60# bag of mix. Not recommended for flat thin castings or super smooth surface finishes. Worked well in the volume of the smooth-surfaced molds, along with the dye powder. Seems to not work in the 2" thick paver molds I'm also using. Makes the concrete a little 'mealy' and less strong in span on a thin paver.
 

driftpin

Well-known member
Joined
Dec 22, 2016
Messages
11,266
Location
Miami-Dade/Broward Co. Florida
Fine Homebuilding magazine did an article on concrete countertops years ago, by now, they probably have > one article. I think they featured the Cheng method. http://www.concreteexchange.com/how-to-center/concrete-countertops/

It stands to reason that doing an 'upside-down' pour would result in a better top surface, once-installed, and using a purpose-built ******** would result in fewer voids than the makeshift use of a reciprocating saw or other vibrating tool.
 

yeldogt

Well-known member
Joined
Jan 2, 2012
Messages
18,184
My first home project was a a 1810 federal with a lot of cast plaster work needing attention .... That got me started making plaster castings. I quickly moved on to making outdoor items along the lines of Haddonstone. Ground limestone/binder w/ cement.

Have helped a few make various counters. All have been outdoor .... I will agree that the upside down w/ hard board is the easiest. No need for release agent -- you just trash the form. It's not an exact science -- so that has to be the look you are going for.

The pros have the ability to cut and polish and that allows for a slightly more liquid mix w/ more cement .... you have to get the mix down over the whole counter or you will see a line ... even with careful mixing batch to batch. Form with counter on top allows for you to see the top .. play with color ............but, you have to know what you are doing to get it right. That is how the best are done IMO ... but, you have to be able to finished it wet.

They were all the rage in NYC 20 years ago and I was still seeing them in remodeled farm houses w/ casual interiors maybe 10 plus years ago. Just understand -- it has sort of run its course and more tailored is in .... quarts ..... honed stone ...... even wood is back.
 
Last edited:

slowtwitch73

Well-known member
Joined
Apr 18, 2019
Messages
5,876
Location
Hellgate
I agree with yeldogt. If you do them try and make them not look obviously like concrete.

They are pretty intensive..forms, extra bracing, all the crete makings, various finishes. And you better like what you come up with.

Personally I think good ol laminate in a tasetful color on top of some nice wood is the way to go.
 

rayra

Well-known member
Joined
Dec 1, 2014
Messages
4,724
Location
Escaped from Los Angeles
whole point of the concrete is the wild finishes and random appearances AND the durability and heat tolerance. Laminate / formica has none of that. All the vagaries of stone / granite, at a fraction of real stone costs.

--

just as an aside, cast the penultimate piece of pillar concrete today. And hopefully the last piece early tomorrow morning. But I'm up to my neck in moving my folks out of CA. so it will be about a month before I will make any substantial progress in assembling the pergola / pillar project and making a topic dedicated to it.
 

Attachments

  • sparta columns 80 round 17 mess.jpg
    sparta columns 80 round 17 mess.jpg
    119.9 KB · Views: 26
  • sparta columns 81 round 17 mess.jpg
    sparta columns 81 round 17 mess.jpg
    131.3 KB · Views: 19
  • sparta columns 82 round 17 mess.jpg
    sparta columns 82 round 17 mess.jpg
    92.8 KB · Views: 70

slowtwitch73

Well-known member
Joined
Apr 18, 2019
Messages
5,876
Location
Hellgate
The finishes/sealers on concrete make heat tolerance moot.

I have granite.. not by choice. All stone is cold and hard.. things break on it. Also loud.

Formica can take a lot of heat.
 

Jazz1

Well-known member
Joined
Jan 3, 2016
Messages
4,184
Location
Thunder Bay On.
My SIL made this cement table. Theres a learning curve to using cement and then there’s the products with best results. Its a very detailed process to get the perfect finish.
 

Attachments

  • B5942732-EF90-4999-9027-E0B032110861.jpeg
    B5942732-EF90-4999-9027-E0B032110861.jpeg
    148.9 KB · Views: 68
  • 06D1A30C-20B5-4FDE-B128-FEFE8191553C.jpeg
    06D1A30C-20B5-4FDE-B128-FEFE8191553C.jpeg
    17.8 KB · Views: 71
OP
B

branimal

Well-known member
Joined
May 31, 2016
Messages
1,942
I bought a couple bags of sakrete sand mix. I'm going to make experiment with it and see how smooth a surface I can get.
 

rayra

Well-known member
Joined
Dec 1, 2014
Messages
4,724
Location
Escaped from Los Angeles
If you've never worked a slab finish, watch some concrete finishing youtube channels. Timing, moisture content, humidity, sun exposure and overworking are all important. Odell concrete has some very good videos of their projects in work, not sure if they have any tutorials, but the guy is real good about explaining what is going on and why.

I'm in the middle of moving my folks out of CA, week after week of truck and packing trips. Right before the last trip I managed to cast the last column piece. Tonight I was out back fiddling around with column base placements. The block walls / planters will eventually have stacked stone facings and cast capstones that double as seating. I'll probably wind up casting all of that, too. But it matters what I ic, how close I can get the pillar bases to the walls. The wall to the right will be my large L-shaped grilling counter with inset grills and pizza oven, that palm tree i sin the middle of that island and is getting removed this winter.
Anyway, still cluttering up this topic with my current project ;)
The pictured pillars are loose stacked at half height. Just picture the same assembly inverted on top for the complete column heights.
 

Attachments

  • sparta columns 84 farting around at night.jpg
    sparta columns 84 farting around at night.jpg
    128 KB · Views: 25

TTMotorsports

Well-known member
Joined
Jan 8, 2019
Messages
1,107
Location
Lucerne Valley, CA
I did a smaller concrete countertop on an outdoor finished patio room. I got some nice and smooth plastic sheet to put on top to make it flatter and then like said grind/sand/finish it with lots of water and if the floor can't get wet you will have to make a nice tarp to catch all of that and damn up the edges. Also like said the concrete mixture, temperature outside, humidity etc all plays into how it will finish as well.
 
To avoid these ads, REGISTER NOW!
Top Bottom