To avoid these ads, REGISTER NOW!

DIY or take it to a Machine Shop?

kazlx

Well-known member
Joined
Oct 30, 2012
Messages
2,851
Location
Tustin, CA
HA! Wow! :thumbup: :thumbup:

Maybe...maybe a lathe in the future... but that is it. :lol_hitti

On the other wall...haha.

https://scontent.**.fbcdn.net/hphotos-xfp1/v/t1.0-9/10626458_10152762871929168_6145011269638601749_n.jpg?oh=facf7d17d5929e41b8ead86355fe6484&oe=56443C54
 
To avoid these ads, REGISTER NOW!

404

Well-known member
Joined
Aug 23, 2014
Messages
3,463
Location
Mass
Congratulations! Don't wear anything that could get wrapped around the spindle.
 

rsanter

Well-known member
Joined
Dec 22, 2007
Messages
18,523
Location
visalia ca
HA! Wow! :thumbup: :thumbup:

Maybe...maybe a lathe in the future... but that is it. :lol_hitti

Your funny......sorry to tell you but it doesn't work that way.
I have had two mills ( only have one now) but I have had about 8 lathes ( currently have two of them) the good thing about buying a small mill or lathe. You can get started on them and learn while making some stuff.
The bad thing is you will always want and will eventually buy a bigger machine.

Save your money up, you just turned onto the freeway on ramp....and they forgot to tell you that all the exits are closed

Bob
 
OP
W

wachuko

Well-known member
Joined
May 15, 2008
Messages
691
Location
Ocala, FL
On the other wall...haha.

https://scontent.**.fbcdn.net/hphotos-xfp1/v/t1.0-9/10626458_10152762871929168_6145011269638601749_n.jpg?oh=facf7d17d5929e41b8ead86355fe6484&oe=56443C54


Love that photo! Teach them young!! :thumbup:
 
OP
W

wachuko

Well-known member
Joined
May 15, 2008
Messages
691
Location
Ocala, FL
I've read some foolish statements on here but this is near the top...

Congratulations on the new mill.

lg
no neat sig line

Your funny......sorry to tell you but it doesn't work that way.
I have had two mills ( only have one now) but I have had about 8 lathes ( currently have two of them) the good thing about buying a small mill or lathe. You can get started on them and learn while making some stuff.
The bad thing is you will always want and will eventually buy a bigger machine.

Save your money up, you just turned onto the freeway on ramp....and they forgot to tell you that all the exits are closed

Bob

I know, I know... for now... just for now... but I did order some additional tools as well:

-Edge & Center Finders; Type: Edge & Center Finder; Head Contact Type: Conical; Cylindrical; Head Diameter (Decimal Inch): 0.20; End Type: Double; Shank Diameter (Inch): 1/2;
-Blue Layout Fluid
-Layout Fluid Remover and Thinner
-Combination Drill & Countersinks; Trade Size: #4; Body Diameter (Inch): 5/16; Drill Point Diameter (Inch): 1/8; Drill Point Length (Inch): 1/8; Overall Length (Inch): 2-1/2; Included Angle: 60
-Combination Drill & Countersinks; Trade Size: #0; Body Diameter (Inch): 1/8; Drill Point Diameter (Inch): 1/32; Drill Point Length (Inch): 1/32; Overall Length (Inch): 1-1/4; Included Angle: 60
-Combination Drill & Countersinks; Trade Size: #6; Body Diameter (Inch): 1/2; Drill Point Diameter (Inch): 7/32; Drill Point Length (Inch): 7/32; Overall Length (Inch): 3; Included Angle: 60
-4 Ounce Can Cutting and Tapping Fluid
-Steel Rules; Length (mm): 150.00; Length (Inch): 6; Graduation Style: Metric
-Steel Rules; Length (Inch): 6; Graduation Style: 5R; Hook (Yes/No): No; Magnetic (Yes/No): No; Flexibility: Flexible; Graduation (Inch): 1/100; 1/64; 1/32; 1/10
-Steel Rules; Length (Inch): 6; Graduation Style: 4R; Hook (Yes/No): No; Magnetic (Yes/No): No; Flexibility: Flexible; Graduation (Inch): 1/64; 1/32; 1/16; 1/8
-Square Sets; Blade Length (Inch): 2; 4; 6; Base Length (Inch): 1-1/2; 3; 4; Number of Pieces: 3; Accuracy (Decimal Inch): 0.0008; Material: Steel
-Blue Polyethylene Spillproof Container
-Red Polyethylene Spillproof Container
-T-Slot Nuts (7/16 because I mistakenly ordered a 1/2" kit...easier to order the T-nuts); Type: T Slot Nut; System of Measurement: Inch; Tap Type: Blind Tapped; Thread Size (Inch): 3/8-16; Slot Width (Inch): 7/16; Slot Width (Decimal Inch): 0.4375
-V-Blocks; Type: V-Block; Sold As: Matched Pair; Overall Length (mm): 101.60; Overall Length (Inch): 4; Overall Width (mm): 65.09; Overall Width (Inch): 1-9/16
418-4510 3X2-1/2X2 WEB END ANGLE PLATE 2
418-4720 4-1/2X3-1/2X3 OPEN END ANGLE PLATE 2
505-4543 1 X 1/2 X 1-3/4 U.S.A. KANT-TWIST CLAMP 2
505-4544 2X1 1/8X1 1/4 U.S.A. KANT-TWIST CLAMP 2
505-4546 3X1 1/4X1 3/4 U.S.A. KANT-TWIST CLAMP 2
505-4547 4 1/2X2 1/4X3 U.S.A. KANT-TWIST CLAMP 2
891-5797 4.0" OAL GRIP HANDLES 2
MN328-1923 1/2" SHANK SPRING CENTER
307-0205 FINE LINE WHT DYKEM MARKING PENS 1
307-0207 FINE LINE ORG DYKEM MARKING PENS 1
619-2912 BROAD WHITE DYKEM BRIT TIP PNT MARKER 1
619-2913 BROAD ORANGE DYKEM BRIT TIP PNT MARKER 1
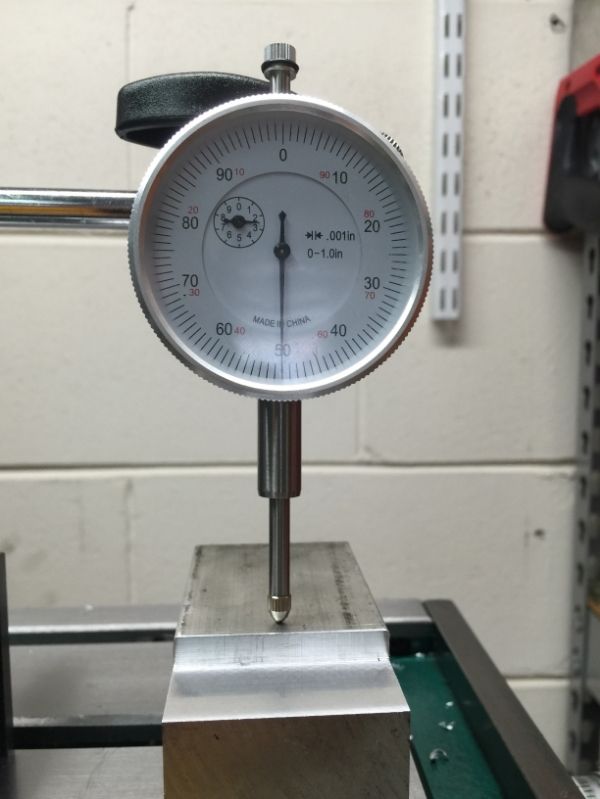
A dial test indicator and an indicol styled holder
A snap/telescopic gauge kit

Also, building a DRO, I am a geek, what can I say! Went to http://www.yuriystoys.com/ Should have stayed away!

Ordered the parts required to build the interface... later I will get the scales

Arduino UNO R3 board with DIP ATmega328P
Sparkfun 500 1/4W Resistor Kit
Arduino Uno R3 Enclosure case box - Black Plastic (just to make it look professional, lol)
Wall Adapter Power Supply - 9V DC 650mA
KEDSUM® Arduino Wireless Bluetooth Transceiver Module Slave 4Pin Serial + DuPont Cable
Arduino Proto Shield R3
Alldaymall A88X 7'' inch Quad Core Google Android 4.4 KitKat Tablet
Added Adafruit USB Mini-B Breakout Boards - rather than soldering the wires from the scales directly to the board, I much prefer to install mini-usb jacks for connecting them. The enclosure box I ordered might not work with this last minute change...

I spent the day cleaning/organizing the garage so that I could make space for the mill... had to get rid of two shelves. That meant moving everything around and getting rid of **** that just accumulates through the years...but it is done!

Bolted down...

aeccb596-cd86-477a-bd6f-0ef54c371829_zpswa04hdbb.jpg


Found an inexpensive 4' LED lamp

22baf4fd-9ca1-44f6-aa0c-8c770dcdd0fd_zpsr2ocelir.jpg


I will route the electric cord better, just wanted to test the lamp...

63716896-e15c-4e27-b10a-387e500b2502_zpsbo0uasgo.jpg


And when done, I just slide these panels and the mess is hidden from view...

69d3231e-05c7-4346-b6b3-7788444acfeb_zpsbe7b0dbo.jpg
 
Last edited:

kazlx

Well-known member
Joined
Oct 30, 2012
Messages
2,851
Location
Tustin, CA
Just get some scrap aluminum to practice on. There are some good speed and feed calculators on little machine shop.
 

404

Well-known member
Joined
Aug 23, 2014
Messages
3,463
Location
Mass
Practice with scrap wood or paraffin wax. Free or cheap. No need to buy and cut up Al just for practice. Calculate your RPM and feeds to cut a good sized chip, not dust, which wears out the cutters in steel.

Seriously, do the math for feeds (cut in .001 per tooth of cutter) and speeds (surface speed per minute), lots of people wing it since it all looks the same when it is wrong.:willy_nil
 
To avoid these ads, REGISTER NOW!

kazlx

Well-known member
Joined
Oct 30, 2012
Messages
2,851
Location
Tustin, CA
That teaches nothing. Aluminum isn't that expensive. If you don't want to 'waste' it, plan out a simple aluminum project and build it.
 

vintagespeed1956

Well-known member
Joined
Dec 24, 2014
Messages
221
Location
RanchoCucamonger, CA
dang, i scrolled through this whole thread looking for pics of the AFTER when he chucked up an end mill in his drill press and went to cuttin...!


oh well, can't win 'em all. nice purchase! :D
 
OP
W

wachuko

Well-known member
Joined
May 15, 2008
Messages
691
Location
Ocala, FL
We got chips!!! :) Everywhere!!

As recommended, I did several passes. Taking small amounts of material when cutting...then stopped at .24", measured, and then went for the extra .01"

79043f96-c7f2-428f-a672-ead36e6657be_zpszwl9zhfm.jpg


b77a8abf-66fd-4f2f-afa9-04c5e9c594c2_zpsvadwgf8s.jpg


So the practice cut for getting 1/4" off went great... (also practicing using the gauges...)

a6e25e5f-3151-45ab-89c9-3886ceacb25d_zpskpudjren.jpg


b3a9a6ca-d772-4ef6-93a4-21e3a6b85677_zpsqxhhdpbm.jpg


Now... where did I leave that caliper? :) Again guys, thank you all for the comments, recommendations, and jokes. :thumbup:
 
OP
W

wachuko

Well-known member
Joined
May 15, 2008
Messages
691
Location
Ocala, FL
Modifying the caliper...

39c989d1-b5ff-4851-b8a8-9a92b296f7b0_zpshjjgr7al.jpg


269ff37c-621b-42fa-9521-13c76ca9c4e4_zpsgetwviix.jpg


Done! New seals for the brake line, bolts where left alone as they do not interfere with the rotor. Plus you can't see them anyway... (I might get new ones and modify them anyway, just so that I know those were adjusted to size :) )

19e50b12-22e6-4fe9-9aa7-41ecf81ea8f4_zpsrcyaw59h.jpg


Not enough time for a test ride...family is calling for attention.
 
OP
W

wachuko

Well-known member
Joined
May 15, 2008
Messages
691
Location
Ocala, FL
Feels good, right?

:thumbup: Feels great man! On the test cut using the aluminum block... at first I forgot to use cutting oil (used WD40 since a lot of folks recommend it when using aluminum)... but I remembered to use it when I did the caliper...

On that piece of aluminum, I practiced with very small increments, then even smaller increments to see what the finish looked like...

When practicing, I kept confusing the knob/wheel that moves the table side ways (X axis) with the one that goes in an out (Y axis)... I learned the importance of setting the table to zero so even if I move the table in the wrong direction, I can move it back to where it is supposed to be. I had to keep reminding me to not touch the Y axis wheel knob...

cnc_machine_axes_zpsdgdl9hsa.png


I am practicing with the play (can't remember the name for it, backslash??) the table has when you go one way and then have to dial it back... there is a slack... need to figure out how to deal with that...

Man do I love the DRO that the machine has on the Z axis... can't wait to do the setup for the other two axis... yes, I can use what the mill came with, but just the ease of seeing the numbers makes it a lot easier. Plus zero-ing with just a push of a button...sweet!

What a mess everywhere... I still need to go back to clean all the chips... lol... and the oil... between my sweat (hot garage without a/c here in Florida, and I was sweating like if they were pouring water over my head) and the oil... plus the chips... goodness!

Clamping the part down while making sure that there was nothing in the way of the mill travel... fun.

c06ffdf9-1f3a-4779-a04d-6ed771884265_zps3qfii31i.jpg


269ff37c-621b-42fa-9521-13c76ca9c4e4_zpsgetwviix.jpg


The table's specs has the t-nuts needed at 7/16" but the ones that came with the kit (I ordered the kit not aware of the different t-nut sizes) are 1/2" fitted perfectly! Knowing that I had ordered the clamping kit incorrectly, I had ordered 7/16" t-nuts. Now I have some spare 7/16 t-nuts... no big deal.

Learning a lot... will play some more with the materials I have.
 
Last edited:

kazlx

Well-known member
Joined
Oct 30, 2012
Messages
2,851
Location
Tustin, CA
Yea, aluminum is pretty easy. As long as you have a sharp end mill, you can run pretty fast. Backlash is the correct term for the slop in the screws. Even tight machines have a little. The key is using the dials when feeding the same direction to make sure the screw is loaded in the direction you are traveling, although you can compensate. Once you get a dro you won't want to ever go back, since the dro reads actual table position and takes out the backlash error. Best thing short of CNC. It's also nice to just read numbers and not have to count turns and keep track. Plus a host of other things that make finding center and edges easier...
 
To avoid these ads, REGISTER NOW!
Top Bottom