To avoid these ads, REGISTER NOW!

Between 705 & 1200 SQ/FT DIY Shop

Workspaces between 705 and 1200 squarefeet.

Prospecter

Well-known member
Joined
May 16, 2015
Messages
2,440
Location
Maine
Good to hear from you, Jeff. I keep an eye out for your posts and was wondering how you were doing. Glad to hear your bike riding is going well. Won't be long now before we have some excellent Fall riding weather. (Just watch out for wet leaves!) Good for you to persevere through the DDW (Dreaded Desk Work). I am sure your sister in law is also grateful.
 
To avoid these ads, REGISTER NOW!
OP
J

Jeff Ivers

Well-known member
Joined
Apr 9, 2010
Messages
2,565
Location
Oklahoma
I don't usually post injury pics on here because I don't want to gross anyone out. But, my most recent "injury" is a bit of a puzzler. Have no idea when it happened or how it happened. Any ideas - other than my heart shrunk and migrated to the wrong part of my body?
my thumb 08152025 r.jpg

It looks like I am finally going to make it to the shop this week for some activity. Yea!
 
OP
J

Jeff Ivers

Well-known member
Joined
Apr 9, 2010
Messages
2,565
Location
Oklahoma
The good news is I finally made it out to the shop for some quality time. The bad news is that not every project has a happy ending.
Started my quality time with some recycling chores and then turned my attention to a bird feeder I thought I could freshen up and pass on to someone else.
red bird feeder r.jpg

This feeder was acquired many years ago and already went through one freshening. Originally it was painted and had a different cylinder that took a hit from a rock thrown by a weed eater. So, about 23 years ago, I had it powder coated and acquired a heavy duty lexan cylinder. This time I thought I would remove the cylinder and thoroughly clean everything and perhaps apply some fresh paint. I fought for over an hour to remove the cylinder, breaking some divots out of the top in the process. Determined I could shorten the cylinder and still be all right. Shortened and then polished the cylinder. Then it would not go back into the metal and some of the metal broke on me. The feeder has now been cut into recyclable metal.

Don't often go to the tool forum on this site, but recently paid it a visit and got curious about Harrry J Epstein Co. Must have spent well over an hour pouring over their catalog and only found one item to order - I am sure that means I am suffering from some sort of a deficiency.

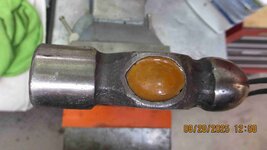
ball peen 1 r.jpg

This is the top of the ball peen hammer I have been using for several years. Notice the slight crack between the handle and the metal head?
new ball peen r.jpg

Courtesy of HJE, I now have a new ball peen. So what should I do about the old one?

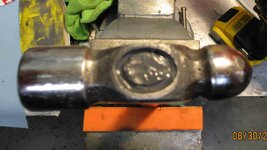
ball peen 2 r.jpg
After using a diamond burr in my dremel, I widened and deepened the crack enough to get the handle out. I then cleaned up the handle by sanding the old epoxy off the fiberglass on my belt sander and used a sanding drum on the dremel to clean out the head.
ball peen 3 r.jpg
This is after the first application of JB Weld.
coaster holder 1 r.jpg
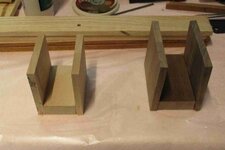
Meantime, I started a project to see if I can recycle some old trophy plaques into coaster holders.
 

taumac

Well-known member
Joined
Aug 30, 2011
Messages
8,104
Location
Brooksville, Fl
I hear you on the FEL woes -- I have to fight with mine almost every time it goes on. (Although my tractor doesn't have a mower deck, so the FEL doesn't come off nearly as often as yours.) There's something a bit intimidating (at least for me) about fighting to align a bunch of steel that's taller than me and outweighs me by 600 lbs! So I just always think about the "get a bigger hammer" expression and hit it harder.

Can I ask what’s the benefit of removing the FEL to mow? It seems like a lot of enough for little gain when just removing the bucket would be easier if have SSQA. I have a Kubota L2501 and my FEL is SSQA. It has a kickstand and “removable”. It’s just to much work to remove the loader. I just remove my bucket or pallet forks. I use a 5th brush hog.
 
OP
J

Jeff Ivers

Well-known member
Joined
Apr 9, 2010
Messages
2,565
Location
Oklahoma
Can I ask what’s the benefit of removing the FEL to mow? It seems like a lot of enough for little gain when just removing the bucket would be easier if have SSQA. I have a Kubota L2501 and my FEL is SSQA. It has a kickstand and “removable”. It’s just to much work to remove the loader. I just remove my bucket or pallet forks. I use a 5th brush hog.
On my Kubota 2380, the FEL arms would interfere with some of the locations that I mow, preventing me from getting as close and requiring more weedeater work.
 
OP
J

Jeff Ivers

Well-known member
Joined
Apr 9, 2010
Messages
2,565
Location
Oklahoma
I mentioned a couple posts back that I was going to try to turn some old trophy plaques into some coaster holders. This is an update on that project and some warnings concerning what I learned the hard way.

First, I found a suggestion on the internet somewhere that one could use double sided tape to hold short boards to a longer board for running through a planer. I wanted to turn 3/4" thick pieces into 3/8" thick pieces for the upright portions of the holders. I had some standard double sided tape (carpet tape?), so I taped the boards up and attached them to a longer board that I had already run through the planer to true up. I even used a roller to try to make sure everything was adhered well. Fortunately, I stand to the side of the planer when running items through, because the Planer ripped one of the pieces loose and slung it clear across the shop. Probably would not have penetrated, but would have left quite a bruise.

So, I went to plan B, which was to glue sacrificial longer boards to each side of the desired planer targets.

coaster holder 4 r.jpg
This shows two boards glued up to the sacrificials. I also decided to run the stock through before cutting the sides to size.
coaster holder 5 r.jpg
This shows the boards planed to the desired thickness before cutting off the sacrificials. These boards are for the second and third coaster holders. On the first holder, I wanted to try to preserve the laser etched images. What I didn't think to do was to lay a thin piece of cardboard down before placing the etched image face down and then doing the glue up. So, I had some marking of the etched image from running it through the planer face down.

coaster holder 2 r.jpg
This is the first holder after the second coat of finish. You may see some slight imperfections in the image, but I think I can live with them.
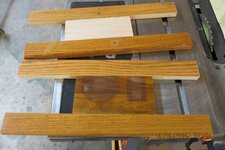
coaster holder 6 r.jpg
This shows the pieces cut to size for the second and third holders.
coaster holder 7 r.jpg
This shows how I figured out where to drill for the brass pieces inserted in each side to keep the coaster from rolling out.
 

Prospecter

Well-known member
Joined
May 16, 2015
Messages
2,440
Location
Maine
Isn't it amazing how much time it takes to complete this sort of project? I had also heard about double sided tape. Thanks for trying it out so I don't need to! I really like your technique of using long boards glued to either side to avoid snipe and make the work manageable. That's a first for me.
 
OP
J

Jeff Ivers

Well-known member
Joined
Apr 9, 2010
Messages
2,565
Location
Oklahoma
Isn't it amazing how much time it takes to complete this sort of project? I had also heard about double sided tape. Thanks for trying it out so I don't need to! I really like your technique of using long boards glued to either side to avoid snipe and make the work manageable. That's a first for me.
Amen to the time issue. The good part of that is such projects lend themselves to periods when you can only spare a few minutes at a time in the shop. Can't take credit for the edge gluing of sacrificial boards - found the idea on the internet somewhere - of course I may have sacrificed wood worth more than what I salvaged for reuse - but maybe I can figure out a use for those on another project.
 
OP
J

Jeff Ivers

Well-known member
Joined
Apr 9, 2010
Messages
2,565
Location
Oklahoma
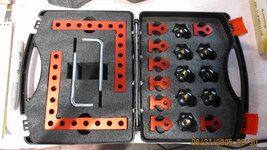
Been spending a lot of time in the shop lately - working on updating my inventory. But, that led to a reportable project. Some time back I ordered a set of 90 degree clamps for woodworking. The main reason I ordered the particular set that I got was that it came in a case to keep the bits organized. Of course it arrived with a crack in the case that I thought I could live with easier than the hassle of returning. Of course, while working on inventory, I dropped the case and destroyed the molded in hinges.
clamp case 1 r.jpg

clamp case 2 r.jpg

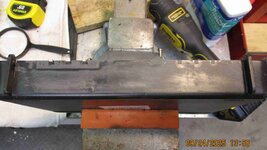
The above 2 pics show the cracks.
clamp case 3 r.jpg

clamp case 4 r.jpg
The above 2 pics show the destroyed hinge.

clamp case 5 r.jpg
clamp case 6 r.jpg
Used my oscillating saw at a very low speed to remove the remnants of the hinges. Then, I used JB Weld Plastic to seal the cracks.
clamp case 7 r.jpg
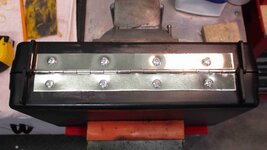
I cut down a long piano hinge to get just the right length to bolt to the back of the case.
clamp case 8 r.jpg
Everything back in place! If I can avoid dropping this, I think it will hold for a long time. If not, I have a good template and a precut hinge that I can attach to a new case made out of wood.
 
OP
J

Jeff Ivers

Well-known member
Joined
Apr 9, 2010
Messages
2,565
Location
Oklahoma
Ouch! Got the weedeater out of the shop this morning to hit the fence lines and go around each tree on the front half of the property. Do this every few weeks as needed and then hit the rear of the property another day. Turns out yellow jackets object to the weed eater spinning that line right over their entrance hole in the ground. They weren't there the last time I went around that tree, but hundreds of them swarmed out of the ground and got rather aggressive almost before I realized what was happening. Got me 3 or 4 times in the left arm before I could back off enough. Happened about 4 hours ago and my arm is still sore.
 
OP
J

Jeff Ivers

Well-known member
Joined
Apr 9, 2010
Messages
2,565
Location
Oklahoma
Gas in the hole and a match :D
With my luck, doing that would result in setting the forest on fire. I retreated to the house where I had a new can of wasp killer which I promptly emptied on the entrance hole. I intend to go back in a couple of days and check for any activity. If there still is activity, I have read that pouring a bucket of water containing dawn detergent down the hole will dispense with the problem.
 
OP
J

Jeff Ivers

Well-known member
Joined
Apr 9, 2010
Messages
2,565
Location
Oklahoma
Managed to get in a couple of quick projects in the shop this week - just the kind I like. I had decided to recycle a Mobil 1 toolkit (promotional item) into a new bike tool kit when the case on my bike tool kit failed. That left me with a 6 piece set of jewelers screwdrivers with no way to organize them.
jewelers rack r.jpg

Used a piece of a recycled walnut trophy plaque and a chunk of oak from a recycled pallet to make a stand for the screwdrivers.

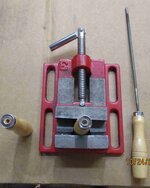
I recently hit an estate sale and could not resist a set of 5 new file handles for $2. Got them home and discovered the pre-drilled holes were too large for any of the files I had that needed handles.
file handles r.jpg
On the left is one of the new handles showing the oversize hole. In the middle is one of the handles with a length of dowell glued into the hole and fixed into the clamp for re-drilling the hole smaller. And, on the right is one of the modified handles with file inserted.
 

Prospecter

Well-known member
Joined
May 16, 2015
Messages
2,440
Location
Maine
Your screwdriver holder is amazing! Might be too snazzy for my shop and make everything else look bad! :unsure:

Good solution on the file handles. Funny. . . I never think to use my drill press vice for vertical stuff. And your picture makes me wonder why I never think to use it as a stand on the workbench? :coffee:
 
To avoid these ads, REGISTER NOW!
OP
J

Jeff Ivers

Well-known member
Joined
Apr 9, 2010
Messages
2,565
Location
Oklahoma
Today, I started a larger scale project for me. I have had a Superwinch T1500 winch installed in my enclosed trailer for 23 years and used it once when I needed to transport a larger car that I could not get into or out of inside the trailer. Since I have a side by side (SXS) that I have taken onto unknown trails, I thought it might be wise to install the winch on my Honda Pioneer 520. I posted a thread over on the tools forum seeking information on winches. Most said I should get a bigger winch. Knowing my driving style and the types of trails I am likely to go on, I doubt that I will ever actually use this, so for that reason and the fact that I already have this winch, I decided to install it.

First challenge was to obtain a winch mount. I really lucked out on this. The mount I ordered did not show included hardware, but for a price less than $21, I figured I could supply my own hardware.
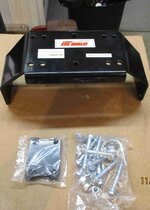
winch 1 r.jpg
This is the mount and it did come with hardware!
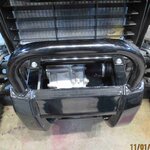
winch 2 r.jpg
This is where the winch mount will go with it resting on those horizontal bars that run from front to rear.
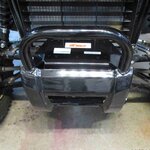
winch 5 r.jpg
This shows the mount sitting in place. It slid right in.
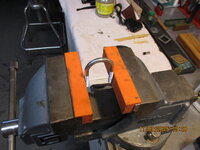
winch 4.JPG
The only installation issue was that I had to close up the 2 U-bolts a bit for them to go in the proper holes.
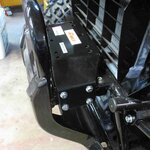
winch 6 r.jpg
This shows the mount all bolted into place.
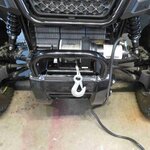
winch 8 r.jpg
And the winch will go right here and the holes line up.

Next, I decided I would need a fairlead and bracket that I did not have in the trailer. Also, after giving it some thought, I decided I wanted a wireless remote since when I spool the cable back onto the winch, I will want to be in front of the SXS applying some tension to the winch cable.

This led me to researching fairleads and brackets. It is amazing how many fairleads are advertised (including on the Superwinch site) with no dimensions allowing one to determine if the device will work with your winch. I made my best educated guess and have a fairlead and bracket arriving next Thursday.
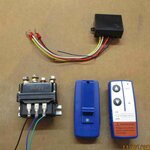
winch 7 r.jpg
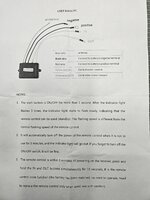
I ordered this wireless remote kit. I think I will be able to get it to work, but it is absolutely the worst product I have bought in years! Why?:
No wiring diagram for the relay.
No indication of which of the top leads should go to winch yellow and winch blue.
No indication of the purpose of each of the three control leads.
Nothing in the remote or instructions to indicate the correct battery for the remote.
No polarity markings for the remote battery.
Very cheap plastic used on the remotes.
 

RickP

Well-known member
Joined
Jan 15, 2013
Messages
1,555
Location
Annapolis, MD
What a pain! No instructions at all? I'm not sure my ATV winch wiring came with very good instructions, but at least there was something... Your installation looks more complicated than mine due to the wireless remote. Once all the wiring connections were made, I actually enjoyed routing the wiring under the hood and mounting switches in the dash.

My remote switch is wired, but I've been wanting to change over to a wireless one.
Will you have a wired switch mounted in the dash as a backup for the remote?
Have you decided where to install the receiver for the remote?
Would you ever want to use a wired remote as a backup for the wireless one?
(I'm thinking about being back in the woods and the remote battery dies.)

Good luck with figuring out the wiring!
 
OP
J

Jeff Ivers

Well-known member
Joined
Apr 9, 2010
Messages
2,565
Location
Oklahoma
What a pain! No instructions at all? I'm not sure my ATV winch wiring came with very good instructions, but at least there was something... Your installation looks more complicated than mine due to the wireless remote. Once all the wiring connections were made, I actually enjoyed routing the wiring under the hood and mounting switches in the dash.

My remote switch is wired, but I've been wanting to change over to a wireless one.
Will you have a wired switch mounted in the dash as a backup for the remote?
Have you decided where to install the receiver for the remote?
Would you ever want to use a wired remote as a backup for the wireless one?
(I'm thinking about being back in the woods and the remote battery dies.)

Good luck with figuring out the wiring!
There were instructions only for the wireless receiver but they did not include info on how to connect to the relay. The remotes have an on/off switch on them, but since the remote will reside in a rollbar mounted storage bag, I do not want to rely on the on/off switch on the remote to prevent activation of the winch while driving. I am going to install an on/off switch in the dash that will have to be on for the winch to work. I am still debating having a wired switch as a backup for the remote, but that seems to complicate the wiring quite a bit (my wired switch is heavy duty and works without a relay). I will show pics of where I mount the relay and receiver, but the plan is under the dash. Having a wired remote as a backup might be a good idea, but not planning on it at this time. Maybe later after I get everything working and actually need to use the winch. I think one could short a pair of terminals on the relay to get it to work if the remote fails.

I have been doing online research and think I have most of the wiring figured out. Might have to reverse the in/out as I have found conflicting info on which is which.
 

bugnut

ALLIANCE MEMBER
Joined
Jul 14, 2012
Messages
3,981
Location
Central Ohio
Jeff I purchased one of those and the wiring instructions on YT seem to cover them and the install pretty good. Take a look I did a search under "remote winch wiring". It is a winter project for my yamaha atv. Good luck....PS I'll be following your tutorial so please get it right!!!:lol:
 
OP
J

Jeff Ivers

Well-known member
Joined
Apr 9, 2010
Messages
2,565
Location
Oklahoma
Jeff I purchased one of those and the wiring instructions on YT seem to cover them and the install pretty good. Take a look I did a search under "remote winch wiring". It is a winter project for my yamaha atv. Good luck....PS I'll be following your tutorial so please get it right!!!:lol:
Thanks for the suggestion. Some of my research has included YT as well as various vendors offerings of the same product. I am just getting ready to sit down with a blank sheet of paper and sketch out the connections based on my research. I have to wait till Thursday for my switch and fairlead.

In the mean time, I was going to post a .pdf image of the "instructions" that came with this, but I can't see how to post a .pdf. Any way to do this?

When I first bought the Pioneer, I purchased the auxiliary wiring harness shown below:
Pioneer 520 access harness 2 r.jpg
All of the leads on this are switched power - only working when the ignition is on. The yellow and white leads consist of 2 wires each - power and ground. I used those leads for my Garmin Tread and for rear mounted lights so that I did not need to worry about chassis ground. The green lead will be used for the winch on/off switch. Heavy duty power cables, both positive and negative, will be run from the battery to two of the connections on the winch relay. All negative connections needed for this install (switch ground, receiver ground) will tie to the negative lead on the relay.
 

Prospecter

Well-known member
Joined
May 16, 2015
Messages
2,440
Location
Maine
Thanks for the suggestion. Some of my research has included YT as well as various vendors offerings of the same product. I am just getting ready to sit down with a blank sheet of paper and sketch out the connections based on my research. I have to wait till Thursday for my switch and fairlead.

In the mean time, I was going to post a .pdf image of the "instructions" that came with this, but I can't see how to post a .pdf. Any way to do this?

When I first bought the Pioneer, I purchased the auxiliary wiring harness shown below:
Pioneer 520 access harness 2 r.jpg
All of the leads on this are switched power - only working when the ignition is on. The yellow and white leads consist of 2 wires each - power and ground. I used those leads for my Garmin Tread and for rear mounted lights so that I did not need to worry about chassis ground. The green lead will be used for the winch on/off switch. Heavy duty power cables, both positive and negative, will be run from the battery to two of the connections on the winch relay. All negative connections needed for this install (switch ground, receiver ground) will tie to the negative lead on the relay.
I just download it to my laptop and attach it like a photo.
 
OP
J

Jeff Ivers

Well-known member
Joined
Apr 9, 2010
Messages
2,565
Location
Oklahoma
Oh, duh - thanks! I have always used the insert image and forgot about the attach files option. So here is a copy of the "instructions" I received.
 

Attachments

  • winch remote instructions.pdf
    1.4 MB · Views: 7

Prospecter

Well-known member
Joined
May 16, 2015
Messages
2,440
Location
Maine
Sadly, I also am encountering those sorts of "instructions" more and more. Sawstop was the exception. Those directions were amazing. However, even my DeWalt planer directions were poor. :(
 

RickP

Well-known member
Joined
Jan 15, 2013
Messages
1,555
Location
Annapolis, MD
The remotes have an on/off switch on them, but since the remote will reside in a rollbar mounted storage bag, I do not want to rely on the on/off switch on the remote to prevent activation of the winch while driving. I am going to install an on/off switch in the dash that will have to be on for the winch to work. I am still debating having a wired switch as a backup for the remote, but that seems to complicate the wiring quite a bit
You've got me thinking about how to add a wireless remote to my existing setup, and I'm wondering if this might simplify the wiring of dual remotes. I already have a dash outlet for a wired remote, so I can unplug the long cord and store it in the glovebox. Could the remote receiver simply be plugged into that outlet? That would make it easy to swap remotes, and it would prevent inadvertent wireless button presses by keeping the receiver unplugged.
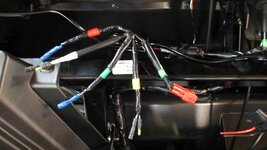
I will show pics of where I mount the relay and receiver, but the plan is under the dash. Having a wired remote as a backup might be a good idea, but not planning on it at this time. Maybe later after I get everything working and actually need to use the winch.
I mounted the relay near the battery, and put the outlet for the remote in a dash cubby next to the steering wheel.
 
OP
J

Jeff Ivers

Well-known member
Joined
Apr 9, 2010
Messages
2,565
Location
Oklahoma
You've got me thinking about how to add a wireless remote to my existing setup, and I'm wondering if this might simplify the wiring of dual remotes. I already have a dash outlet for a wired remote, so I can unplug the long cord and store it in the glovebox. Could the remote receiver simply be plugged into that outlet? That would make it easy to swap remotes, and it would prevent inadvertent wireless button presses by keeping the receiver unplugged.
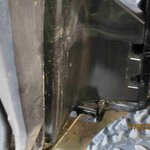
I mounted the relay near the battery, and put the outlet for the remote in a dash cubby next to the steering wheel.
If your wired remote has the same 4 leads that the wireless receiver has and you have a spare plug to fit the jack that you can attach the wireless receiver to, that might make a very elegant solution for you. The wireless receiver could be attached to the dash with some velcro for easy removal. The leads on my wireless receiver are fairly flimsy and would not tolerate any tugging force so the plug would have to be the type that you can grab to unplug without stressing the wires.

I have mounted my relay on a cross bar behind the dash and will be mounting the receiver as close as possible.
 
OP
J

Jeff Ivers

Well-known member
Joined
Apr 9, 2010
Messages
2,565
Location
Oklahoma
For anyone interested, this is the wiring diagram I came up with for my installation based on various internet sources and a little think time. The yellow and white leads off the receiver are sometimes marked win out and win in respectively, and sometimes the reverse of that. The yellow and blue leads from the relay to the winch are anybody's guess. I found no information on which relay pole is winch out and winch in.
The long and short of it is, it does not matter. I simply have to finish the installation, release the winch and pull out a couple of feet of cable and then test to see which button winds and which unwinds cable. If it is backwards, I can either reverse the yellow and white control leads to the relay or reverse the blue and yellow leads from the relay to the winch. All wire colors noted on the wiring diagram are the colors on the devices in my kit. They will not stay that way when I complete the wiring. Since everyone knows that ground leads are supposed to be black or green, it offends me to have a black lead used for positive voltage and a blue lead used for ground.
 

Attachments

  • planned wiring diagram.pdf
    103.2 KB · Views: 2
OP
J

Jeff Ivers

Well-known member
Joined
Apr 9, 2010
Messages
2,565
Location
Oklahoma
Jeff, took a look at mine and found the instructions. Yellow and blue leads are identified. When wire colors need to be corrected a roll or 2 of colored electric tape is my go to.
Lucky you! Unfortunately, I found online instructions that say just the opposite of that. That tells me which control terminals on the relay to connect to but it does not identify which terminal on the relay is to have the yellow winch lead and which is to have the blue winch lead. And, I can't find anything in the winch instructions that says the yellow lead to the relay is for winch out and blue for winch in or vice versa. Thus the need for the experiment step.
 
OP
J

Jeff Ivers

Well-known member
Joined
Apr 9, 2010
Messages
2,565
Location
Oklahoma
winch 14 r.jpg
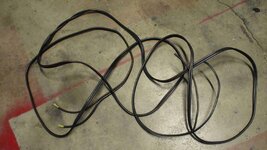
When I had the winch installed in the car trailer, I had spliced together 2 cheap jumper cables to provide the power leads that I could run out the door of the trailer and up to the battery of the tow vehicle. Might as well use this for the power leads from the battery of the SXS to the relay.

So, yesterday I decided to start disassembling the portions of the SXS to allow me to route that cable. I had watched a YT video of a guy installing a winch in his 520, so thought I knew what to do. Remove battery cover, remove panel under the front passenger seat, and remove the rear panel in the right front wheel well.


winch 12 r.jpg
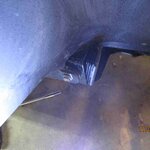
So, the wheel well panel is held in place by several plastic rivets and one bolt. Put the 1/4" drive short ratchet to it and started unscrewing and unscrewing and unscrewing - wait, why am I not seeing a gap behind the head of the bolt? Obvious answer was either a nut on the other side was turning or the bolt is stripped. See that partially removed rubber plug to the right of the bolt? I popped that out and found no nut - stripped bolt!
winch 13 r.jpg
This is one of those tools I have had in my tool box forever - not even sure what it is. But that metal bar and with wood block under it, inserted in the end of the tube where I removed the rubber plug, allowed me to apply pressure to the end of the bolt while turning it out - success! So then I got the panel off and discovered that this step was totally unnecessary - it provides no useful access for routing the cable. So now I need to clean the threads in the hole and acquire a replacement bolt.
winch 10 r.jpg
This is where I have mounted the relay.
 
OP
J

Jeff Ivers

Well-known member
Joined
Apr 9, 2010
Messages
2,565
Location
Oklahoma
Today, I expected to be posting the final pictures of my winch project. :(

But, that was not to be.

winch 15 r.jpg
This is the shoulder bolt that was stripped (on original installation) and gave me fits removing. Went to the local honda dealer and they ordered me a replacement for about $4.50 and a week wait. Meanwhile, my fairlead and bracket and switch were supposed to arrive today. According to Amazon tracking, the package arrived in Tulsa about 6:30 this morning. But, this afternoon I get a notice that the package has been delayed and will take another 2 days to get here (14 miles away)?
winch 19 r.jpg
This shows the area behind the panel I removed based on YT video that resulted in needing to replace the shoulder bolt. I see no gain from removing the panel. Now, if I hadn't seen the video, I might have removed the panel anyway trying to figure out how to route my power leads to the battery. But it would be really nice if posters of videos would identify unnecessary steps shown in the video or delete them entirely - would have saved me $4.50 and a week wait!
winch 16 r.jpg
What did work for routing wires was to use my electrical fish from under the passenger side of the seat pushing the lead forward to the engine compartment. I hooked my wire on to the fish, pulled it back to this area, disconnected the fish, and then poked the wire out of the back or this area and into the battery area.

winch 17 r.jpg
This shows where the wire came out by the battery ground. I had the end wrapped with yellow tape so I could distinguish this from all the other black under this machine.

winch 18 r.jpg
This shows the winch leads connected to the battery positive and to the battery chassis ground. Battery negative is still disconnected till all other installation is complete.
winch 20 r.jpg
I velcroed the receiver to the back of the glove box blanking plate. Ever since my son (many years ago) shorted his oil filter between his dipstick and the hot lead on the starter relay, I have had a firm opinion that any permanently hot lead should be insulated. I had an old distributor cap boot that I slit on the back side so I could fit it over the positive lead on the relay. A wire tie holds it closed and in place.

And that is as far as I can go till ordered parts arrive.
 
OP
J

Jeff Ivers

Well-known member
Joined
Apr 9, 2010
Messages
2,565
Location
Oklahoma
My delayed order came in!
winch 21 r.jpg

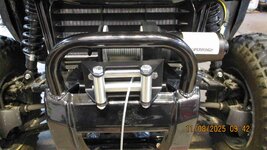
Because of the way my hook is attached, I had to temporarily remove one of the fairlead rollers in order to get the hook through the fairlead.
winch 22 r.jpg
Other than that, the fairlead and bracket bolted up perfect. I lucked out on fairlead selection and think this will work fine.
winch 23 r.jpg
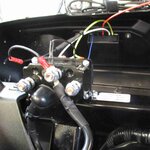
I then turned my attention to finalizing the wiring. This shows everything buttoned back up and ready to put the hood back on - although looking at this pic, I need to go out and check that I clipped those last two wire ties.
winch 24 r.jpg
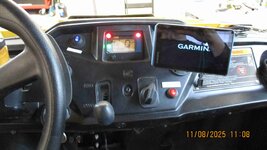
This is the view from the cockpit, showing the blue switch for the winch, red switch for the rear lights and the Garmin placement.

So, I was ready to test winch direction. I had an A23 battery in the first of the remotes, turned the ignition on, turned the blue winch switch on, turned on the switch on the side of the remote, pressed in "in" button on the remote, the indicator light flashed and - nothing! Inserted another A23 battery in the other remote, turned the remote switch on, pressed "in" and the cable started unwinding. So, I reversed the yellow and white control wires on the relay and everything works great! With the exception of the one bolt I am waiting on, this project is done.

I am attaching a final wiring diagram.
 

Attachments

  • final wiring diagram.pdf
    107.5 KB · Views: 3
OP
J

Jeff Ivers

Well-known member
Joined
Apr 9, 2010
Messages
2,565
Location
Oklahoma
Been getting some shop time in lately - changing the oil on the Silverado, recycling tasks, etc.
2121 backyarrd 12092025 r.jpg
On 12/9, I took a look out the back door behind the shop and towards the barn and noticed how many more leaves had dropped. So, it was time to get the mower out again and work on mulching the leaves. Started the process only to be interrupted by a surprise visitor.
2121 backyard 12112025 r.jpg
Finished the process 2 days later, except for the very back part of the woods. I think this is the latest in the year I have ever done this - but it was great to have 60 degree weather.
trailer spare 3 r.jpg
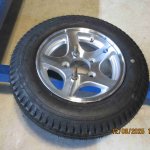
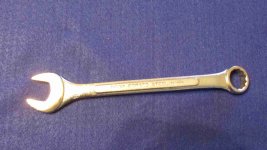
I needed a new spare for my utility trailer, so decided to get a new wheel to match the ones on the ground. Then I had to cut down some acorn nuts to make retention nuts for the spare tire holder. Then, I realized I did not have a 13/16 inch wrench in my truck tool kit to use to remove the spare. I lucked out and only had to hit 2 places to find the right sized combo wrench.
13-16 wrench back r.jpg
Picked up a no-name Taiwan combo for a $1 and buffed it up a bit before adding it to the truck tool kit.
P9060070.JPG
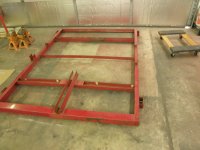
I have had my utility trailer for a while. It was bought 8/19/95 and by 2011, after years of being stored outside, it looked like this.
P9220081.JPG
So, I got a wild hair and decided to restore it. This is what it looked like in 2011. For the past 14 years it has been stored in my barn and still looks pretty good. It is a 2350 GVW trailer with a payload capacity of 2000 pounds and a 5' by 8' deck.
 
OP
J

Jeff Ivers

Well-known member
Joined
Apr 9, 2010
Messages
2,565
Location
Oklahoma
Nice restoration job on that trailer!
I've got one that size that needs some paint too.
I don't know about you, but I hate picking up leaves in mid-December.

Trailers looking good!
Thank you both. When I decided to restore/upgrade the trailer in 2011, I had the frame and fenders powder coated, upgraded to LED lights, and went with custom wheels. I had no idea what that would cost until I got done. I spent about $750 restoring/upgrading a trailer I had bought for $475. Thought maybe I had gone off the deep end, but recently I checked prices on 5x8 tilt bed trailers and discovered they are about what I have in mine total and that is without the custom wheels and perhaps paint instead of powder coating.

I agree that I hate dealing with leaves - anytime, not just December. I don't have a way to pick them up, so I can only mow clockwise over and over until they are just small bits of dirt fodder - very dusty job! Sad part is not all of the leaves have dropped yet and I may have to repeat the process after the first of the year.
 
To avoid these ads, REGISTER NOW!
Top Bottom