To avoid these ads, REGISTER NOW!

Doghouse Forge FSJ Cherokee resto project

DoghouseForge

Well-known member
Joined
May 11, 2013
Messages
374
Location
Lakeland, Fl
I realize im supposed to be posting blacksmithing projects right now, but ive been a bit preoccupied as of late with another "small" shop project...


So.... Im knee deep in the soon to be frame off restoration of my 83 FSJ Cherokee. Ive been documenting the Cherokees progress on the the IFSJA jeep forum and its been fun to show the progress and get feedback from others involved in the same type of projects.

In fact one of the Jeep Forums members turned me onto Garage Journal and I must admit the wealth of knowledge availible here is incredible... I dont know if i thanked him?? guess I should do that...

Its that very reason that has prompted me to post the Jeeps projects, challenges, and progress here. Alot of the education/knowledge I have used to achieve the projects completed so far have been due to threads from garage Journal members. "MP&C" has been working with me most recently with some pretty dicey rust repair and I couldnt/ wouldnt have begun it without his thread and personal advice.

On that note I am an absolute novice, and the level of my work is not the same as MP&C's or E-Teks or the other amazing restoration guys on GJ... I dont want it to be looked at as a showing off of skills, but instead as a "how I tried it, did it work?, and what I learned"... Ill post my failures as well as the sucesses, and hopefully be able to look back at this thread in the future and realize how much has been learned.

So the post date back to November of last year but for this thread Im going to start with the day the "Frame off" level of restoration was decided on. Ill add some other completed projects from the previous year when they pertain to something current but the for now I feel like this is more than enough.

So this will be a big opening post but might as well get caught up.

Read it, enjoy the pictures, and feel free to comment, citique, and advise in areas you might feel are lacking... Can't learn if I only bounce ideas off of myself...


so here we go!

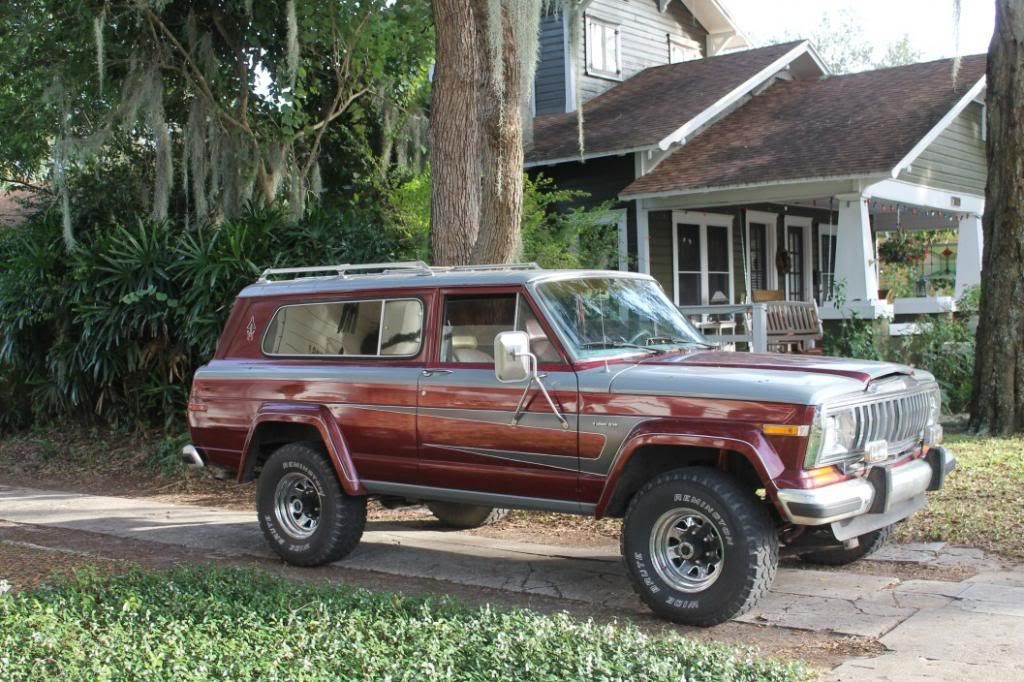
To start here is the Jeep...She has been named the "rustoleum princess" due to the PO's decision to paint everything he felt like in Grey oil based rustolium paint. Dash, door panels, hood, you name it. Its got rustoleum on it somewhere. :)

Love this things stance:


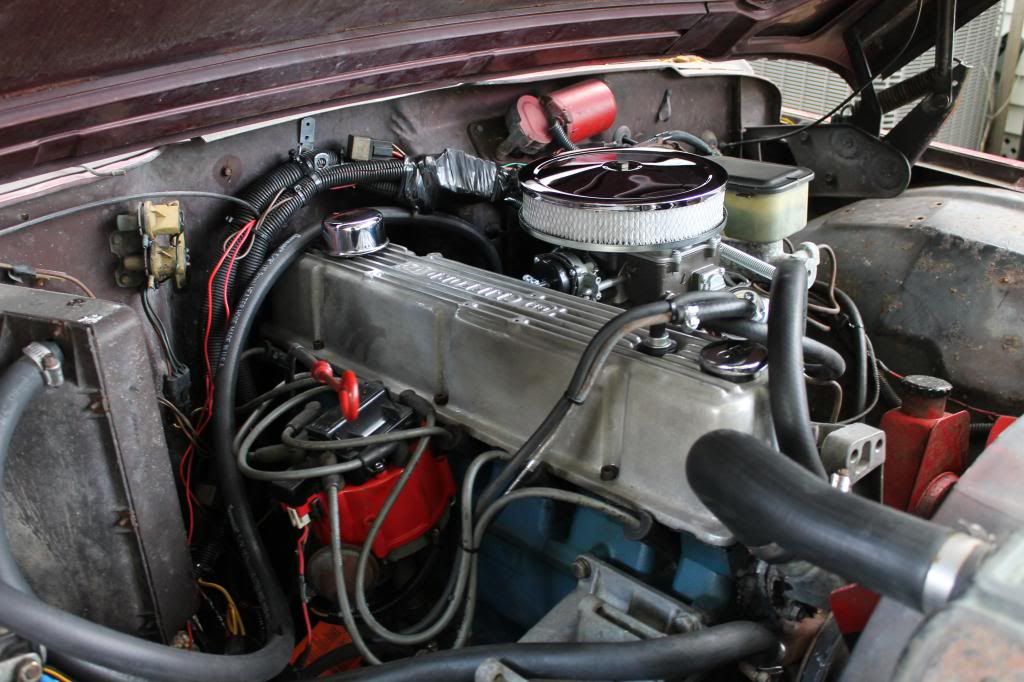
258 I-6 4.2 liter... GM duraspark, Motorcraft 2100, no emissions, no computer!


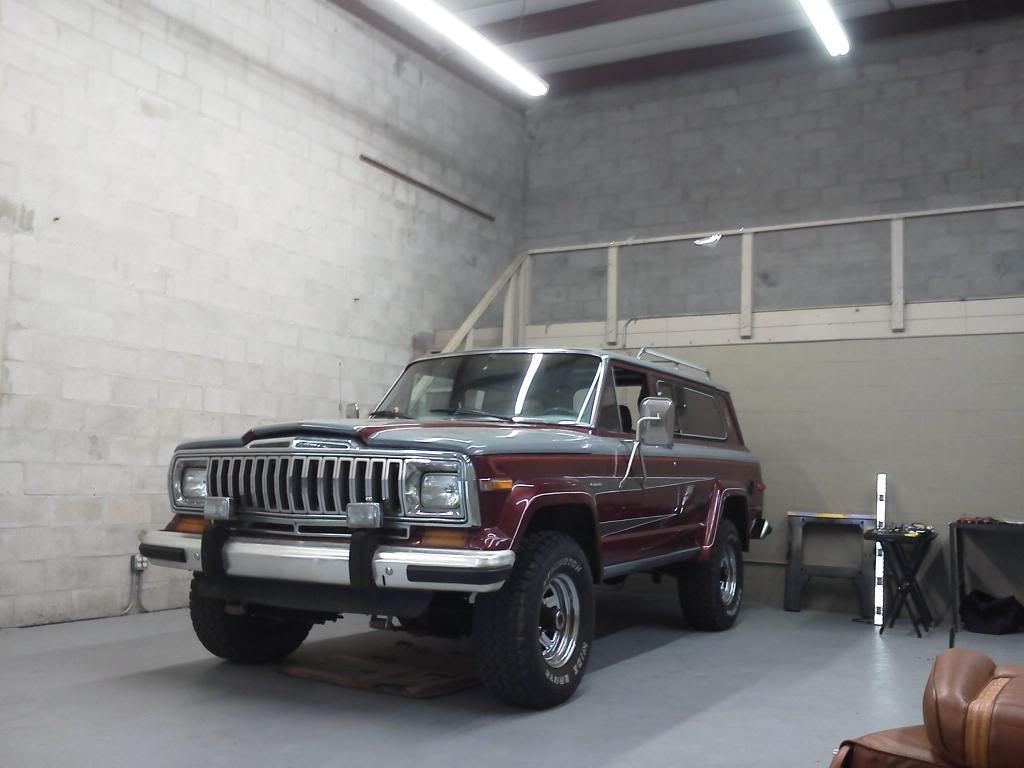
The day she moved into the new shop! No more rain storms and no more leaves!

 
To avoid these ads, REGISTER NOW!
OP
D

DoghouseForge

Well-known member
Joined
May 11, 2013
Messages
374
Location
Lakeland, Fl
MY GOD! WHAT HAVE I DONE...


It has officially gotten serious now. NO weekend piddling in the driveway to clean a small issue or change what can be changed before dark. Its now going into full blown restoration.

Im inspired by my fellow members and feel like if Im gonna do 75% of a resto I might as well do 100%... So today the real work began....


As of 2PM EST the "rustoleum Princess" looked like this...


by 500PM EST she looked like this... couldnt get the bumper bolts to quit spinning and hadnt found the three main bracket bolts yet... LOL... so I worked around it...


And as of 630PM EST she looked like this...


First I wanna give a big shout out to AIR TOOLS!!! un-freaking real... I cant believe I made it this long without them.

Second I wann give and equally big shout out to my main man PB-Blaster..."you complete me"... ;)


I started with a 1/2" wrench and socket, the air ratchet and a screw driver. I ended with this... unbelievable... look like that garage sale hardware drawer is gonna be worth the $.50 I paid for it. :)


engine is gonna be much easier to get out this way


Some noteable sections:

Rust was pretty minimal. (remember I said this in a few post :lol_hitti 
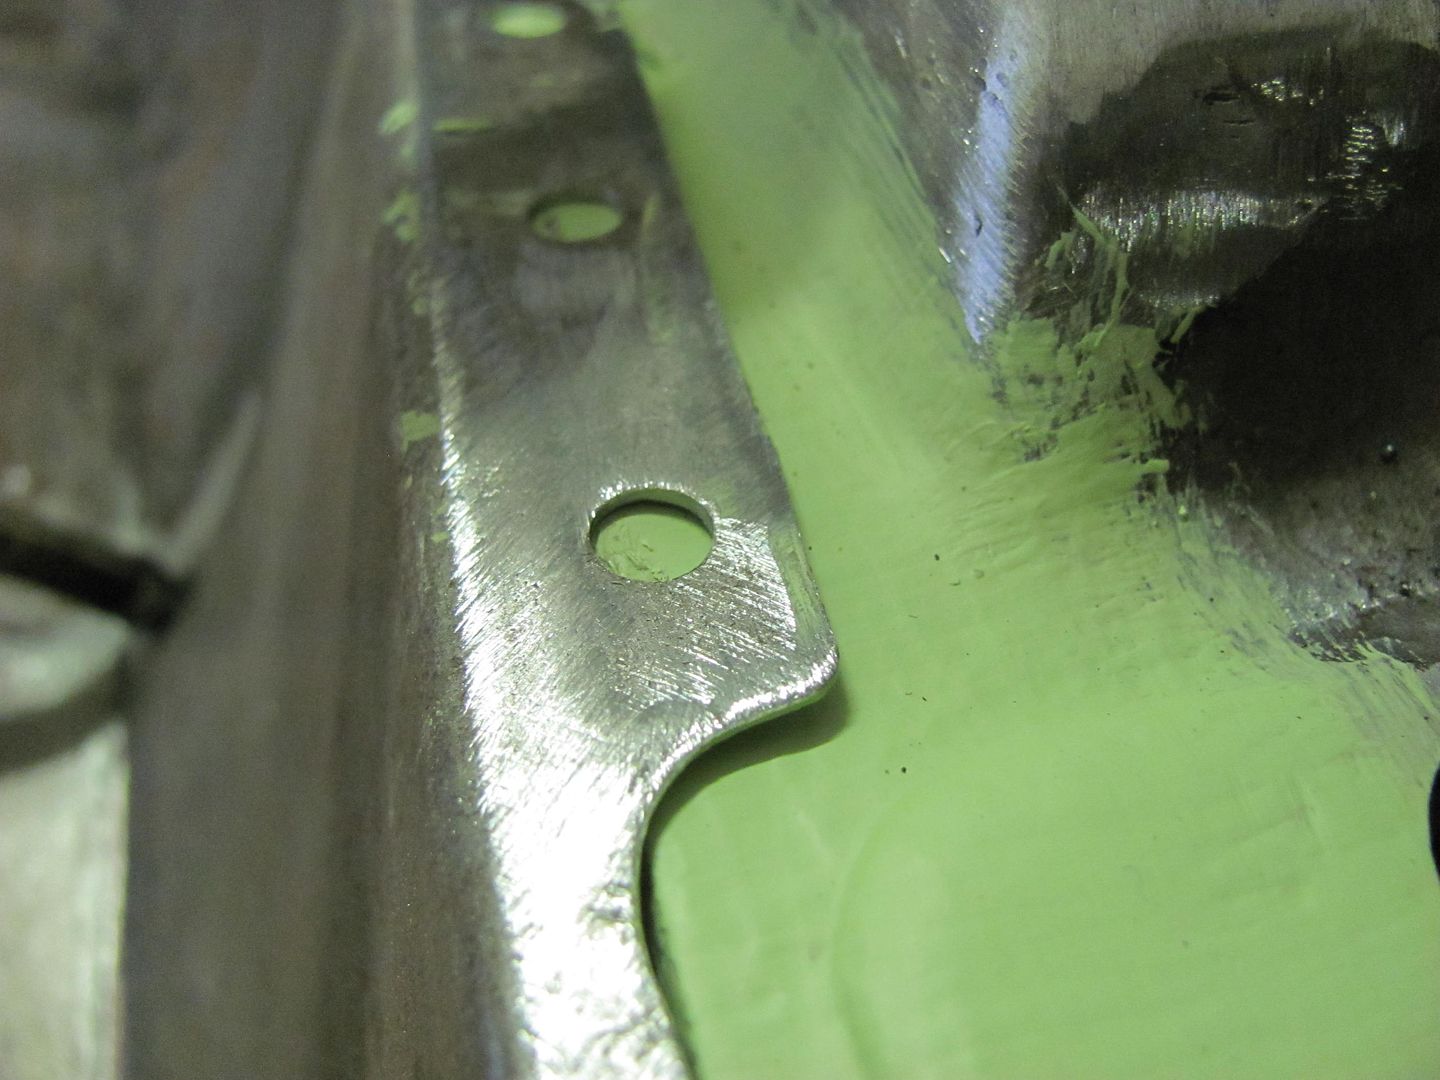
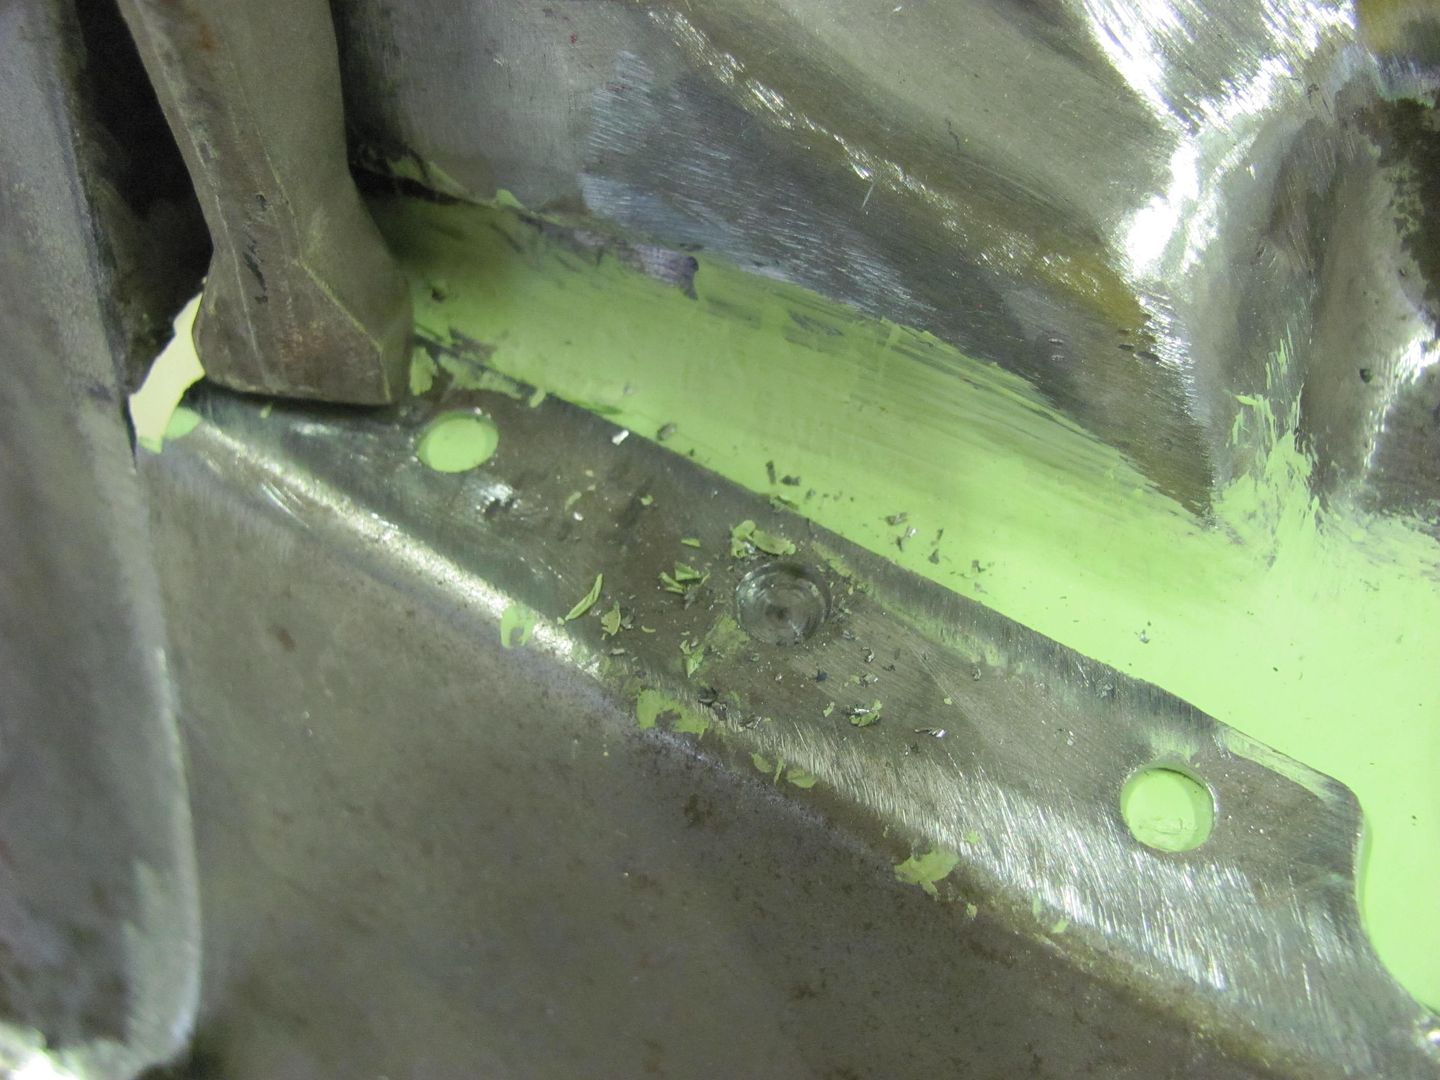
) As I suspected someone did this same process before. Definitly not recently but I bet somewhere late 90"s this thing got a real good going over.


This freaked me out when I first pulled the radiator away because it looked really bad, but after a quick look with a wire brush its not bad at all. In fact someone has used some maner of rust convertor/stop. Its peeling away at this point but it did its job.


The other side couldnt be expected to be any better


Under the fender panel overlap and directly above the drivers cowl vent box was the worst rust of the day. Definintly fixable and we will have to see how much replacement after the paint comes off. From my look today its not more than whats shown... also had rust convertor/stop caked on it.


passenger side was surface only and the tapping test felt nice and solid


The cowl was full to the brim on both sides with leaves, I expected that after reading everyone elses accounts of the bucket fulls they had removed. I used the shop vac and fed the hose into both sides. It literally filled half of my big shop vac up and I dont think I got any further than the top level... Ill continue that serach as I dissasemble further back...

only other rust to show was under the battery tray on the inner fender well.


There is definitly going to be some nasty rust under the windshield seal and I know that the floor boards will need some attention as well, other than that it just depends on whats under that paint. I do however now have a key piece of my puzzle since rocky cut the whole A-pillar off a super clean 91 waggy a couple weeks ago. Im hoping for a little cut and paste project instead of cut and fabricate...


PowerTrain is gonna come out soon and I will post later about the plan of attack concerning the mechanicals..

Time will tell.

Im gonna get this pic blown up ino a poster to hang on the shop wall... Going to be a LONG! time before I see this again...

The day it all started, before I found Stode82, WSHII, CJ5, Marcus, and evrybody else (IFSJA big retso thread fellows) thats taken it to this level.... Ive said it before and I try to remember its appropriatness to this situation. "experience is the hardest teacher because she gives the quiz first and the lesson after"


BRING ON THE QUIZES!

JP
 
OP
D

DoghouseForge

Well-known member
Joined
May 11, 2013
Messages
374
Location
Lakeland, Fl
I never do this but I cancelled my appointments this afternoon and went to the shop to get dirty! The head mystery has been haunting me and I had to get my answer.

So here todays good and unfortunatly todays bad as well...

Tore down the engine to the basic long block (plus starter and water pump). Ill finish the rest once its out and on its stand.
This was my fist time breaking one down this far... Not saying much considering it was mostly the accessories and bolt ons. But with whats ahead I want to be invloved with as much engine work as possible. So..today was about me and the air ratchet (PB blaster visited a little as well)...


The manifold bolts were a cinch! not a single stuck one in the bunch.

As mentioned above it has the 4.2 head and manifold so at least I have my answer...


Went ahead and removed the Fuel Tank...no photos of that... Its wasnt ugly but it wasnt pretty either...I will be much more ready next time (HA!) just thought I was droping the protective cover at first and then the whoel darn thing fell on me! But its out so I can grind, cut and weld in peace.


Also removed the doors and pulled the front windshield


So that all went nice and fluid...Lots of pictures of where and how things were attached and I started a parts storage room that ill post below in a minute.

Unfortunatly, thats the end of fun meditative tear down time...

Enter RUST!!!!!!

So to be fair I was ready for this and have been researching and planning for it but this is the issue..

The seals under the chrome strips were cracked so I didnt bother trying to save them. I was a little bummed because I have read a few different times that the replacemnets do fit really great...

But there was no saving this...


Once removed I lost me breath for a minute...


and if those arnt bad enough here's the kick to the man junk!


so I have a complete top half of the A-pillar and roof line so the next thing to start looking for is going to be a complete bottom half... Ill check with rocky and ask hime to keep an eye out...

Im pretty good at body work and patch work but this isnt worth trying to fix...Im gonna ponder it a while...i might cut out an entire a pillar and window frame in one piece.. At least that way if my allignment isnt exactly perfect the windshiel cutt out will be.. I can fudge a little on the body lines matchingup in the roof contour but not the windshield fitt.. any thaughts would be appreciated and considered.

So..on a happer note to finish for the day, I organized all the parts into theparts room in the office section of the shop... Its nice to have an A.C.'d area to keep everything.. Im gonna work at that room kinda as if it were my list..If I have a spare afternoon Ill pull out a fender and work on it, if I have a day Ill work on a door, or a few hours Ill polish chrome...etc.

Its also gonna be nice when I start priming the panels because I can keep them stored in the low humidity 80deg office while I work on the others.


Ive been hording parts and buying stuff since last november so I actually have most of the interior collected and alot of the seals, door wipes, and replacement body parts. The old file cabinet was a dumpster score and is proving usefull for the saving of the bolts and hoses and stuff.


So good day despite the window framework..

Thanks everybody and I will keep posting as I keep taking it apart..

Brad, just FYI, I took 266 photos today.. lol

Thanks

JP
 
OP
D

DoghouseForge

Well-known member
Joined
May 11, 2013
Messages
374
Location
Lakeland, Fl
well, I think somewhere im my first post I made the statement "this things is actually pretty good on rust for a florida truck"

Remind me never to say stuff like that without knowing the answer....

Got the majority of the interior striped yesterday eveving. It wasnt "hard" work but man was it annoying. The seats were all rusted into the floor... the dash wiring is a nightmare, and the rust, oh the rust... NOT as bad as others Ive seen on here but im going to be a sheetmetal worker for the next month or so...

so seats and dash are out


Carpets out and ran the shop vac through it. Also, took the time to make lables on all the dash wires/connections so I can "possibly" get them in the right place later...


Floor boards are at about 70% heathly metal. So untill they get sanded completly down I wont be toatlly positive that patches will be sufficient.

Passenger floor baord and some contamination on the side wall..


Passenger center under seat mounts (pretty much anywhere that had a bolt through the floor had rusted out around it and will need replaced)


Rear passenger floor panel


Probably gonna be completly redoing the passenger side at this point. Driver side is suprisingly clean. makes me wonder if it had been done with the rest of the previous body work.

With the dash out I was able to get a full look at the windowframe and A-pillar... Lets just say the easy repair of the current pillar isnt going to be an option.

Brace Yourself!!! this is for mature audiences only

outer underside:


inner underside:


top: (please be sure and note the rust hole that has been filled with bondoglass, I am guilty of having done this when i restored my VW BUS in high school, I didnt know any better but this is obviously the Karmic forces repaying me for my sinful repair style of the past ;) )


this isnt a really simple repair because the A-pilar is actuall 4 layers.
Heres a cross section of it


If you simply **** weld it in place you cant weld the inner layer... This makes it tricky and is why we are looking for a complete A-pillar/cowl/roof line donor instead of using the half section I currently have and finding the bottom seperatly. There will still be some complicated welding in the roof line section and the cowl area but they are necessary no matter which method is choosen. The complet donor does however remove the hardest weld from the equation

Heres the roof, upper door weld difficulty


I will be documenting this process very thoroughly. My search returns little to no availble or helpfull information on this type and level of repair in this area.

Now wheres my gorilla glue???


Kinda had a moment when removing this fuel sender cap. Its the first this I made for this jeep and at the time I had no idea this was going to be the path it was going to take. It was gonna be a fix it up, clean it up, and have fun in it truck but its just to special to let it waste away any further!


So im gonna work a bit this weekend and try to finish getting the side windows out, roof rack off, steering out, and rear door removed. It needs to be ready to have the Body taken off by the time the next Florida Shop day happens so there are some able bodys to help lift it onto the dolly... ;)


Well, I guess thats it for now. Hopefully Fridays donor attempt proves sucessfull!

Thanks everyone for support, and feedback. I NEED IT!

JP
 
OP
D

DoghouseForge

Well-known member
Joined
May 11, 2013
Messages
374
Location
Lakeland, Fl
Thanks everyone for your support, I needed it this week...

I went to look at the possible donor Cherk for my windshield A-pillar replacement

The advertised item for sale:

" 82 Cherokee Laredo, body and frame for sale, $400, Minimal rust! Inside the truck is full of random extra parts" ....


It was with excitment and anticipation that I awoke this Am. Ive been waiting all week to see this, the solution to my issues. Finally a break in the work schedule big enough to make the 75 mile trek into the St.Cloud Nothing lands.

Disappointment does not begin to express the feeling I have about this mornings outing...


So yup well worth the trip.... I offered the guy $150, figured I could cut it up to practice... (I called rocky first to ask what a titleless body and frame was worth), the owner however, claimed it was worth $800-$1000 in scrap and did not counter! (exactly like Rocky said he would) ;)

So thanks to Rocky for the advice and in case you guys didnt know our Jeeps apparently weigh between 8000-10000lbs (just frame and body) LOL!!!!!!
 
OP
D

DoghouseForge

Well-known member
Joined
May 11, 2013
Messages
374
Location
Lakeland, Fl
Because I was a little angry I decided to take out some aggression on the rust in the Rustoleum Princess.

ENOUGH OF THIS DONOR ****!!! BE A MAN AND BUILD THIS ****!

if you cant tell im a little pissed off about the trip today...


Drivers side:


Passenger Side


So...this whole A-pillar nonsense is made up of 4 seperate layers of sheet metal.The Dip rail, lower , middle, and upper curve. These are Bent and formed into various patterns and tied into an upper an lower brace section below the cowl cover. As you can see in the photos at least some of a section is left after debriding most of the pillars rotten metal. The passenger side is going to need an additional section removed but I cant do that untill after this top section has been re formed and attached..

here is a cross section. If you look its not hard to determine each layer:
 
OP
D

DoghouseForge

Well-known member
Joined
May 11, 2013
Messages
374
Location
Lakeland, Fl
The phots of todays post are on the previous page....

Sunday Im going to my buddys shop to use the hydraulic brake press and recreate each layer of the a-pillar in individual pieces. Im then going to go back to that truck and weld in each section, one layer at a time.. I cut away most of the nasty today and ist still solid! Which means it will not change angle by fixing it in the manner I have decided. I will start with the inner layer and then add the top. tieing each section into the appropriate brace section inside the cowl. After those two are complete the passenger side will need the lower section removed and replaced. This WILL work! Once the lower sections are rebuilt I will turn my focus to to roofline... I already have a spotless replacement for the top half so its all about measuring and finding a method of controlling the realignement.. I have some ideas...

To be fair the outer Dip rail and cowl sections I am hoping to have made by a sheet metal worker I have been talking with. The cowls contour is tricky without certain tools and the dip rail has to many tight bends for the press I have access to. Its possible that the cowl cutouts could be reused but the 1/16" loss on both sides equal a minimum of 1/8" missing material. Some areas might be as large as 3/16" and thats more than I am comfortable tying to weld across with 18guage steel.


If you cant tell Im pumped. The Surgury today showed me that its not to far gone! Just in the nick of time? Yes, but still repairable.

Thanks

JP
 
OP
D

DoghouseForge

Well-known member
Joined
May 11, 2013
Messages
374
Location
Lakeland, Fl
A-Pillar Repair - section 2- fabrication day

Went this morning to my good friend Kevin's shop (actually his dad's shop...). He and his father are fellow farriers and his dad, Kenny is one of my mentors.


Kenny has a side business building utility bodies and other metal based art, fabrication, and design projects. He has always been one of the first to help me in situations that were above my experience level as far as fabrication and Farriery are concerned.


So I asked Kevin for his help in creating the detailed brakes in the A-pillars various layers.

To begin careful measurements were taken of each layer and recorded on the top secret cardboard box cutout. ;)


The various bends were measured using a gauge finder (this one came from H.F. and cost under 10$ )


After all "figur'n" the best tool for the job was determined to be...The good ol' manual brake.


A sample piece was created to test our measurements and the math. If it ended up short or long we would know to add or subtract steel... The reason it could change is that when you bend steel it stretches and grows. Kevin’s basic rule is to add the thickness of the steel, multiplied by the number of bends, to get the total added width needed in the section. Sometimes you need less and sometimes more. It just depends of the degrees of angle you’re bending. As an example a 125deg bend will stretch more than a 45deg bend…

the gauge is magnetic and sticks to the breaks table so you can pull up the bend untill the gauge hits your mark. A good tip is to always pull to your mark, release pressure, and then pull back to the point of contact to check your angles. There is a slight spring to the metal that will cause your bends to be slightly off. after the second check you can pull the bend back up a touch to get your actually measurement.


The sample worked out perfectly except we couldn’t make the final break because it was too tight and the previous breaks were interfering….To fix this he reversed the order so he could finish on the opposite side of the pattern and it worked perfectly so on to the full length section.


First the shear


Finished top section


Checked for alignment and fit


Everything looked good so out came number two


Next we worked on the inner section. This was a much easier pattern because there were no tight angles. When finished we checked them against the original A-pillar and in the new top section. Again it lined up perfectly


The bottom layer was not able to be created as a single piece because the final section wouldn’t clear the ½” tolerance of the break. Instead of fighting it we made the section that matches the Dip rail separately and brought the seams to the corner of the underside door jamb edge. This allows a single weld line that can be tied into all 3 layers. It also can be plug welded along the center/bottom edge of the top and center section. Since this piece is responsible for holding the seal it needs to be secure. The plug welding and the solid inner seem should accomplish that and make it stronger than original.

 
OP
D

DoghouseForge

Well-known member
Joined
May 11, 2013
Messages
374
Location
Lakeland, Fl
So it’s hard to hold all the pieces in absolute alignment but since it’s assembled in sections that won’t be an issue.

This is the completed A-pillar minus the outer Dip Rail...It matches the original perfectly and it has truly been a gift to have Kevin create these for me. Use your imagination and picture it plug and seem welded together nice and tight!


Next is to rebuild the lower tie in sections that are inside the cowl/firewall bulkhead. Luckily they all tie into areas that are solid and not rusted so simply cutting and pasting the new metal will accomplish it. Since this area cannot be seen once the inner layer is welded over it , and even more so when the cowl is completely covering it I’m going to make some changes to the design. Basically beefing up the areas where the pillar ties into the brace instead of leaving the strength to the same 16 gauge sheet metal. I feel this is part of the flaw that has allowed such devastation to occur inside that area.
This will not alter the angle or pitch of the windshield because the lower section is already tied into the thicker lower windshield support brace (my saving grace at this point). As long as I build onto the lower braces and line up to the upper solid pillar it should be identical... should have a chance to work on this at the upcoming shop day so I’ll take pictures and get you guys updated.

Thanks for checking it out and I hope the good fortune continues with this repair project!

JP
 
OP
D

DoghouseForge

Well-known member
Joined
May 11, 2013
Messages
374
Location
Lakeland, Fl
Thanks Guys!

So tonight I traded the Jeep fabrication and assembly for some far more technical stuff ...


My daughter is 1 year and 8days old, so it's time for her first set of wheels...

Only took and hour!!!


I of course POR15'd the inside A-pillar connections (Im learning from my experiences ;) ) , also treated the under carriage with rust preventative. The electrical was super easy so I dont know why you "Prissy" guys are complaining about wires so much??? Also, the new " Dana-44 'Independant Series' " axles were a breeze to build. The hub assembly only requires one tool!

AND the verdict is..... SHE LOVES IT!!!! we spent a good 30 minutes rolling around the house.. If I stoped to long she would smack the sides and babble at me untill I started moving again! LOL

My dogs however are toatlly freaked out! LOL


Have a good week guys!

JP
 
OP
D

DoghouseForge

Well-known member
Joined
May 11, 2013
Messages
374
Location
Lakeland, Fl
I couldnt take it...

I took a few hours today and fit up the drivers side A-pillar section,

I apologize for my forgetfullness latley. I keep leaving the good camera. so the crappy phone was all I had


When we stoped last i had removed the top layer and cut small access holes in the cowl. it looked like this...


so to start today the inner layer was removed and I cut out some larger sections of the inner cowl to remove all the rusty metal inside.


I need access to deeper in the cowl than I can reach from the top and the inner wall had some surface rust any way,, so I cut out the inside for access... I will use this access later to be able to paint the high zinc primer inside the upper cowl and hinge bulkhead.


The upper edge of that cut still has the old seam sealer on it. Before I weld the replacement in it will all be cleaned and preped.

this is the inner section, outer top section, and gasket rail cut to fit and clamped in place


Checked for clearence with the outer cowl section layed in place


the angel of the pillar is 50deg. I used my new angel finder to recored it and it will help me line up the roof later as well.


the inner section needed a replacement made. It not only needs the area that was cut out replaced but also the corner flange the runs in the space just above and behind th corner section. I saved this piece so it could be easily reproduced when the time came.. as for the panel itself I used a scrap section of wood and cut out a template. It was adjusted as needed untill correct for the space


all the wierd gold stuff is the old sealer that needs to be removed. Im planning to add a thin section of angle in the upper seem to strengthen the brace and make it easier and cleaner as far as the weldin is concerned.


The inner cowl has a small rectangular piece that ties the top of the upper A-pillar section to the bottom of the inner cowl section. Mine was basicly destroyed by the rust so I am in the process of fabricating the inner framework. So far there is this section of 1.25" square tube that fits perfectly with the upper A-pillar contur and touches on the outside corners to the cowl. Im going to work on a second piece to this tubing insert that spans the gap completing the tie in to the center cowl attachment point, outer wall, and to the side panel that was just fabricated. That will be stronger than stock and since its all exposed it will be completly rust proofed (if there is such a thing) . Either way it will have a much better chance of lasting the test of time than just the 19guage sheet that was in its place to begin with.


heres the fit check with the addition of the inner panel and corner flange.

So far so good, starting to look kinda pretty! :lol:


OP
D

DoghouseForge

Well-known member
Joined
May 11, 2013
Messages
374
Location
Lakeland, Fl
so one of the last pieces to recreate is the gasket lip across the front. It was rotten and I have honestly not seen what it is supposed to look like or when it ties into..

ANY OF YOU GUYS WITH YOUR WINDSHIELDS PULLED... IF YOU COULD TAKE A PICK OF THIS CONER AND WHERE THE GASKET LIP ENDS IT WOULD BE APPRECIATED!!!!! I need to know if it tucks in behind or crosses in front of the side gasket bracket lip

I feel like it makes more since design wise to cross over and terminate on the outer edge.. So for now thats what I created as the replacement... it needs to be countoured and twisted to fit correctly around the outer lip so i used the anvi and hammer to set the radious and twist the piece accordingly...


and the final test fit of the evening... Not to bad for amature work!


Truthfully today isnt anywhere near the final weld up, there is still complete sanding and possibly some media blasting to do , the inner sections need to be cleaned and primed, all the sections will need to be drilled out for the plug welds, and some of the internal structures need to be tweaked. After all that is done I will paint everything in either epoxy primer or zinc weld through primer prior to final assembly.

So the passenger side is a little worse in reguards to the fact that the driver side didnt need the lower panel replaced. Its still doable when replacing all three panels but it will need to be finsihed in two parts to maintain the integrity of the pillar... hopefully, we will get to the passenger side this weekend!


Thanks, having fun around here! hope you guys are ...

JP
 
OP
D

DoghouseForge

Well-known member
Joined
May 11, 2013
Messages
374
Location
Lakeland, Fl
Got the driver side internals and A-pillar welded in this weekend. Made a few mistakes that Im going to have to work on later but overall it went very well.

In the last A-pillar repair post the Sections had been fit up, and I was working on the inner cowl/A-pillar tie in section.

To clarify... (since I realize that probably no one has 3 layers of their jeep cut away to see this first hand) ... the Cowl , A-pillar, Windshield gasket molding, firewall, and door jamb hinge area all tie into this corner that I have disected in the previous photos. The original design supported and tied all these layers together by a series overlaping flanges spot welded together on top of the A-pillar and under the lower/inner cowl wall. My Cherokees internals in that area were disentegrated so that non of the flanges were connecting any longer. To recreate this original design was noot possible so I needed to find a simple but effective replacement.

The internal support ties need to span the gap between the outer firewall/ hinge bulkhead across to the inner firewall (immediatly behind the dash). It needs to connect at the top to the inner cowl bulkhead and on the bottom to the A-pillar shaft itself. The issue is that its not a square or rectangle inside.. Its a "whatthefishagram" the a-pillar has its specific shape, and the inner cowl and outer firewall are tapered in opposite diections...

Im sorry, Im trying to make it not confusing but this stuff is hard to explain.

So here is the solution to the inner brace:

expanded:


together:


welded:


Ok remeber this piece for later in the picture sequence....


So with the brace fabricated the different layes of the A-Pillar were drilled for Plug welds.


Here is where a very stupid mistake was made...I was super stoaked to have finally finished the braces and actually have them fit. In the the excitement I rushed the marking of the plug weld locations without thinking it through. The center holes are useless...there is a big gap under the crest of that section... now I have all these holes to fill in when i get finished... grumble...

The areas were wire wheeled for the final time and brought to the cleanest level possible. All the replacemet metal was sanded clean, roughed up, and cleaned with brake cleaner to remove all oils before primer was applied.


Next the entire area and every nook and corner i could reach was coated in High Zinc Weld Through Primer. I should note that epoxy primer was recommended over the weld through, but it was very costly and needed almost a week! to cure before you were supposed to weld on it...


The individual pieces were also coated.


Inner layer clamped and ready...No going back now..


Welded:


(ugly but actually got some good welds considering how nervouse I was)

Reapplied primer where needed and welded in the upper section and gasket rail.

Guitarsail (Jarod) snagged this pic of the majical dance between me and my HF 90amp stick welder... Yup ...


Welded and ground down fairly flush.. The stick welder just wouldnt lay it down clean enough to get the perfect "all weld" repacement I was hopeing for... Im going to look into lead filler techniques but if thats not worth it a little!!! filler will be enough to blend the pinholes and minor imperfections.


okay remeber that little insert from the beginning of this post?

Here is where it come into play:

In order to get it situated now that the A-pillar is filling up its fair share of space you have to access it through the side wall. the tag that was left hanging over the inside was drilled for a plug weld and tacked on through the inner panel to hold it in place while the rest of the connections were made.
I admit this isnt beautiful and shiny like the stuff above the cowl line but I seiously hope that NO ONE! ever has to cut this thing open like this again and spending time grinding and polishing out a section that is never going to be seen was not a priority at this point.

Inner cowl panel removed and brace in place:


this is looking down the A-pillar into the guts of the cowl... Its plug welded twice to the top, once through the side, onto the pillar itself, and plugged through a hole in the inside to the inner cowl.


At this point I shot everywhere i could reach from the side panel access with high zinc primer. most of these areas are not in direct exposure to the elements but i figured why not.

then,
Inner cowl pannel replacement installed
The upper seems need to be sealed. I cut out the fatory stuff and will do all the seals at the same time once the fab work is finshed. I know the plug welds are ugly but the dash and brake sit right over it so i didnt exactly shoot for the stars for finish.


last but not least the internal cowl/ a-pillar area got slightly overkill High Zinc primer application. Before its sealed up its going to get a top coat of something but i havent decided yet.

The actually pillar still needs to have the finish work done to it but since its going to be a while before i get the rest of the winshield corners completed it got a coat of rust preventitive primer as well. :;):
 
OP
D

DoghouseForge

Well-known member
Joined
May 11, 2013
Messages
374
Location
Lakeland, Fl
the next step is to replace the Inner and outer cowl cut away sections. This shouldnt be as gruling as the internal work but its still going to be a challange.

Inorder to help get my roll right in the outer panel i got a countour guage to help me out. Hopefully i wil get that done this wekend and Ill post how it turns out.


I like this angle... :;):


In other fun news its almost time to take the body off and get it living on its dolly. Monday evening I had a couple hours free and decided to strip it the rest of the way down...


the original paint is beautiful. Vintage metallic red... I was cosidering going a different color but this has definitly got me thinking...


the first! ha! todo list is getting smaller!


Ok, thanks for checking it out and ill keep going on the windshield repairs. Passenger side is the whole deal...all three layers...but ive been devising a plan! :;):

JP
 
OP
D

DoghouseForge

Well-known member
Joined
May 11, 2013
Messages
374
Location
Lakeland, Fl
Took a much needed shop day today and got the passenger side a-pillar structural stuff welded up.

This side was quite a bit worse for wear than the drivers side. Since the drivers side still had a non rusted lower pillar layer I could build the rest of the pillar around it. This helped to keep the alignment exact...which when dealing with the windshield is "kinda" important.

So here are a couple recap photos of the passenger side rust:


so definitly had some work cut out today...


Since all three layers were going to have to be cut out this would completly disconnect the upper and lower corners from each other. I needed away to support the upper pillar once it was severed from the lower and keep the 50deg. angle. It also needed to stay in in place without dropping downward or bucking inward or outward when the tension was released.


My solution was to take a thick piece of 3/8"x7/8" flat bar stock, and forge the lower section to match the countour and slope of the upper door jamb section. (this is the triangular section just below the A-pillar and above the top hinge mounting acces hole)

Look at your FSJ upper door jamb where it connects to the pillar and you will see the countour Im speaking of. Unfortunatly once you get below the actual pillar connection there is no more flat surface to brace against. This is why the stock had to be shaped before hand.

clamped in as tight as I could muster...


Because I am Me... I find it necessary to have back up plans for stuff even when the main plan is pretty much working exactly like I expected. So I measured and cut these two boards to have a reference for alignment if the bar stock failed and the roof shifted downward. I think if needed it would have been useful but all it did was provide things to bump my head on... :lol:


Moment of truth.. The A-pillar is officially disconnected from the lower cowl!!!!!!!!!!!! No going back now, its either get it right or bust...


The lower section of the pillar assembly was cut to length and clamped in place. Using the bar stock as the supportive layer to build around...


the lower contact area was drilled for plug welds but the upper junction was unfortunatly limitied to a **** weld...


I got a decent seem and the weld was strong, but I decided to add a small brace inside the lower section since there was no over lap.. Its a small 90deg bend on a flat section of 12guage. It was plug welded on top of the new section (as pictured) and a hole was drilled through the bottom of the original lower section in order to plug weld thru to the inside where it was out of reach :;):


Added the middle and top layer in the same manner as the previous post


Did some General weld clean up and added the inner gasket rail and inner support bracket.


I still need to finish grinding the inner plug welds flush before the finish filler is applied but Im not doing the finshing work untill all the corners are repaired. Thats gonna be a few weeks still so for today it got primer coated to prevent it from rusting. (in florida right now, the bare sheet metal will literally develope a light rust coat overnight...even inside the shop)


What a relief! I have been dreading this part of the windshield repair... Onward to the Roof corners... ::):


Thanks
JP
 
OP
D

DoghouseForge

Well-known member
Joined
May 11, 2013
Messages
374
Location
Lakeland, Fl
Upper passenger cab corner / windshield frame repair


Well... part of yesterday and today were spent with the repair of the rusted out A-pillar/ windsheld /cab corner. In all this repair took about 10 hours to complete so keep that in mind when working on your DD's.

The upper corner was more of the same as far as my rust issues were concerned. All three layers of the pillar were toast and the cab corner also had a hole through it. The windshield gasket frame was weakend and had some breakthoughs from rust. So not to long untill it to would have been consumed.

Here are some recaps of the upper corners rust:


In order to replace this section the main junctions between the three main supports will have to be cut away. This obviously causes the problem of realignment, and since the windshield isnt very forgiving something needed to be done to maintain the current angles and levels. It needed to hold while the old metal was removed and the new replacement was being trimmed to size and welded in place.

To accomplish this a piece of 3/8"x7/8" bar stock was cut and welded in the same angle as the lower door frame. It was then clamped in place below and behind the repair area. With it locked in the upper cab rails and a-pillar measurements should not chage. That leaves the center windshield frame section, and my efforts at forming a brace to support it were wasted by the roundness of the metal brace and the curve of the windshield countour.
So high tech was abandoned for two sticks. :lol:


Seriously though, I measured the boards and inserted them into the frame untill the were under pressure and slightly loaded. To ensure this could be reproduced in the case of myself knocking it out on accident during the repair(very possible) I marked the locations of the board on the floor and on the windshield frame. If I was to knock it out aligning the marks should put it back in the same spot.


With the support in place the donor roof was measured for clearence of the rusted areas it was replacing. Its important to realize that this 3 way joint has a double wall and inorder to weld in the upper frame connections you have to cut away an access panel above it.

This panel was measured, cut , and then used to template the roof for its cut. The roof was cut to the inside of my mark to ensure that I have enough metal to trim the patch and have a nice tight! fit for welding it in later.


So off the top came and boy was this rust nasty!


The next step was to remove the corner. I used a cut off wheel. A sawzall and bimetal blade would work as well but I have a better feel with the grinder so its just a personal preferece.


The donor corner was measure off the original and the bandsaw helped insure my cuts were nice and even.


As much as I wish it would have dropped right in the replacement needed to be tweaked since my on the truck cutting job was not perfect like the band saws...


OP
D

DoghouseForge

Well-known member
Joined
May 11, 2013
Messages
374
Location
Lakeland, Fl
So after several!!! trips to the belt sander and some tweaking fom the flap disc the fit was finesed and I did a rather happy jig around the shop to celebrate!


So i dont like **** welds for structual stuff. My friends ( who build trucks from scratch) tell me that they are fine, but since Im over cautious I went a step further and shaped some cross braces for aas many off the joints as i could. This also helped me get good welds across the gapped areas. My stick welder doesnt like gaps so every little bit helps.


So the rest is... weld a little here...weld a little there...repeat...repeat...repeat...


I didnt want to overheat my joints and warp the fit so I had to force myself to stop after welding a bit and let the area cool. One thing I filled the time with was salvaging the clean dip rails off of the original and donor cut aways... Im glad I did this because for the first time I can actually see what it looks like with all the pieces.


Alright! finsihed the welding, grinded everything flush, welded the holes, grinded flush, welded a third time, and then grinded evrything as flush as possible... Ive accepted the fact that im going to have to use a little filler once all the weld work is finished, and Im ok with that. My original intent was to be a bad *** and do it all with weld, but im just not good enough at it nor is my welding machiene focused on being tidy. The lead filer option is still out there but Ive had zero experience with it and if the filler needed stays as minimal as it is so far I think Im going to stay with what I know..


3 down 1 to go...

I saved the corners of my door seals when they were removed. they made a nice test to see how the fit was and went on perfectly. Kinda cool to see it with a seal, and kinda eye opening to realize that 80% of the work im doing wont we seen at all by the time the gaskets, seals, dash, and chrome trim are in place. Not to mention the seam sealer that will be applied...


the final test was the ever daunting angle of the pillar...50deg is the majic number... and I am proud to say its fifty from top to bottom!


Sundays mean work is near so tomorrow Im gonna have to switch back to horseshoeing mode and away from body work... Im hesitant! :lol:
However, as much as I wanted to spend the rest of today doing the final corner, its just not worth rushing and not really something I would recommend leaving apart for a week either. So instead I organized all the hardware from the tear down into marked ziplocks, wrote in my restoration journal all the stuff I needed to remember in a year when Im wondering "what the Heck" , and cleaned up my mess in the shop.


Feels go to know that next weekend everything is in its place and ready for another round!


Have a great week and thanks for checking it out.

JP
 
Last edited:
To avoid these ads, REGISTER NOW!
OP
D

DoghouseForge

Well-known member
Joined
May 11, 2013
Messages
374
Location
Lakeland, Fl
Nice old iron ! Great Job !

Love me some Big Jeeps!!! The first car I bought and paid for myself was a 1972 Grand Waggy. Keith

Thanks guys!

Sorry to post over you earlier, didnt realize you had commented.


JP


So this gets us current... if you get taken to this second page post go back through page 1 and check it out. Come along way so far and still have miles! to go...

Should be able to work on the last corner next weekend, and then start putting the panels back over the access holes and the finish work. Alot of work still to get it finished but it feels good to have gotten this far against that windshield rust situation...

I cant believe how hard I worked at avoiding this repair..If id just started doing it instead of wasting a day driving to look at another rust bucket i might be finshed with all four corners by now!

Oh well, lesson learned...Buck up and try it before you say its not possible...lesson learned...again...im pretty sure its not the first time its been taught to me... ;)

Thanks

JP
 

D.J.

Well-known member
Joined
Sep 16, 2009
Messages
1,116
Location
New Haven IL
Get you some Kroil for the rusty problems and you'll be glad you spent the money for it will save you a bunch of twisted off fasteners. Good luck with your restoration.
 

MP&C

Well-known member
Joined
Oct 21, 2009
Messages
4,403
Location
Leonardtown, MD
Jonathan, it's looking good! I'm really impressed that you're doing this with a stick welder. A couple comments...

Weld through primer is really not weld through. You'll get a much better weld if you clean it back from the **** weld joint on top, and out of the bottom of your plug weld holds. Here's the tool for the job:

I use a letter A size (.234) drill bit for my plug welds, and to clean the epoxy from the adjacent panel, I use a letter A that has been flattened and backfaced to form a cutter similar to an end mill. It cleans the paint well, and hardly touches the metal on the adjacent panel..


Picture314.jpg


Picture315.jpg


Picture316.jpg


Picture318.jpg


Picture321.jpg


In fact one of the Jeep Forums members turned me onto Garage Journal and I must admit the wealth of knowledge availible here is incredible... I dont know if i thanked him?? guess I should do that...

So who was it that referred you?
 
Last edited:
OP
D

DoghouseForge

Well-known member
Joined
May 11, 2013
Messages
374
Location
Lakeland, Fl
Jonathan, it's looking good! I'm really impressed that you're doing this with a stick welder. A couple comments...

Weld through primer is really not weld through. You'll get a much better weld if you clean it back from the **** weld joint on top, and out of the bottom of your plug weld holds. Here's the tool for the job:

So who was it that referred you?


Thanks! I believe Ill be making one of those. Truthfully, from reading your thread I like your epoxy primer but the weld through was already on the shelf at the shop. So waste not want not...

Ive been using rustoleum professional enamel as the top coat in the areas that will eventually be closed off. Do you think its necessary to add the top coat or is the primer sufficient. I guess I was thinking better over done than under done.

"54PanelFord" is the gentleman responsible for my garage Journal introduction. He suggested it after I posted a couple blacksmithing projects on our jeep forums Off topic section.

Well, Farrier work was hot today and I couldnt stop thinking about the Jeeps body work... This stuff is addictive!

Thanks

JP
 

scab

Well-known member
Joined
Sep 20, 2012
Messages
462
I could look at build threads all day long, keep the pics and updates coming! This is an excellent one. :rocker:

A few years ago, I had a buddy buy one of those for $80 from a tow lot after someone didn't claim it. We knew the owner so he gave him a screaming deal. It was almost identical to yours except it was auto, beige, and V8. The only things it had wrong were a frozen back window, a couple rust spots here and there, and just overall neglected cleanliness. Unfortunately, my buddy was lazy and never did anything with it.... I would kill for a doable project for less than a hundred bucks.
 

54FordPanel

Well-known member
Joined
Aug 7, 2009
Messages
5,711
Location
Fort 54, Littleton, Co
So who was it that referred you?

"54PanelFord" is the gentleman responsible for my garage Journal introduction. He suggested it after I posted a couple blacksmithing projects on our jeep forums Off topic section.

Well, close.....I guess welding fumes give you dyslexia, JP.

I told him specifically to find your threads, Robert. You're our very own Ron Covell.

Great work JP. I'm very impressed with what you're getting done.
 

Mr. 360

Well-known member
Joined
Nov 23, 2012
Messages
662
Location
Bowmanville, Ontario
Very nice work on this! Makes me want to get my Wagon out from it's storage-slumber on my parents farm and back on the road.

View media item 32952
I did a "working resto" on mine a few years back. I paid $250 for the thing and drove it home. Took me the 4 years I was in university to get it back on the road. The orange avenger had really sunken it's teeth deep into mine, so I feel your pain. If I could go back I'd have done a better job, like you've done. But hey, I bought it in part to learn how to weld and do body work, so the next truck will be all the better.

IMG_0197.JPG

IMG_0195.JPG

IMG_0190.JPG

IMG_0699.JPG

IMG_2441.JPG

IMG_1822.JPG


Or, check out the blog: http://ericspringate.blogspot.ca/

Great progress on yours, I'd love to slot the 4 speed stick into mine. Auto just seems like a waste, much less fun and worse gas mileage. Subscribed!
 

54FordPanel

Well-known member
Joined
Aug 7, 2009
Messages
5,711
Location
Fort 54, Littleton, Co
Nice work, Eric! My favorite Grand Waggy's are black with the woodgrain.

You and JP are kindred spirits in bringing them back from the rust death. I enjoyed your blog. I'll spend more time on it later. Love the bumper.

Go to http://www.ifsja.org/forums/vb/ and poke around. That one is a wealth of information, but new people have a hard time signing up anymore.

Also, check out http://fsjnetwork.com/forum/index.php

We'd love to see your project over there.
 

skippy24

Well-known member
Joined
Oct 31, 2012
Messages
546
Location
Reno, NV
Awesome job even though it is a Jeep. :lol:. Actually the GWs look pretty bad ***. Keep the updates coming! :beer::beer:
 
OP
D

DoghouseForge

Well-known member
Joined
May 11, 2013
Messages
374
Location
Lakeland, Fl
Very nice work on this! Makes me want to get my Wagon out from it's storage-slumber on my parents farm and back on the road.

I did a "working resto" on mine a few years back. I paid $250 for the thing and drove it home. Took me the 4 years I was in university to get it back on the road. The orange avenger had really sunken it's teeth deep into mine, so I feel your pain. If I could go back I'd have done a better job, like you've done. But hey, I bought it in part to learn how to weld and do body work, so the next truck will be all the better.

Or, check out the blog: http://ericspringate.blogspot.ca/

Great progress on yours, I'd love to slot the 4 speed stick into mine. Auto just seems like a waste, much less fun and worse gas mileage. Subscribed!


Ummmm... thats a "working resto" ??? you sir are a mad man! Im crazy and stuburn as they come once I get an idea in my head but your Jeep was GONE!!! If anyone gets to be impressed today it's me.

I was late to my afternoon apponintment becasue I couldnt stop reading your blog. Im sure the Chili's waitress was thinking "this guy wont leave!" ...

Havent made it all they way through it yet, but your resourcefulness in the repair stratagy the paint booth are impressive!


Thanks for following along and Ill make sure to keep the quality up ;)

you definitily need to come hang out with the rest of the FSJ guys, if you think our restos are cool you should see some of the extremes people are taking these old dinosaurs to. "54FordPanel" (aka Sock Monkey Master :p ) is being humble but his is one of best ones you'll see.

JP


Thanks everybody for posting up the support! Its a three day weekend so I might be totally finished by monday. HA!
 

aggierailroad

Well-known member
Joined
Jan 8, 2012
Messages
581
Location
Houston, TX
I had no idea you posted anywhere other than the fab forum..

Awesome stuff man, cannot believe you are doing it all with stick either. You can borrow my mig when I can borrow that electric motor we talked about...
 

Press_Corpse

Well-known member
Joined
Jul 23, 2012
Messages
54
Location
Lemont, Illinois
I love the detailed posts and the story of all the work you are putting into it. When I saw the cross section of the A pillars I had a hunch you would do it in layers. One thing differently I would have tried to do instead of **** welding would be to stagger the cuts and weld that way. Also, have you considered getting some por 15 and pouring a little at a time from a drilled hole at the top of each pillar in the roof and letting that cover any rust/metal inside? As much fun as this looks to me reading about this, I'm sure the stress of recreating everything with little/no deviation from the original product is bad enough. Anyway, Keep up the detailed posts, we all love it!
 

Mr. 360

Well-known member
Joined
Nov 23, 2012
Messages
662
Location
Bowmanville, Ontario
Thanks 54 and JP! didnt mean to hijack the thread, but thanks for reading, im flattered. I actually did sign up for the IFSJA a few years back, but i'm sorry to say i think im one of those guys who's only posted like, once. must rectify

Just used a couple work hours up browsing again, haha

Any progress on the rig?

I'll have to make sure I actually complete that blog, made it a lot further than stripping the paint.
 
OP
D

DoghouseForge

Well-known member
Joined
May 11, 2013
Messages
374
Location
Lakeland, Fl
Thanks 54 and JP! didnt mean to hijack the thread, but thanks for reading, im flattered. I actually did sign up for the IFSJA a few years back, but i'm sorry to say i think im one of those guys who's only posted like, once. must rectify

Just used a couple work hours up browsing again, haha

Any progress on the rig?

I'll have to make sure I actually complete that blog, made it a lot further than stripping the paint.


NO worries, would love to see the blog completed!

Unfortunaty I have done zero addition work to the Cherokee since the last roof corner. I need a solid block of time to commit to cutting the last corner and just havent had it yet. My assitant quit week before last so I have been running like a mad man. After this friday I will have "made It" :lol: and be able to relax a little next week. With no assitant I dont get home untill around 830-9pm and i leave everyday around 6am. My Daughter gets up at 630am and goes to bed at 8pm so when those weeks happen I literally dont get to see her all week. So this past weekend was all hers! :) we played and did stuff the whole time. Cherk will be there when Im caught up....

I had a cancellation this afternoon and went to the shop for a few hours.
Knocked out a cutting/serving board.


Im making a stack of these, some blacksmithing artwork, and some more knives for the October Downtown market here in lakeland. Plans to use the money i make towards buying my engine in november/december. With the used parts Ive got for sale and the market place I should come pretty close to getting it free and clear of my normal (wife moderated :p ) income.


Ill hopefully get the other corner done saturday or sunday! but ill keep you posted.

Thanks

JP
 

e-tek

Well-known member
Joined
Dec 19, 2007
Messages
10,690
Location
Saskatoon, SK
Sweet thread! Nice to see someone else tackling the rusty **** (besides me). The photos are really good too.
On the weld-through topic I do the same as MP&C's - in that I'll use it, but still remove it right where the weld is gonna go so I have metal to weld to.

The Princess has got to be loving the attention!
 
OP
D

DoghouseForge

Well-known member
Joined
May 11, 2013
Messages
374
Location
Lakeland, Fl
!!!!HUGE SCORE!!!!!

Ive been watching the local classifieds like a hawk for months, and today the elusive creature Ive been hunting finally showed itself.

Floor Pans, trim pieces, and countless other projects are now available for fabrication right in Doghouse Forge. It also means I can make and sell the A-pillar replacement kits!!!!

Meet the new arrival! could be the best $250 bucks (yup, I know!) I have spent in the shop yet!

48" Finger Break

It comes with a set of half round "teeth" as well...


In another area of awesomeness! My buddy Brad sent me an extra paint Gun he had. "Finishline" by DeVillebiss. This is a amazing thing to add to the tool room. Now I can do the body work and prime each section as needed without buying infinate spray cans! THANKS Brad!!!!


Hoping to get some stuff done this weekend but I might get sidetreacked playing with the new toys. :thumbup:

Thanks for the comments and Ill post the progress soon.

JP
 
To avoid these ads, REGISTER NOW!
Top Bottom