To avoid these ads, REGISTER NOW!

Doghouse Forge FSJ Cherokee resto project

To avoid these ads, REGISTER NOW!

PCO6

Well-known member
Joined
Dec 25, 2008
Messages
4,573
Location
Newmarket, Ontario
That's a great model of Jeep and you're giving it the dedicated work that it deserves. Thoroughly enjoying this thread. :thumbup:
 
OP
D

DoghouseForge

Well-known member
Joined
May 11, 2013
Messages
374
Location
Lakeland, Fl
Thanks everybody! much appreciated.

MP&C I think now that I have this break I shoud be as good as you are in a week or so. :lol: or maybe not. ;)

I am aware of the suckage and am currently basking in it. Thanks!

Super excited to get back to working on it soon. Had to knock out some "handy crafts" :lol: so I can generate some more income for this thing. Got a few more projects to wrap up and ill be able to shift my focus again.


JP
 

MP&C

Well-known member
Joined
Oct 21, 2009
Messages
4,403
Location
Leonardtown, MD
Jonathan, I think I'll be making some drip rail soon, and wanted to see if you needed any for this project... Here's the sample profile if you want to check it to yours...


64aca60a52f56dd2784eff076c79eb77.jpg
 
OP
D

DoghouseForge

Well-known member
Joined
May 11, 2013
Messages
374
Location
Lakeland, Fl
Well Hello to all of you guys...


I am affraid I have made a liar out of myself, I think the last time this restoration had anything new to report was in September. Wow, i cant believe its been 3.5 months since I was able to work on the Jeep.

My little plan to make some "stuff" , sell it, and then use the money to fund the resto worked a little to well. I have been running ragged since September trying to keep up with my normal full time business, and the new side business that Doghouse Forge has become.

If life had its way nothing would change and the jeep would keep getting pushed behind a growing list of orders and business. So...an intervention was needed. A little grease, grime, and metal must be reintroduced.

This weekend I started my new system. Still chugging away with orders and farriery but time for the Jeep was scheduled as well.

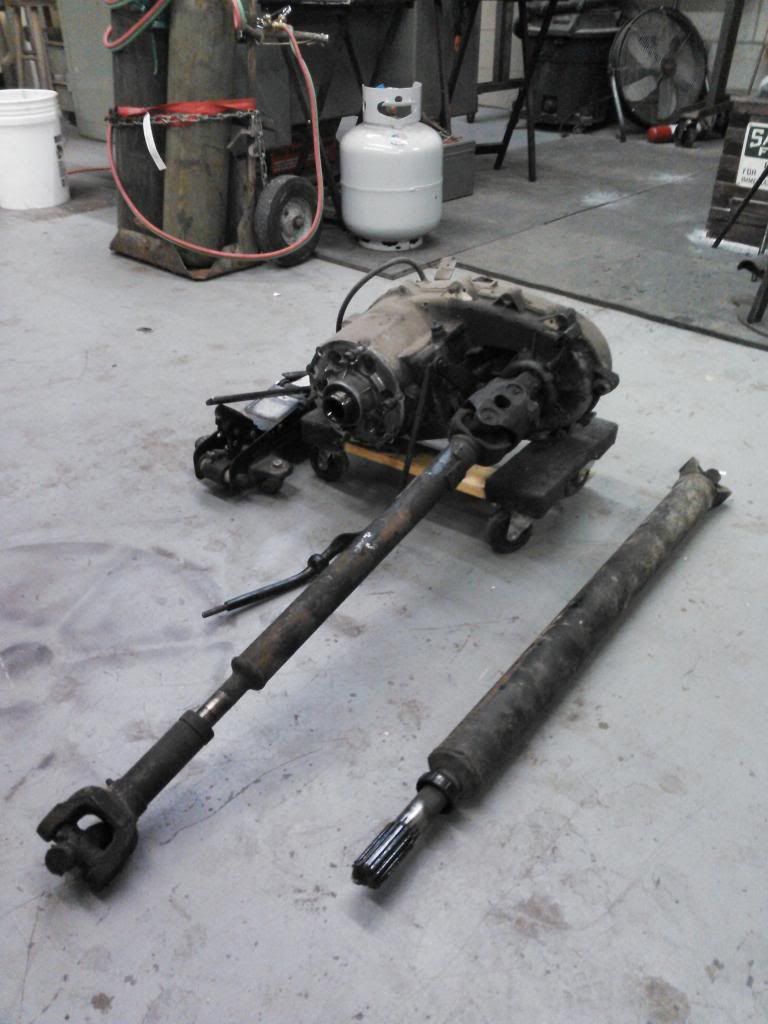
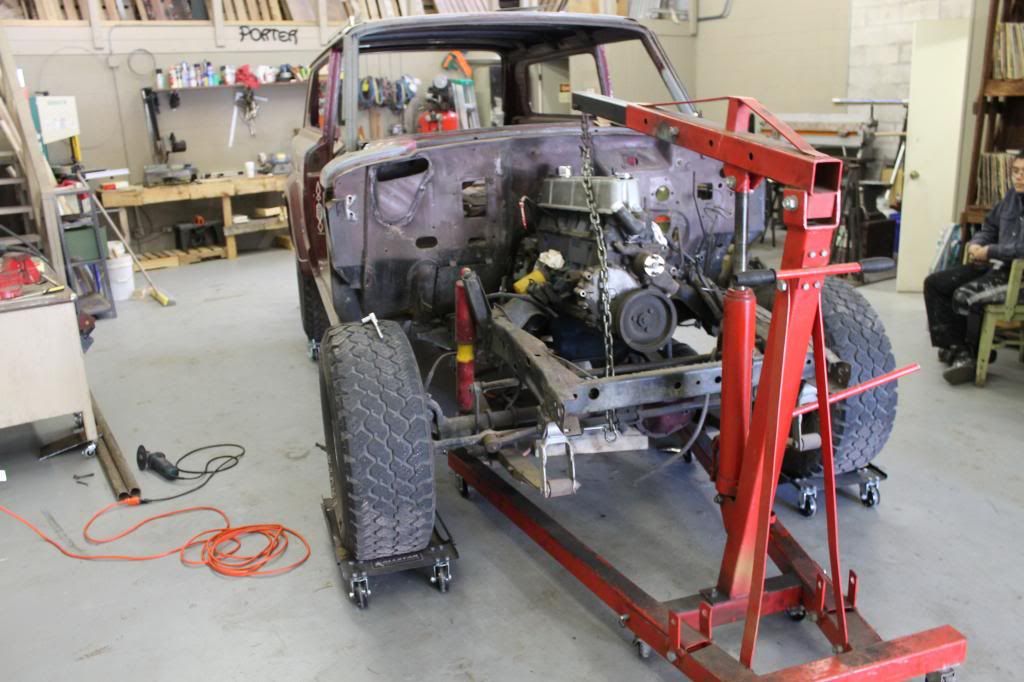
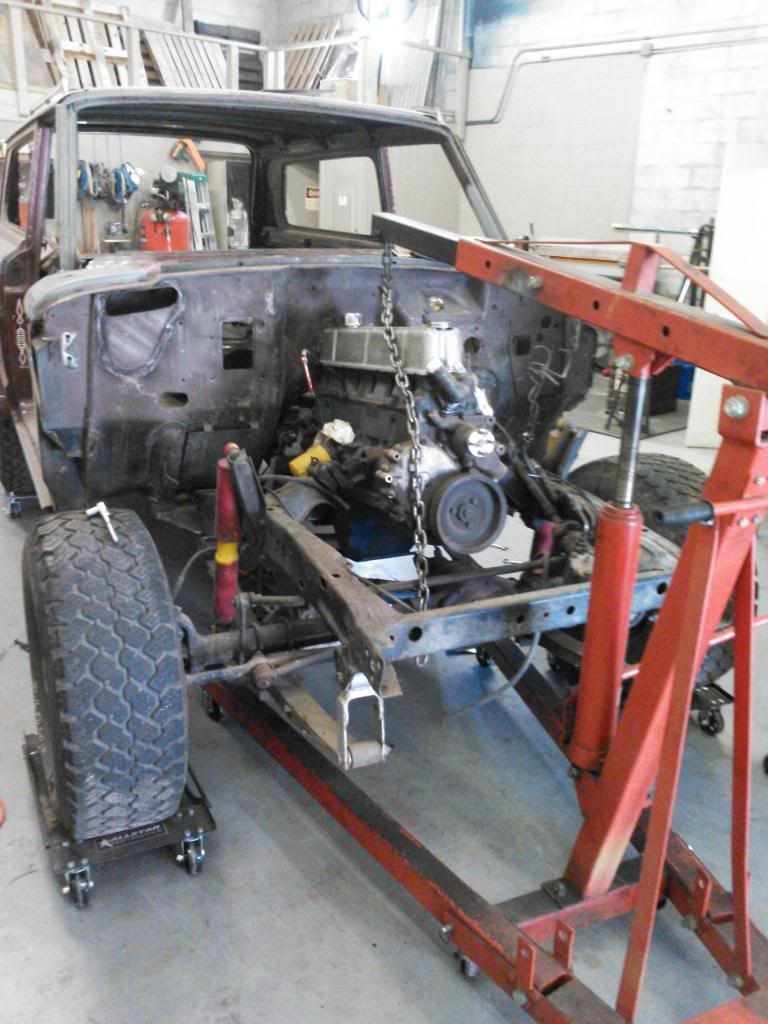
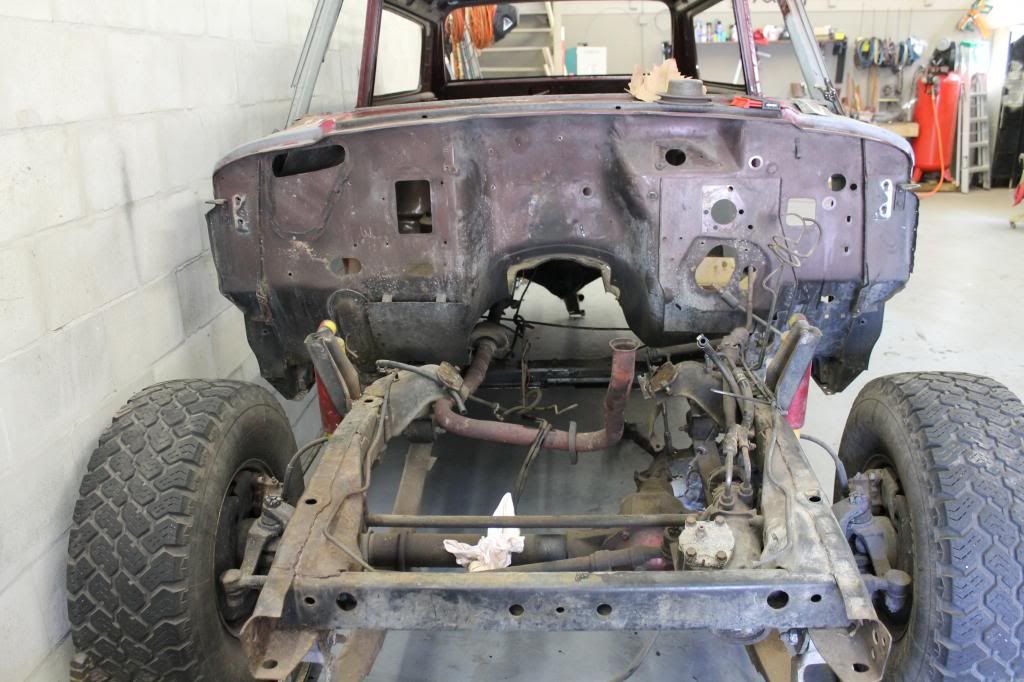
First on the list was to finish pulling the power train. The current 258 I-6 is a great little motor and it runs like a top. With the HEI and Carb upgrades I had installed it was actually pretty peppy as well. The T-5 was nice since the 5th gear is good for fuel usage but with my planned usasge this setup wasnt going to cut the mustard.

The removal was pretty straight forward. If you have never done one before I would recommend the glorious "you tube" for some good ol' backyard DIY guys approaches to the process.

Since this is a 4 wheel drive vehicle you do need to make sure you remove the transfer case before pulluing the motor and ****** out. Its possible to remove it as one unit but not ideal.

Basic steps are:
:Drop drive shafts
:Use a jack to support T-case and undo the bolts connecting it of the rear of the trans
:push back the T-case and lower down the jack slowly (the t_case and ****** both will have a bunch of little accessory attachments. Brake line retainers, fuel line retainers, the tach, and possibly even a exhaust mount attachment so give a good look before you get half way out and hung up)

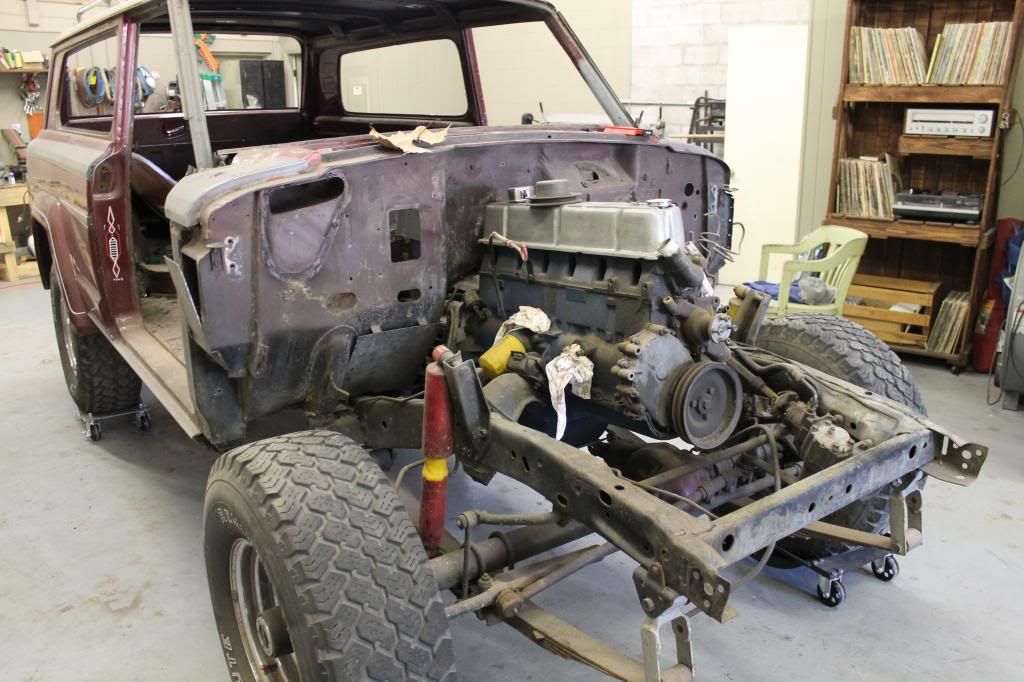
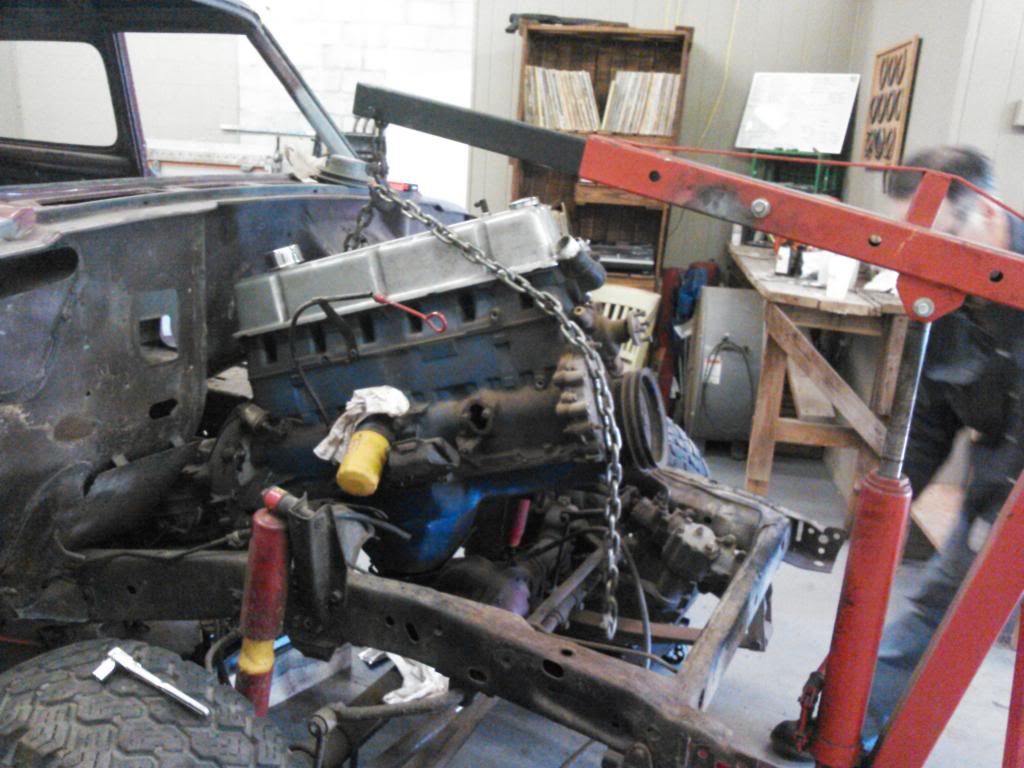
The rest is your standard engine ****** removal. With this applicatin I needed to drop the transmission support cross member to allow clearance, but other than that the crane did the hard work.


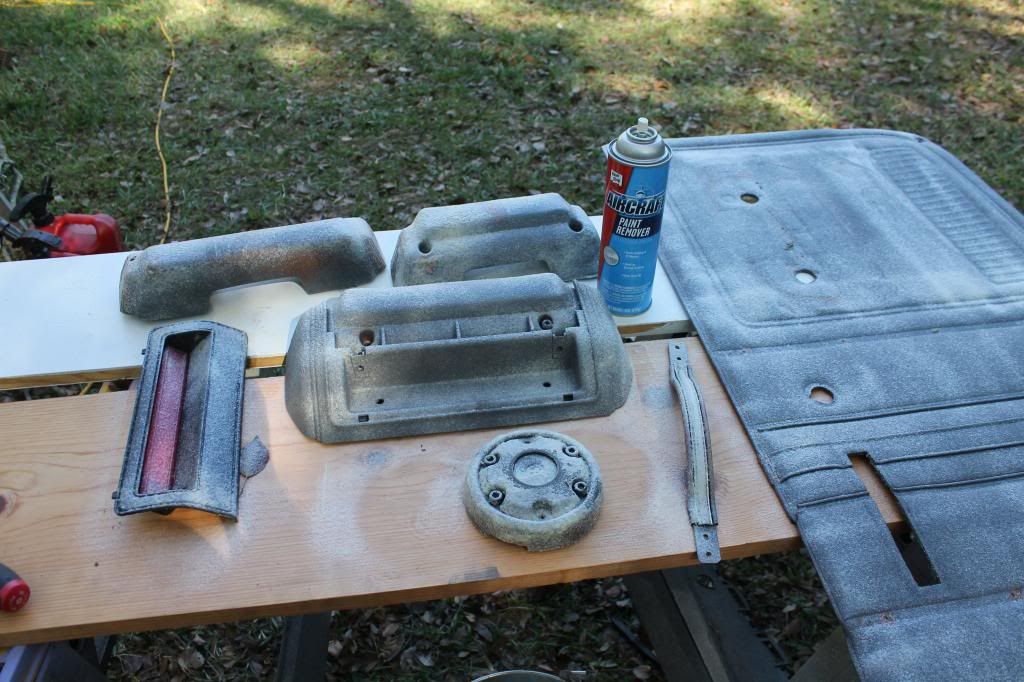
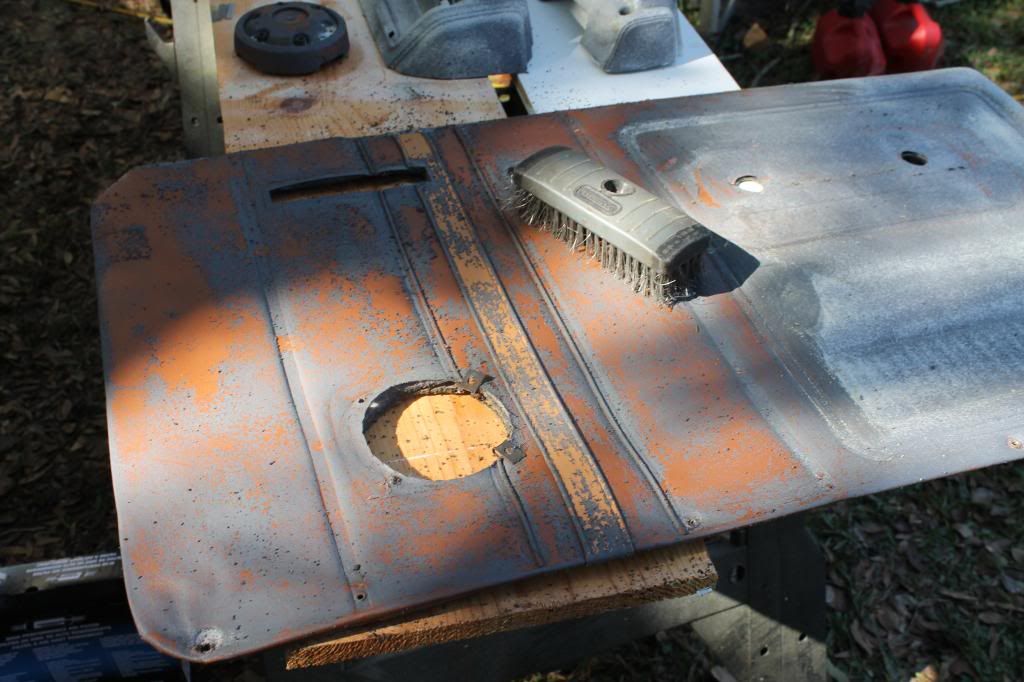
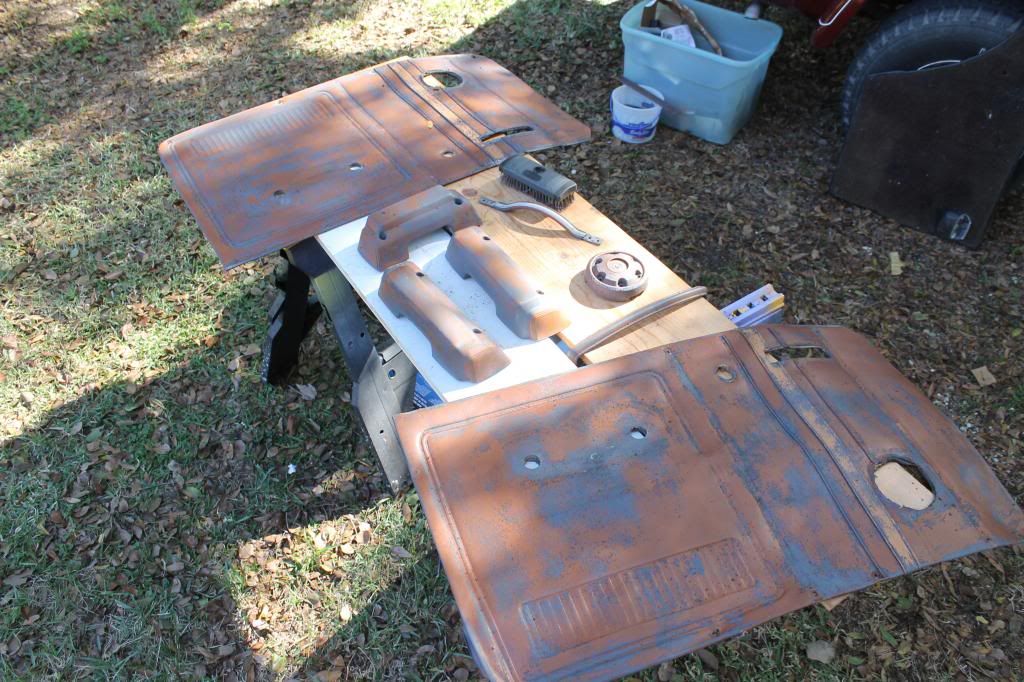
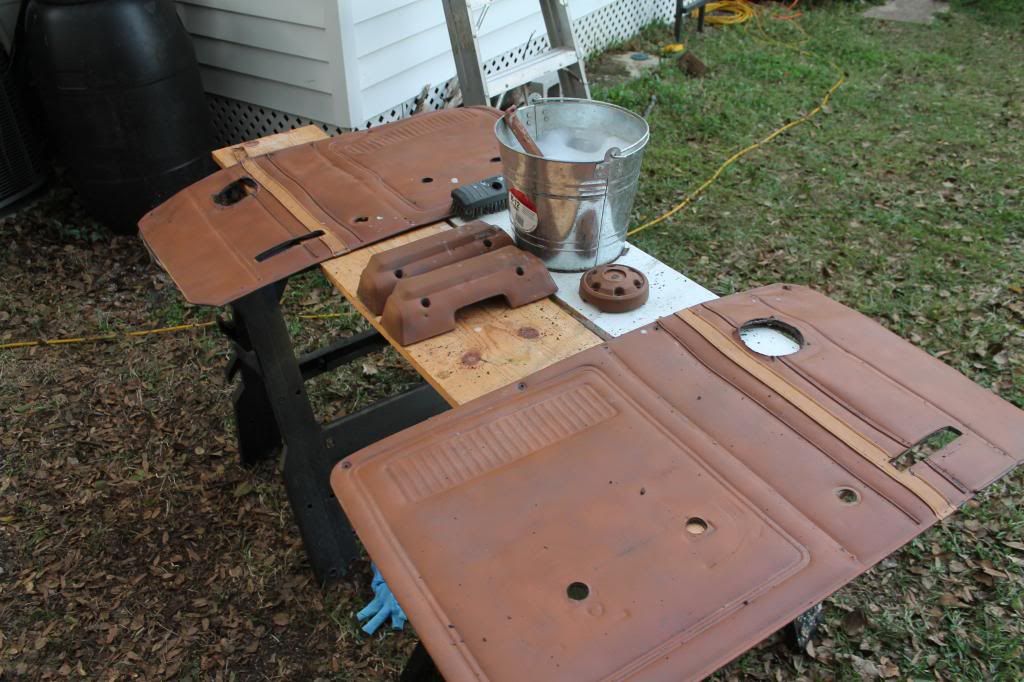
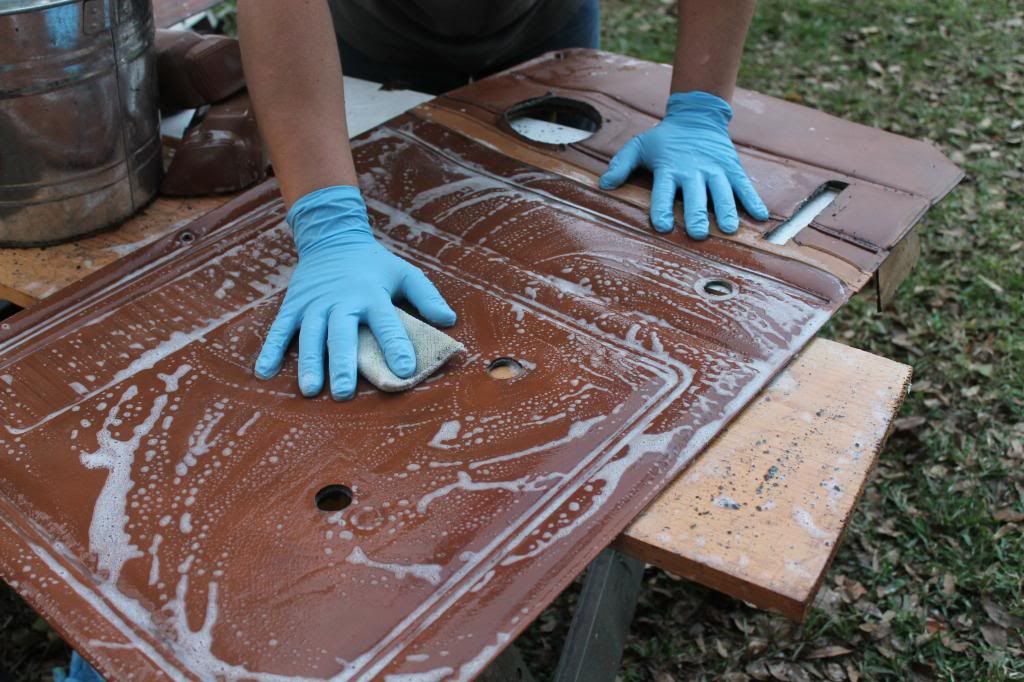
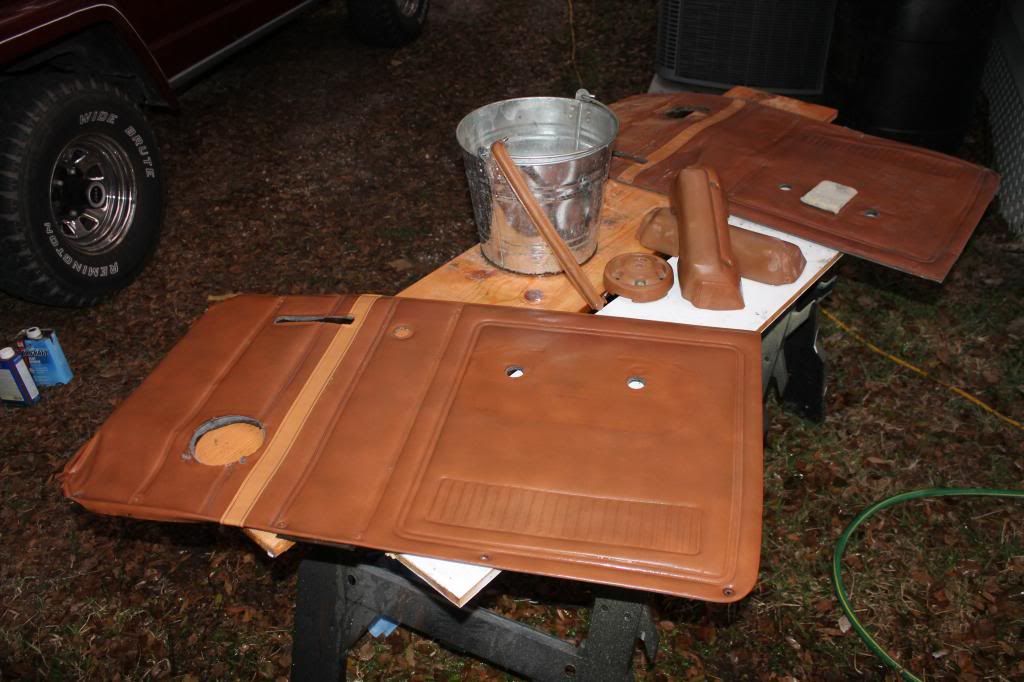
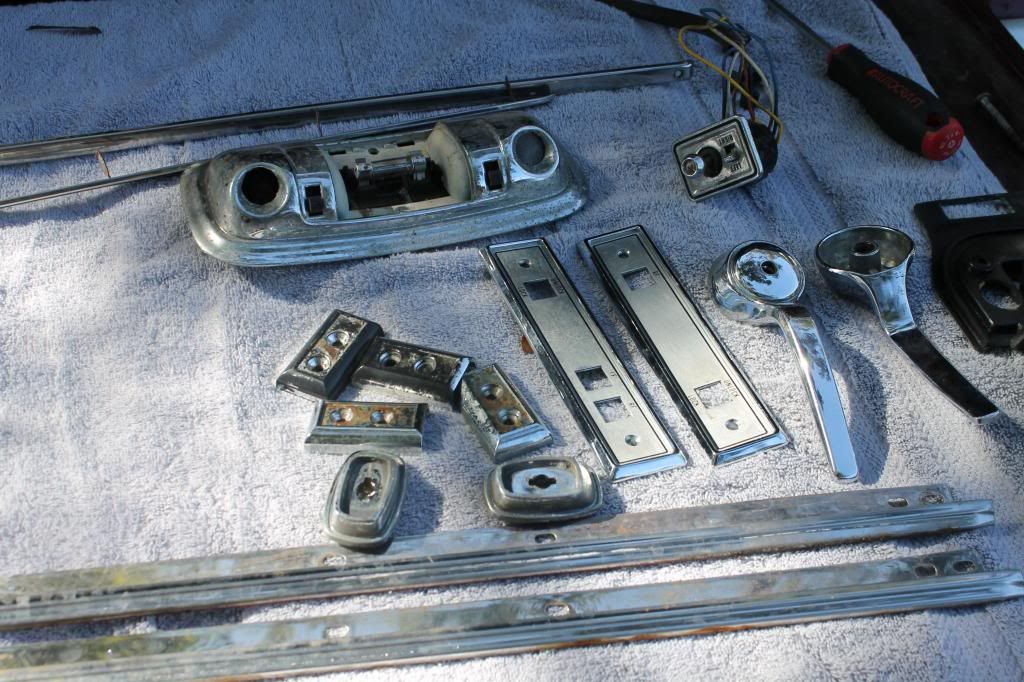
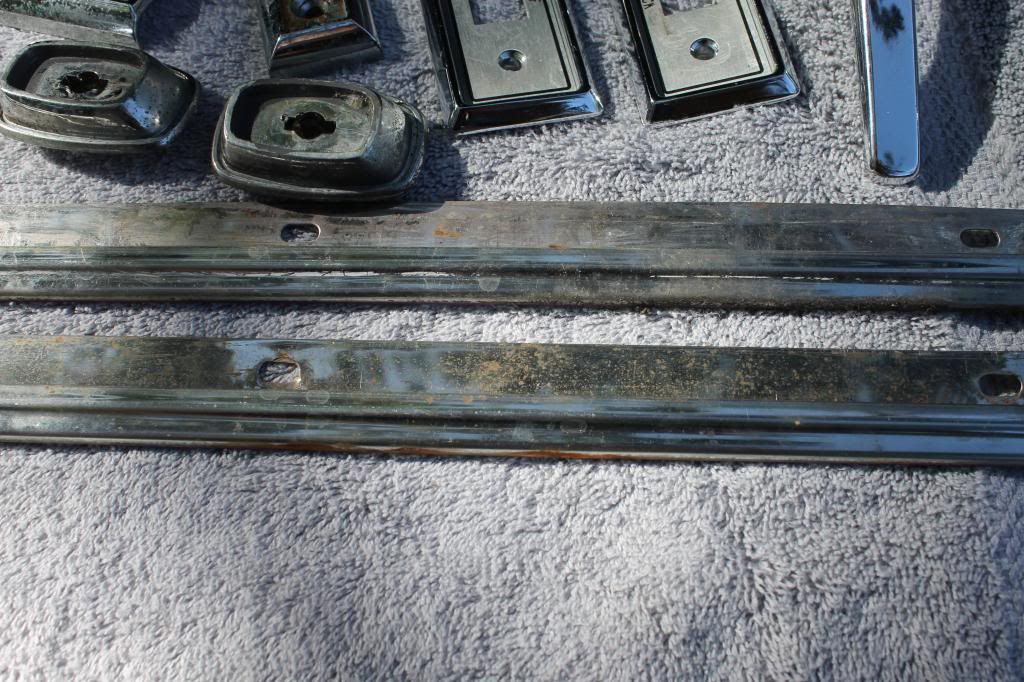
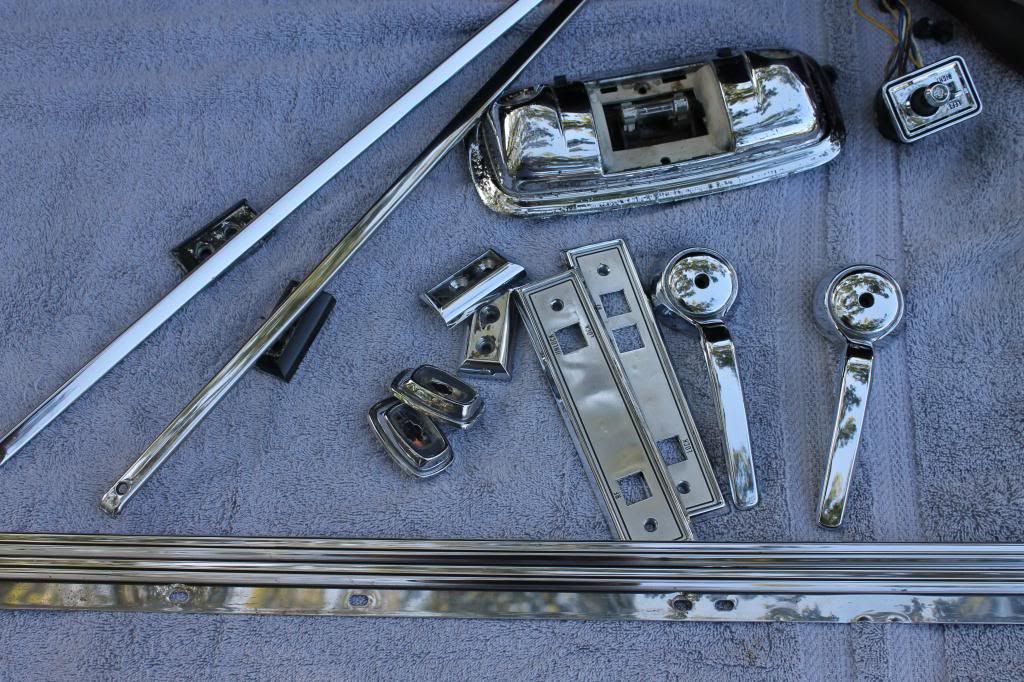
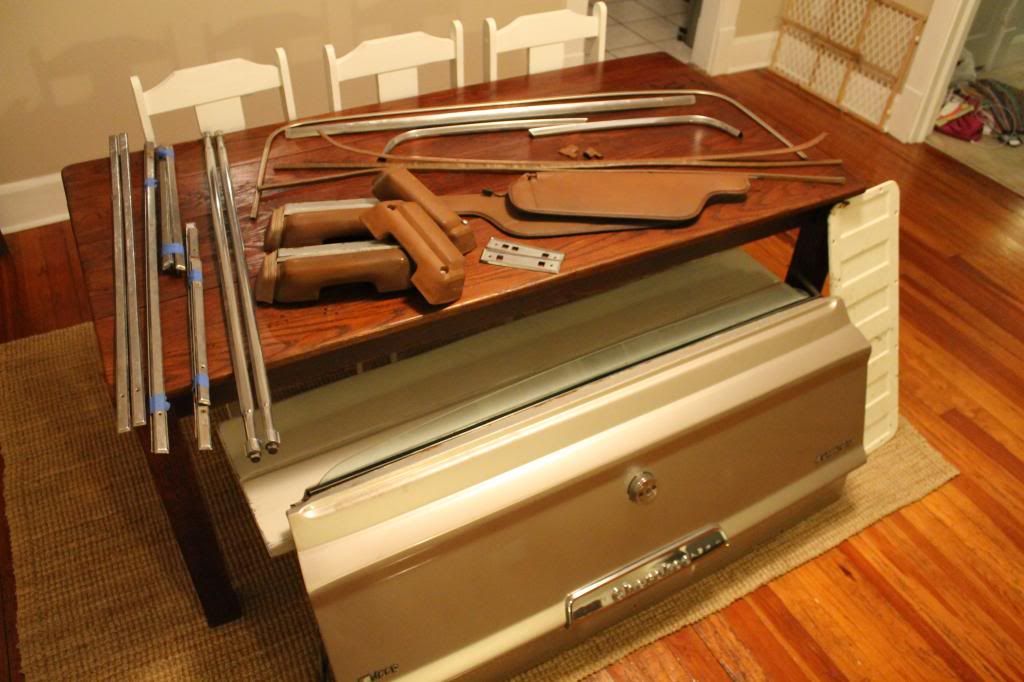
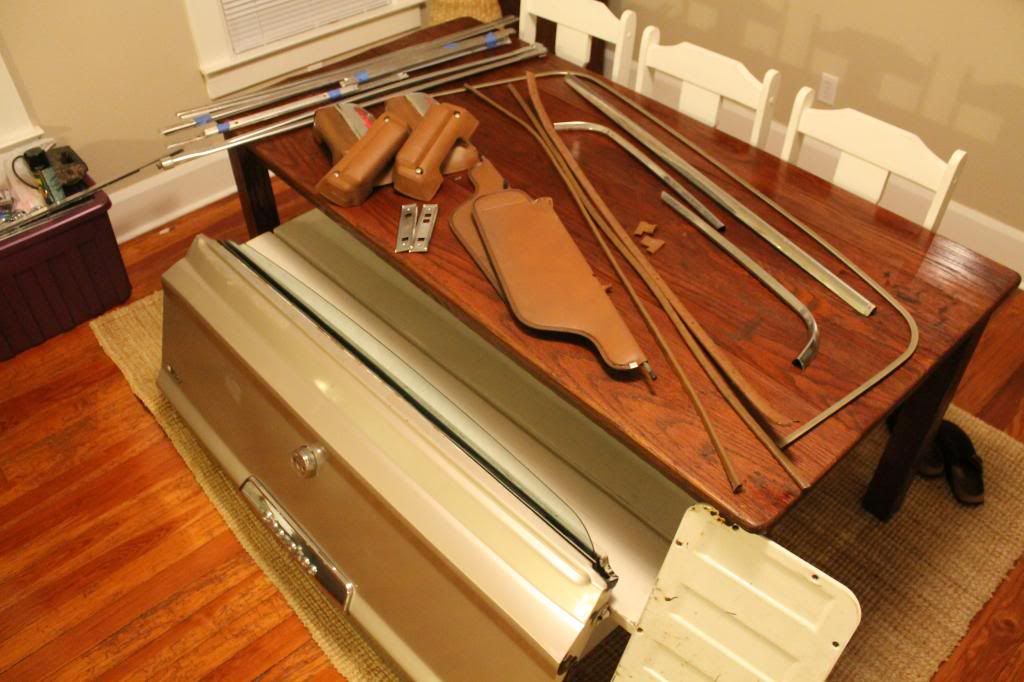
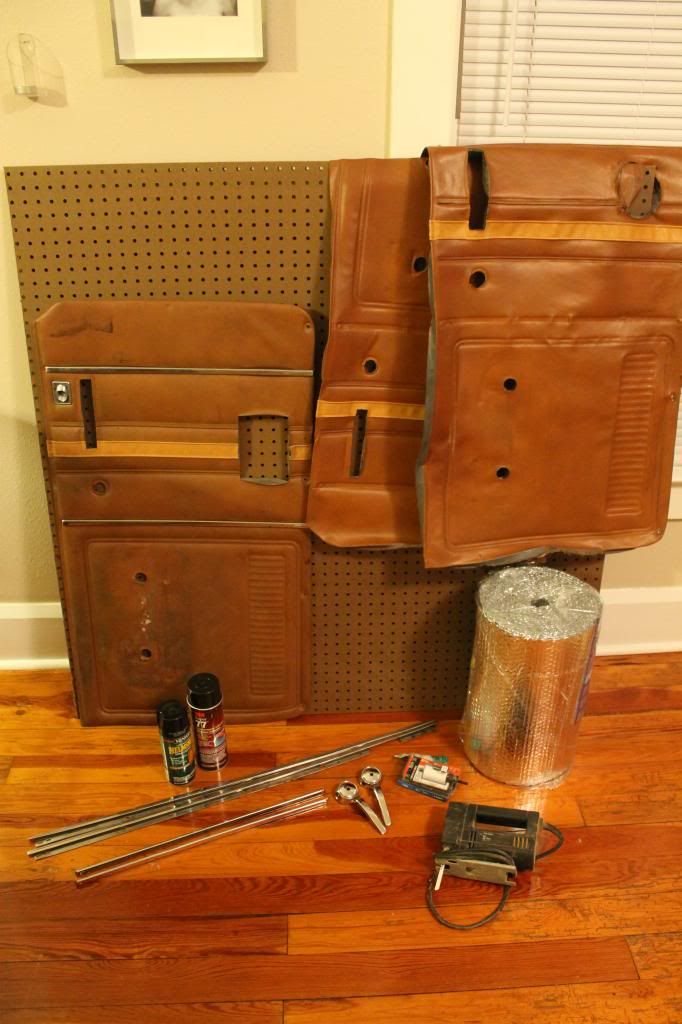
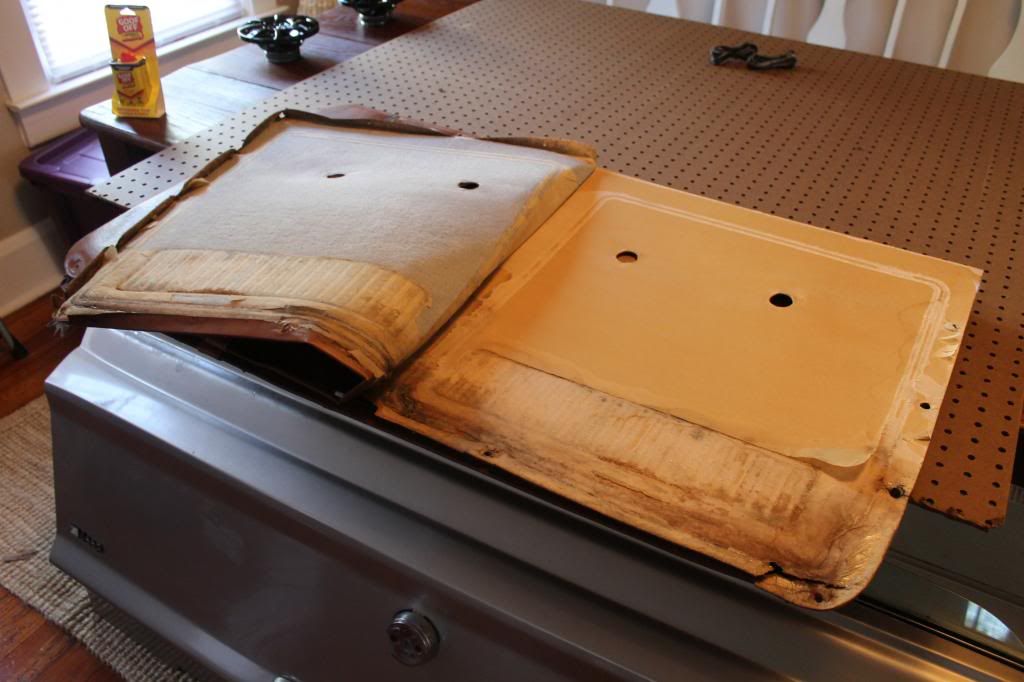
Heres some pics from todays work

Transfer case removal,


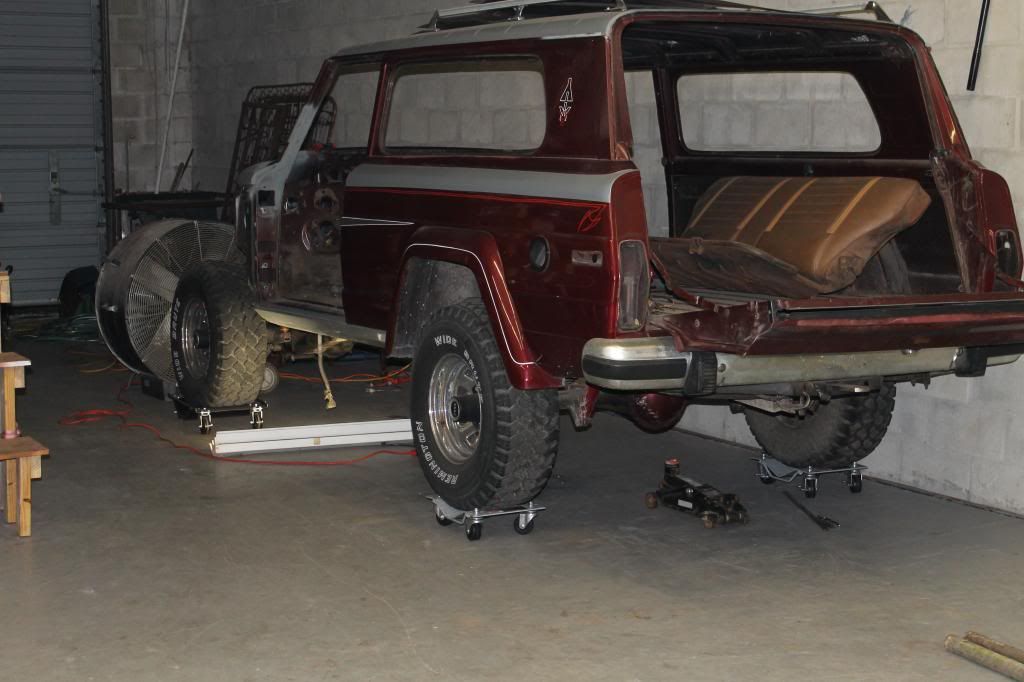
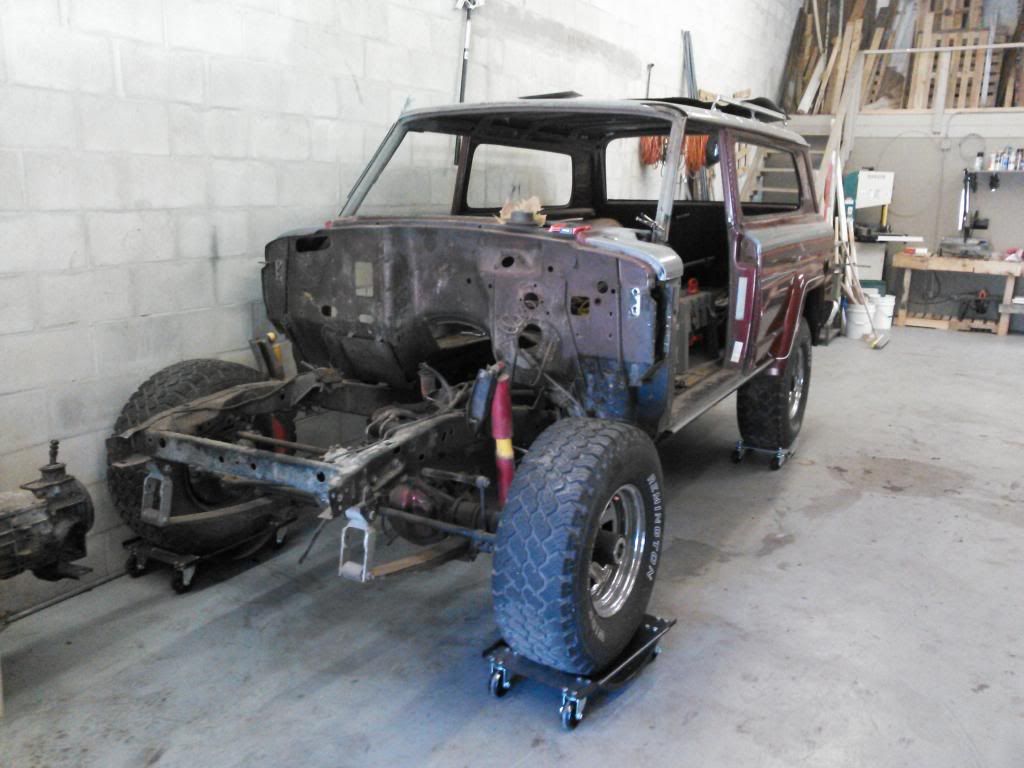
Jeeps on its dollys and rolling around nicely at this point. makes for easier work for projects like this:


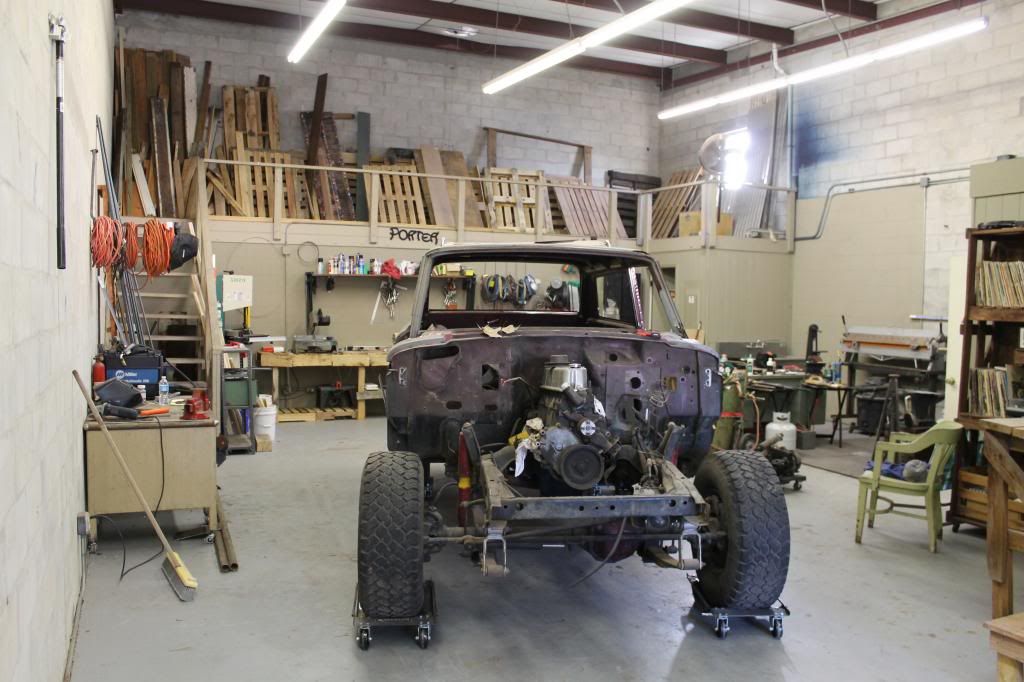
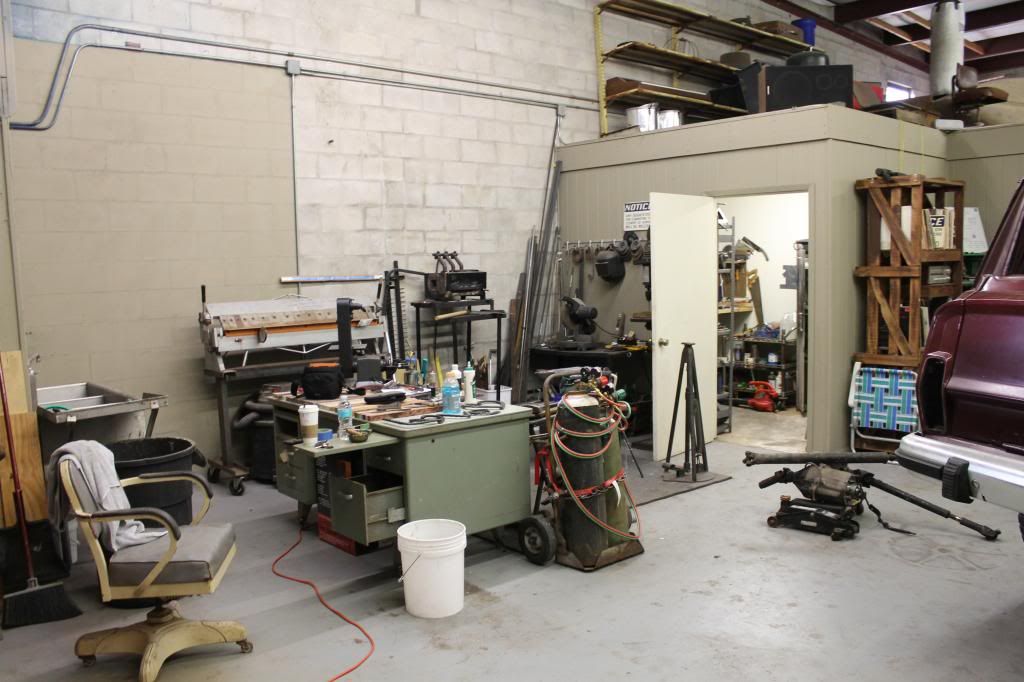
With the Jeep mobile I was able to relocate it towards the front of the shop. This will allow me to roll it outside or closer to the main door during body work and sanding projects. Im quite frankly over the dust so everything that generates alot of it has been relocated near the main door. Once the body is off, the frame needs to be able to make it outside for cleaning/pressure washing/ sand blasting etc... so this move needed to happen anyway.

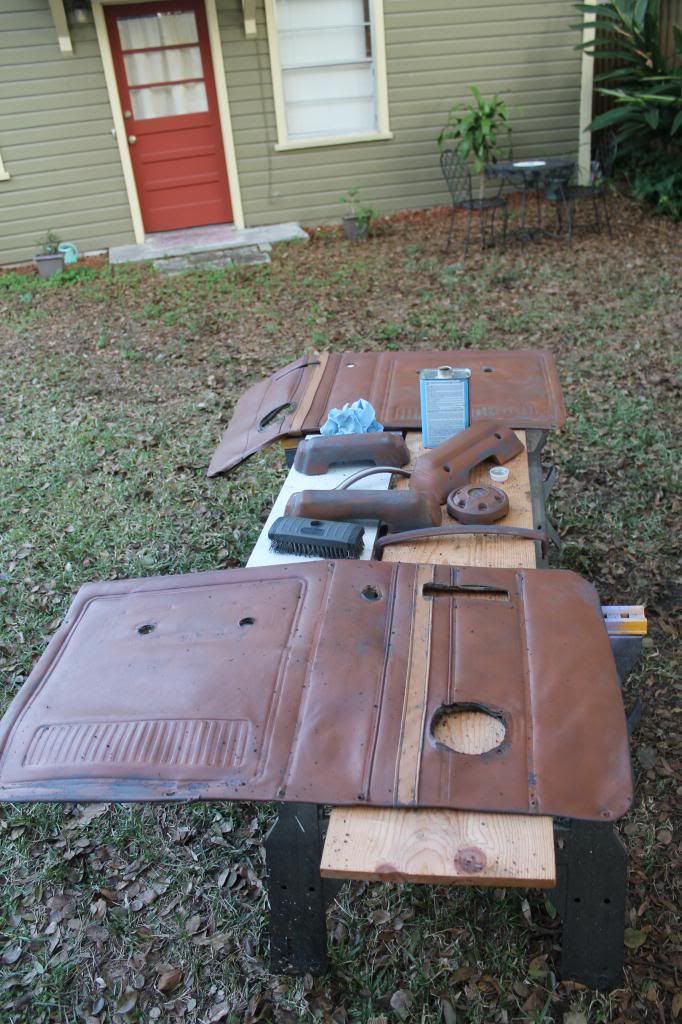
The free space has been nice. I scored these old metal desk for $25 each and promptly dropped double that in castors for the feet. :thumbup::lol: Its was really easy and has been very functional. When bigger projects arrise you can push the two desk together for one large work platform. The castors lock so its very stable.


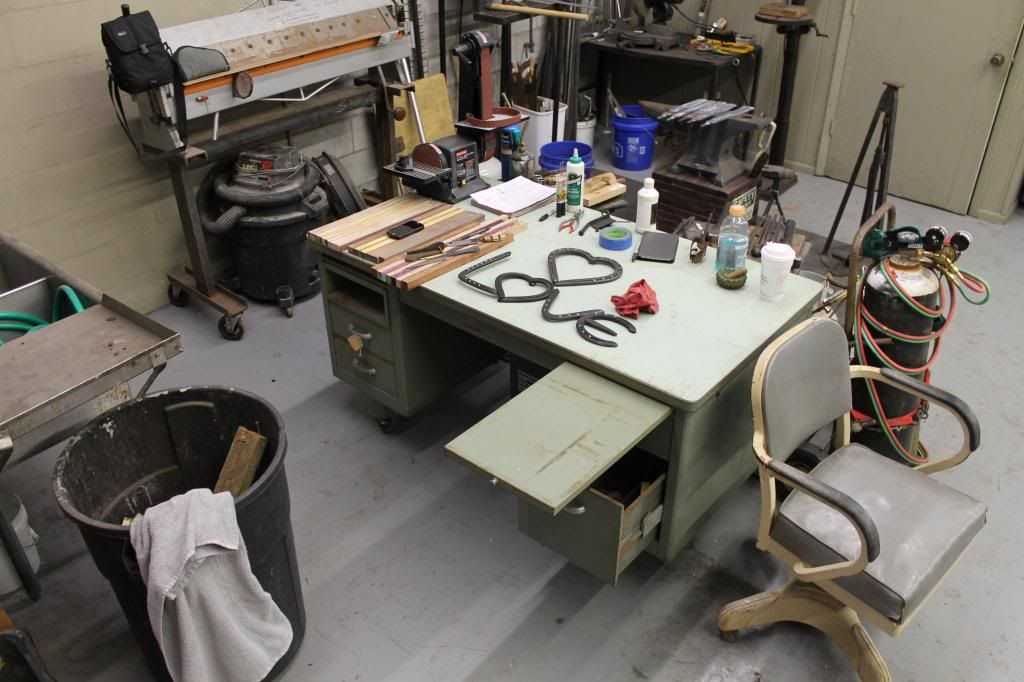
Yes there is the word "love" Forged and a horseshoe heart...Its almost that time of year fellas, and my buddies give these to there wives...I just bank the favors for a rainy day...


Ok, back to the heavy lifting


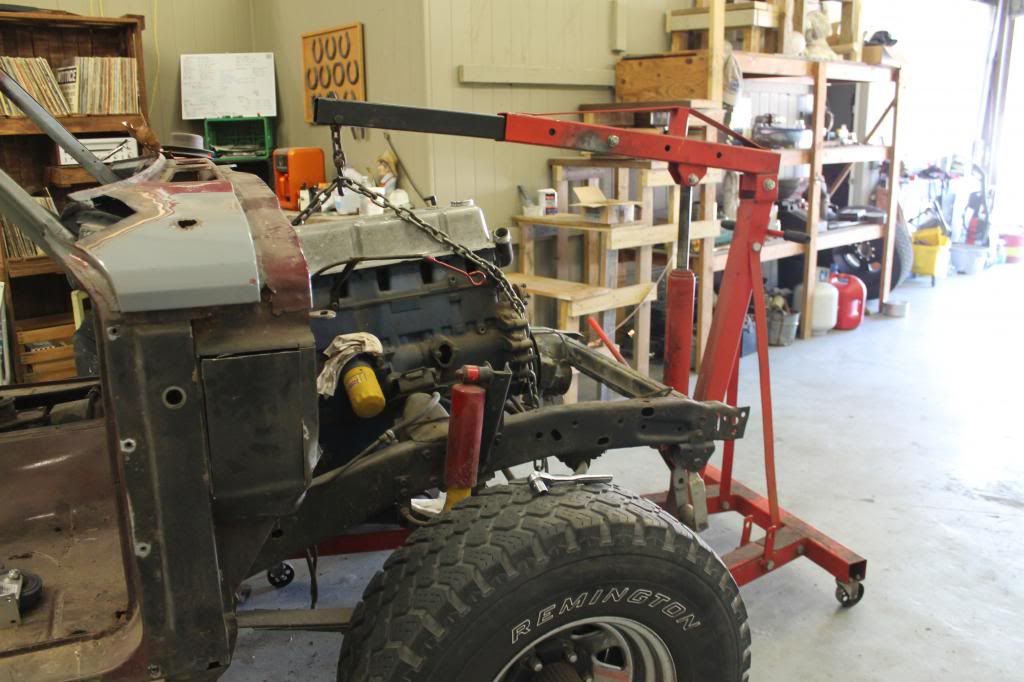
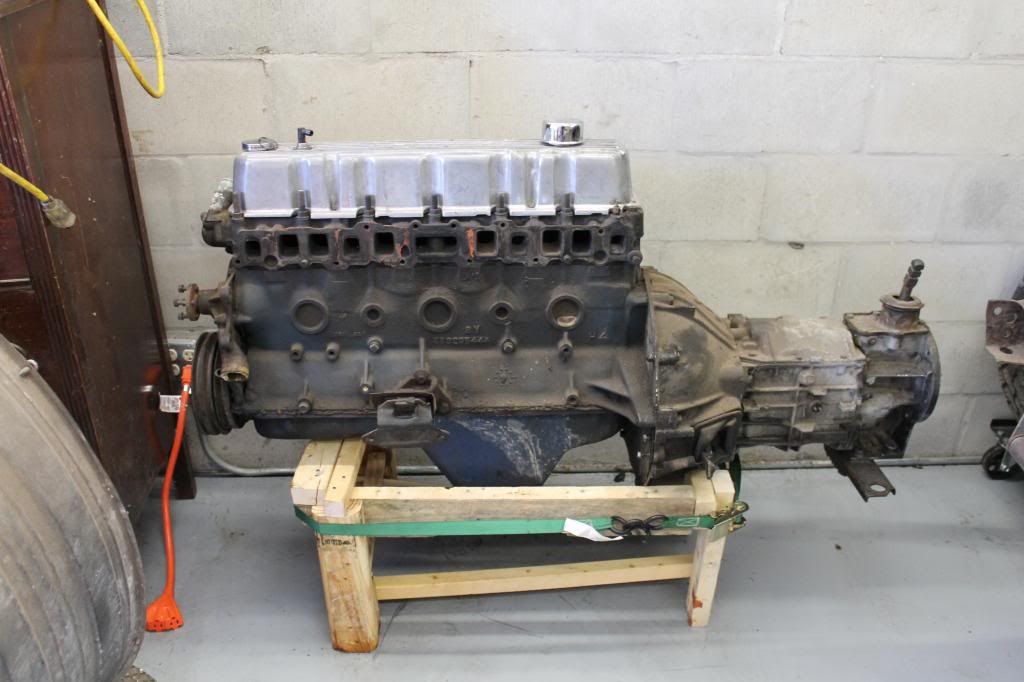
And now...where to put it... LOL

Free pallet wood makes a great engine stand, but it creaked so i ratchet strapped it!!!:headscrat.


We do we go from here:


The powertrain plan is currently as follows but I have a few snag/variable factors that keep me awake at night.

If anyone has any feedback on this line up please chime in. Just remember Im trying to stay simple, manual everything, no computer, and as minimal electronics as possible.


Blueprint Engines - 383 Stroker - roller cam/roller rocker - 420HP / 410Trq
Muncie - Sm465 - 4 speed - 6.55:1 - 3.58:1 - 1.70:1 - 1:1 essintially a 3 speed with granny 1st gear
New Process - NP208 - 2.68:1 low range ratio -
Dana 44 front/AMC 20 rear axles - 3.31 gearing


The Engine is overkill, but I dont care. Everytime I say the words "383 Stroker" I get a **** eating grin...and like it or not there is value to that. :3gears:

The ****** and transfer combo need an adapter, but they are everywhere down here, and cheap! The over all length is very close to to current. Without the fifth geat housing the SM465 and adapter fit the void left over nicely. This combo also keeps my clutch linkage mechanical. I realize that hydraulic is considered better but since the jeep is currently mechanical linkage, having to change out and fit a different pedal assembly, run lines, and add the cylinder assembly just scares me...

With the combined Low range ratios the Jeeps "crawl" ratio hits right at 60:1 with my current gearing. I have no intention to trying to scale walls but i do want to be able to feel confident on the trails when im using it for off road fun. I reallize 60:1 isnt the most ideal but its tuff, and a good blend for my usage of mixed road and off road. If im honest... this thing will get putted around town, Ill light it up every now and then on a backroad, and it will get trailerd to the mountains a couple times a year for trail riding events.

So drive shaft work could be needed but I have a very good friend that runs a drive shaft business 3 minutes from the shop so thats nice. :thumbup:


A couple other combos floatin around in my head are:


383 sbc - NV4500 - ? T-case - (every way I run this I get a better/smoother trans, but would need a different drop front axle to pair wih the available t-cases (pre 79 J-trucks axle is only fit availible), hydraulic change over, and body floor cutting and modifiying to fit it. All for 5th gear that Im probably never going to use)(Im sure someone will point out that the NV and NP units bolt up...so why not keep the NP208??? the only spline count that works is the one out of a gasoline(no diesel) 2500 dodge truck from the late 90's...Good luck finding that combo and bring your checkbook when you do)(cost of switching the shafts is ridiculous and out of budget)

383 sbc - NV435 - NP205 - (this ones tempting...drill and tap two holes on the trans tabs and, all though a ford trans, it bolts right up to the SBC bell housing. The NP205 is driver drop so the axles stay the same but its got a whimpy low gear at around 1.92:1...it is a cast iron housing but im never gonna slam this thing in the rocks so that kinda washes...hydraulic switchover is needed :mad: but no adapters and basicly the same length as the current set up.)


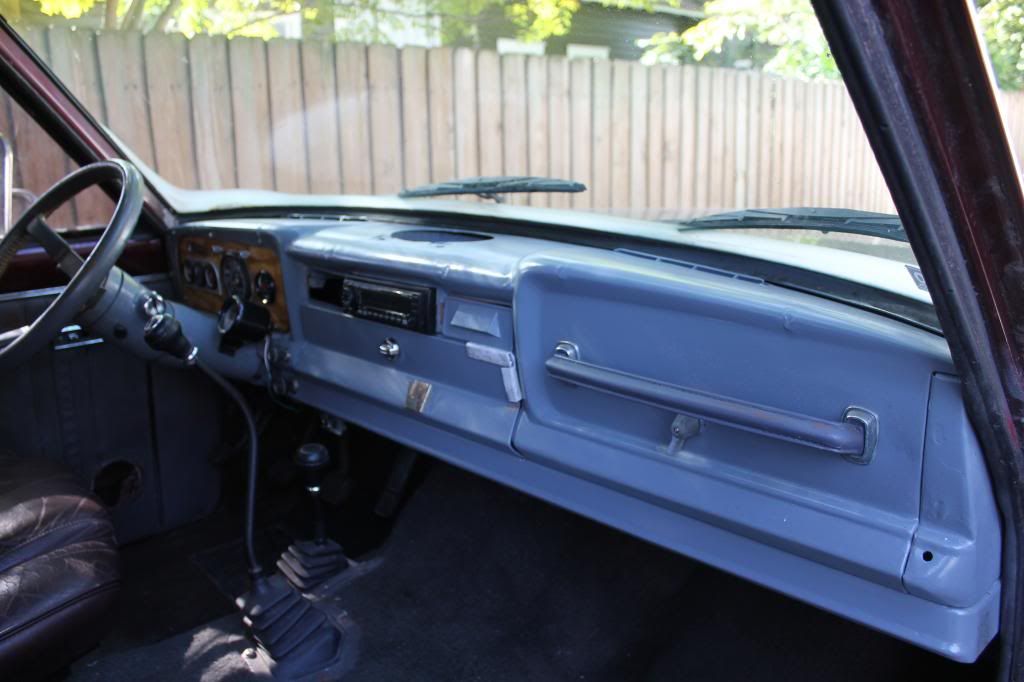
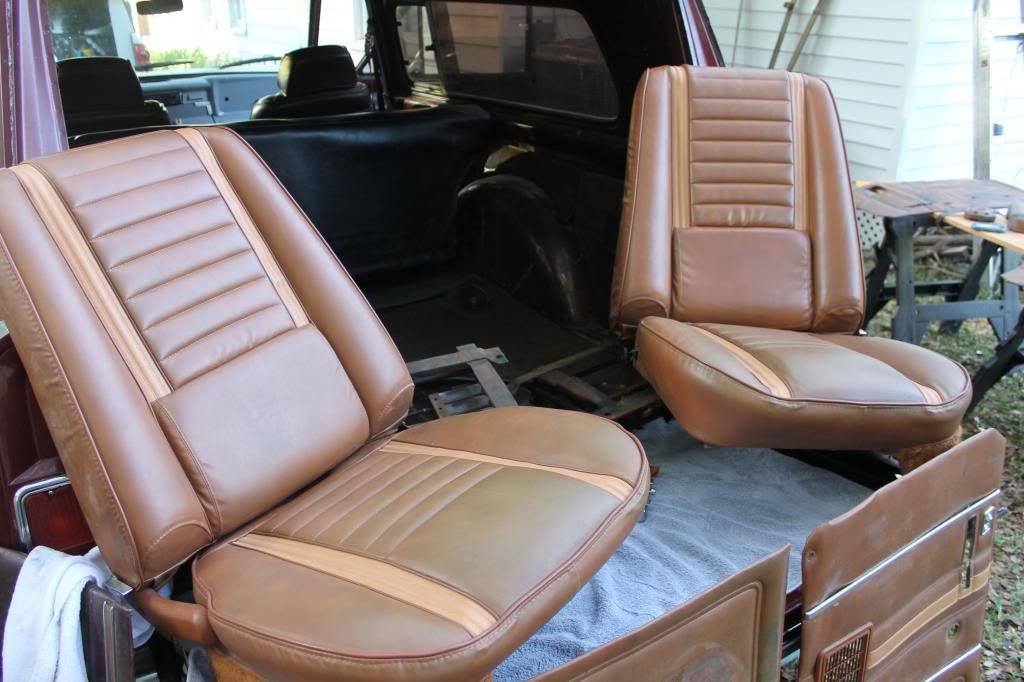
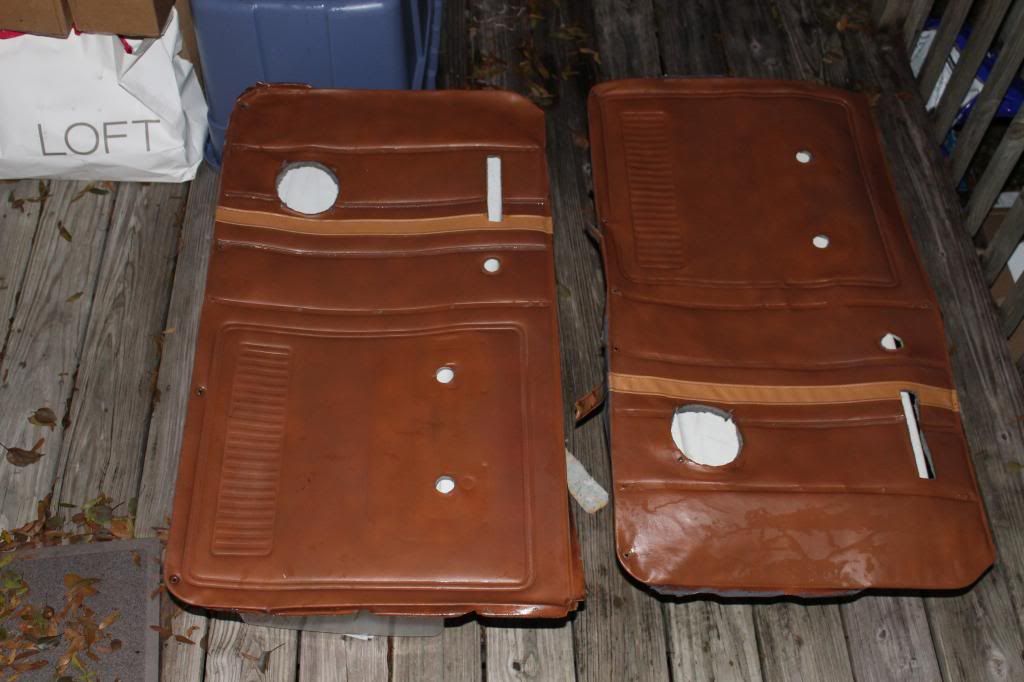
SO thats what i got for now... Im fighting daily with wether or not to go with blue exterior and the nutmeg interior or keep the vintage metallic red with the nutmeg...another day for that decesion...

Any advice or insight into the above listed powertrain rambling would be appreciated.


:thumbup:
JP
 

bluebolt

Well-known member
Joined
Dec 28, 2008
Messages
5,441
Location
Benton LA
Also consider a Ford T18(non-synchronized first gear)or T19(synchronized first gear) with a Ford NP208 or BW1345/1356. The T19 from a 460 powered 1984ish F250 has the granny gear as well. Novak has some swap parts and an article on the FSJ engine swaps. http://www.novak-adapt.com/knowledge/fsj_swap.htm

Also a Ford NP208 would work behind the NP435.
 
Last edited:
OP
D

DoghouseForge

Well-known member
Joined
May 11, 2013
Messages
374
Location
Lakeland, Fl
Also consider a Ford T18(non-synchronized first gear)or T19(synchronized first gear) with a Ford NP208 or BW1345/1356. The T19 from a 460 powered 1984ish F250 has the granny gear as well. Novak has some swap parts and an article on the FSJ engine swaps. http://www.novak-adapt.com/knowledge/fsj_swap.htm

Also a Ford NP208 would work behind the NP435.

Thanks,

I have the Novack website commited to memory at this point. :eek:

I will look into the t-18/19...another FSJ'r just finished doing that switch behind the 360...I might go over and drive it to see what its like.

JP
 

malibulvr

Well-known member
Joined
Jan 5, 2012
Messages
141
Location
Lockport, NY
Great looking project, LOVED the stance of this Jeep (pre teardown, lol). I like the 383 with the NP205, you can't kill those things. Good luck and keep it going!
 

csp

Well-known member
Joined
Mar 23, 2010
Messages
5,719
Location
Franktown, CO
My next Jeep engine swap will be a LSx 6.0. I'm done messing with carburetors or retrofitting TBI on formerly carbed engines.

I have a low mileage 401 that I've been hanging onto for years that I think is going to have to go.
 
OP
D

DoghouseForge

Well-known member
Joined
May 11, 2013
Messages
374
Location
Lakeland, Fl
Im going to get the drivers cab corner replacement started tomorrow night so I will have an update for you reguarding any snags hopefully by sunday...

Untill then...I was looking back thorugh the original thread form the IFSJA.org and go ta chuckle from a couple of these post from about a year ago...My idea then and my idea now of what this project is was a little different..

Anyway, the before and after in these is worth the look and it should shed some light on why I call her the "rustoleum princess" :thumbup:

....Enter back in time squiggles and fallen harp chording...

Yesterday I worked for hours at this next phase of the Cherokee's cleanup.

The PO's taste and my own are slightly different, so the custom rustoleum interior was in need of a facelift. (If liftable)...

If I was only going to use the jeep for off-roading and mudding I don’t think it would bother me as much, but it’s so cool and so nice that I think it deserves better than this.

panelrepair001_zps05ecf3d3.jpg


panelrepair002_zps4a25e3ea.jpg


panelrepair003_zps5171f5c3.jpg


The plan is to put it back to the original interior; not to put a completely new/redone interior in it. So today’s goal was to clean up as much as would be cleanable, especially the parts and pieces that are no longer available for purchase.

The truck originally came with the nutmeg color option, and I was lucky enough to score these original seats from a local "parting out" add. They will be the basis for the rest of the refurb. All the replacement pieces will need to be in the same or better condition in order to have good continuity within the cab. Your job is only as good as the weakest link….

panelrepair029_zps59f262a7.jpg


I’ll have to order carpet, headliner, and some dash trim/instrument pieces, but I think I’m going to opt for the dash to be painted the same color I decide to paint the truck.

Used Door panels came with the seats but they were a little worse for wear and faded. Since they aren’t available anymore new, and fairly costly when gently used, I figured a good effort at reviving the originals was in order, painted or not.

panelrepair009_zpsde7fddc4.jpg


I’m going to use the extra sets boards as patterns since the originals are slightly!!!! disintegrated, and re-stretch the cleaned originals over them; hopefully getting a stronger, cleaner, longer lasting replacement. The passenger dash pull strap, steering wheel, horn button, chrome trim, and the assorted arm rest are also on the cleanup list since they also seem to be fairly difficult to locate.

Paint remover, a wire brush, and good old elbow grease will be the ticket for the panels , but I have a secret weapon in store for the chrome…

panelrepair008_zps8296e228.jpg

panelrepair012_zps957368f3.jpg


Round 1 – Ding Ding ….
panelrepair013_zps9a690d0f.jpg

Round 1 – Draw


Round Two –Ding Ding...
panelrepair032_zps3157b74a.jpg

Round 2 – Advantage Elbows

Round 3 – Ding Ding
panelrepair034_zps4059a02b.jpg

Round 3- rustoleum’s against the ropes!

Round -4 Ding Ding
panelrepair036_zps775ada29.jpg


panelrepair038_zps446faf02.jpg

Round 4 – Winner by TKO ….Elbow power!

Unfortunatly it got dark : (

I removed the old rotten boarding and layed them flat to dry. Next time I get a chance to work on her I will cut new backing boards, restretch the covers, replace all the chrome trim, and try to do the steering wheel....
panelrepair042_zpsef27422d.jpg


So, here’s a little trick for the chrome trim…
New chrome and trim can be ridiculously expensive to buy and the little stuff is often irreplaceable. So, instead of spending money on the replacements (if they are even out there), go to your preferred home improvement store, and instead use that money to buy a small bench top grinder. I use a delta adjustable speed 1/3rd HP model ($80). Instead of installing the Stone Age grinding disc that come with them, get two cloth buffing wheels. You will need “rouge” as well, so get one mild polishing compound and one scratch free polishing compound. Play with the speeds and wheel loads on some scrap pieces and when you get the feel, gently and patiently work the trim items until you achieve the appropriate cleanliness/shine. For the cost of just a few replacement pieces you can have the ability to repair every piece on your rig to a cleaner almost new condition. Here are some before and after’s and below is a link to photos of what I’m talking about.

Before:
panelrepair014_zps309b2141.jpg

panelrepair017_zpsedec0e31.jpg


After:
panelrepair023_zpsf43ca0f6.jpg


Buffer/grinder links:

fuelboards9_zpsb9f15915.jpg


http://www.ebay.com/itm/New-Delta-G...005?pt=LH_DefaultDomain_0&hash=item3f208f60dd

http://www.grizzly.com/products/6-x-40-Ply-x-3-4-Soft-Muslin-Buffing-Wheel-4-000-RPM/H3379

http://www.grizzly.com/products/category/100010

Thanks for checking it out and I hope to have some finished panels by next week! Fingers crossed...
 
OP
D

DoghouseForge

Well-known member
Joined
May 11, 2013
Messages
374
Location
Lakeland, Fl
So…. This week (a year ago) was a decent week for the progression of the Cherokee…
The parts hunt yielded great results at a time when my schedule is still flexible and based on holiday availability.

I managed to track down:
Headliner trim pieces that I was missing – they are in good shape but will need to be refurb’ed with the paint “CJ5” was so nice to share.
Rear door chrome trim and inner chrome trim
Visors
Rear door (zero rust, totally smooth functioning rear window with defrost..) the current door needs hours of body work and the window quite frankly *****… lol
The roof rack and the cargo strips. These are going to need a few hours on the buffer, ; )
Extra set of door handles ( hopefully I can create 1 decent set of door handles from the 2 : ) I have…

thebooty021_zps26b19003.jpg


thebooty022_zps9a29ba67.jpg


thebooty026_zps7d6670e4.jpg


Hopefully I can get theses door panels redone this weekend...
 
OP
D

DoghouseForge

Well-known member
Joined
May 11, 2013
Messages
374
Location
Lakeland, Fl
These last three post are a look back to last year, so start at post 51 to get started down memory lane from the beginning...

So today I started fitting the cleaned panel covers to new backing boards.

This took way longer than I thought it would, but turned out decent.

At the local home improvement store I picked up some perforated panel board 1/8th inch thick , insulated backing material, spray adhesive, and some 5/16 by 8mm staples. (I actually got 3/8th by 10mm staples but they were to big/long and I had to go back for the smaller size).

To begin I chose the best back board from the two donor panels. Even it was missing a large section but it had the necessary layout of holes and attachments so it was good enough. It was carefully removed from the cover and used to mark out the new boards.
DoorPanel001_zps6185a036.jpg


A jig saw worked great for cutting the panels out and also for cutting the slots for the window controls and the door speaker. A hole drill was used to cut out the openings for the arm rest and door handle.
DoorPanel002_zps9b46c35e.jpg


Once back inside I pulled the cover onto the board to check that I had enough material to secure it. I needed to trim one of the panels about an 1/8th inch so I’m glad I checked.
DoorPanel003_zps7cd621d6.jpg

DoorPanel004_zpsbd880059.jpg


Using the old template I marked the locations of the door panel fastener holes. The hole size was determined from the template and was, I believe, 3/8th inch. These were inserted at this stage because I wasn’t sure if the leather would make attaching them impossible once it was covering the area.
DoorPanel005_zps67db6436.jpg

DoorPanel006_zpsc54efe5b.jpg

DoorPanel007_zpsffaf87c2.jpg


I realized at this point that I only had enough door panel fasteners to make one complete panel so I focused on finishing one panel completely and the other as far as was possible.
Tonight I will order some fasteners and the leather strap pulls since they didn’t clean up from the paint very well. Once they arrive I will knock the other panel out.

I marked the speaker location and got it cut out at this point so it wouldn’t be a hassle after the cover was mounted.
DoorPanel009_zpscb04f79c.jpg


The next step was to simply lay the cover out and place the backing board on top of it. Then starting at the corners and working back and forth around the panels’ edge I stretched the fabric tightly and stapled it in place.
DoorPanel010_zps3f656264.jpg


The insulated backing was an addition to the panel’s original design. It made sense to insulate the door and I think I will follow suit behind the kick panels and under/in front of the dash. I’m interested to know if I can use this on the roof in between the metal and headliner. Anyone ever done that before?
DoorPanel011_zps9df9d6b2.jpg


Anyway, the insulation needed to be trimmed and I did that with a sharp pair of scissors. The speaker mounted easily though the upgraded panel material, and I pre-drilled 1/8th inch holes for the chrome strips to push through and fasten to.

Just to see what it would look like I laid the other trim pieces on…
So I’m happy that I decided to strip the paint, these turned out really great and I’m chomping at the bit to do some other projects.
DoorPanel013_zpsd5489a9d.jpg

DoorPanel020_zpsa812005b.jpg

DoorPanel021_zpsb6cb7241.jpg


Thanks for checking it out and chime in with any tips, info, or whatever.

JP

ohh!!! - this is kinda important. I registerd the jeep yeaterday!


In hind sight the 5/16ths backing boards were to thick and caused fitment issues with the door handles :lol_hitti and I think I will probably redo them with something other than the peg board but at the time I was excited:lol:
 
Last edited:

bad_idea

Well-known member
Joined
Jun 11, 2011
Messages
4,335
Location
Pasquotank, NC
Nice project. I like the use of pegboard for the door panels. I have (3) 4x8 sheets of the stuff in my wood rack waiting for a use. I am in process of welding floor pans in my 79 Camaro and couldn't imagine trying to stick weld them! The mig has been challenging enough.
 

whyNick?

Well-known member
Joined
Jul 10, 2013
Messages
1,016
Location
Midwest
I used to have a base model XJ Cherokee that had no sound deadener at all. When it came time to replace the fabric on the headliner I added a layer of that mylar-covered bubble wrap to the underside of the roof before I reinstalled the headliner. It quieted the interior down quite a bit. I just cut the bubble wrap to fit between the ribs on the roof and stuck it in place with 3M emblem tape.
 
To avoid these ads, REGISTER NOW!
OP
D

DoghouseForge

Well-known member
Joined
May 11, 2013
Messages
374
Location
Lakeland, Fl
Friday my buddy and I got nice and greasy pulling apart the 258 I-6...

I listed the engine locally on CL and for the last two weeks guys have been calling or emailing me wanting to buy the Cherokee it came out of...:headscrat

I listed a pic in the add so they could see it wasnt some **** jeep that the engine belonged to but that was a mistake.

So needless to say I still had the engine... so when a guy from down in the sarasota area called asking for the just the crank I laughed a little inside. I new what he was doing so I made him a really sweet deal... $100 for a crank wasnt worth the time to pull it so if he came and got the whole short block he could have the rods he needed as part of the deal... I made a little towards the resto and cleared out a very staionary piece of metal from the floor. :)


So jarrid and I stripped the block of everything except bare bones before it went to be donated to the stroker build, and I have to say, so far this was one of the most stress relieving things Ive done... smoking cigars, rocking the Ipod, and running the impact with no reguard for where of how to put something back together was pure threapy....Except the fly wheel bolts...grumble...grumble... :headscrat


THE FLYWHEEL HAS FALLEN!!!!


So i gotta sell the trans, bell housing, clutch assembly, and transfer case and I should have enough for the suspension lift, bushings, and parts which will be nice.

JP
 

Mr. 360

Well-known member
Joined
Nov 23, 2012
Messages
662
Location
Bowmanville, Ontario
Great progress, as always. I have always... always wanted the stick shift in my truck. I mean, nothing against the TF727, it's pretty hefty, but lets face it, it's auto. I do have some friends up north with an old J-truck that is home to a 360 mated to the 4-speed. I am first in line to buy it off them, or trade something for it if they ever want it gone.

You're really making me miss having my Wagoneer around (still have it, just parked at my parents farm), maybe someday soon I can get it back on the road... Someday.

Great looking build, I check it often!
 

Rhyno

Well-known member
Joined
May 21, 2013
Messages
327
Location
Salt on the left, Mormons on the right, Yup, "This
Sorry, I have been a little slow to "subscribe."

After reading through this, I might have something for ya...

The front spring shackles, make me "cringe."

Can I suggest a Shackle reversal? So, that the Pivot Point is in the rear with the Fixed Point in the Front.

You possess some good Skills and Resources, to make this happen. Plus, this mod will make the "Road Manners" improve.

Or at least a Front Shackle Rework?

I have done a few Rebuilds... and a lot of "improve this" projects.

Following along......looking forward to your progress.
 

RivennHewn

Well-known member
Joined
Jun 4, 2011
Messages
10,373
Location
PNW
Wow. Just looking at the 1st few pics from the original post, I was thinking "What a nice clean survivor to start with"

So much for my assessment skills.

What an amazing amount of work. Totally worth it when you're done.

Love that year, and it does have a great 'Stance'

Looking forward to watching this one come together.
 

Rhyno

Well-known member
Joined
May 21, 2013
Messages
327
Location
Salt on the left, Mormons on the right, Yup, "This
After reading through this, I am gonna guess that this will live a majority on the road/Hwy, with occasional Off-Road. I say this, because of the care and attention to detail for the repairs, thus far.

I really don't know, but if that is true, than I'd recommend a Trans with OverDrive and an available Transfer Case.

When I do a rebuild, I like to use readily available parts. I don't wanna spend a $hitLoad for something like an Adapter. Don't get me wrong, an Atlas Transfer Case has its place, but not in any of my rigs. And I don't need to do a 6 Speed out of a 2008 Dodge Diesel to a NP205.

A NP205, is a 1000HP, gear to gear, Great case, (I have a few awaiting the next project)

NP208 is a good to great case, Chain Driven, and can be found with an adapter for a 700R4...(I have a few of these, too.)

NP231 is decent, too. They came in Mid to Late 90's Dodges with NV4500 manuals, attached.

If it's gonna live a majority on the street, and you have to have a manual, I'd go with a NP231 with a NV4500. (It's probably a little HeavyDuty, for a 1/2 ton Jeep, though.)

There is probably a similar combo, with a NV3500, which would probably be better for your project.
 
OP
D

DoghouseForge

Well-known member
Joined
May 11, 2013
Messages
374
Location
Lakeland, Fl
Sorry, I have been a little slow to "subscribe."

After reading through this, I might have something for ya...

The front spring shackles, make me "cringe."

Can I suggest a Shackle reversal? So, that the Pivot Point is in the rear with the Fixed Point in the Front.

.


Funny Thing...I literally just installed an FSSR kit this morning. :lol:

The old shakles were fom the previous owner and yes they made the steering wonky and the ride wierd.

I will post pic when I do my next update but Im running a 2.5"rancho lift spring with the 2.5" FSSR up front for 5" and a 4" skyjacker spring lift in the rear. Should even out after the 383 is in place. If needed I can put a 1" block behind to level it but I dont think it will be needed. Ive seen this combo and it looks nice with the FSJ's. 33's should be good as tire size.

I also picked up my Trans/transfer case this am...changed slightly from my previous plan so I could use less/no adapters and such. Went with a NP435 and NP205 ... Im happy with the gearing and should be sufficiently low in 1st for trail work. The cast Iron Tcase is nice as well. All driver drop so it works with the current D-44.

Minimal Bell housing mods and it bolts up.

I got the drive shafts as well from the Bronco they came out of so I should just need to have it shortend with the jeeps rear yoke welded on in place of the ford...

The SM465/np208 is slightly lower geared but i decided it wasnt worth the extra adapting and modification.

crawl ration with the NP435/205 should run - 45 which is lower than I want so Im probably going to source some 4.10 geared axles.

JP

Its a slow process for me as I am busy with the work related projects but its moving in the right direction.
 

Rhyno

Well-known member
Joined
May 21, 2013
Messages
327
Location
Salt on the left, Mormons on the right, Yup, "This
Something that I forgot to add......

One of my wagons, has the beauty and AeroDynamics of the late 1970's model years. :lol:

I'll start from the ground up.....34" x 9.50" tires..... They don't "Eat" front End Parts....And for the mud in my area, they cut through the film and get to the traction..... No, they don't float on sand, but that's where my "Discretion" comes into play.... :lol:

12 bolt Rear, with an Auburn Gear Limited Slip.....they have "Cone" Style friction surfaces, and heavier springs......I will never again replace or rebuild my "Limited Slip" Flat Friction and Steels.... 3.40 to 1 ratio

10 Bolt Front, (Same/similar Internals as Dana 44).....Lock Right Diff....3.41 or 3.42 ratio..... :confused:
When I put it in 4wd, I need it....I never use 4wd on hardpack anything.....The Lock Right will break factory Shafts, U-Joint Yokes, and U-Joints..... Another Spot for "Discretion." :lol:

NP205 Transfer Case.....a K-Cased TH350 with TH400 "Extremely LowStall" TorqueConverter.... I call it the "PoorMan's OverDrive."....It also holds a little more fluid.....There would/could be a loss of Friction and possible improvement of Gas MPG if I used a NP208, but I'm not gonna buy an adapter.. I run this Trans, because they are everywhere, and for less than $100 I can rebuild one. It was $76.00, the last time..... :)

The motor is a "One Piece" rear main seal, small block.. Even though, the two Piece Rear mains aren't bad...... It was born with a "Roller Cam" but I installed a Hydraulic Lifter..... It's a 350 bored .020 over and a **** "Stroker" Crank.......380.7 cubes..... I can't remember the head Casting Numbers, but the compression is 9.7 to 1.....I really like 10.2 to 1 as a "max Street Compression"......that way I can still run the "Cheap Gas.".......It's balanced, too...... Factory Z-28, four barrel manifold, (Edelbrock later copied and manufactured/still manufactures it).....Carter 600 cfm, mechanical secondaries, and "super Lean" on the secondary jets....

HomeMade Forced Air Induction......the softest springs, that I could find, controlling the Secondary Needles, the timing advanced a little more than 1 degree for every 1000 feet above sea level,.....and a few other "Timing Tricks."

It's ugly, comfortable, (Cadillac A/C Pump, and 134A conversion), power windows and locks, and has holes in the body. Everywhere that I go, is at least, a 130 mile round trip. I get 22mpg, (if I'm kind to the pedal) at 65mph, and if it gets nasty, .....I get out.

I hope that this helps you out.....
 

Rhyno

Well-known member
Joined
May 21, 2013
Messages
327
Location
Salt on the left, Mormons on the right, Yup, "This
Funny Thing...I literally just installed an FSSR kit this morning. :lol:

............
I will post pic when I do my next update but Im running a 2.5"rancho lift spring with the 2.5" FSSR up front for 5" and a 4" skyjacker spring lift in the rear. Should even out after the 383 is in place. If needed I can put a 1" block behind to level it but I dont think it will be needed. Ive seen this combo and it looks nice with the FSJ's. 33's should be good as tire size.
........

Do your springs, as your last move, to complete your project...... Not only will the rig be easier to work on, (install motor, fenders, exhaust, paint, etc....) but I have never met someone who can guess "stance" on there first try...... (I still can't... :lol:)


Once everything is done, take your measurements to a "Spring Manufacturer" and not spend as much $$$ on a "Kit." :)

Get some Gabriel Gas Pressurized shocks, +3" or whatever, lifetime warranty, from P-Boys, instead of the Rancho shocks in the kits.....(Better Road Manners, too.)

.........Went with a NP435 ........
The SM465/........
.............

Inspect it well........They have a tendency to leak a little oil, because of owner neglect......and as soon as the oil level drops too far, 3rd gear begins to "complain."

Once it complains......your gonna "Restack" the internals and spend some more time and money.....

Just a "Heads Up" prior to "disappointment."
 

FunkyfullWidth

Well-known member
Joined
Oct 3, 2011
Messages
1,238
Location
Three Rivers, ma
So maybe I missed it, but what motor are you putting back in this thing? My 92 wrangler has a 4.0 mated to a 435/205 combo that I did a few years ago. Axle gears are in the 3.55 range. I couldn't imagine driving this thing on the road. Then again, i'm not sure i've ever even used 3rd gear ha ha. The 435 is a looow geared trans. 6.69 granny. 3 something second. If your not gonna be wheeling it hard why would you want it? As mentioned, a 4500 would be alot more streetable. Also keep in mind how low that 205 hangs. I had to clock mine to feel happier about it. But that messed with my twin stick linkage.

With that said, that combo is not really talked about too much in the jeep world for some reason. It's one of the easiest things to adapt to a 4.0. I used an older bellhousing, which is probably what you already have, an external slave from a 2.5L iron duke bolted right up. The only problem I had was the crank sensor. But what I did was use the advanced kit with for a different vibration dampner and sensor, which i'm not sure they even make anymore.

Either way, your doing awesome rehab work on that thing. I love those grand waggy's and it looks like your doing it justice.
 
OP
D

DoghouseForge

Well-known member
Joined
May 11, 2013
Messages
374
Location
Lakeland, Fl
383 stroker sbc is a fine engine, but a 401 AMC would be much cooler. jmho. Nice sheetmetal work. Mike

So maybe I missed it, but what motor are you putting back in this thing? .


1953mercury finding a 401 that's not already. 30 over is hard...and from my exposure to guys rebuilding them after.30 they start having temp issues. However, My buddy 54panelford just built one for his cherokee and his appears to be running cool enough at .40. Thing is hes only driven it around the block, in winter, at this point.

The rebuild budget compared to the new engine budget isnt comparable, and rebuilding the 401 is way out of mine. Agreed it would be cool but just not the road im on. I want to be able to walk into any parts store and buy what I need. The SBC alows that.


Funky, its a toy that will be used for lots of various activities, but daily driving wont be one of them. . As mentioned above im going with blueprint 383 stroker/ roller engine. 420hp 400torque. Its s much higher reving engine than the straight sixes so the range of gears will be a little wider.


I had a 69 chevy C30 in college with a 292 / SM465 and god only knows the rear axle gearing, it was low! I pulled the dump bed off and built a flat bed . Drove it everywhere so I understand the monster im building. :)
the nv4500 is the clear best option for general use but its very expensive, requires floor mods , a complete switchover to hydraulic pedal assembly/clutch, and the available tcases are passenger drop which means switching axles.

Rhyno, thanks! Lots of good info. I agree with the "kit" shortcomings. I bought each spring individually from amazon and got free shipping. Ill look into the shocks you suggested, I was going with procomp but havent ordered them yet.

The trans/transfer was sold to me by a local parts dealer. He's an active member of our little jeep group and his shop is around the corner from mine. With what I paid I can sell them and make money on it so if I decided to go nv3500 or4500 it wouldn't hurt me that I have them.


Thanks guys,

jp
 
Last edited:
OP
D

DoghouseForge

Well-known member
Joined
May 11, 2013
Messages
374
Location
Lakeland, Fl
Wow. Just looking at the 1st few pics from the original post, I was thinking "What a nice clean survivor to start with"

So much for my assessment skills.

What an amazing amount of work. Totally worth it when you're done.

Love that year, and it does have a great 'Stance'

Looking forward to watching this one come together.

just realized you commented, thanks man. I knew it had rust but untill it was pulled apart the truth was definitely being with held.

Jp
 

peter2772000

Well-known member
Joined
Jan 17, 2016
Messages
241
Location
Montreal Can. & Cape Coral FL
You're $hitting me, right? I just spent an hour+ reading every post, drooling in anticipation of what this truck would look like finished. After all, the work started in 2013.

There's gotta a continuation somewhere, isn't there?
 

MP&C

Well-known member
Joined
Oct 21, 2009
Messages
4,403
Location
Leonardtown, MD
Jonathan can be found on Instagram as doghouseforge. He did a season on Born in the Forge on Discovery Channel ?? and came in second place.. So he is now celebrity status.. :bowdown:
 
To avoid these ads, REGISTER NOW!
Top Bottom