To avoid these ads, REGISTER NOW!

Doing it right the 1st....errr 4th time

wes.harville

Well-known member
Joined
Mar 31, 2010
Messages
67
Location
Central Ky
Before I go into what exactly my intentions are with my garage renovation, I think it is important that I explain how exactly I got to this point. Or, you could always just skip to the pictures; I’d be lying if I said I have never done that.


In April of 2003, I was 21 years of age and my wife and I had just bought our first house. Before we had even signed the contract, I had already delivered the block to the property so I could start building a shop (my wife called it a garage) right away. I had got the block for a few cents each from a K-mart that was closing; they had used the block to make shelves in their Lawn and Garden area. They were also selling off the lifts from their oil change center; looking back I can’t believe I didn’t buy one.


The shop was a 24x32 with a single garage door and vaulted ceilings. It took me about 2 years to finish with only the occasional help of my wife, father and brother-n-law and sadly these are the only pictures I have of it.


One in Progress (That was one of my favorite vehicles by the way; I kick myself all of the time for selling it.)


IMG_0862.jpg


And here is a finished product (with one of my not so favorite vehicles!)


2006 673.jpg


I put the money into this Garage, and the house because I expected to live there for at least 10-15 years. So even though I knew I would move eventually it was worth it to me to build it anyway. In December of 2003, we bought the ford excursion you see above. We wanted a diesel because I had a 45+ min drive to school every day and even further for work sometimes and the 454 dually was getting about 8mpg pulling my trailer every day. At that time diesel was around $1.60 then and much cheaper than gas, that coupled with the promise of 20+mpg of the new 6.0L was the deciding factor for us, so we purchased it.


As most of you know, by the end of 2004, diesel had climbed to over $5.00 per gallon. At this time, I couldn’t afford to fill up, I was putting around $225.00 in it every 3-5 days. Our house was in Berea, KY and I was driving to Lexington, KY every day and sometimes further, so I decided to rent a house in Lexington and just come home on the weekends. After doing this for about 6 months it only made since to put the house for sale and just move to Lexington.


The only dilemma with this move was storage. While going through engineering school, I started a construction company so I could schedule jobs around my classes. Over the past 3 years, the company had grown greatly and I had acquired contracts with 7 LOWES stores across the state. This had resulted in a lot of tools and large equipment that I had to store somewhere and there was no way it would fit in the garage of the house I was renting (which would have been against code anyway). So at this time I rented a 2000sqft building, 200sqft office, 1800sqft warehouse. This was great! I had plenty of room to work on my personal stuff and store anything I needed for the business. But because it was a rented shop, I never really felt “at home” there when I was working on my personal projects. It was great for business, but never really “my shop”


By 2009 the business had grown so much that I had to move into a 3000sqft area. As the business grew, I just kept acquiring more tools and had to have more room to store them all. I know what a lot of you guys are thinking “you can never have enough tools” this is true, however when the tools are multiples, or tools specific to construction (like an aluminum brake) they are only purchased out of necessity, not out of my love for tools.


By now, I had graduated from U of Kentucky with my Mechanical Engineering degree, My wife and I had lived in our new house for a few year and I was really losing motivation with the construction company. I guess I was tired of worrying about making payroll during the winter, and rising insurance cost and had been contemplating closing the company but never did anything about it until in the fall of 2010 when an employee stole from a customer. After this, I decided that I was going to close the business and get a job where I could use my degree.


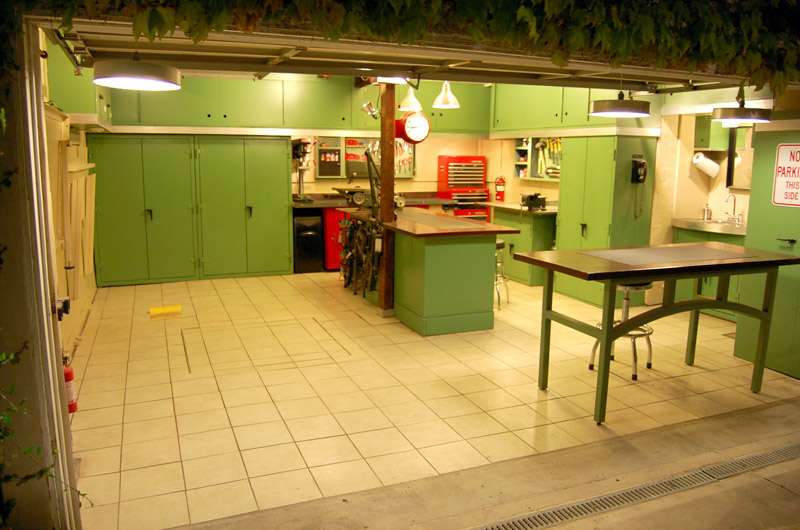
As of 01/01/2011, Precision Doors & Windows, LLC has dissolved. I now have a job using my degree and so far love it. The only problem was that pesky warehouse that I have a lease on until December of this year. This means on 01/01/2012, everything that I haven’t sold or given away has to fit in my 2 car garage along with my household JUNK! I know I don’t want to have everything just piled in the floor, so I have decided to completely overhaul my garage. While contemplating how I was going to do this, I decided on one thing for sure. If I was going to do it, I was going to do it right and make it a place I wanted to be in! I want doors on everything, no open shelving. And I know you guys aren’t going to like this, but I want very limited work surfaces. The more counter space I have the more I tend to pile stuff on them, so I like to minimize my working surfaces so I am forced to store things where they go. The only flat surfaces will be the workbench and table saw out feed table.


Now, I am getting ready to turn 30, I am working on my 4th Shop in 8 years and it is going to be my smallest one yet! This seems backwards to me. But hey, if done right, even the smallest spots can work!
 
To avoid these ads, REGISTER NOW!
OP
W

wes.harville

Well-known member
Joined
Mar 31, 2010
Messages
67
Location
Central Ky
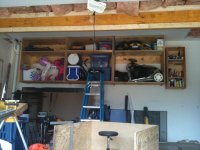
Here is what I have accomplished so far. Sadly I don’t really have any before pictures, just imagine a standard 2 car garage with a bunch of junk in it.


Also, I wanted to note that I am keeping strict tabs on the cost of this remodel and plan on posting it along the way.


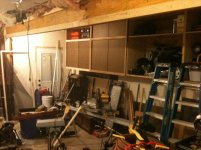
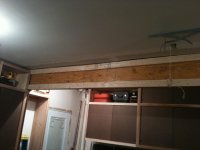
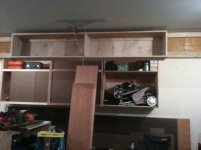
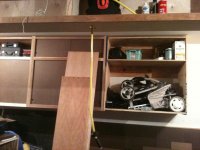
These are the carcusses of the cabinets along the back wall. The are 4’x4’x2’ each. (notice the beam and plumbing from the room I am adding above our garage.)


IMG_0828.jpg


Here is the last cabinet on that wall getting ready to go in place. My stool came in handy!


IMG_0829.jpg


Here is a picture of some of the doors and cherry facing installed. I know what your thinking, cherry in the garage? Well, for 10 years, when we would install kitchens, I would save any left over fillerstrips or fall off. Now I have all of this cherry and no place to store it, so I decided to make my self a place I will love!

IMG_0837.jpg


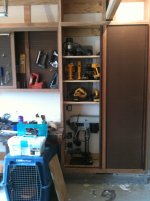
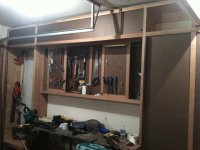
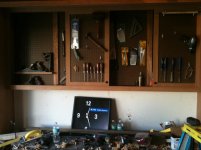
I had already built this cabinet, so all I had to do was hang it. I love this cabinet, the two doors in the front slide from side to side to access more peg board behind them.


IMG_0842.jpg

Here is one of the cabinets being built and good pic of my 92 chevy truck that I have had since I was 16. My wife hates it but I can’t bare to part with it. Needs a new bumper though 


IMG_0856.jpg
 
OP
W

wes.harville

Well-known member
Joined
Mar 31, 2010
Messages
67
Location
Central Ky
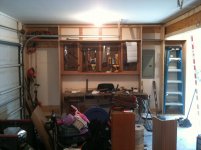
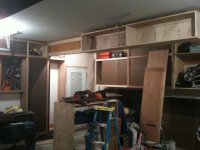
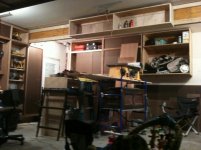
This was taken tonight 8/30/11. Starting to make progress but still a long way to go


IMG_0860.jpg


Here is a list of what I plan to do:

-Continue cabinets all around on 3 walls and beam
-Epoxy the floor
-Install a minisplit
-Install new garage door and opener
-Install dual monitor computer/tv over workbench
-Find a fridge.
 

rickairmedic

Well-known member
Joined
May 31, 2005
Messages
4,165
Location
louisville ,Ky
Wes welcome from a Louisvillian :D. Looks like you are headed in the right direction ( although I doubt this is your " last " shop ) :D.


Rick
 

CDM

New member
Joined
Jun 19, 2011
Messages
2
Looks great. With your experience I'm sure it will turn out very nice.
 

Omphaloskeptic

Well-known member
Joined
Oct 11, 2008
Messages
2,346
Location
Ultima Ratio, Wa.
Wes.H, being an M.E., have you laid out all you plans using a CAD program, or is this project something you could do in your sleep? I like the idea of minimizing counter space to reduce clutter and save precious real estate, but I do love the innovative fold down work surfaces the Jack Olsen created for his '12-Guage garage'. What kind of work will be done in the shop? Looking forward to see the results of the '4th time' effort; you should have shop building down to a fine art by now? lol
 
OP
W

wes.harville

Well-known member
Joined
Mar 31, 2010
Messages
67
Location
Central Ky
Rick,

This is definitely not my last shop. As a matter of fact, I am planning accordingly. All of my cabinets are hung on french cleats so I can take them with me :)
 
OP
W

wes.harville

Well-known member
Joined
Mar 31, 2010
Messages
67
Location
Central Ky
Wes.H, being an M.E., have you laid out all you plans using a CAD program, or is this project something you could do in your sleep? I like the idea of minimizing counter space to reduce clutter and save precious real estate, but I do love the innovative fold down work surfaces the Jack Olsen created for his '12-Guage garage'. What kind of work will be done in the shop? Looking forward to see the results of the '4th time' effort; you should have shop building down to a fine art by now? lol


I actually didn't "draw" anything up. Kinda sad since I'm an engineer. It seems though, I can usually visualize how I want it in my head and then just take some measurements for references.

As for the fold down counters, I love Jack's setup, however, unfortunately I have so much stuff coming in that every inch of wall will be utilized for storage just to hopefully fit it all.

The last question is kinda tricky. Most of my work is woodworking related, however, as i imagine a lot of you are on here, I love to do anything that involves working with my hands, welding, turning wrenches, building fine furniture and even upholstery and sewing (no comments from the peanut Gallery)

I will attach some photos of some of my projects over the years. The quality is poor on some of them because I am taking pictures of pictures. I have most of them on a thumb drive that I can't locate now:headscrat


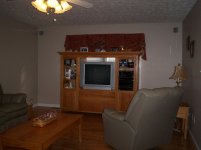
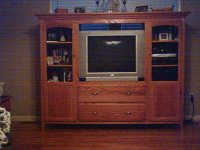
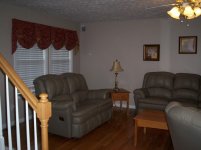
These are of the living room suite, runners and curtains I made for our last house, I will attach other projects to the next post
 

Attachments

  • 2006 055.jpg
    2006 055.jpg
    148.9 KB · Views: 96
  • furniture 001.jpg
    furniture 001.jpg
    146.9 KB · Views: 101
  • furniture 003.jpg
    furniture 003.jpg
    112 KB · Views: 84
  • furniture 004.jpg
    furniture 004.jpg
    147.7 KB · Views: 104
  • 2006 057.jpg
    2006 057.jpg
    144.8 KB · Views: 80
OP
W

wes.harville

Well-known member
Joined
Mar 31, 2010
Messages
67
Location
Central Ky
I'm having problems uploading more pictures right now and have an appointment, I will try to upload a few more when I get back in an hour or two
 
OP
W

wes.harville

Well-known member
Joined
Mar 31, 2010
Messages
67
Location
Central Ky
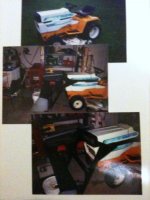
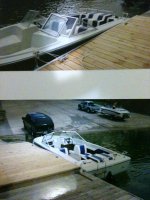
Below are some more examples of the type of projects I work on, again, sorry for the quality, they are pictures of pictures. They include a restored 1967 john deer 110, a front end loader for a cub cadet, a 20' sail boat and a restored 1976 renken bowrider.
 

Attachments

  • IMG_0879.jpg
    IMG_0879.jpg
    145.4 KB · Views: 61
  • IMG_0878.jpg
    IMG_0878.jpg
    146.4 KB · Views: 71
  • IMG_0876.jpg
    IMG_0876.jpg
    144.1 KB · Views: 88
  • IMG_0875.jpg
    IMG_0875.jpg
    146.5 KB · Views: 70
  • IMG_0874.jpg
    IMG_0874.jpg
    146.4 KB · Views: 73

rickairmedic

Well-known member
Joined
May 31, 2005
Messages
4,165
Location
louisville ,Ky
Wes the Deer and Cub look great . That is a future project for me finding a nice " older " cub to redo . I have a 1970 Starcraft I am in the middle of now .


Rick
 
OP
W

wes.harville

Well-known member
Joined
Mar 31, 2010
Messages
67
Location
Central Ky
Working on the garage today, even though the heat index is over 100:spit:

Thought I would add some pictures while I'm taking a break for lunch

More will come tonight with today's progress
 

Attachments

  • IMG_0885.jpg
    IMG_0885.jpg
    138.7 KB · Views: 138
  • IMG_0886.jpg
    IMG_0886.jpg
    134.9 KB · Views: 135

rickairmedic

Well-known member
Joined
May 31, 2005
Messages
4,165
Location
louisville ,Ky
Wes dont melt over there its brutal out :D. I just stopped in to change into dry clothes and grab a bite then back out to fix more AC units :D.


Rick
 
OP
W

wes.harville

Well-known member
Joined
Mar 31, 2010
Messages
67
Location
Central Ky
Rick,

Yeah, it was brutal! I changed shirts many times today. You said you were fixing ac units, do you work on mostly residential or commercial? I actually work for an Industrial HVAC vendor.


I didn't get much more done after lunch, I spent more time wiping sweat out of my eyes than anything. I did manage to get all of the face frames installed on the cabinets, I guess tomorrow I will work on the doors then move on to another wall.
 

rickairmedic

Well-known member
Joined
May 31, 2005
Messages
4,165
Location
louisville ,Ky
We do mostly residential . I understand wiping sweat out of your eyes :D wait till you get older and have to wear glasses that makes it 10 times as much fun as the sweat drips onto your lenses and everything goes blurry :D. We will look forward to the pics :D.


Rick
 
OP
W

wes.harville

Well-known member
Joined
Mar 31, 2010
Messages
67
Location
Central Ky
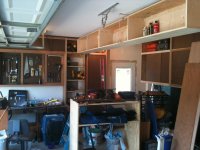
Here are some more pics showing the progress so far. The pictures don't look much different, but it was a lot of work getting from just plywood boxes hanging on the wall to this point.

Here are some of the Face frames and doors. I am not a big fan of sliding doors, but I am using them on this project for two reasons. First, they are economical, time and cost wise. Second, So many I have needed something and had to pull out a vehicle because I can't open the door all of the way on a cabinet. This should eliminate that problem.

IMG_0902.jpg

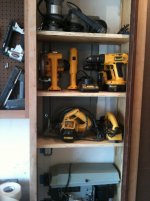
I couldn't resist putting some tools in them!

IMG_0903.jpg


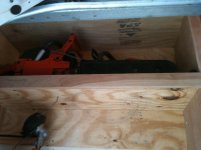
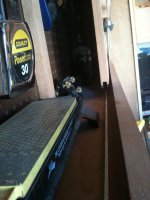
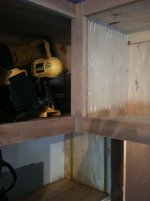
In two places, to eliminate small doors, I cut slots between the cabinets for the doors to slide from one cabinet to the other. If you notice the Chainsaw cabinet, If I would have used two doors in this space, I would not have been able to get the saws in and out, but by using one door and allowing it to slide into the adjacent cabinet, it gives me a full opening.


IMG_0904.jpg

IMG_0905.jpg


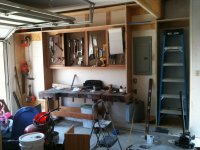
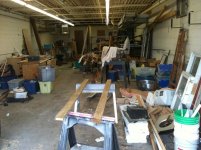
Also, I wanted to show you guys the space I am moving out of. This is the rear warehouse space of the old Office. It is in shambles now, as I have been removing stuff, selling stuff, etc. Still kinda gives you an idea of the space difference.

IMG_0901.jpg
 
Last edited:

Jack Olsen

Super Moderator
Staff member
Joined
Mar 22, 2009
Messages
6,678
Location
Los Angeles
It's looking great.

And don't worry about the hours. Time spent making things is the reason you do all the other stuff. :)
 

DoyleDee

Well-known member
Joined
Jun 17, 2007
Messages
689
Location
North Texas
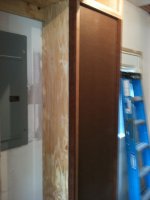
One question....will you be able to get to your electrical panel easily? It's always the times of no power and need a flashlight to check the panel when there is an issue. Looks like you have to move tools and the shelf (hope it comes out easily), to get to the breakers.
 
To avoid these ads, REGISTER NOW!
OP
W

wes.harville

Well-known member
Joined
Mar 31, 2010
Messages
67
Location
Central Ky
Jack,

Thanks and you're correct. If you're counting hours while your in the shop, even if its while working on the shop itself, you're in there for the wrong reason and probably on the wrong forum!:thumbup:

DoyleDee,

I agree about the Electrical panel. I should store the ladders in that cabinet so all I would have to do is pull out two ladders, but I am being stubborn right now and wanting my tools close to the workbench. Luckily they are just adjustable shelves on pins so the do remove easily. But as you say, when you need to get to the electrical panel, its usually not the best time to have to move a bunch of stuff. We will see:)
 
OP
W

wes.harville

Well-known member
Joined
Mar 31, 2010
Messages
67
Location
Central Ky
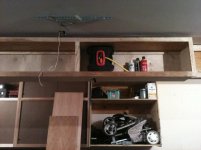
Alright guys, I need your advice on something. I may be getting ahead of myself but I'm trying to plan ahead.

here is my problem. My garage floor has cracked and heaved in the center. It seems as though it has been stationary since I have lived here (approx. 5yrs).

Two options have crossed my mind:

1.) Grind the cracks flush fill and epoxy. This would look decent but the floor would definitely not be planar.

2.) Lay tile on a wet bed (mud bed) and make the floor planar.


I would like the floor to be planar because I have a lot of tools on casters and don't like having to try to find a spot where all four wheels touch the ground. My fear is that the floor may still move some and crack a tile floor or for that matter crack my epoxy floor. I am not going to break out the old floor, its just not worth it considering I only expect to be here about 5-7 more years.

Does anyone have experience or an opinion ( i might regret asking the latter:bounce:)with this?
 

Jack Olsen

Super Moderator
Staff member
Joined
Mar 22, 2009
Messages
6,678
Location
Los Angeles
I really like my no-frills tile job. My slab was poured in 1925, and I'm not only in earthquake country but also very near the La Brea tar pits -- which means there's a constant oozing mess underneath my property (which also happens to produce a steady-but-small revenue flow from some oil company that sends us a check every 60 days).

But my point is that I am not on solid ground, and my slab had very big irregularities in it. I filled in where one edge and the front portion had sunk down, but did not level the floor with anything. As a result, you can look carefully and see the waviness and irregular grout lines of my tiled floor. I love having this floor. I used the cheapest tile that Home Depot had on sale and I'm three years into it with no problems.

So that's a data point for you. Here's the picture. To see the waviness, look under the rear cabinets on the left, and also around the perimeter of the lift.

cleandown.jpg
 
Last edited:

ChristopherLutz

Well-known member
Joined
Jun 17, 2010
Messages
270
Location
Flower Mound, TX (DFW)
Wes,

Thanks for posting pics of your project - I really like your cabinets - what material are you using for the sliding doors? Also - looks like plastic track....but, hard to tell from the pics.

Looking forward to your answers.

RE: Garage Floor - I can sympathize with both you and Jack. My previous house (Southern California) had the "grand canyon" of cracks that seemed to just chip worse and worse by the day. I never did anything with it (moved first) - but struggled many days trying to move things around.

In my current house (TX) I have a epoxied (sp?) floor. It's "ok" - but, has absorbed some stains from auto fluids that I didn't realize were leaking (old parts) until far too late.

so - the long winded opinion, is to go with something like Jack has. I think it will not only be easy to maintain but, will help you with resale. It looks very "clean".

One other thought, if your garage slab is floating (not attached to your walls) - you could just do the demo yourself and have a new one poured. Not sure how much that would cost but grinding and laying tile is also going to be time consuming.
 
OP
W

wes.harville

Well-known member
Joined
Mar 31, 2010
Messages
67
Location
Central Ky
Christopher,

Thanks for looking!:thumbup:

I am using 3/16" hardboard for the doors. The tall doors are reinforced with cherry 1x2 that also acts as the handle.

On all of the doors except the tool cabinet, the tracks are just pieces of scrap cherry used to make channels. This with a little beeswax to the doors works really well. I wanted to buy actual channel so there would be less friction, But I am working on a really tight budget here just trying to use up a lot of material I already had. Things like hardware are what really add to prices of projects. here are some pictures of the tracks:

IMG_0914.jpg

IMG_0916.jpg

For the tool cabinet, on the bottom I used an aluminum track and screen door wheels so it slides really well, at the top I just used scrap cherry as I did on the other doors

IMG_0915.jpg
 

Foxxtrot

Well-known member
Joined
May 23, 2011
Messages
100
Location
Huntersville, NC
I think that if it has been relatively stationary for the last 5 years, it has probably moved the most that it is going to. You might get slightly more shifting over the next few years, but probably mostly imperceptible. To that end, tile is still probably your easiest fix. It is much easier to level a floor 12" at a time, than to try and level the entire floor. Good luck with whatever you choose!
BTW, love the sliding doors! I intend to do that one day. If I ever get started remodeling my garage, I have a feeling I won't ever stop!
 

jhn9840

Well-known member
Joined
Mar 11, 2007
Messages
1,189
Location
Northern Panhandle of WV
Love the 110. Did you do the restore yourself? That is a great idea for your cabinets. Looks like you are going to have a really sharp space when your done.

jhn9840
John
 
OP
W

wes.harville

Well-known member
Joined
Mar 31, 2010
Messages
67
Location
Central Ky
jhn9840,

Thanks for looking and the nice comments.

as for the 110, yes, that was my first restoration project. My father n law gave it to me and I took it completely apart and rebuilt it from the ground up. The only thing I didn't remove were the tires from the rims. That was 10 years ago and I really can't remember why, but I taped off the tires and painted them with the tires still on.:lol_hitti
 

slghmmr88

Well-known member
Joined
Jun 16, 2007
Messages
582
Location
Edmond, OK (way north)
100 degree heat index. Child's play :lol_hitti. You could float the floor as planar as possible and mount the tile on isolation membrane or barrier to assist in the prevention of future cracks. But remember to use square edge tile and minimal grout joints to allow ease of movement of caster mounted equipment.
 
OP
W

wes.harville

Well-known member
Joined
Mar 31, 2010
Messages
67
Location
Central Ky
Well, it has been raining here in Central KY non stop since Sunday afternoon, so I haven't been able to build any more cabinets. Instead, I have been cleaning a little and temporarily stocking some of the cabinets I already built. I plan on getting back to building this Saturday but for the time being I thought I would take some pictures of where the next set of cabinets will be going.

I will have a run of 12"deep x 15"tall(the same height as the top cabinets already built) spanning the entire length of the beam. This will be where I store things that I rarely need like fluids and the such.

They will go here

IMG_0935.jpg

IMG_0936.jpg


This is the wall that conjoins to the house. I plan on making a refrigerator cabinet between the beam and the door and a 6' long 18" deep x 8' tall between the door and the garage door. This will be perfect for strollers, golf bags and "household stuff". Once I do this, I will remove all of the household stuff from the back cabinets and these will be filled with tools.

IMG_0937.jpg

IMG_0938.jpg
 

bhclark

Well-known member
Joined
Aug 20, 2011
Messages
418
Location
OHIO
I had already built this cabinet, so all I had to do was hang it. I love this cabinet, the two doors in the front slide from side to side to access more peg board behind them.


IMG_0842.jpg

I LOVE this cabinet....can you provide any more details on its construction, measurements and detailed photos?

Also, with your cabinets being rather sturdy, what size french cleat are you using?

Thanks!
 
OP
W

wes.harville

Well-known member
Joined
Mar 31, 2010
Messages
67
Location
Central Ky
Didn't get a whole lot done today. We had a yard sale today so that took most of the day.

I started building and installing the cabinets for the beam this evening.

Gotta love Kreg Jigs

IMG_0966.jpg

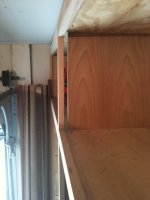
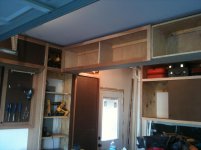
here is one of the carcases installed. I plan on installing a lumber rack on the back side of this beam to offset any torque on the beam. As for the vertical load, I am not really worried as by code the beam isn't even necessary. I added it when we added a room over the garage for extra stability to the floor.

IMG_0967.jpg

IMG_0968.jpg

IMG_0969.jpg

Hopefully more pictures will follow tomorrow
 
OP
W

wes.harville

Well-known member
Joined
Mar 31, 2010
Messages
67
Location
Central Ky
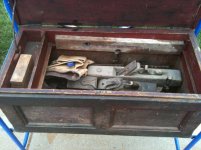
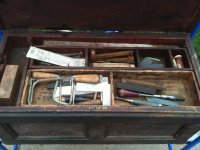
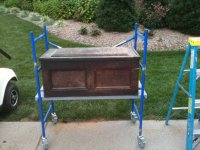
While I was working today, I had my antique tool chest out so I thought I would snap some photos for you guys.

This is mostly filled with my grandfathers tools, however a few of my more modern ones happen to be in there right now. I have an extreme love for antique woodworking tools. When I first starting woodworking, I only used power tools; however, I have slowly been using hand tools more and more. I will never abandon power tools but I do consider myself I hybrid woodworker.
 

Attachments

  • IMG_0965.jpg
    IMG_0965.jpg
    140.1 KB · Views: 26
  • IMG_0964.jpg
    IMG_0964.jpg
    141.4 KB · Views: 29
  • IMG_0963.jpg
    IMG_0963.jpg
    143.8 KB · Views: 29
  • IMG_0962.jpg
    IMG_0962.jpg
    141.2 KB · Views: 31
  • IMG_0961.jpg
    IMG_0961.jpg
    147.7 KB · Views: 32
OP
W

wes.harville

Well-known member
Joined
Mar 31, 2010
Messages
67
Location
Central Ky
bhclark - here are the pics I promised you.

The cabinet is 84" wide by 30" tall and is 8 " deep. Basically, It is a 3/4" plywood box with a dado in the back for the peg board and a hardwood front. I also ran a dado in the bottom for a piece of 1/8" x 1" aluminum bar for the doors to roll on. For the doors, I ran a dado through the bottom to install screen door rollers. The top of the doors are held in place by a strip of cherry that keeps them from falling backwards.

One thing to note is that you want the back piece of pegboard to have a 3/4" gap behind it so the hooks have a place to go
 

Attachments

  • IMG_0977.jpg
    IMG_0977.jpg
    132.4 KB · Views: 33
  • IMG_0978.jpg
    IMG_0978.jpg
    137.9 KB · Views: 29
  • IMG_0979.jpg
    IMG_0979.jpg
    138.9 KB · Views: 26
  • IMG_0980.jpg
    IMG_0980.jpg
    138.5 KB · Views: 26
OP
W

wes.harville

Well-known member
Joined
Mar 31, 2010
Messages
67
Location
Central Ky
I worked on the garage for most of the afternoon today with the "help" of my three year old. She absolutely loved using the impact gun (with a little help).

I built the other beam cabinet and got it hung. I was also able to get the face frames installed.

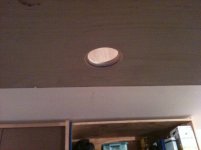
I the right compartment of the center cabinet I have installed a retractable air hose. I will be installing a retractable power cord in the left side. I also plan on installing puck lights under these cabinets.

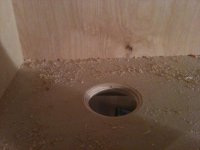
When I cut the hole for the air hose, I undersized it by 1/4 " so that the plastic ring would catch on the circle. I then rounded the hole over so that the hose wouldn't get snagged and so the tapper of the plastic ring would fit nice in the hole. The only problem is after the top was routed when I routed the bottom, the bearing was no longer sitting on the original surface. This ended up enlarging the hole by about 5/16", just enough so the plastic ring goes up into the cabinet. It still functions as intended, just doesn't look as nice as it would have if it would have fit the way I wanted.
 

Attachments

  • IMG_0972.jpg
    IMG_0972.jpg
    137.2 KB · Views: 28
  • IMG_0973.jpg
    IMG_0973.jpg
    136.8 KB · Views: 27
  • IMG_0981.jpg
    IMG_0981.jpg
    141.4 KB · Views: 22
  • IMG_0976.jpg
    IMG_0976.jpg
    142.1 KB · Views: 23
  • IMG_0975.jpg
    IMG_0975.jpg
    136.5 KB · Views: 24
  • IMG_0982.jpg
    IMG_0982.jpg
    149 KB · Views: 22
  • IMG_0983.jpg
    IMG_0983.jpg
    145.8 KB · Views: 21
OP
W

wes.harville

Well-known member
Joined
Mar 31, 2010
Messages
67
Location
Central Ky
more pictures
 

Attachments

  • IMG_0984.jpg
    IMG_0984.jpg
    142.1 KB · Views: 19
  • IMG_0985.jpg
    IMG_0985.jpg
    142.7 KB · Views: 18
  • IMG_0986.jpg
    IMG_0986.jpg
    143 KB · Views: 19
  • IMG_0987.jpg
    IMG_0987.jpg
    137.2 KB · Views: 26
OP
W

wes.harville

Well-known member
Joined
Mar 31, 2010
Messages
67
Location
Central Ky
Thank Rick,

I will be picking up a fridge tomorrow from a friend so I can start building the cabinets on the right side. I can't wait to get the stain on the cherry and paint on the walls, but at this rate it might be a while. The bad thing is the longer I spend working on the garage, the more ideas I come up with of things to do. This might take a while :headscrat
 

rickairmedic

Well-known member
Joined
May 31, 2005
Messages
4,165
Location
louisville ,Ky
Wes I dont think you can outdo me . My garage remodel started in April of 2007 :D. I am still at it and still redoing things that I didnt like .


Rick
 
To avoid these ads, REGISTER NOW!
Top Bottom