To avoid these ads, REGISTER NOW!

Down The Hatch...

250

Well-known member
Joined
Oct 16, 2014
Messages
537
Location
West of the Sierras
After considerable contemplation and coffee drinking, I've decided to start my own show thread. I generally don't consider what I'm doing to be that interesting and I certainly don't have the technical or fabrication still that some of the members here do. However, I've enjoyed reading a variety of other threads here and gleaned some good ideas, maybe there will be one or two hidden in here for someone else as time go by.

A quick bit of backstory. We've been in this house a little over 3 years and spent a good portion of that time refreshing and fixing issues ignored by the prior owners. What drew us to this property was that it has some space, but wasn't too far of a commute for me; in a reasonably defined neighborhood; and has a 3 car 'heated' garage. Coming from not having any real area that I could tinker in since getting married (apparently the kitchen table and guest bath aren't appropriate places for parts prep) and becoming a some what responsible adult, this looked good. I liked the garage, she liked the house, sold!

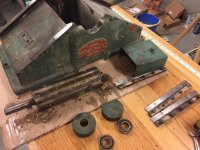
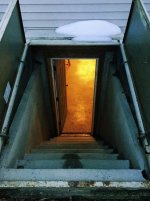
What I learned that first winter in this house is that my californian blood thinks working in a heated massachusetts garage isn't warm enough. I'd go out and work on my new to me motorcycle at that point, but everything was cold and after a full day of work, I didn't have a whole lot of motivation. Thus, over the next couple years I slowly started taking over the unfinished basement and Down The Hatch was born.

24309366388_e1341a1eaf_b.jpg
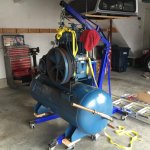
basement 1 by david koenig, on Flickr
 

Attachments

  • IMG_1920 2.jpg
    IMG_1920 2.jpg
    97.7 KB · Views: 92
Last edited:
To avoid these ads, REGISTER NOW!
OP
2

250

Well-known member
Joined
Oct 16, 2014
Messages
537
Location
West of the Sierras
Marc- I wouldn't say gave up, more of an expanded. We park inside, so there goes a bit of space and between the bikes and snowblower, that left me with about half a stall to free. Which was working ok until I decided to start buying large tools. Clearly I was going to need more space. I'd like to thank the mrs for enabling all of this by saying 'no more motorcycles'

Propane heater on the ceiling, installed by the previous owner. Exact specs escape me at the moment.
 
OP
2

250

Well-known member
Joined
Oct 16, 2014
Messages
537
Location
West of the Sierras
After some digging around I found a couple pictures of how things looked when I decided there was going to be a meaningful occupation of the basement. This is looking into the basement, the hatch off picture to the right.

38129890652_c6f36af7da_z.jpgbasement 2 by david koenig, on Flickr

Looking into the 'main bay' of the basement, table saw behind me.
38129891132_baed7652d2_z.jpgbasement 3 by david koenig, on Flickr

And finally from the stairs up into the house.
38129896372_0c908ef49a_z.jpgbasement 4 by david koenig, on Flickr
 
Last edited:

ambenz

Well-known member
Joined
Dec 12, 2010
Messages
4,236
Location
NW Chicago Suburbs
Oh, Screw the basement, we wanna see the garage!
Oh, sorry, forgot to say Welcome to the GJ, glad you decided to start sharing a bit of your experiences in life.
The basement is also a great place for a workshop so it is all GOOD!
Thanks for sharing...will be watching ...for garage and toy pics!
 

-Brent-

Well-known member
Joined
Dec 23, 2009
Messages
4,709
Location
Utah
One of the coolest basement shops I've ever seen was of a friend's father. He built RC airplanes, not just little kit ones but these massive (and fast) machines. He had a walk-out so that made life a bit easier going in and out but man, it was a pretty neat and well-equipped place.

I really think it comes down to what hobbies you have for making it function best. Obviously, it would be difficult to build a canoe or an auto-related project "down the hatch" but for lots of things that'll fit through the door, it'll be great.

So, are we going to see a ramp for the motorcycle?
 

Marcm157

Well-known member
Joined
Jan 12, 2014
Messages
525
Location
Newburgh, NY
Marc- I wouldn't say gave up, more of an expanded. We park inside, so there goes a bit of space and between the bikes and snowblower, that left me with about half a stall to free. Which was working ok until I decided to start buying large tools. Clearly I was going to need more space. I'd like to thank the mrs for enabling all of this by saying 'no more motorcycles'

Propane heater on the ceiling, installed by the previous owner. Exact specs escape me at the moment.

Got it - Welcome to the group. Looking forward to seeing how this plays out...
 
OP
2

250

Well-known member
Joined
Oct 16, 2014
Messages
537
Location
West of the Sierras
What's a basement?

My wife has made a couple comments about not having another basement workshop when we move back west and I've reassured her that isn't in the plans. Though this one wasn't either....:headscrat

Brent- got a picture of said basement?

Yes, I hope this turns out to be of interest. Thanks to those who've already stopped by.

-david
 
OP
2

250

Well-known member
Joined
Oct 16, 2014
Messages
537
Location
West of the Sierras
By far the biggest thing to go down the hatch thus far is the air compressor. I've talked a bit about it elsewhere, but the long and the short of it is, I was looking at new compressors when I stumbled across this one. Over kill, perhaps.

At pick up
IMG_1173_zps89afa026.jpg

At home
IMG_1175_zps89aad195.jpg

One problem that I became painfully aware of as I was considering just how silly this whole compressor idea was it that just because the door into the basement is X- inches high, that's not the measurement that matters. Its the top of the door to the third or forth stair. This baby wasn't going to clear, so I separated the halves.
IMG_1229_zps546790de.jpg

Of course the hatch and the garage are completely opposite ends and sides of the house with lawn in between. At least its basically flat. Getting ready to go down.
IMG_1234_zps57208e41.jpg

IMG_1235_zps8f05ccf2.jpg

Coming down on the ramps.
IMG_1237_zpsfe3f66f9.jpg

Just fit...
IMG_1239_zps31e541fc.jpg

And finally back together.
IMG_1379_zpswzt3ej25.jpg
 

Attachments

  • IMG_1173 copy.jpg
    IMG_1173 copy.jpg
    140.9 KB · Views: 56
  • IMG_1175_zps89aad195.jpg
    IMG_1175_zps89aad195.jpg
    104.7 KB · Views: 52
  • IMG_1239 copy.jpg
    IMG_1239 copy.jpg
    83.6 KB · Views: 52
  • IMG_1238 copy.jpg
    IMG_1238 copy.jpg
    65.1 KB · Views: 54
  • IMG_1235 copy.jpg
    IMG_1235 copy.jpg
    118.3 KB · Views: 56
  • IMG_1234 copy.jpg
    IMG_1234 copy.jpg
    132.4 KB · Views: 53
  • IMG_1229 copy.jpg
    IMG_1229 copy.jpg
    125.5 KB · Views: 55

captain14

Well-known member
Joined
Dec 19, 2012
Messages
7,013
Location
Near College Park Maryland 20740
Have you fired up the compressor with your wife upstairs?

How many people were involved with moving both halves "down the hatch"?


Interesting to see where you go with this.

Certainly looks like a Bilco door assembly.

Any water issues in that area from the doorway?
 
OP
2

250

Well-known member
Joined
Oct 16, 2014
Messages
537
Location
West of the Sierras
Captian- Thanks for stopping by. I'll go in reverse order. I haven't had any water issues as of yet, the bulk head seems to do its job of keeping the vast majority of moisture out. Maybe the equivalent of a couple cups a few times after big rains. I think the door assembly is contractor made, but I could be completely wrong on that. The most I've looked at it is to determine if I could remove it completely for more clearance.

Two people were involved, me and her. I have buddy/coworker that will help occasionally, but I don't think he really likes to. Most items though I've winched down the hatch all by myself. It's not any harder, just a lot slower. Stop, walk around though the house to adjust the direction of whatever item, walk back around to the top and crank some more. I use a worm drive winch, anchored to the truck, so there's no way it can get away from me. Also no way to do it quick.

IMG_1929a_zps3ucvto9r.jpg

And to the most important question of them all... surprisingly she doesn't mind it. I depowered the pump to a 5hp motor which spins at 450rpm give or take so it's reasonably "quiet". I had the head apart a couple months ago for valve service and considered putting a intake muffler on it. Ultimately didn't because mufflers in that size are a little spendy, and I couldn't get the current filter unthreaded from its mounting bracket.
 

Attachments

  • IMG_1929a.jpg
    IMG_1929a.jpg
    144.2 KB · Views: 38
To avoid these ads, REGISTER NOW!
OP
2

250

Well-known member
Joined
Oct 16, 2014
Messages
537
Location
West of the Sierras
Bigdukaaa- I took a look at your build. What you've got going on there, and primarily off CL is impressive. You may not have a basement, but you also don't have to go down the hatch either. Keep up the good work.
 
OP
2

250

Well-known member
Joined
Oct 16, 2014
Messages
537
Location
West of the Sierras
I'm impressed you got that compressor in the basement. Where are you going to locate the sand blast cabinet?

Down the hatch... in the basement of course. :thumbup:

But before I could proceed with a blast cabinet, I needed to give big blue a tuneup. Since day one I'd suspected a leak on the high pressure exhaust valve, which ultimately seals the tank, but it wasn't something I wanted to dive into. Basically I was concerned that I'd get it apart and not be able to get it back together. I like to think I have mechanical skills, but I really don't compared to some of the guys here. Finally it got jammed and kept blowing the pressure relief valve between the high and low sides. No choice now...

Quincy has a disassembly and refresh guide for the QR-25 heads. This was a life saver. It mentions at one point a special valve tool, but I was informed from a good source that this wasn't needed and basic hand tools would do. Thanks A_Pmech :thumbup:

View of the top. Note the unloading towers in the bottom of the frame. These allow the compressor to start unloaded and build up its oil pressure before putting load on the unit.
24318394368_c71a5e023d_b.jpgIMG_0036 copy by david koenig, on Flickr

Inside the tower.
38115041906_bbf01bc191_b.jpgIMG_0039 copy by david koenig, on Flickr

37460659264_53052cd312_b.jpgIMG_0040 copy by david koenig, on Flickr

37460659154_e01260419f_b.jpgIMG_0041 copy by david koenig, on Flickr

Valve covers off. The upper right valve is the one in question.
38115041526_6d08eff353_b.jpgIMG_0047 copy by david koenig, on Flickr

Middle ones. These cleaned up good, but where a bit of a pain to disassemble.
24318393648_e0608115fb_b.jpgIMG_0055 copy 2 by david koenig, on Flickr

37460657564_0f42fb67de_b.jpgIMG_0056 copy by david koenig, on Flickr
 

Attachments

  • IMG_0036 copy.jpg
    IMG_0036 copy.jpg
    133.5 KB · Views: 30
  • IMG_0039 copy.jpg
    IMG_0039 copy.jpg
    137.2 KB · Views: 34
  • IMG_0041 copy.jpg
    IMG_0041 copy.jpg
    137.8 KB · Views: 30
  • IMG_0047 copy.jpg
    IMG_0047 copy.jpg
    135.8 KB · Views: 32
  • IMG_0055 copy 2.jpg
    IMG_0055 copy 2.jpg
    143.8 KB · Views: 32
  • IMG_0056 copy.jpg
    IMG_0056 copy.jpg
    101 KB · Views: 32
  • IMG_0040 copy.jpg
    IMG_0040 copy.jpg
    139.8 KB · Views: 32
Last edited:
OP
2

250

Well-known member
Joined
Oct 16, 2014
Messages
537
Location
West of the Sierras
And the high pressure valve in question. Very crusty. Too bad I don't have a compressor and a blast cabinet to clean it all up. :lol_hitti

37460657414_ca745910f7_b.jpgIMG_0057 copy by david koenig, on Flickr

Instead mixed up a garbage can E tank and drop any part that I could wire up in, turned it on and came back a few days later. I didn't take a picture of that part, pretty boring. I will say those gaskets were hard as a rock and took some care to remove.

I found the clean pictures... The new copper ring that the valve assembly sits on, and the spring that holds the valve closed.

37460656604_abcb8044f0_b.jpgIMG_1874 copy by david koenig, on Flickr

New vs Old
24318392218_3449e65dd7_b.jpgIMG_1875 copy by david koenig, on Flickr

Clean valves
24318392858_95503d17f4_b.jpgIMG_0067 copy by david koenig, on Flickr

37460657164_01752bb1ac_b.jpgIMG_0063 copy by david koenig, on Flickr

Final head shot.
37460656834_db1da9b653_b.jpgIMG_0068 copy by david koenig, on Flickr

Reassembly went in the general reverse order and without any major problems. This included 'lapping' the valve rings on a flat piece of granite left over from the kitchen project and some 600-800 grit sand paper.

Back together, tucked in and ready to purr.
IMG_1940%20copy_zpsp9ntjdjp.jpg

There we are for tonight. Thanks for stopping in.
 

Attachments

  • IMG_1874 copy.jpg
    IMG_1874 copy.jpg
    79.7 KB · Views: 26
  • IMG_1875 copy.jpg
    IMG_1875 copy.jpg
    108.5 KB · Views: 27
  • IMG_1940 copy.jpg
    IMG_1940 copy.jpg
    90.1 KB · Views: 26
  • IMG_0063 copy.jpg
    IMG_0063 copy.jpg
    85.8 KB · Views: 20
  • IMG_0067 copy.jpg
    IMG_0067 copy.jpg
    71.8 KB · Views: 19
  • IMG_0068 copy.jpg
    IMG_0068 copy.jpg
    146.4 KB · Views: 19
  • IMG_0057 copy.jpg
    IMG_0057 copy.jpg
    115.3 KB · Views: 19
Last edited:
OP
2

250

Well-known member
Joined
Oct 16, 2014
Messages
537
Location
West of the Sierras
Its been one of those weeks where you're doing good to get through dinner, crash on the couch and not immediately fall asleep. And the reason you can't fall asleep is the major negative points from the Mrs for watching the munchkin and napping at the same time...

Anyways, after the errands have been run I went and picked up the newest shop denizen. Meet the KR Wilson 37 Hydraulic Press. 25 ton capacity hydraulic, 3 ton manual, and top heavy enough that I'm glad I paid a few bucks to have it loaded for me. Below is a current picture of the garage to fulfill richard's request. :thumbup:

Behind me is where the garbage cans, entrance to the house and her car live. the open bay houses my truck, and then we have bay three with the other 'stuff'.

24318513698_42db259b55_b.jpgIMG_1941 by david koenig, on Flickr

37460752494_ea733200d0_b.jpgKR Wilson 37-2 copy by david koenig, on Flickr
Just had her 67th birthday. Cool. :beer:
 

Attachments

  • KR Wilson 37-2 copy.jpg
    KR Wilson 37-2 copy.jpg
    125.8 KB · Views: 20
  • IMG_1941 copy.jpg
    IMG_1941 copy.jpg
    138.2 KB · Views: 24
Last edited:
OP
2

250

Well-known member
Joined
Oct 16, 2014
Messages
537
Location
West of the Sierras
Ok, now that I have a functioning compressor again, I can finally pursue my desire to get a blast box. I've been pining after one for a good year now was suffering from a good case of paralysis by analysis. I finally got off the fence and placed my order.

38139388322_096b319db0_b.jpgIMG_1924 by david koenig, on Flickr
I made the cut in the box to verify which was the from before the kid with the pallet jack left.

37460953874_5413fdec73_b.jpgIMG_1925 by david koenig, on Flickr

I was really surprised how easy this cabinet was to move on the dolly. I thought I might need help to get it back to the hatch, but thankfully it took all of a minute to wheel it around.
38115282236_c53b195766_b.jpgIMG_1930 by david koenig, on Flickr

37460953544_16b82dcd7e_b.jpgIMG_1931 by david koenig, on Flickr
And we're in!

Got it situated, put some riser under the feet to give my arms a better angle and got busy setting up the vac when I ran into a problem. My plan was to have the vac hide under the end of the work bench, to the right of the miter saw that you can see in the picture below. but the vac was too tall to fit. I'd measured other aspects of this project ten different times, never though about how tall the vac was going to be. Hmmm, where else can this thing go? Guess I'll flip it around and stick it on the other side... except that's where I'd piled all the stuff from where I'd originally wanted it to go. Putz.

This was mid reshuffle
38139388032_72ffe4084a_b.jpgIMG_1932 by david koenig, on Flickr

And home. The offending vac is on the far side tucked away.
37460953174_d28713ef0d_b.jpgIMG_1933 by david koenig, on Flickr

This was a satisfying afternoon.
 

Attachments

  • IMG_1930 copy.jpg
    IMG_1930 copy.jpg
    148.4 KB · Views: 23
  • IMG_1931 copy.jpg
    IMG_1931 copy.jpg
    132.3 KB · Views: 23
  • IMG_1932 copy.jpg
    IMG_1932 copy.jpg
    143 KB · Views: 26
  • IMG_1933 copy.jpg
    IMG_1933 copy.jpg
    127.2 KB · Views: 24
  • IMG_1925 copy.jpg
    IMG_1925 copy.jpg
    134.3 KB · Views: 22
  • IMG_1924 copy.jpg
    IMG_1924 copy.jpg
    130.5 KB · Views: 20
Last edited:

NedNorton

Well-known member
Joined
Jul 14, 2012
Messages
608
Location
Colorado, USA
Hey 250! Man, I'm having blast cabinet envy (plus compressor envy, to boot). You will have to let us all know how it functions.

Also, do I see a killer press tucked to left?

Looking forward to reading the progress.

Cheers,
Chris
 
OP
2

250

Well-known member
Joined
Oct 16, 2014
Messages
537
Location
West of the Sierras
Chris, thanks for stopping by. I see you made some very satisfactory progress on you're compressor woes. Such 'simple' machines by some standards, they can really dive one bananas when not working.

I plan to put some more time in with the cabinet tomorrow and then share my initial thoughts. So far the feelings are warm and fuzzy. :thumbup:

Its a Greenerd #3 1/2 that I found last winter and proven very handy for other machine fixing tasks. It replaced my Greenerd #3 and I have to say provided my first lesson in weight research and 'it didn't look that big in the picture' syndrome. Its easily 2x larger dimensionally and 3x on weight. The guys that helped me load it up though I was a bit nuts with my plan on getting it home, but it all worked out in the end. I don't use it every day, or even every month, but it is so satisfying when it pushes a shaft a housing or whatever with ease.

IMG_0028_zps3owrnxyy.jpg

38171391461_912a9d22d9_z.jpgIMG_0039 by david koenig, on Flickr

38115326296_b2fd2a7e58_z.jpgIMG_0038 by david koenig, on Flickr
-david
 

Attachments

  • IMG_0038.JPG
    IMG_0038.JPG
    118.9 KB · Views: 25
  • IMG_0039.JPG
    IMG_0039.JPG
    103.9 KB · Views: 25
Last edited:

C_F

ALLIANCE MEMBER
Joined
Jan 21, 2005
Messages
9,675
Location
Utah...SNOW BLOWS!
I love that massive compressor!:drool: 
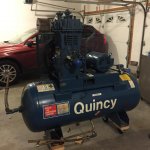
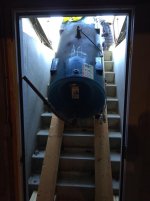
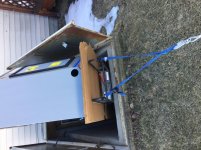
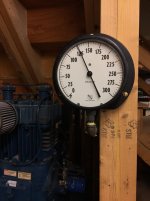
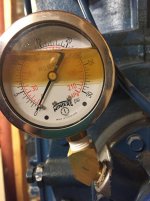
I'm impressed that you have been able to get that many large items down the hatch & through the door.

Looks like you haven't run out of room yet, looking forward to future updates. :)
 
OP
2

250

Well-known member
Joined
Oct 16, 2014
Messages
537
Location
West of the Sierras
Always good to have new folks stop by. Thanks for coming; and yes C_F, there is some room left, and there are some future plans. How quickly they happen is up for some debate but I'll see what I can do. So after a morning out with the family, and a shake down ride on the triumph, time to get down to business.

:3gears:

Today was my second shift with the new blast cabinet and now I feel I can make some initial comments. First of all, its already saved me hours of cleaning on my current project, the rehab of a 1958 powermatic 60 jointer. With my prior endeavors I prepped parts with a combination of wire wheel, paint stripper, wire brushing, navel jelly. It was slow work. While the sheet metal cabinets that powermatic liked/likes using are still best prepped with paint stripper, the weld points tend to get rusty and don't clean easily. Lets look at some pictures.

These are some of the parts prior.
38171452381_ed337b5018_b.jpgIMG_1919 copy by david koenig, on Flickr

Pork chop during
26394862109_f144d1b8a6_b.jpgIMG_1937 copy by david koenig, on Flickr

Pork chop after. The remaining glue... rubber... whatever is pretty resistant to the media, but comes off by other mechanisms without too much grief.
24318817838_403c2e52c1_b.jpgIMG_1939 copy by david koenig, on Flickr

Support leg for the table saw. It took a couple minutes to take it from green right to silver left.
26394861809_7c5f85751d_b.jpgIMG_1954 copy by david koenig, on Flickr

Light brushing of the cast iron parts.
24318816978_7a0641e295_b.jpgIMG_1962 copy by david koenig, on Flickr

And the pile of clean parts grows.
24318816698_9fef63f67b_b.jpgIMG_1963 copy by david koenig, on Flickr

This took me probably about 2 hours, including some disassembly time. I'm using glass beads. The equivalent progress on prior projects would have taken a couple weeks worth of evenings. I even managed to get the jointer base, the big sheet metal box, in there but it was a really tight fit and only worked because I was working on the inside of the box on the weld points.

When I ordered it I didn't get the foot pedal because I was trying to ease the purchase with the mrs. In hind sight, it probably wouldn't have made any difference. I did find that my hand got pretty tired and this will be an upgrade at some point in the future, which is a very popular course of action. The single light isn't bad, but its not great either. Being right handed I tend to shoot in the 10-11 oclock direction, roughly 90 degrees against the light source. I found a couple times the shadows were problematic. If the single light was on the right, pointing into the cab, then one light would get you a lot farther but I'm sure too many knuckle heads out there have busted the light off there. I'll get around to adding more light, but I'm going to think it out a bit before I start poking extra holes in the cabinet.

Over all I'm very pleased with how its working. It came with 50lbs of media and I asked for the glass bead instead of the skat magic and I'm very satisfied that I did. I figured that if the beads didn't clean the way I like, I could always get something sharper but I don't think that's going to be necessary. I mocked up both this box and their smaller box out of cardboard that I had lying around to get an idea of what the measurements actually felt like. I'm glad I didn't go smaller, and while a lot of people will say go as big as you can afford, I think this a good size for me.

Another good session. :thumbup: Now if I could just get that stupid bearing off, we'd really be cooking...

-david
 

Attachments

  • IMG_1919 copy.jpg
    IMG_1919 copy.jpg
    145.5 KB · Views: 20
  • IMG_1939 copy.jpg
    IMG_1939 copy.jpg
    143.9 KB · Views: 19
  • IMG_1963 copy.jpg
    IMG_1963 copy.jpg
    141.7 KB · Views: 20
  • IMG_1937 copy.jpg
    IMG_1937 copy.jpg
    111.3 KB · Views: 21
  • IMG_1962 copy.jpg
    IMG_1962 copy.jpg
    55.4 KB · Views: 19
  • IMG_1954 copy.jpg
    IMG_1954 copy.jpg
    77.5 KB · Views: 19
Last edited:
OP
2

250

Well-known member
Joined
Oct 16, 2014
Messages
537
Location
West of the Sierras
I love a good old fashion dial gauge. Don't really know why or when it developed but I've always preferred a round dial and a pointer to most any other options. This goes for car stuff, weather stuff, machine instrument pressure stuff.

This interlude will be the tale of two gauges.

The first gauge is an older ashcroft I got off Ebay a few weeks ago. While I had the compressor out of its hole the 4 inch gauge I'd be using to display my 'supply' pressure got knocked out of calibration. Instead of pointing to 0 when there's no pressure, the dial rest directly down at the 6 o'clock position. I found some vague instructions on the ashcroft site, but didn't make it very far in my attempt to fix it. Lets see if I can find an inexpensive replacement.

38171478741_498a3d4f37_b.jpgIMG_1974 by david koenig, on Flickr

I love it. I can read it all the way across the basement from the blast cabinet. Here's how its mounted.

Piece of scrap 1/2 inch plywood that was taking up space. Traced the gauge outline on said wood.
38171484281_855c133bf9_b.jpgIMG_1921 by david koenig, on Flickr

Relief cuts on the band saw.
37461083344_498a3d4f37_b.jpgIMG_1922 by david koenig, on Flickr

And around we go.
37461083314_f43f5c821e_b.jpgIMG_1923 by david koenig, on Flickr

I guess I didn't get a picture of the backing mounted without the gauge. I held it up at a pleasing height, made sure it was level and popped in a few 16g nails to hold it. 3 brass screws from the junk drawer and a 1/4in feed line round out the installation.

There was the good, now the bad.

When I had the compressor apart I started thinking about the two gauges on it, and how they seemed like such cheapos, even though they are NOS to the unit. From bouncing round in various jeeps as a teen I remembered they had glycerin fill gauges to help smooth out the reading from all the jostling. Some shopping on the internet brought me to these Winter gauges. Reasonably priced, company been around awhile, decent reviews. I'll give them a whirl.

The QR-25 head should be run around 18-20 psi of oil pressure. During my second long stent with the blast cabinet, I noticed that the point pressure was hovering 17-18 while the head was under load. Ok, no problem, lets increase the pressure. I don't remember for sure but turned it up to just over 20 (my foggy memory was thinking 18-22psi was the normal range). I wouldn't have though this to be much of an issue until I saw this a few days later.

24318850068_6ac0aae6af_b.jpgIMG_0090 by david koenig, on Flickr

Apparently these gauges are rated to 75% of the face capacity, that's 22.5psi on this lovely 30psi gauge. So my theory here is that the head was running 21psi (plus or minus) when it was nice and warmed up. Come back later in the week after its cycled cold and who knows what it was, but north of 23 for sure. I was thinking about looking at other gauge makers to see if this is pretty standard. If it is it would explain why 300psi gauges are put on compressors rated for 175psi operating and equipped with 200psi relief valves.

In my love of gauges, one thing that is required is an appropriate scaled gauge. I always though it was silly they guys that would put the 10k tacks in their cars when their engines redline at 6k. My options are replace the 30psi, knowing its limitations and keeping a close eye on the pressure variations until I get it dialed in, or bump up to a 60psi scale and suffer from over gauging... hmm dilemma. For now I've put the old cheapo back on.

-david
 

Attachments

  • IMG_1923.jpg
    IMG_1923.jpg
    87.3 KB · Views: 25
  • IMG_1922.jpg
    IMG_1922.jpg
    102.5 KB · Views: 25
  • IMG_1921.jpg
    IMG_1921.jpg
    97 KB · Views: 24
  • IMG_1974.jpg
    IMG_1974.jpg
    69.7 KB · Views: 31
  • IMG_0090.jpg
    IMG_0090.jpg
    88.8 KB · Views: 27
Last edited:
OP
2

250

Well-known member
Joined
Oct 16, 2014
Messages
537
Location
West of the Sierras
I assume the motorcycles have to go in/out the same way down the outside stairs? Not especially convenient.

My apologies for not getting to this question earlier.

No. Not convenient at all, but I haven't really needed to move them down. One reason that I was initially considering basement moto parking was a muscle car project that has been patiently sitting on the side lines for a while. Logistically its been impractical to move forward with that particular money pit so the bikes have their own slot. Another is the handle bars won't fit through the basement door as is. If I remember correctly there is enough space down the steps, but the door frame is too tight. There is a project my wife and I have been toying with that would necessitate the relocation of the bikes. We'll cross that bridge if we get to it.
 
Last edited:
OP
2

250

Well-known member
Joined
Oct 16, 2014
Messages
537
Location
West of the Sierras
Its the general consensus of the folks over at OWWM that bearings though be replace when ever the age/condition is unknown. Cheap insurance. One of this weeks projects has been to freshen up the motor for the jointer. By far the most challenging part in disassembly was the bearings. Pictures are better than words.

Old 3ph motor. Don't know who made it for Powermatic. Pulling the pulley off. This one came off easily.
38140251702_aae8744811_b.jpgIMG_1895 copy by david koenig, on Flickr

A bit of old saw dust. Bearing #1 came off easy.
37461696494_9beac79c8d_b.jpgIMG_1898 copy by david koenig, on Flickr

Bearing #2 was the problem. And it wasn't the bearing but the cast metal fan that snuggled up around it. There was no room to get the 3 jaw puller or bearing splitter down there. Too tight for the dremel to get all the way in there as well. There was space to set it up in the arbor press, but I didn't want to crack the fan and moving both the bearing and the fan at once was probably going to take more force than I was comfortable applying.
38140244352_0cccab95b1_b.jpgIMG_1902 copy by david koenig, on Flickr

I got the suggestion of inducing metal fatigue by getting it cold with dry ice then cracking the races to pull them off. Thus on my way home one afternoon this week, I picked some up. I 'borrowed' a bowel from the kitchen and put the offending bearing on ice.
26395473819_1d72e870b7_b.jpgIMG_0089 copy by david koenig, on Flickr

I let it sit like this for about 6hrs. I don't know if it needed that long, but I found other things to do. I mounted it up and away we went. It took more whacks than I anticipated but the job got done. Here's the inner race coming off.
38140287502_ccb9dac500_b.jpgIMG_1968 copy by david koenig, on Flickr

And the victim.
38172070211_b44a457e41_b.jpgIMG_1971 copy by david koenig, on Flickr

With the new bearing in place. With the shaft still quite cold, I warmed up the new bearings on my coffee warmer plate and got them installed.
24319622998_da5d142f6c_b.jpgIMG_1972 copy by david koenig, on Flickr

-david
 
Last edited:

bj383ss

Well-known member
Joined
Sep 29, 2011
Messages
3,166
Location
TX
Love what you have done so far. Your old Powermatic stuff is awesome. Can't wait to see the Jointer completed. Are you going to paint it in original color?

I also totally agree with you over inflated gauges. I try to do the same as you on Auto gauges. My Camaro has a 180mph speedo and it is factory rated at 168 mph. And the 70 mph is way over on the left which is normal driving. I always tried to plan the gauge to be pointing straight up for oil pressure, water temp, as much as possible at normal driving conditions. Maybe that is an OCD thing.

You almost need an elevator to get stuff down the hatch.

Looking forward to your updates.

Bret
 

machine_punk

Well-known member
Joined
May 14, 2011
Messages
2,540
Location
Napa Valley, California
Enjoying your thread. You've got some nice equipment there. It seems that you and I worry about the same things (getting the gauges 'exactly right,' when nobody else would think twice about it).

Looking forward to the continuation of this thread. Thanks for taking the time to post your projects.

Kev
 
To avoid these ads, REGISTER NOW!
Top Bottom