
To avoid these ads, REGISTER NOW!

Drilling rivets. How to pick the correct size drill bit?

cosmokenney

Well-known member
Joined
Oct 18, 2017
Messages
275
Location
Loyalton, CA
I need to drill (EDIT: drill out) some rivets that are holding two pieces of carbon fiber together. I believe the rivets are stainless steel. I don't want to touch the carbon fiber at all when drilling these out. So I'm wondering what is the best way to pick a drill bit. I don't know what size the rivets are. And everything I've seen via google search starts with "If your rivet is 1/x inch, use a #x drill bit". Well, I don't know what size they are.

Is the goal to drill the little pan-shaped cap/head off of the rivet? Or to drill out the remaining shank (the part snaps off when you install it)?

Also what prevents the whole rivet from just spinning while being drilled? Is a slow rpm on the drill better than fast or vice versa?
 
Last edited:
To avoid these ads, REGISTER NOW!

hans109h

Well-known member
Joined
Dec 27, 2017
Messages
261
Location
Upper Midwest
If your ultimate goal is to not enlarge the hole in the CF, then just start with the smallest bit you have and drill down until you know you're below the CF, then step up to the nest drill size up and repeat. Eventually the rivet head will pop off and you can punch the rest through.

As for the spinning it will depend on how tight the rivet is in the hole. If it spins you might use a little super glue to hold it, or otherwise get creative.

Hans
 

mikedodge

Well-known member
Joined
Jun 27, 2017
Messages
2,839
Start with a bit a bit bigger then the center hole and go up from there. You don't want to go too small because if the bit breaks it can become harder to deal with.

Especially for smaller rivets I prefer to use the drill to cut the head off and then punch out the rest because if youre trying to drill the whole thing out you usually end up hitting what's left of the pin and the rivet body sort of shaved off on an angle thats harder to deal with. Plus once the head is off there's less chance of damaging the good part the rivet is holding on.
 

JABgj

Well-known member
Joined
Nov 11, 2013
Messages
547
Location
So. California
Usually when I drill a rivet, I use a bit the same as the shank in the rivet so sneak up on the size starting smaller. Do the first one or 2 in a spot that will not be visible normally just in case.
 

LXCam

ALLIANCE MEMBER
Joined
Apr 23, 2013
Messages
19,200
Location
AZ
There’s a definite trick to drilling off the head and no matter how well practiced you are you’re going to get some spinners. Add in the fact they’re stainless will just add to the fun.

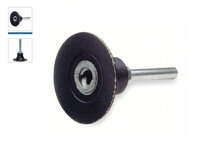
Since it’s a muffler and can be removed and placed in a good workable position I’d suggest a die grinder and a 1-1/2” soft back quick change holder and fine grit disc. Take your time feathering away the center until it becomes thing enough you can punch out the stem from the head. It might sound harder but it’s not.

IMG_3540.jpeg
IMG_3539.jpeg
 
OP
C

cosmokenney

Well-known member
Joined
Oct 18, 2017
Messages
275
Location
Loyalton, CA
There’s a definite trick to drilling off the head and no matter how well practiced you are you’re going to get some spinners. Add in the fact they’re stainless will just add to the fun.

Since it’s a muffler and can be removed and placed in a good workable position I’d suggest a die grinder and a 1-1/2” soft back quick change holder and fine grit disc. Take your time feathering away the center until it becomes thing enough you can punch out the stem from the head. It might sound harder but it’s not.

I have those sanding disks for my air die grinder but since the base material is carbon fiber, I don't think I want the disk anywhere near the carbon. Too easy to ruin the tube with a little tiny touch of a sanding disk at full speed.
 

regguy1

Well-known member
Joined
Dec 15, 2009
Messages
4,057
Location
On Mount Olympus with Zeus
I need to drill some rivets that are holding two pieces of carbon fiber together. I believe the rivets are stainless steel. I don't want to touch the carbon fiber at all when drilling these out. So I'm wondering what is the best way to pick a drill bit. I don't know what size the rivets are. And everything I've seen via google search starts with "If your rivet is 1/x inch, use a #x drill bit". Well, I don't know what size they are.

Is the goal to drill the little pan-shaped cap/head off of the rivet? Or to drill out the remaining shank (the part snaps off when you install it)?

Also what prevents the whole rivet from just spinning while being drilled? Is a slow rpm on the drill better than fast or vice versa?
test drill a piece of scrap and fit rivet , then you're ready to do finished holes
 
OP
C

cosmokenney

Well-known member
Joined
Oct 18, 2017
Messages
275
Location
Loyalton, CA
It takes a lite touch but it’s not hard. If you’re that worried take a piece of sacrificial sheet metal and drill a hole just a tad larger then the head and band it. That way if you slip you’re not into the CF.
That's a good idea!
 

tyyost

Well-known member
Joined
Jan 14, 2009
Messages
807
Location
Tunkhannock, PA
I’d follow mikedodge’s advice above and drill slightly larger than the current rivets hole and work your way out from there. Rivet sizes are pretty standard, 3/32”, 1/8”, 5/32”, 3/16”, 1/4” are the pretty standard sizes, so that should give you something to work toward.

I’d also recommend the masking as well, but given your substrate I would likely mask over the entire rivet once I determined a starting drill size. That would help with any slips and minimize the rivets tendency to start spinning.
 

Pinemarten

Well-known member
Joined
Jan 23, 2023
Messages
333
Location
Washington
A rivet should be a light drag it in the hole. The last thing you want is to enlarge the hole for the replacement rivet. Use the sizes mentioned in the post above. Drill through the head, and take a punch or the shank of the bit to snap the head off. Then punch the rivet out. Keeping the hole nice is key!

The tape is a good idea or protection from a mistake. Ease into drilling the hole, making sure you are centered.
 
To avoid these ads, REGISTER NOW!

Hohn

Well-known member
Joined
Aug 25, 2016
Messages
2,702
Location
Diesel Central, Indiana
I have those sanding disks for my air die grinder but since the base material is carbon fiber, I don't think I want the disk anywhere near the carbon. Too easy to ruin the tube with a little tiny touch of a sanding disk at full speed.
Put a several layers of painter's tape around the rivet and buy yourself some margin.
 

T45

Well-known member
Joined
Nov 20, 2014
Messages
3,253
Did you buy a caliper yet and simply measure the rivet?
 

T45

Well-known member
Joined
Nov 20, 2014
Messages
3,253
Lots of good advice here also about masking off / shielding, and alternative to drills.
 
OP
C

cosmokenney

Well-known member
Joined
Oct 18, 2017
Messages
275
Location
Loyalton, CA
Did you buy a caliper yet and simply measure the rivet?
I have three. One analog that replaced the other two battery powered ones that never turn on when I need them because the batteries are dead.

How would one measure an already installed rivet? In other words, when you see the term "1/16 inch rivet", is that referring to the mandrel or body?
 
OP
C

cosmokenney

Well-known member
Joined
Oct 18, 2017
Messages
275
Location
Loyalton, CA
Not really work better just differently.
If you tried with whatever bits you already have you'd have been done by now.
I am actually waiting on the replacement s/s rivets to come in from Italy before starting the project. Also, I have a ride planned this weekend so I cannot take the exhaust apart yet.
 

garfunkle24

Well-known member
Joined
Mar 18, 2008
Messages
3,429
Location
Saskatoon, Canada
When a size is listed it's for the body/shank, not the pin. On a motorcycle and particularly coming from Italy, they're likely metric rivets.
 

matthew

Well-known member
Joined
Dec 4, 2009
Messages
1,347
From context it sounds like these are pop rivets.

Look at the style of head, measure the head diameter, and look at McMaster-Carr drawings to get the rivet diameter. The size of the hole from the breakstem would also correlate to the rivet size. But why not just start with the size of the stem hole, add about 1/32”, and if you can’t break the head off enlarge 1/64 at a time.

Or to cut to the chase - I’d be surprised if it wasn’t 3mm or 4mm or at most 5mm. A 7/64” drill would be just a little smaller than a 3mm rivet, 9/64” for 4mm. If it appears to be 5mm then start with 11/64”, which may need to be enlarged to 3/16” but better to start small in case it’s actually a 3/16” rivet.
 
Last edited:

Hohn

Well-known member
Joined
Aug 25, 2016
Messages
2,702
Location
Diesel Central, Indiana
I have three. One analog that replaced the other two battery powered ones that never turn on when I need them because the batteries are dead.

How would one measure an already installed rivet? In other words, when you see the term "1/16 inch rivet", is that referring to the mandrel or body?
You'll find that upgrading your digitals to something name brand will pay for themselves in battery savings alone, never mind the hassle factor.

Cheap digitals leave the sensing electronics energized continuously-- that's how they maintain the constant reference. When you turn them off, only the display turns off.
It doesn't have to be mitutoyo or Mahr, it just can't be the cheapest of the cheap. Igaging is inexpensive and has proven to me to have the same long and excellent battery life of the good ones. They don't have that rolex feel of the good ones, but I can get consistent measurements from them and they're good enough for most of what I want them to do, because I recognize they aren't a micrometer and cannot do what a mic can do.
 

cannuck

Well-known member
Joined
Nov 30, 2021
Messages
4,656
Location
Rural SK
Drilling out a blind rivet depends up where the stem breaking point is located. The idea of having maximum shear strength usually means the mandrel breaks up near the face of the head, and that make drilling out....ESPECIALLY for stainless extremely difficult to keep the bit in the middle - thus the use of die grinder or abrasive disc to knock down the head.

On the electronic digital instruments diversion: You know you are looking at decent stuff when you turn it on and it is NOT zero on display. I have some Mitutoyo calipers (the good ones that never leave the shop) that still have their original batteries many years after purchase. My throwaway **** uses batteries at a stunning rate, but they also don't last themselves worth a damn. Cheap digitals are not a cost effective tool.
 

Hohn

Well-known member
Joined
Aug 25, 2016
Messages
2,702
Location
Diesel Central, Indiana
Drilling out a blind rivet depends up where the stem breaking point is located. The idea of having maximum shear strength usually means the mandrel breaks up near the face of the head, and that make drilling out....ESPECIALLY for stainless extremely difficult to keep the bit in the middle - thus the use of die grinder or abrasive disc to knock down the head.

On the electronic digital instruments diversion: You know you are looking at decent stuff when you turn it on and it is NOT zero on display. I have some Mitutoyo calipers (the good ones that never leave the shop) that still have their original batteries many years after purchase. My throwaway **** uses batteries at a stunning rate, but they also don't last themselves worth a damn. Cheap digitals are not a cost effective tool.
+1 on your caliper comment.
As for the rivets, you'll find that the break point varies greatly by rivet design. There's a lot of variation within blind rivet design.
 

Zeus36

Well-known member
Joined
Oct 1, 2016
Messages
814
Location
Ventura, California
Unfortunately, no. It is basically a cylinder. Motorcycle racing exhaust. I need to take the end cap off to repack with sound deadening material.
It would be helpful to upload a photograph of the end cap and rivets - actually the whole exhaust too. This will help with the suggestions.

Is this a factory or aftermarket system? I'm assuming aftermarket as it is a racing exhaust.... If aftermarket, you could contact the manufacturer and ask what size the rivets are. If it is a racing exhaust, why add sound deadening material? Unless you are using a racing exhaust for the street ;)

Have you considered how and what you will be replacing the fasteners with once you have repacked the muffler? Will you be using rivets or stainless or titanium screw-type fasteners to facilitate future maintenance? (Please don't say pop rivets :) These sound like blind rivets and would be tough to replace with OEM.
 
Last edited:

Leaflessshadetree

Well-known member
Joined
Aug 1, 2013
Messages
7,175
Location
Don't ask.
It would helpful to upload a photograph of the end cap and rivets - actually the whole exhaust too. This will help with the suggestions.

Is this a factory or aftermarket system? I'm assuming aftermarket as it is a racing exhaust.... If aftermarket, you could contact the manufacturer and ask what size the rivets are. If it is a racing exhaust, why add sound deadening material? Unless you are using a racing exhaust for the street ;)

Have you considered how and what you will be replacing the fasteners with once you have repacked the muffler? Will you be using rivets or stainless or titanium screw-type fasteners to facilitate future maintenance? (Please don't say pop rivets :) These sound like blind rivets and would be tough to replace with OEM.
I assumed they are pop rivets with no access to the other side. Any bit from 1/8" up to maybe 1/2" would probably work (the smaller would be a little easier).
They also could be drive screws that the OP thinks are rivets. The easy way to remove drive screws is to cut a slot and use a screwdriver.
 

AEAdam

Well-known member
Joined
May 27, 2023
Messages
2,789
Location
SE PA
We don’t buck rivets in composite. Pop rivet or soft squeeze rivet. Yes, don’t drill out rivets in composite. Drill the heads off, then CAREFULLY tap the shank out with a punch. Ok if you touch countersink the hole a tiny bit. Drill can be virtually any size, e.g. bigger than the shank is ok if you are centered.

Be careful what fastener you replace these with. You can crack the hole with a bucked rivet.

Composites are great, but you can damage them if you are careless. Keep this in mind on your next submarine voyage.
 
Last edited:
To avoid these ads, REGISTER NOW!
Top Bottom