To avoid these ads, REGISTER NOW!

Electric Box Spacer/Extension?

D45

Well-known member
Joined
Mar 21, 2014
Messages
4,836
Location
NW INDIANA
This "sunken" dual switch box is annoying me...........what can I do to have the face of the switch box flush with the paneling?

It is inside my garage:


20180103_222736_zpsli94zyky.jpg
 
To avoid these ads, REGISTER NOW!

Bad Habit

Well-known member
Joined
Mar 19, 2014
Messages
2,007
Location
Chumstick WA
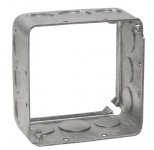
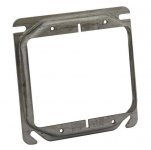
Looks to be a typical 4-S box. If you want to keep the Raised "industrial" cover you could get a 4-S-Ext box, that would push the face out ~1-1/2". Or you could use a 2 gang mud-ring of the appropriate depth to match the plywood face, then use a typical faceplate, stainless or plastic.
 
OP
D

D45

Well-known member
Joined
Mar 21, 2014
Messages
4,836
Location
NW INDIANA
I like the metal cover, so I would like to keep that

I just need a two gang mud-ring? Does the mud-ring just get screwed onto the preexisting box?

Do they sell an over sized metal plate, so that I can cover and seal up the gap in the plywood?
 

Norcal

Well-known member
Joined
Mar 16, 2008
Messages
13,769
A standard stainless steel plate may cover the opening if a raised ring of the proper depth is is used, it will be close one way or the other.
 

Bad Habit

Well-known member
Joined
Mar 19, 2014
Messages
2,007
Location
Chumstick WA
The raised cover you have mounts to the box and holds the devices, so if you want to keep that you would need the extension which will stick out from the plywood. I don't know of a shallower 4-s extension that would only extend out the ~3-4" to 1" to the face of the plywood.

A Mud Ring would hold the devices and you could could get the correct depth to match the face of the plywood, but you would then use a typical flush faceplate (which could be oversized to cover the opening). That type of faceplate then attaches to the devices, rather than the box itself.
 

zmaxmotorsports

Well-known member
Joined
Jan 11, 2013
Messages
11,948
Location
South of omaha
The raised cover you have mounts to the box and holds the devices, so if you want to keep that you would need the extension which will stick out from the plywood. I don't know of a shallower 4-s extension that would only extend out the ~3-4" to 1" to the face of the plywood.

A Mud Ring would hold the devices and you could could get the correct depth to match the face of the plywood, but you would then use a typical flush faceplate (which could be oversized to cover the opening). That type of faceplate then attaches to the devices, rather than the box itself.

:thumbup::thumbup::thumbup::thumbup:
 

Bad Habit

Well-known member
Joined
Mar 19, 2014
Messages
2,007
Location
Chumstick WA
The mud ring you posted would work, gives you some flexibility to line up with the plywood face too. You would then just use a standard faceplate. Looks like the plywood is cut close enough that you wouldn't need an oversize one
 
OP
D

D45

Well-known member
Joined
Mar 21, 2014
Messages
4,836
Location
NW INDIANA
The mud ring you posted would work, gives you some flexibility to line up with the plywood face too. You would then just use a standard faceplate. Looks like the plywood is cut close enough that you wouldn't need an oversize one

Because the two switches would then mount to this mud-ring?

I might also install new switches also at the same time, one has been giving me issues
 

Bad Habit

Well-known member
Joined
Mar 19, 2014
Messages
2,007
Location
Chumstick WA
Because the two switches would then mount to this mud-ring?


Correct If you do reuse the existing ones, double check that the mounting screws are still there (the ones on the plaster ears). Many time they get taken out when being used with a raised cover like that. (8-32 x ~3/4" I believe)
 

dscheidt

Well-known member
Joined
Apr 26, 2017
Messages
2,908
Correct If you do reuse the existing ones, double check that the mounting screws are still there (the ones on the plaster ears). Many time they get taken out when being used with a raised cover like that. (8-32 x ~3/4" I believe)

6-32 to mount a device to a box; 8-32 for the screws in corner of a box for the cover. 10-32 (usually) for the ground screw hole in the back of the box.
 

75gmck25

Well-known member
Joined
Jul 21, 2014
Messages
1,328
Location
Alexandria, VA
Standard metal mud rings come with 1/2", 5/8", 1" and 1 1/4" extensions, and I'm sure there are other versions. It seems like one of the standard ones might work to extend it out level with the wood, and then just add an oversized wall plate.

Bruce
 
OP
D

D45

Well-known member
Joined
Mar 21, 2014
Messages
4,836
Location
NW INDIANA
Isn't always a mystery what lurks behind the wall plates?

One switch is marked "663-WGU", which appears to be a 15amp 3 way made by
Legrand-Pass & Seymour under their Trademaster line..........$1.50 switch

https://www.menards.com/main/electr...5-amp-3-way-switch/663wgu/p-1444451143930.htm

The other switch is marked: "Q1303V", which I cant find any info on

As you see, there is a 2" piece of wire not even connected to anything.

If this small project turns out good, I will then move over and do the other switch/outlet box


20180106_105317_zpsbpjimoxv.jpg


20180106_105307_zpscclmia6r.jpg


20180106_105354_zpso7ewjkke.jpg
 
OP
D

D45

Well-known member
Joined
Mar 21, 2014
Messages
4,836
Location
NW INDIANA
Standard metal mud rings come with 1/2", 5/8", 1" and 1 1/4" extensions, and I'm sure there are other versions. It seems like one of the standard ones might work to extend it out level with the wood, and then just add an oversized wall plate

Thanks for the info......is the extension amount as simple as measuring from the metal box to the outer face of the siding?
 

alfredeneuman

Well-known member
Joined
Mar 3, 2011
Messages
4,590
Location
Fullerton, CA
is the extension amount as simple as measuring from the metal box to the outer face of the siding?

If you choose to use switch (mud) rings and a flush cover plate, you are required to have the box flush to, or project beyond any flammable surface (the siding).
 

mrjaw14

Well-known member
Joined
May 22, 2012
Messages
1,958
Location
Nashville, TN
These are what you're probably looking for. available at the local big box store.
 

Attachments

  • 4sext.JPG
    4sext.JPG
    31.2 KB · Views: 17
  • 4sext2.JPG
    4sext2.JPG
    35.3 KB · Views: 16
Last edited:

haptiq

Well-known member
Joined
Feb 13, 2014
Messages
84
Location
VA/NC
511bf13f1ce74ac04d5eaa4e431809d2.jpg7e74c714a8a20e068d081f41dc26d13e.jpg

I wish I had before pictures but mine were recessed slightly and the lack of overhang that left the drywall edge exposed drove me nuts. I made these with a holesaw kit, drill bits, MAC shears and some aluminum scraps from my buddies shop. It took about an hour, I spent many hours searching for the prefab fix first.
 

Attachments

  • 511bf13f1ce74ac04d5eaa4e431809d2.jpg
    511bf13f1ce74ac04d5eaa4e431809d2.jpg
    217.2 KB · Views: 0
  • 7e74c714a8a20e068d081f41dc26d13e.jpg
    7e74c714a8a20e068d081f41dc26d13e.jpg
    173.8 KB · Views: 0
To avoid these ads, REGISTER NOW!

Norcal

Well-known member
Joined
Mar 16, 2008
Messages
13,769
The siding looks like 5/8" so I would use a 3/4" raised ring.
 
OP
D

D45

Well-known member
Joined
Mar 21, 2014
Messages
4,836
Location
NW INDIANA
I bought an adjustable ring, new metal wall plate and two new commercial grade switches

I will get it installed tomorrown
 

Norcal

Well-known member
Joined
Mar 16, 2008
Messages
13,769
Isn't always a mystery what lurks behind the wall plates?

One switch is marked "663-WGU", which appears to be a 15amp 3 way made by
Legrand-Pass & Seymour under their Trademaster line..........$1.50 switch

https://www.menards.com/main/electr...5-amp-3-way-switch/663wgu/p-1444451143930.htm

The other switch is marked: "Q1303V", which I cant find any info on

As you see, there is a 2" piece of wire not even connected to anything.

If this small project turns out good, I will then move over and do the other switch/outlet box


http://i106.photobucket.com/albums/m251/D45_2006/House%20Pics/20180106_105317_zpsbpjimoxv.jpg[IMG]


[IMG]http://i106.photobucket.com/albums/m251/D45_2006/House%20Pics/20180106_105307_zpscclmia6r.jpg


http://i106.photobucket.com/albums/m251/D45_2006/House%20Pics/20180106_105354_zpso7ewjkke.jpg[IMG][/QUOTE]

That 2" tail is the result when stranded conductors are wrapped around screw.
 
OP
D

D45

Well-known member
Joined
Mar 21, 2014
Messages
4,836
Location
NW INDIANA
Meaning what......I cannot find where it broke off from or why it is there
 

mm08822

Well-known member
Joined
Jan 13, 2012
Messages
6,034
Location
NJ
Meaning what......I cannot find where it broke off from or why it is there

It is part of a method used to terminate stranded conductors under a screw without having the strands walk out from under the screwhead as it is tightened.
That 2" tail is keeping the strands together and the insulation should extend past the copper to act as an insulator.
Nothing broke off from anywhere.

You can find a thread or 2 in GJ discussing this.
 
OP
D

D45

Well-known member
Joined
Mar 21, 2014
Messages
4,836
Location
NW INDIANA
Good info to know, thanks!!

It is such a mix of color and wire (strands and solids) all over the shop, half conduit and half Romex

I see that some people also wrap the outlets and switches with electrical tape, after the connections are made

I just turned the heat on in the shop and will start working out there soon
 
OP
D

D45

Well-known member
Joined
Mar 21, 2014
Messages
4,836
Location
NW INDIANA
Adjustable ring won't work, hits some of the conduit nuts and won't recess deep enough

I just shot some foam around the two boxes (I took the other switch and outlet apart also)
Once it dries and I trim the excess back, I will measure for a normal mud ring

I am thinking 1" will work
 
OP
D

D45

Well-known member
Joined
Mar 21, 2014
Messages
4,836
Location
NW INDIANA
Do I want the extended mud ring flush with the paneling or recessed slightly
 
OP
D

D45

Well-known member
Joined
Mar 21, 2014
Messages
4,836
Location
NW INDIANA
3/4" worked about perfectly.......just need to grab one more for the other box

Thanks for all the info and input!


20180107_170539_zpszegk7lca.jpg
 

rburke65

Well-known member
Joined
Nov 10, 2007
Messages
12,349
Location
Canfield, Ohio
I would want the ring flush as it's the only thing that is going to keep your switches looking as they should when you attach the switch plate. Flush is always preferred. This is why you should have decided ....on a new build.....on the thickness of your finish wall material (drywall, OSB, etc) before you set the depth of you boxes.
 
Last edited:

Norcal

Well-known member
Joined
Mar 16, 2008
Messages
13,769
W/ rings, add 1/8" to the finish material thickness, for example: 5/8" use 3/4", for 1/2" use 5/8", this allows the ring to be flush with the finished surface, and not have floating devices.
 

PoorOwner

Well-known member
Joined
Feb 10, 2007
Messages
5,032
Location
CA
It's marked "Eagle"

20180110_204330_zps6dk6bfl9.jpg

Does anyone know how the ground get broken off a chunk like that. My house has some of this and it’s almost like someone deliberately go around and done it with a plier. Is it dangerous?
 

Bad Habit

Well-known member
Joined
Mar 19, 2014
Messages
2,007
Location
Chumstick WA
30+ years of the ground prong hitting it being inserted and/or when being yanked out. Probably at a slight enough angle that it just snapped off that section eventually. It's just the plastic/lexan face, the contact should be still in place
 
OP
D

D45

Well-known member
Joined
Mar 21, 2014
Messages
4,836
Location
NW INDIANA
Good info the know, especially how old it is!

Glad I swapped in a new outlet
 
To avoid these ads, REGISTER NOW!
Top Bottom