I couldn't sleep so here is my long winded reply....
What brand and color of paint did you use for the saw and the guards
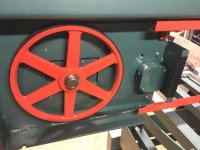
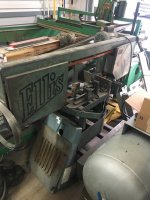
The factory Ellis paint is a green hammered type finish. I tried to replicate it by using Rustoleum Hammered Verde Green. I have had mixed luck with the hammered paints and in this case it was not worth the hassel of spray bombs for such a large area and the hammered effect was faint. I probably used $100 worth and halfway through you could not buy the Verde Green anywhere and had to get some off an eBay reseller to finish. Its back on Amazon now at least, I thought it had been discontinued. On the 1800 I am just going to get a gallon of alkyd enamel from SW color matched and spray it through the pressure pot. I dont think they make the hammered paint the same as 15-20 years ago, it used to be a lot tougher and had a stronger hammered effect but the stuff now not so much. SW has one in their industrial line I want to try but its only premixed and more of a blue. The orange is Kabota Orange implement paint from Tractor Supply. That I would do again for how small of an area it was.
Did you buy a new Ellis decal
Friends wife cut it out of vinyl on her craft cutter. I attached a PDF of the logo cut path I made by tracing a scaled picture of the original in AutoCAD. The E got offset on mine when placing it on, if you didnt notice before you will now. I may redo it since I ended up buying one of the cutters myself since. My wife makes fun of me for it, but its been a great shop tool!
How did you clean up the machined surfaces
Since its not really a precision machine and almost all of it is painted I used more aggressive methods. Purple power and green scotch brite to start, wire wheel to remove 2 previous paint jobs on the big pieces and steel grit blast on the parts that would fit in the blast cabinet. On the bare steel back plates I DA sanded them after blasting then straight sanded for grain and oiled after painting. The aluminum base was almost cut in half so I milled out the cutup contaminated metal then used aluminum stick weld to fill it back in, milled back flush and sandblasted.
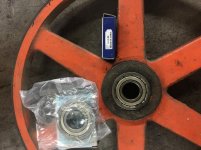
Is there any issue with buying cheap bearings from an online retailer, or do I need to buy top notch stuff? Is there anything special about the bearing axles or are they basically just bolts? Also, do you know the bearing numbers for the miter pivot portion? Is there a bearing in the head drop joint?
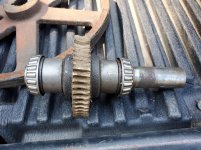
I bought cheapest ones I could find that met the original specs. They still are not cheap though since they are double row steel shielded bearings. I think I got them online from VBX or somewhere like that. The pivot bearings on mine were fine so I reinstalled them. If you pull them off you should be able to read the model number on the race if you look real close or with a magnifying glass. The bearing axles are just bolts. There are very few machined parts on these other than the base castings. The drop head has bronze bushings I think but cant remember exactly, definitely no ball bearings, may even just be steel sleeved.
If I blow this apart for paint, is there anything special about putting it back together?
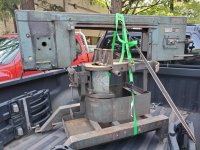
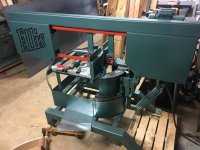
I had the advantage of having a second one sitting there for reference so its easy to say no, but they are really basic saws when you get to it. I like to work in chunks and try not to disassemble a bunch of small pieces at once. Take the head off and set it aside, do the base swivel and table, then move on to the head, get it mounted, do the motor and gearbox, finish with the blade guides.
My 2 cents, get it running before tearing it down, even if you dont have a down feed cylinder. Find a replacement gearbox before doing anything else and get it roughed in enough to test other issues that could be fixed along the way.
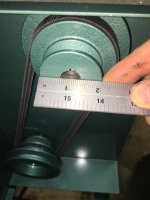
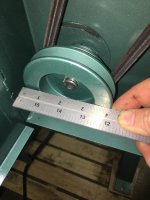
Finally, can you tell me the depth of the v-groove in your pulleys at all 3 positions and what the 2nd grove measures? Is there any reason I can't just buy generic pulleys that have the same measurements and shift diameter? I looked at an Ellis one and the measurements were different. Maybe like 3.62" is ringing a bell instead of 4". Are yours original?
Little less than 1/2", 0.47" or something. I have only ever measured pulleys/sheaves by OD and belt width. You may be referring to the pitch rather than the OD with the 3.62" measurement. I doubt it is a 3-5/8" OD but its possible. I dont know if they are original, but on the two saws I have both use a 4" 3-step steel sheave. Note steel/cast iron, diecast/zinc is also available for less money but I would not recommend that.
https://www.masterdrives.com/sheaves/Step Pulleys.pdf
https://www.rainbowprecisionproducts.com/mas42-5/8_step_v_belt_pulley
or
https://www.mrosupply.com/sheaves/step-sheaves/2485845_aks42-58_masterdrive/
Is the chip brush anything special? It looks like a wire wheel you'd chuck up in a drill.
Its a wire wheel you'd chuck up in a drill with a bronze bushing slid over the shaft and a small piece of weld to hold it on. I need to make one still.
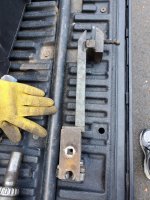
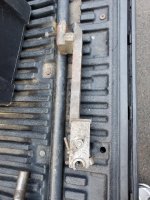
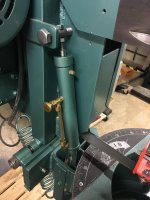
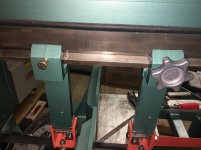
Can you send measurements of the downfeed
Pin to pin is 11-1/2". I have read some guys use a double acting pneumatic cylinder with the ports valved together to accomplish the same thing.
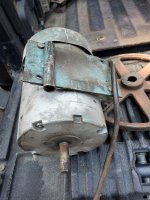
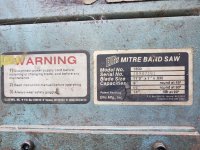
Any info on the on/off switch or how the auto shutoff is formed
Its just a cheap toggle switch with a threaded barrel that goes trough the small hole inside that 4" box with a piece of flat bar that slides up and down to turn it off. Thats what the arch in front is for, the sliding bar hits it and turns the switch off. I tried to load a video but I guess you cant do that.
Both saws I bought had the factory switch removed and a light switch in its place if that tells you something.