To avoid these ads, REGISTER NOW!

epoxy coated VCT install, plus extras

atlm

Well-known member
Joined
Jun 4, 2010
Messages
344
In 2008, my wife and I found our current home. It was a bank-owned foreclosure with significant damage to the interior. But it had the 3-car garage we needed, it was only 5 years old, all brick, and had the perfect floor plan for us. After a bidding war drove the price way up, and a lot of unnecessary stress dealing with the bank (owner), we bought it and then (luckily) sold our previous house. Two years, a pile of money, and an unbelievable amount of (my free) labor later, all repairs (and a few upgrades) were finally done.

Then my wife says, "You should build your dream garage." Yes, she's super awesome.

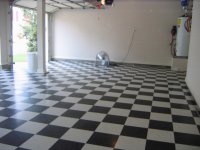
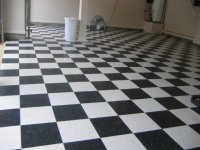
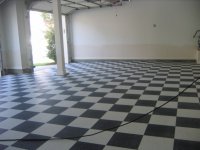
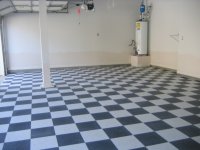
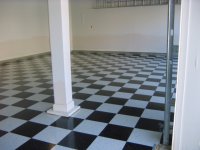
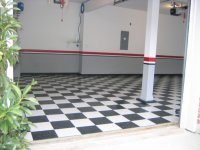
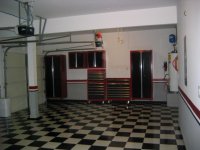
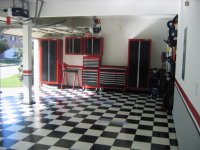
After reading these forums for quite a while and getting floor samples in the mail, we decided we liked the black and white checkered pattern the best, and the solid feel of VCT. Since motorcycles were in the equation, we chose a topcoat of clear epoxy with grip additive.

After 7 straight weeks of labor and a whole lot more spent than planned, here are the pictures for your enjoyment.

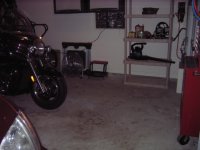
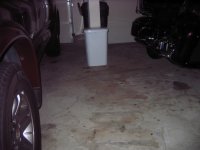
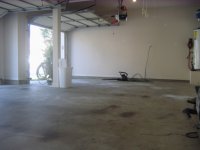
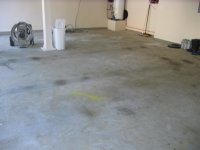
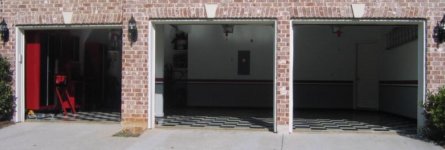
These first few pictures are "before", after most of the stuff had been moved out of the garage to the living room. The floor just plain looked gross to me.
 

Attachments

  • IMG_2556.JPG
    IMG_2556.JPG
    117.8 KB · Views: 228
  • IMG_2558.JPG
    IMG_2558.JPG
    110.5 KB · Views: 199
  • IMG_2559.JPG
    IMG_2559.JPG
    98.5 KB · Views: 205
  • IMG_2560.JPG
    IMG_2560.JPG
    95.3 KB · Views: 220
Last edited:
To avoid these ads, REGISTER NOW!
OP
A

atlm

Well-known member
Joined
Jun 4, 2010
Messages
344
Garage emptied, worst oil spots treated with Pour-N-Restore (which I wasn't thrilled with).

I purchased 3 gallons of BondLok, 3 gallons of Behr's #990 non-etching floor cleaner, Feather Finish, a watering can, a mop, a squeegie, and a large plastic broom. Since those chemicals are toxic and nasty, I also purchased the 3M respirator suggested in these forums, a pair of rubber boots, and a pair of arm-length rubber gloves.

Total time to empty stuff out of garage, treat with P-N-R, and buy chemicals, protective equipment and tools: about 28 hours (one entire weekend plus a few afternoons), including moving the motorcycle and trailer to a neighbor's house.
 

Attachments

  • IMG_2564.JPG
    IMG_2564.JPG
    93.3 KB · Views: 147
  • IMG_2563.JPG
    IMG_2563.JPG
    85 KB · Views: 128
  • IMG_2562.JPG
    IMG_2562.JPG
    97.5 KB · Views: 146
Last edited:
OP
A

atlm

Well-known member
Joined
Jun 4, 2010
Messages
344
I rented a floor buffer from HD. I used both the BondLok and the Behr 990 (at different times) on the oil spots. The worst spots were the tire marks. The oil just kept coming and coming. My method was to pour the product on the spots full strength using a water can and then use the floor buffer with scrubbing pad to scrub the entire area. Then I rinsed, squeegied, and repeated until I saw no more dark brown puddles after pouring the chemicals.

Once that was done, I wet the floor and sprinkled BondLok over the whole floor and buffed again. Then I washed, rinsed, squeegied, and repeated with the Behr 990. Then I pressure washed to make sure the rinse was thorough.

The BondLok outperformed the Behr product by far. After pouring the Behr product and getting no more oil out, I rinsed, squeegied and repeated with BondLok, and more oil came out. I would not recommend the Behr product unless you really don't want to etch the concrete for some reason, and are using it simply to clean, rather than to prep for topcoat.

I then filled in all the cracks, smoothed out rough areas, and leveled a couple of spots using Feather Finish. That stuff is awesome. These are pics after that process. The dark spots are blemishes in the concrete - no oil came from them.

I trimmed the wood at the bottom of the support post so the tile could go under it. I trimmed the sides of the water heater support for the same purpose. I removed the wood support under the step going into the house.

Total time to clean and repair floor, pick up/drop off floor machine, and trim stuff: about 27 hours (3 days).
 

Attachments

  • IMG_2565.JPG
    IMG_2565.JPG
    87.9 KB · Views: 171
  • IMG_2567.JPG
    IMG_2567.JPG
    81.9 KB · Views: 193
Last edited:
OP
A

atlm

Well-known member
Joined
Jun 4, 2010
Messages
344
I set up my chalk lines to start with an almost full tile row by the doors. I'm glad I did, as I think the look from the front is great. I used the pyramid install method described in these forums. I used Armstrong 750 glue, spreading it first over the 2 car bays. After installing a bunch of tile and realizing I could finish it in one day, I spread the glue in the bike/work bay. To trim the edge pieces, I used the tile trim tool from HD. That saved me many hours and is highly recommended. I rolled the tile with a (rented) 100lb floor roller from HD the night of the installation, and again the next morning.

Notes: I special ordered the tiles and glue from HD. The tiles arrived on time, but not the glue. HD also did not carry the correct size notched trowel for the glue. Neither did Ace nor 2 flooring stores I tried. Lowes had the glue and the trowels in stock. I went through 3 trowels while applying the glue. The concrete floor sanded them down during application, making the notches smaller.

This is the completed tile install the next day. There were 2 tile corners sticking up a tiny bit, probably from a small glue lump. That's the reason for the weights, which fixed it.

Total time to order and pick up VCT, find and buy glue and trowels: 9 hours (a few afternoons)
Total time to glue, tile, roll, and pick up/drop off roller: about 24 hours (one day and a few morning hours).
 

Attachments

  • IMG_2578.JPG
    IMG_2578.JPG
    112.9 KB · Views: 339
  • IMG_2579.JPG
    IMG_2579.JPG
    134 KB · Views: 312
  • IMG_2580.JPG
    IMG_2580.JPG
    125.7 KB · Views: 312
Last edited:
OP
A

atlm

Well-known member
Joined
Jun 4, 2010
Messages
344
While letting the glue and tile bond for 3 days, as the instructions suggest, I decided the yellowy/peachy wall color had to go. I originally planned to just run a trim stripe. Being obsessive/compulsive, plans changed. So I painted the entire garage a cool white that is close to the white on the tiles. That, of course, meant removing everything from the walls, including the air lines, hose reels, etc., plus taping, etc., etc.

Once the ceiling and walls were repainted, I noticed the wood supports around the garage doors looked unfinished, so they all had to have every seam caulked which gave them a very clean look.

I then rented a floor buffer from HD (again) and used Zep stripper to remove the wax that comes on the tiles from the factory. I also bought a string mop and 2 large plastic buckets for the diluted stripper mix and the rinse water. Following the instructions, I spread the diluted stripper on the floor with the mop, waited a few minutes, used the buffer with pad to get the wax off, rinsed, squeegied, and repeated.

I originally didn't know the tile came with wax on it, but boy am I glad I was told and stripped it off. Lots of white yuk in the driveway afterwards.

I then returned the buffer and rented a floor sander. I sanded the entire floor with 80 grit. To clean off the dust, I sponge mopped, then hosed the entire floor and squeegied, and then sponge mopped again.

Here are the walls painted white and the floor stripped, sanded, and cleaned.

Total time to remove everything from the walls and prep for paint, paint, caulk, and put everything back up: 34 hours (4 days).
Total time to strip, sand, clean, and pick up/drop off rentals: 11 hours (1 day)
 

Attachments

  • IMG_2583.JPG
    IMG_2583.JPG
    115.3 KB · Views: 201
  • IMG_2582.JPG
    IMG_2582.JPG
    112.8 KB · Views: 199
  • IMG_2581.JPG
    IMG_2581.JPG
    110.5 KB · Views: 207
Last edited:
OP
A

atlm

Well-known member
Joined
Jun 4, 2010
Messages
344
At the front edge of the tiles by the doors, I had cut out a 1" wide notch when I installed the tiles. I installed 1" x 1/8" x 8' aluminum strips in the notch using the PL glue in the yellow tube, as someone else did in their garage. Since the floor wasn't perfectly flat at the doors, the strips had to be held down with multiple weights and held against the edge of the tiles with duct tape. That turned a simple task into a half day affair.

Later that night and the next day, the excess PL glue that had squirted out when the aluminum was weighted down was cleaned up with a putty knife, a utility knife, flat razor blades, mineral spirits, and a lot of scrubbing. That was another 1/2 day affair.

The decision to use clear epoxy as a finish was made because of the multiple warnings about VCT being slippery. With the motorcycles, I didn't want the risk of wiping out while coming into the garage from the rain. I also didn't want my wife slipping and hurting herself.

I chose the Quikrete clear epoxy product for 3 main reasons. One was that at least 2 other people in these forums used it over the same VCT tile with success. The second was that it was available locally, and I didn't want any complications due to shipping mishaps. The third was that it goes down white, which prevents spots from being missed.

The kits come with some anti-slip additive, but with the motorcycles, I decided more was better, so I bought more.

After a full day to dry after the stripping/sanding/rinsing (100 degress outside, with a fan circulating air), I put down the epoxy clear coat. The extra anti-skid packages had about twice as much in them as the bags that came with the kit. So I used 1/2 pack of extra anti-skid with each kit, doubling the amount that came with them. 2 clear epoxy kits just covered the 3 bays. I also hand-brushed the front concrete lip of each bay.

Here's the floor with the epoxy finish. Shiiiinnnnneeeeyyy! In the last picture you can see the texture with the non-slip added.

Total time to buy epoxy kits, anti-skid, heavy duty roller frame, extension pole, high quality rollers, aluminum strips, glue, and duct tape: 7 hours (2 days)
Total time to install aluminum strips: 8 hours (1 day)
Total time to put down epoxy clearcoat: 7 hours (1 day)
 

Attachments

  • IMG_2584.JPG
    IMG_2584.JPG
    115 KB · Views: 306
  • IMG_2585.JPG
    IMG_2585.JPG
    109.9 KB · Views: 287
  • IMG_2586.JPG
    IMG_2586.JPG
    126 KB · Views: 377
  • IMG_2587.JPG
    IMG_2587.JPG
    120.9 KB · Views: 393
Last edited:
OP
A

atlm

Well-known member
Joined
Jun 4, 2010
Messages
344
Then it was time to finish the paint job. After playing with colors and patterns in PaintBrush, I chose this scheme. Trying to find a nice deep red that somewhat matched the Craftsman cabinets I had purchased (stacked in the living room) was difficult. The rest was just time consuming.

I used a spinning laser level on a tripod in the middle of the garage floor to tape for the stripes, to make sure they were perfectly straight and at the same level everywhere. I used Frog Tape for the first time for the stripes. I've painted a LOT, and I've never seen clean lines like this. Highly recommended.

Total time to find and buy the right paint colors and an affordable laser level: 5 hours (2 days)
Total time to tape for stripes: 4 hours (1 evening)
Total time to paint the gray/black/red/black: 14 hours (3 days)
 

Attachments

  • IMG_2594.JPG
    IMG_2594.JPG
    121.9 KB · Views: 295
  • IMG_2598.JPG
    IMG_2598.JPG
    127.3 KB · Views: 244
Last edited:
OP
A

atlm

Well-known member
Joined
Jun 4, 2010
Messages
344
I purchased Craftsman cabinets when they went on a web sale. I chose them because the red/black would be the color scheme. Although designed to be floor standing, I wall-mounted the larger cabinets. I like stuff off of the floor for easier cleaning. Plus I think it looks better. The studs in the walls somewhat dictated their positions.

I had originally measured cabinet height clearance using the top panel of the garage door. After the cabinets were mounted, I re-tested the garage door opening, and the second panel hit the top of the left cabinet! I then noticed that the roller wheels on the top panel are mounted differently than on the other panels, so the other panels interfere more. D'oh!

So I removed the cabinets, filled the holes, repainted the wall, and supported the cabinet in place with shims, opening and closing the garage door for fit. It couldn't go left or right because it's 32" wide and had to be centered on the studs. After a couple of hours, I mounted it. It has 1/8" clearance on the top left, and is wedged on the top of the wood trim on the bottom. Plenty of room!

Then I remounted the right cabinet at the same height, and the small cabinets with the tops level with the large ones.

Once all that once in place, I realized there wasn't enough room under the small cabinets to work. That's where I was going to put a bench. So I tried to move the rollaway under the cabinets, but they were about an inch too low. Time to remove the smaller cabinets, fix the holes, repaint (again), and remount them slightly higher.

Total time assembling the cabinets, mounting the cabinets, remounting cabinets, filling holes, repainting, etc.: 30 hours (4 days)
 

Attachments

  • IMG_2599.JPG
    IMG_2599.JPG
    125.8 KB · Views: 335
  • IMG_2607.JPG
    IMG_2607.JPG
    138.9 KB · Views: 388
Last edited:
OP
A

atlm

Well-known member
Joined
Jun 4, 2010
Messages
344
With the cabinets and toolbox in place, I needed counter space. I also needed more drawers for tools.

I had previously purchased a Craftsman ball bearing rollaway set (also sitting in my living room), similar my very old Homak seen in the picture. With garage real estate being a valuable commodity, I decided instead to use a large rollaway bottom cabinet for double-duty.

I played in PaintBrush (again) and came up with the first picture, showing what the US General 41" roller should look like if painted to match. It's a cut and paste and stretch of the bottom half of my existing tool box. The second pic is the actual result. Pretty good, eh?

FYI, the vise mount is something I welded together about 15 years ago. It's an I-beam with 2" steel pipe legs. Yes, it weighs a lot. I painted it to match, also.

Total time to fiddle in PaintBrush, buy primer and paint, mod the Homak to open drawers with the lid closed, and clean and paint the vise stand: 8 hours (3 days)
Total time to sand, clean, prime, tape, and paint the 41" US General: 18 hours (4 days)
 

Attachments

  • IMG_2607-tb.JPG
    IMG_2607-tb.JPG
    127.9 KB · Views: 280
  • IMG_2610.JPG
    IMG_2610.JPG
    145.2 KB · Views: 362
Last edited:
OP
A

atlm

Well-known member
Joined
Jun 4, 2010
Messages
344
View from outside (sorry for the poor lighting). Yes, I need to plant a bush between the left 2 bays. That's planned for next month.
 

Attachments

  • IMG_2611.JPG
    IMG_2611.JPG
    42 KB · Views: 333
Last edited:
OP
A

atlm

Well-known member
Joined
Jun 4, 2010
Messages
344
The rear wall became the new home for the motorcycle trailer (Kendon stand up model). It used to be on the wall up front, by the garage door.

A red Lincoln cover for the Lincoln welder just arrived in the mail. The duct tape plastic bag is done serving its temporary purpose! The blue HF welding cart will be painted red or black. The stereo system will be mounted to the wall to the left of the compressor and vacuum once the speakers are painted black to match.

To prevent the tires from staining the floor, I am using clear vinyl runner material from HD - the stuff with no spikes on the bottom. It virtually disappears from view when the cars are parked, and is working as planned. Highly recommended!
 

Attachments

  • IMG_2617.jpg
    IMG_2617.jpg
    82.5 KB · Views: 291
  • IMG_2619.JPG
    IMG_2619.JPG
    133.5 KB · Views: 316
Last edited:
OP
A

atlm

Well-known member
Joined
Jun 4, 2010
Messages
344
I'd like to thank the people in this forum for the assistance and knowledge you've shared in your posts, and the information some of you gave me in emails and PMs. They were extemely valuable to me.

Cheers! :beer:
 

Munich77

Well-known member
Joined
Jul 19, 2009
Messages
261
Location
Silver Spring, MD
Wow that turned out great. I would be interested in hearing how the VCT and epoxy combo holds up. Out of all of the choices out there it seems to be the best to me.
 

aqr81

Well-known member
Joined
Jul 20, 2010
Messages
1,127
Location
Central Valley, Ca.
Your garage space turned out really good. You put in a lot of effort and the results show. Nice choice of colors. Thank you for taking the time to document the process and post up the pics. Very detailed and informative. (You didn't account for that time however :))
 
Joined
Aug 20, 2009
Messages
16
Location
New Jersey
Your garage look fantastic! Thanks for taking the time and sharing your experience and process. This is the direction I am hoping to go and you made it that much easier for me. Enjoy your garage and be proud of it. You did a great job!
 

Hooked

Well-known member
Joined
Sep 24, 2010
Messages
423
Location
League City, Texas
I just found this forum today and already see loads of ideas for helping me organize things in my garage and workshop.

The work you did here is great. Thank you for the detailed writeup.

I would like to offer a suggestion for hanging your cabinets which provides more flexibility in where they are located. There is a technique used by many workworkers called French Cleat. Very effective and provides versatility in mounting cabinets, etc. on walls. Just google it and you'll find good descriptions of how it works and how to install.
 

Gottspd

Well-known member
Joined
Aug 2, 2010
Messages
116
ATLM,

Your garage looks amazing. May I ask, however, why you choose this floor over racedeck? It seems like the racedeck would have accomplished the same visual effect at a fraction of the level of install effort.
 
Joined
Jun 23, 2009
Messages
8
Your garage looks great! I am doing my garage now, I am going to put epoxy over my tiles when I the time comes.
 
To avoid these ads, REGISTER NOW!
OP
A

atlm

Well-known member
Joined
Jun 4, 2010
Messages
344
Wow that turned out great. I would be interested in hearing how the VCT and epoxy combo holds up. Out of all of the choices out there it seems to be the best to me.

I waited for 3 weeks after the epoxy went down before bringing in the vehicles. After a month of driving in and out, the epoxy and tile show no signs of wear whatsoever. I've moved the toolboxes around, including the tall one full of tools, and the wheels left no marks. I'm glad I put in the extra anti-skid. The floor had a nice texture and is not slippery at all.

I'll post an update farther into the future, but so far it looks promising. I also received an email from one of the other people in this forum who used VCT and the same clear epoxy (a few years ago), and he said his floor still looks great.
 
OP
A

atlm

Well-known member
Joined
Jun 4, 2010
Messages
344
I just found this forum today and already see loads of ideas for helping me organize things in my garage and workshop.

The work you did here is great. Thank you for the detailed writeup.

I would like to offer a suggestion for hanging your cabinets which provides more flexibility in where they are located. There is a technique used by many workworkers called French Cleat. Very effective and provides versatility in mounting cabinets, etc. on walls. Just google it and you'll find good descriptions of how it works and how to install.

Thanks for the French cleat suggestion. For mounting the cabinets, I actually considered using brackets or French cleats, but chose not to for 2 reasons. The first is that I wanted the cabinets flush up against the wall, without any gaps, for both aesthetics and to avoid a potential home for dirt, spiders, etc. The second is that I put a lot of heavy stuff in them, like paint, a drill press, etc., and I didn't feel comfortable having them supported by only one or two places. They're made of somewhat thin metal, which could tear. So each large cabinet is fastened to the wall with (8) lag bolts with large washers to spread the load. The bolts go through the side panels, which have notches which support the shelves, which is all the weight. Yes I'm sure it's overkill, but I sleep better at night!
 
Last edited:
OP
A

atlm

Well-known member
Joined
Jun 4, 2010
Messages
344
ATLM,

Your garage looks amazing. May I ask, however, why you choose this floor over racedeck? It seems like the racedeck would have accomplished the same visual effect at a fraction of the level of install effort.

Why I chose VCT is a bit of a long answer, as I debated the pros and cons of all options (VCT, epoxy, RaceDeck, porcelain tile) for quite a while before making my decision. But you asked, so here goes.

Yes, RaceDeck would have been much less work for the floor. It's also easy to replace if it gets damaged, and I seriously considered it for those reasons. I've had RaceDeck in my gym (under the heavy equipment, on top of carpet) for a few years, and like it for that purpose. There are 4 things I don't like about it for a garage, though. One is the hollow clackety-clack feeling of it on concrete. The second is the small gaps between the tiles that allow the floor to be seen below (worse when it's cold and on cheaper products). The third is that it expands and contracts significantly with temperature changes, causing a bit of a wrinkle between vehicles when it's really hot, and pulling a gap around the edges when it's cold. The fourth is the way the front edge (by the garage door) shows that something was put down on top of the floor, rather than it being the floor. I realize those things are all nit-picking, and I'm in no way implying that it wouldn't be great for someone else. I realize the clickety-clack part and the seeing between the tiles part could be fixed by putting landscaping mat or something similar under the RaceDeck. But in the end, I realized I was only considering using it because it would have been easy to install, not because it's what I really wanted. It might be a similar visual effect in photos, but in person, VCT and RaceDeck look and feel very different. Again, this is not knocking RaceDeck. It's a high quality, rugged product. But to me, it just doesn't have the finished look or solid feel I wanted.

I eliminated colored epoxy as a choice primarily because my wife and I both love the black and white checkered look, and I didn't want to try to do that with epoxy. It can be done, but I don't think it would look as good as the tiles look, and it would have been even more work. I was also slightly concerned with the possibility of hot tire lift or some other disaster.

Porcelain tile got scratched as a choice almost solely due to price, again due to color. Textured black and white porcelain tile is very expensive. If I didn't care about the color and could have purchased whatever was on sale, it would have been a top contender.
 

TheShrine

Well-known member
Joined
Oct 27, 2008
Messages
1,168
Location
Texas Hill Country
Good looking garage!:rocker:

Now that you have the clear coat down are you finding that the floor shows EVERY foot print on it? Mine is done the same way and I have given up! The floors aren't necessarily dirty, with debris everywhere, they are mostly dusty. At some angles and at certain times of day it looks like never clean them.

I'm considering re-doing the epoxy and VCT and not doing the clear. We have been in a drought here so that certainly adds to the dust but it's driving me crazy!:eyecrazy:

What have you experienced? Again, good looking garage!
 
OP
A

atlm

Well-known member
Joined
Jun 4, 2010
Messages
344
Great Garage!!!! Just one question: How do you use that shop vac with it up there!?

The shop vac doesn't weigh much, so I just grab it by the wheels. The gray and black cabinet above the table saw, though, is too high to reach without a step stool. It's for things I only use once every few years.
 
OP
A

atlm

Well-known member
Joined
Jun 4, 2010
Messages
344
Good looking garage!:rocker:

Now that you have the clear coat down are you finding that the floor shows EVERY foot print on it? Mine is done the same way and I have given up! The floors aren't necessarily dirty, with debris everywhere,

Odd. I don't have foot prints anywhere. No dust, either. It still looks spotless. I'm in a subdivision in a very populated area, though, and there's really no dust to speak of, even during droughts.

Is your floor smooth or did you use the anti-skid additive? A smooth, mirror-like finish would tend to show every imperfection, like dings or dust on a shiny dark colored car. The double-dose of anti-skid I used gives the floor a bit of a texture. When the sunlight comes in horizontally in the evening, you see the glitter of the texture, which I think looks really cool. I should take a picture one night.
 

SteveB

Well-known member
Joined
Dec 31, 2005
Messages
107
Location
Okanagan Valley BC Canada
I did my VCT garage floor in 2006. Had I known of epoxy coating I probably would have gone that route. When my wax needs to be stripped within the next year or so I'll probably lay down some clear epoxy with anti-skid as well.

Well done and nicely documented. Thanks for the ideas.
 

roger55

Well-known member
Joined
Mar 19, 2006
Messages
595
Location
Fort Collins, CO
Very well done! And it looks stunning.

Sorry to bring up a negative point but, I have one big concern and that will be yellowing of the epoxy on the white tiles where they will get sunlight (thru the windows and near your open doors). Naturally this will not happen overnight. But, I would like to hear from you on this thread a year from now and beyond if this does happen or not.

I don't know if your Quikrete clear advertises that it has any UV protection but I don't know of any clear epoxy that won't yellow in sunlight. I've just heard that some are better than others.

Fluorescent lights also emit UV radiation but not near as much as sunlight does. However, it can still have an effect on epoxy.

I would make a control tile by putting the clear epoxy over a white tile and store it in the dark.

From what I know, I would discourage the use of white tiles under epoxy. You could get away with yellowing with other colors though. If it has to be white, I would consider some other clear product like a 2 part urethane or a polyaspartic polyurea rather than a clear epoxy. I'm not sure about adhesion on VCT with those other products though.

With your prepping the tiles with 80 grit and coating with epoxy, adhesion should not be a problem.
 

jdaallen

Well-known member
Joined
Mar 22, 2009
Messages
178
Location
Castle Rock, Colorado
The floor is great. I just completed a 1100 sq. ft. garage this spring and will be doing the interior this winter. I think you've sold me on the VCT/Epoxy floor. Only concern I have with your garage is the placement of the gas water heater. I don't know what your local building codes are but every location I've ever worked in that is noncompliant and un safe. It should be in an enclosure (it's own room) with it's own combustion air inlet.
Take Care
 
OP
A

atlm

Well-known member
Joined
Jun 4, 2010
Messages
344
Very well done! And it looks stunning.

Sorry to bring up a negative point but, I have one big concern and that will be yellowing of the epoxy on the white tiles where they will get sunlight (thru the windows and near your open doors). Naturally this will not happen overnight. But, I would like to hear from you on this thread a year from now and beyond if this does happen or not.

Thank you for the words of caution. Before choosing the finish, I had read in these forums about the sunlight causing yellowing of clear epoxies, some much worse than others. My garage has no windows, which I like for security reasons. The only time sun light gets in is when the garage doors are open, when driving in and out, welding, or using stinky chemicals.

The posts I've found about yellowing seem to be mainly on the thicker, higher solids epoxies. I'm guessing the yellowing looks worse on those because there's more product there, but I'm not a chemist so it's just a guess. I actually don't remember any posts complaining about yellowing of the Quikrete or Rustoleum products, but I could have missed them.

I will do future posts with updates on how it holds up, and will include noticeable yellowing if it occurs.
 
Last edited:
OP
A

atlm

Well-known member
Joined
Jun 4, 2010
Messages
344
I did my VCT garage floor in 2006. Had I known of epoxy coating I probably would have gone that route. When my wax needs to be stripped within the next year or so I'll probably lay down some clear epoxy with anti-skid as well.

Well done and nicely documented. Thanks for the ideas.

Thanks! BTW, your posts were some of the ones that helped convince me to go with VCT.
 
Last edited:

AndrewBigA

Well-known member
Joined
Oct 28, 2009
Messages
763
Location
LONG ISLAND, NY
im thinking about doing this in my detail shop but i dont know if it will hold up. the amount of traffic that i have on my floor each day is alot more than if you moved your car in & out of your garage a few times a day.

what is the durability of this stuff? can anyone tell me? ive read about people using 2 layers of tile then sealing everything with a few layers of clear.

thanks, sorry to thread jack lol.

btwy

your garage looks fkin awsome!!!!!!
 

Redshift

Well-known member
Joined
Aug 4, 2010
Messages
105
Well, my hopes for possibly doing this in my garage are shot. I contacted Armstrong, maker of VCT tiles, asking them which series they thought would be best for a light-use garage application (I used epoxy in the shop garage, but for the parking area, I thought VCT would look slick). Their response:

Thank you for contacting Armstrong World Industries, Inc. We do not
recommend any of our products to be installed in a garage application. I
apologize if this has caused you any inconvenience. Please see the
insert below for a more detailed explanation on why we do not recommend
this.

In order for flooring materials to be installed in residential or
commercial garages, the flooring material must meet the International
Residential Code R 309 for Garages and Carports for one and two family
residential buildings or the International Building Code 406.2 for all
other buildings. The codes outline garage floor surfaces shall be of
approved noncombustible material. Armstrong flooring products do not
meet this standard and therefore should not be installed in parking
garage areas where vehicles will be parked on the surface of the
Armstrong floor.

In addition Armstrong flooring should only be installed in
temperature-controlled environments. Normally garages are not
temperature controlled areas. After installation, the temperature should
be maintained at a minimum of 55 degrees. Most garage floors have had
gas and oil dripped or spilled on them. This residue in the substrate
will inhibit the adhesive from working properly. Automobile fluids, such
as brake, transmission and oil, if leaked onto the resilient flooring
can get into the joints of the tile and break down the adhesive creating
a bonding issue and a possible installation failure. The oils and
antioxidants used in the manufacturing process of rubber tires will
cause a permanent yellow discoloration to any resilient (vinyl)
flooring. Also, exposure to the moisture from rain, snow or sleet and
varying temperatures will have a damaging affect on both tile and sheet
flooring.
 

JohnJL

Well-known member
Joined
Jul 28, 2010
Messages
150
Location
Toronto
One of the nice things about VCT is cutting out/replacing tiles when they get damaged. Can you still do that it its been epoxy top-coated? Can you still score the topcoat, lift out the old tile, put in a new one, then feather/sand the topcoat seam and re-seal?
 
To avoid these ads, REGISTER NOW!
Top Bottom