Re: Epoxy Coating over pitted concrete - COATING COMPLETE!
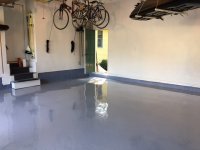
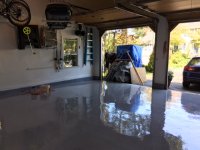
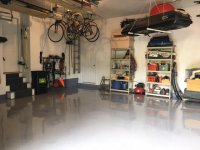
Following a couple of weeks of start/stop floor prep, and agonizing over etching/grinding; priming or not; and which product(s) for patching pitted areas, I finished the floor coating the other day! (pictures attached) After using the acid etch which came with the Epoxy Coat Full Premium Kit (Medium Gray color coat, and clear coat), I ended up renting a Diamond Grinder. The acid etch just didn't seem to have much effect on the cement. Patched the pitted areas with Rust-Oleum Concrete Patch & Repair (5 kits) - expensive, but easy to work with and left a nice smooth finish. Also tried Epoxy-Coat Pave Patch with aggregate - seems like a good option for deeper holes/pitting, but for shallow pitting the recommended aggregate amount resulted in an overly "grainy" mix which I ended up having to grind down with my 4 1/2" angle grinder w/diamond grinder blade before coating. Also went with recommendations above to use a primer - Legacy Industrial Standard Primer - 55% solids, Dark Gray. I feel this resulted in a better surface for the Epoxy-Coat with a more uniform color & porosity to accept the coating. Not sure why Epoxy-Coat recommends against primer, just seems to make sense, and I believe resulted in a better finish for my floor.
On to the actual coating:
Day 1: Primer coat - took about an hour for final sweep & shop vac of floor, tape edges, and applying primer using 9" roller. I skipped the roller pan and dipped right into the 5-gallon bucket which I used to blend the two-part epoxy primer.
Day 2: 20 hours after primer, color coat went smoothly, great product to work with! Dump on floor near the back wall, spread with squeegee, roll, and flake – a little more than hour (Temp in low 70’s low humidity). Used about 2 lbs. of the 5-lb. bag of 3-color flakes included with the kit.
Day 3: Clear coat – after the primer and color coat, the clear coat went very quickly! Used squeegee and back-rolled, didn’t bother with taping walls or edging with brush, felt like a “squeegee pro” after the color coat! Pour product onto floor, distribute with squeegee, back roll bi-directionally with roller, just like the directions say, works great.
Findings/tips/lessons learned:
• Prep is everything, but at some point you need to move on and apply epoxy! I probably could have done more/better prep, but the more you do the more imperfections in your floor you find and you can go crazy trying to make an old concrete garage floor perfect.
• For my 480-sq. ft. floor, the Legacy primer coat (2 gallons) just made it and I could see where the bare concrete areas soaked up the primer; the Epoxy-Coat color coat easily made it with just a little left over (started a little thick at first then realized after the first batch - 1/2 the kit - that I wasn’t going to have enough, so used the squeegee to re-distribute what was already down, then rolled and flaked the first ½ and moved on to the 2nd and final batch. All ended well, although I admit to panicking for a minute! Plenty of clear coat, could have easily gone thicker or covered a slightly larger floor with the amount included in the kit.
• Although I used some pressure to roll the primer coat, with the thicker color & clear coats it felt like the purpose of the squeegee is to simply distribute the product, then pulling the roller across the surface both directions “finishes” the surface, with no additional pressure (unlike painting a wall with latex)
• The shoe spikes really help, but can be treacherous! I learned to take baby steps and keep my feet flat on the floor after almost falling on my *** a couple of times

Also, I bought a better pair than the ones included with the kit, and they had shorter spikes which seemed more “stable”, and had better straps to keep them attached. Don’t forget to tighten the spike nuts before wearing them, I had a couple of hand-tightened nuts come off in my color coat before properly tightening them.
• Invest in a good quality 18” squeegee, the one which comes with the kit is too small. Also, a long pole helps – I used an 8’ pole and it made the spreading & rolling much easier.
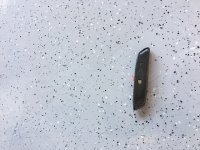
• Don’t expect the coating to hide un-patched flaws (cracks, pitting, etc.) I left some shallow pitted areas and they were still visible with the color coat – a little less so after the clear coat, but if you look closely you can still see some “ripples”, even though the clear coat finish feels smooth. I also had some bubbles/fish eyes show up overnight, even though I primed. Not a big deal for me, but if you are looking for a perfect finish, realize that they may not show up immediately after rolling the surface. I just popped them and sliced some with a razor blade – I know they’re there, but the casual observer probably won’t see them.
• FOLLOW THE DIRECTIONS – Good prep, clean buckets, thorough mixing of product, etc.
I’m very happy with the finished result, huge improvement over the bare cement! Thanks to the Forum for great advice and guidance!