After a lot of research on this forum and a lot of hard work in my garage I am finally finished with my floor. My floor wasn't as painless as most of the floors on this board. There was a lot of sweat and elbow grease put in.
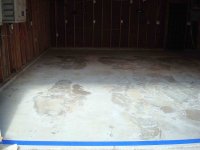
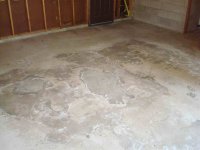
The previous owner of my house attempted to fill some very large spalled and pitted areas of the garage floor with a concrete patch kit. It was starting to chip off very badly in some areas. So I took an air hammer and chipped out anything that was loose. I ended up filling a 5 gallon pail full of chips. There were a few spots in the centers that were still holding pretty strong so I left them. Most of the pitted areas were 1/2"-3/4" deep.
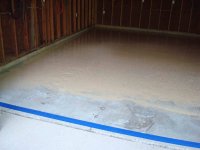
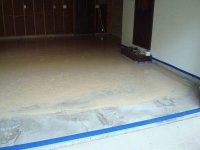
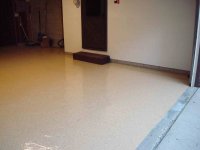
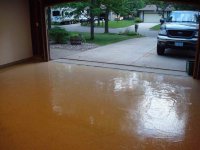
Now that I had all of the areas chipped out, I had to figure out some way of filling them back in that would work better than the junk that was put in there before. After quite a bit of searching for a patch, I decided on using EpoxyMaster's Crack Patch Kits (4 of them to be exact). So after trowelling 8 gallons of this stuff all over my floor I came up with a decently smooth floor. I'm pretty happy with how the epoxy patch worked out. It was a little difficult to trowel smoothly because it wanted to stick to the trowel and not the concrete and it got very hard to work with after about a half hour. I ended up having to use an air powered sanding disk to smooth it all down.
More to come...
The previous owner of my house attempted to fill some very large spalled and pitted areas of the garage floor with a concrete patch kit. It was starting to chip off very badly in some areas. So I took an air hammer and chipped out anything that was loose. I ended up filling a 5 gallon pail full of chips. There were a few spots in the centers that were still holding pretty strong so I left them. Most of the pitted areas were 1/2"-3/4" deep.
Now that I had all of the areas chipped out, I had to figure out some way of filling them back in that would work better than the junk that was put in there before. After quite a bit of searching for a patch, I decided on using EpoxyMaster's Crack Patch Kits (4 of them to be exact). So after trowelling 8 gallons of this stuff all over my floor I came up with a decently smooth floor. I'm pretty happy with how the epoxy patch worked out. It was a little difficult to trowel smoothly because it wanted to stick to the trowel and not the concrete and it got very hard to work with after about a half hour. I ended up having to use an air powered sanding disk to smooth it all down.
More to come...