bmxr4life87
Well-known member
that treadmill belt sander is awesome


So you carried a fullsize Bridgeport in the bed of your truck? How did it drive? I've thought about it but was sort of scared to do it.


Belts are sourced through KMSTools. They are in western Canada. It's a pain to change belts. I have a plan to fix that in the future which will also make it possible to have the belt right at the edge of the table. As well I plan to use two separate rollers to make belt tracking independent of the guides underneath the table.
Thanks for the props,
Richard
^^^ That's cool.
I found this treadmill belt-sander already built with one belt for $30.00. I added a second belt and enclosed the motor board and flipped the board upside down to prevent metal dust build up. I flipped the board after having a little magic smoke action. Luckily not all the magic got away lol, those boards are ~$200.00;


This ought to be a handy little thread ..
Hope this is of use to someone, besides me.
yeah .... a lot roll their eyes and wonder what the piece of junk steel and lawnmower wheels - is doing, wasting space on my shelf ..
I just drove by the place a couple weeks ago and was wondering what it was.


neel2008,
Way better than my attempt! Mine worked but not w/o drama.
ha ha nice, is that a pool noodle? lol I've done the "try to get board up there and jam it in place with a couple 2x4's" as well.....and the "two guys on painters scaffolding holding it with their heads as they attempt to work a screw gun" method....


Here are a couple of mine. I guess they would be classified more as a "jig" than tool though.
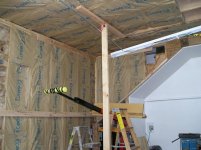
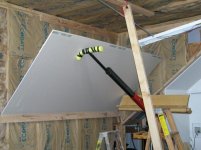
I used a piece of 1/2" EMT along with a pair of roll cage gussets to build a spacing jig for my overhead light fixtures in my shop. It snapped right onto the overhea beam holding itself in place while I drilled the pilot holes to mount the light fixtures. Using this made the spacing perfect and the sudsequent over-my-head work much easier.
Second, I was installing vinyl privacy fence that came in prefabricated sections. The 6'x6' panels are attached to the posts via three metal brackets and screws on each end. Since these brackets have to be installed before the posts go in, their positioning is absolutely critical. With a total of 57 brackets and 456 screws, that is a lot of opportunity to screw up. Measuring for all those brackets, and holding them in place against a slick vinyl posts, while installing the screws, seemed like an impossible task. I decided the best way to be precise, and lazy at the same time, was to build this jig:
Nice job on this jig keep the posts coming.
Since I figured that I needed to roll my front fenders, I was going to buy an Eastwood fender roller, but when I saw one, I thought that I might be able to make a better one.
I'm sure that I spent a lot more time and money then what I could have just purchased one for, but that is how I roll (pun partially intended, LOL).
Some of the features that I thought that I could improve on or add are the following:
* Larger rolling wheel that helps bend the metal more gradually.
* More robust design to minimize flex, for a more controlled movement.
* Counterweight to keep the tool upright, so the operator does not have to hold it doing adjustments. Also, this keeps the tool from swinging into the brake caliper (if left attached).
* Adjustable main body extension using a lead screw, for fine adjustments during the procedure. This also helps avoid having to use two hands to adjust length.
* Ergonomic handle at roller for control and leverage.
* Fixed heat gun (to soften paint), with foot switch for control. It is attached with a magnetic mount, if it is needed to be operated manually.
* I was going to mount the IR heat gun to the roller to monitor the temperature, but reading it upside down without a mirror was an annoyance. LOL
Eastwood fender roller.
Thats what I am talking about!!! I made one of these as well but not with all the extra gadgets I love the heat gun idea and the fine adjust too!
A circle roller, it will roll 2 " x 1/4 " mild steel flat no problems. It will roll a circle from about 6" min. up. I made it out of bits and pieces I had laying around the place. all hand fitted and finished. Its surprising just how much I use it.
View media item 34657
That is nice. Any more details on making it? I have found myself needing a roller, and that looks great. Compact but capable.
That is nice. Any more details on making it? I have found myself needing a roller, and that looks great. Compact but capable.
Wow very nice!!!!! I love making my own stuff also twice the fun if you ask me.
Scott
...
Eastwood fender roller.
JonnFX. Now that is a fender roller!!!!
I really like that fender roller. Looks fairly simple to make in theory. When using it I'm assuming the fender isn't a perfect radius from the center so any tricks on setting it up or using it do roll the whole fender? Or do you just do the closest part and keep adjusting until you get the whole fender lip?
Any more details about making one? For a guy without a mill or lathe. How crucial is it to get the lug holes perfect? Can they be a little oversized or will that mess up the swing if the tool isn't lined up perfectly on center.
What did you use for the roller part?

while making my engine harness for the TBI on my jeep I got really tires of holding wires by hand 20 minutes of fab and here she is