To avoid these ads, REGISTER NOW!

Fabrication / Fixturing / Welding table build

slodat

ALLIANCE MEMBER
Joined
Feb 6, 2010
Messages
3,679
Location
Central-ish, WA
I started building this table March 2010. I built it to support a 3' x 4' top with 4" overhang on all sides. Since then I have been keeping an eye out for a piece of thick plate or possibly a machine table to use for a top. If the plate worked out, I planned to drill and tap a grid of 1/2-13 holes so I can use commonly available milling machine clamps for fixtures and such.

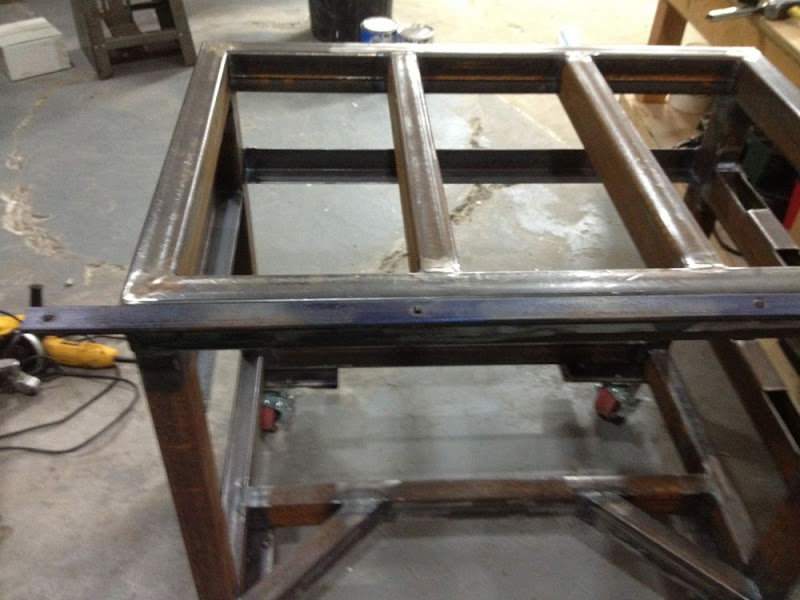
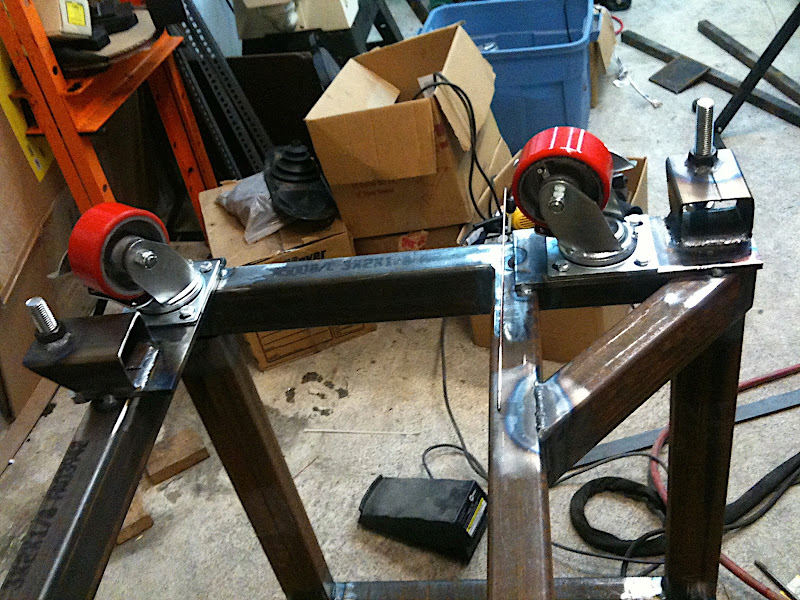
The base is built out of 2"x3"x.125 tubing, like so..

IMG_1891.jpg


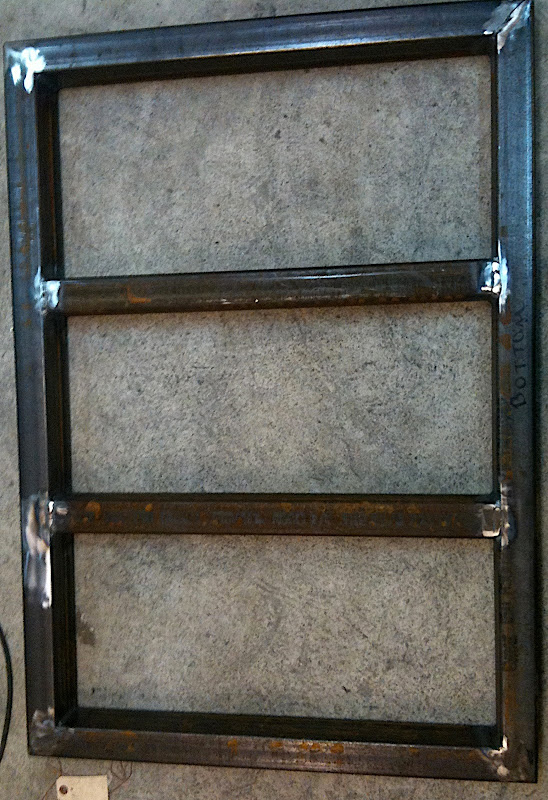
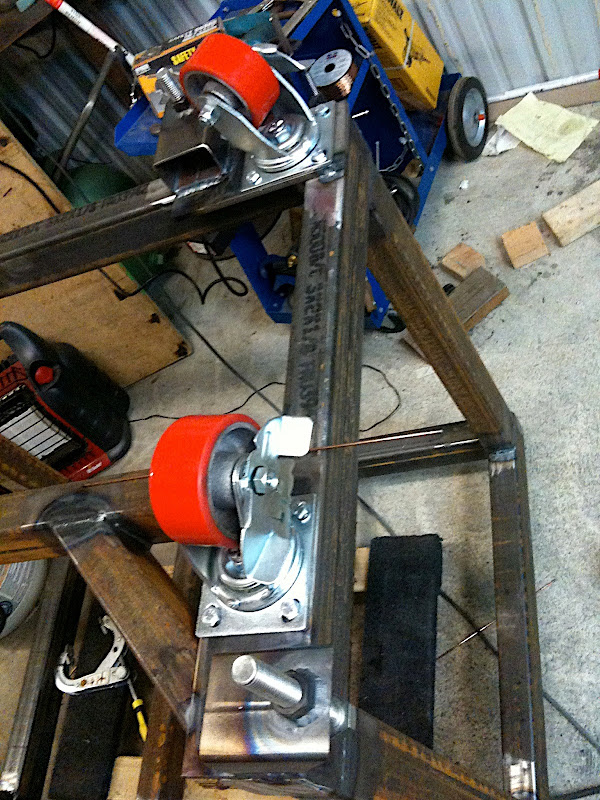
The bottom is similar, it will have an inset in the center of one long side so I can sit at the table and weld. This is the beginning of laying it out to see how things will look.

IMG_1894.jpg


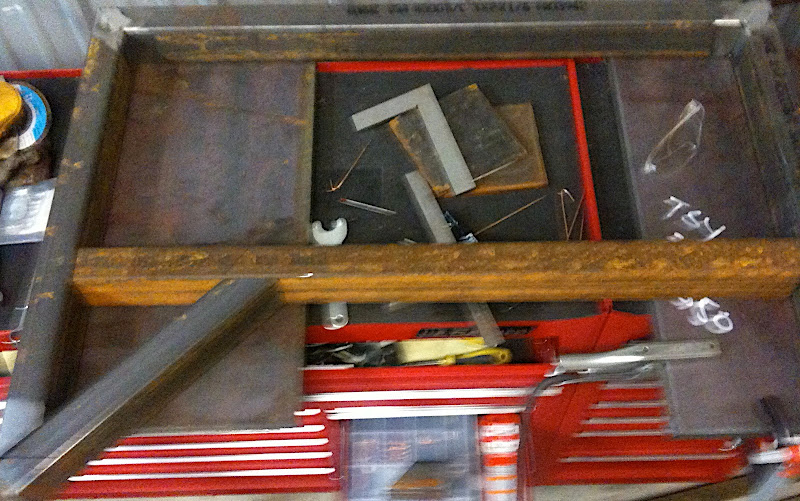
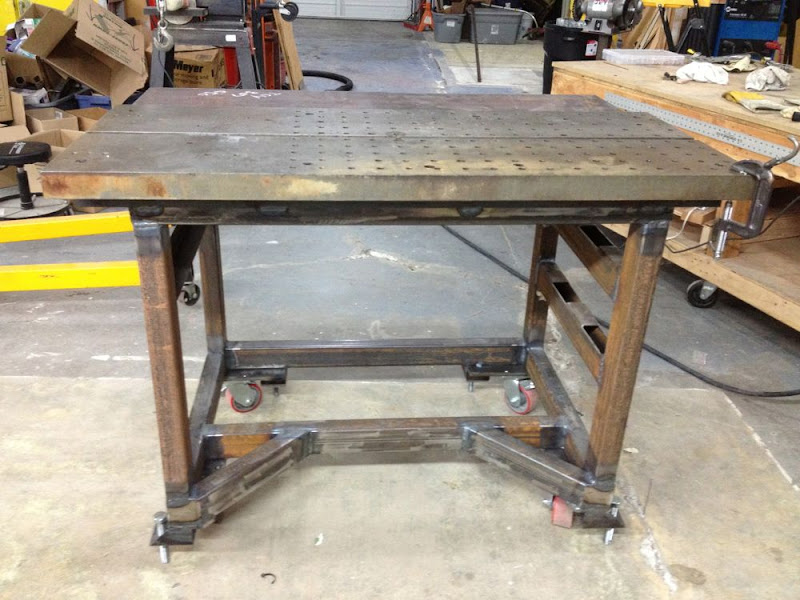
When I built this it was my second welding project ever. I'm completely self taught. I used two pieces of 1' x 2' x 1" steel on top of my toolbox to put this together.

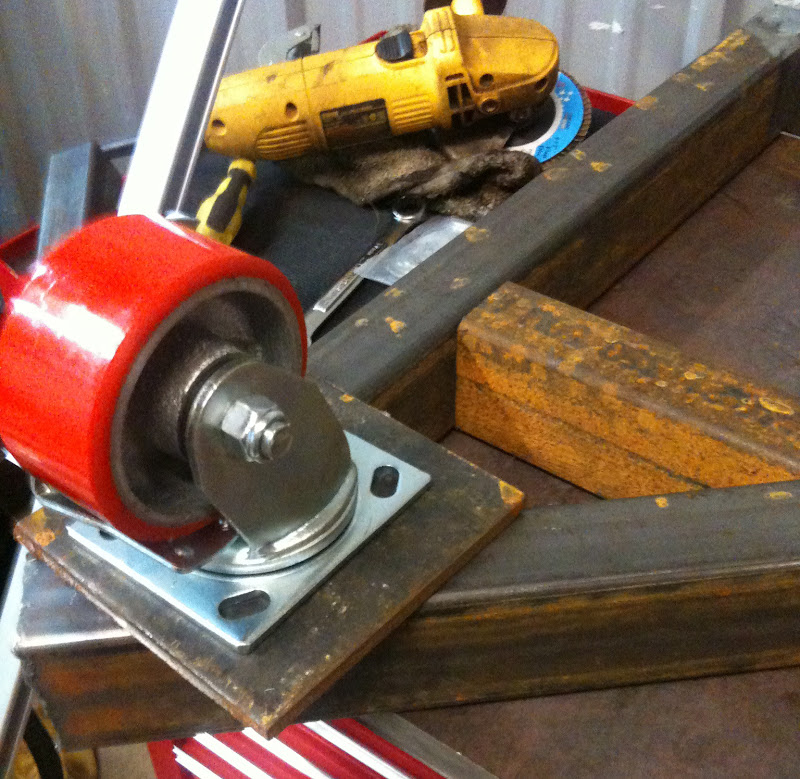
The casters are bolted to 3/8" plates welded to the bottom of the base, kinda like so:

IMG_1895.jpg


IMG_1929.JPG


IMG_1930.jpg


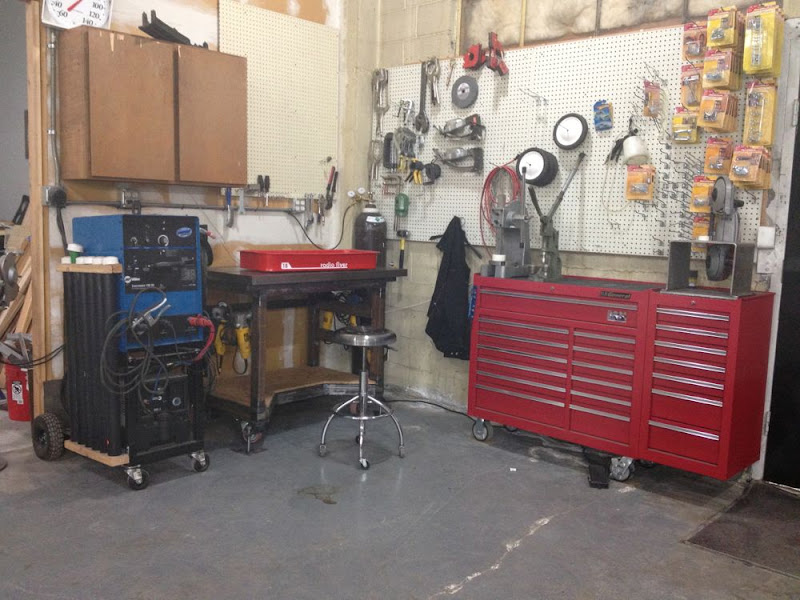
I bought a portaband mount from Troy at Swag Off Road. At some point I plan to mount up some 2" receiver hitch tool holders. This will have the appropriate mount..


IMG_1933.jpg


I used the table in the above form for the past 2.5 years. A week ago I spied this at a local scrap yard:

IMG_6506.jpg


IMG_6507.jpg


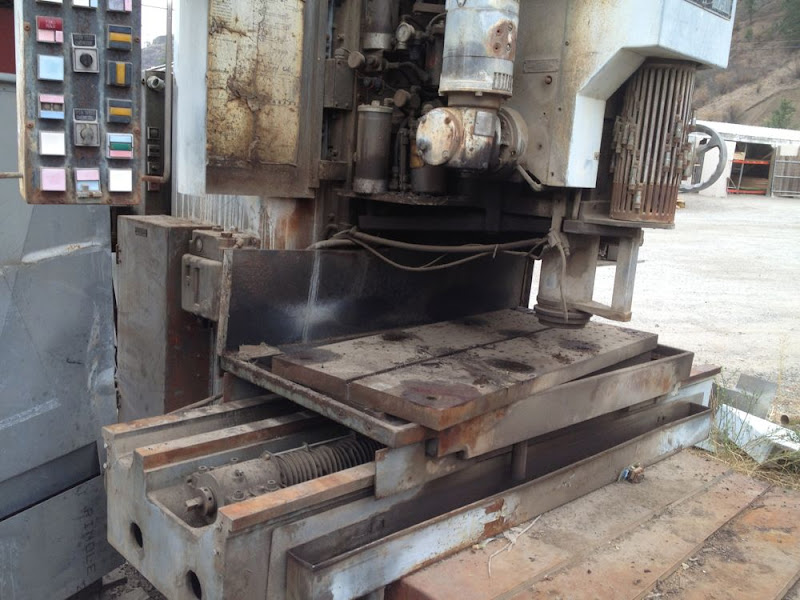
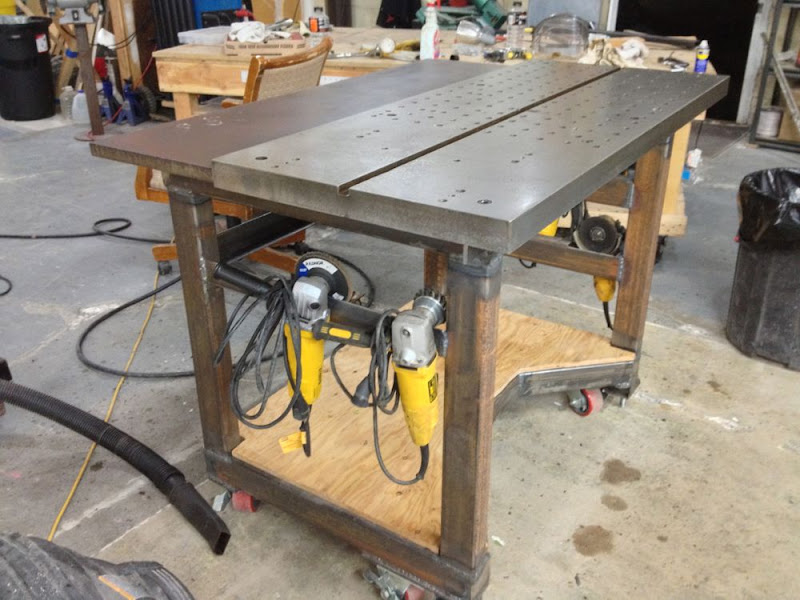
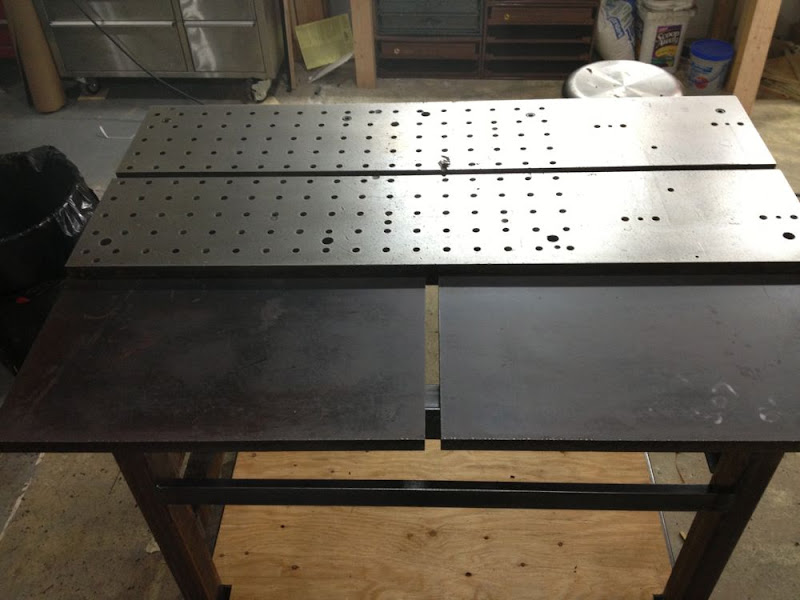
Negotiated a very good price for the table and it was mine. It had years of dried oil and chips protecting it from the elements. I scraped it off and power washed it prior to putting it in the shop.

IMG_6509.jpg


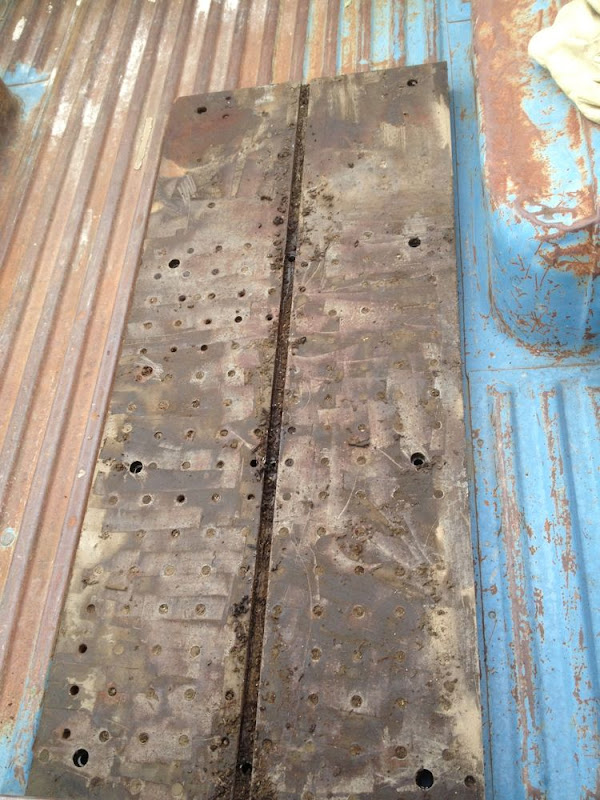
Here it is after a couple of hours cleaning out holes and working on the surface.

IMG_6511.jpg


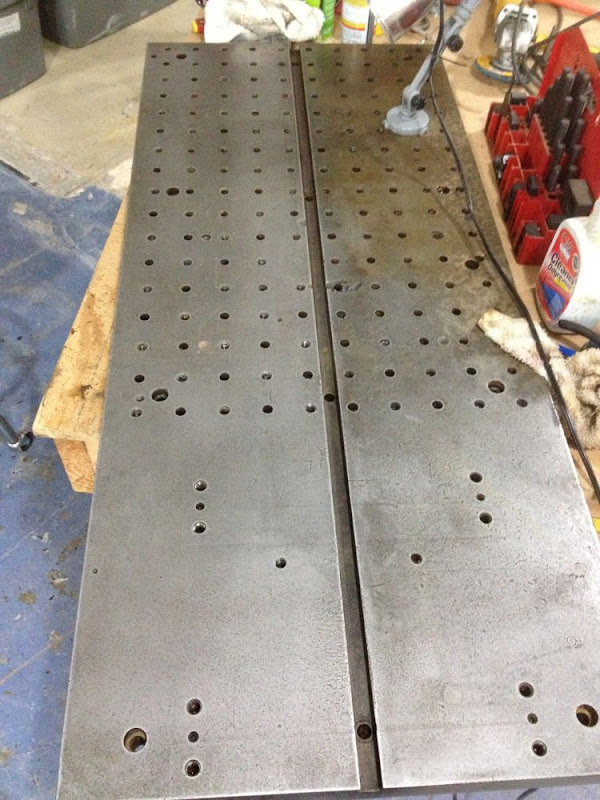
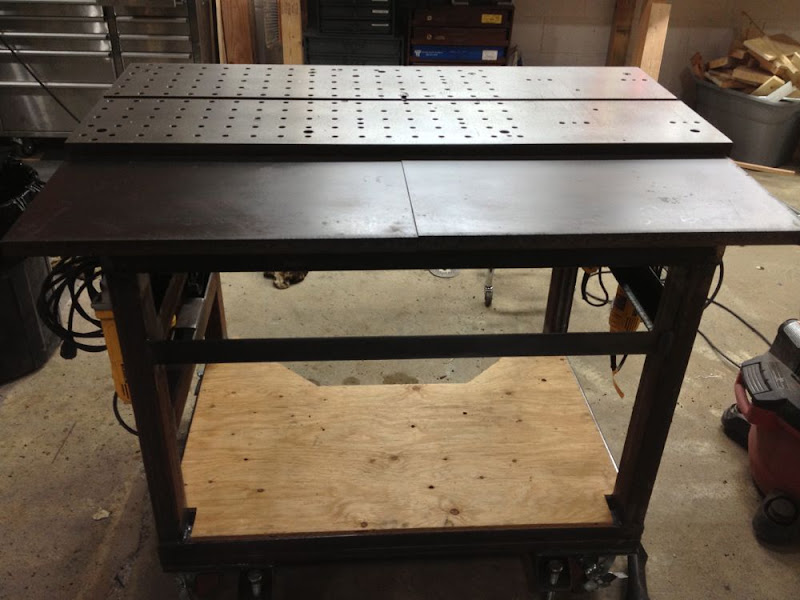
I'll get the other half cleaned up and the surface looking nice in the morning. Then, I need to do some finish welding on the base and prep it for some paint. I am really excited to finally have found a top for the table I started so long ago.

The top piece is 21" x 49" x 1-7/8". Every other hole is tapped 1/2-13.
 
To avoid these ads, REGISTER NOW!

OccupantRJ

Well-known member
Joined
May 15, 2009
Messages
10,906
Location
Eastern North Carolina
Looks like things are coming along nicely. Good idea on the leg clearance, and a good find on the slotted plate, for sure. I have haunted salvage yards for 40 years, and have never found one similar, so you did good.
 
OP
S

slodat

ALLIANCE MEMBER
Joined
Feb 6, 2010
Messages
3,679
Location
Central-ish, WA
I got the casters from Enco before I started building the frame. I'm very happy with them. The overall weight on this is over 800 pounds.
 

bad_idea

Well-known member
Joined
Jun 11, 2011
Messages
4,329
Location
Pasquotank, NC
Cool table top. Your table just sparked an idea. I am off to the garage to pursue it. Thanks for the inspiration!
 
OP
S

slodat

ALLIANCE MEMBER
Joined
Feb 6, 2010
Messages
3,679
Location
Central-ish, WA
Was in the shop late last night and tonight. I had some finish welding to take care of. I added 2"x2"x1/8" angle stringers between uprights on the left side and rear. Grinders hang really nicely from the angle.

Then I laid out mounting holes on some thicker 1/4" angle to screw the top down. Welded this across the front.

IMG_6514.jpg


At that point I set the top in place.
IMG_6515.jpg


It took a few hours to get the top cleaned up and all of the holes cleaned out. It made a huge mess, but they are clean now. I used my RO sander to lightly sand the top with WD-40 as a lubricant. It worked well. Used 100 then 150 then 220 grit. Very happy with the how it is turning out.

IMG_6515.jpg


IMG_6526.jpg


IMG_6528.jpg


I've been undecided about the area under the table since I started building it. I'm considering building a drawer cabinet to fit under the table. I have a bunch of full extension ball bearing slides and 3/4" plywood. Would be really cool to make the drawers match the shape of the cutout in the base. As I type this, I am liking that idea more and more..

I'm holding off painting the base until after I've used it for a while and the rear section (where the 1" plate is currently sitting) is sorted out.
 

welder4956

Well-known member
Joined
Apr 8, 2010
Messages
3,052
Location
Birmingham, AL USA
I think I would shim that 1" plate up to the same level as the drilled plate. A drawer cabinet underneath or some racks for clamps and tools would be good.
 
OP
S

slodat

ALLIANCE MEMBER
Joined
Feb 6, 2010
Messages
3,679
Location
Central-ish, WA
I think I would shim that 1" plate up to the same level as the drilled plate. A drawer cabinet underneath or some racks for clamps and tools would be good.

I want to get it up to the same level as the rest of the top. Still playing with ideas on how to go about it. I think I am going to make two drawers today as well..
 
OP
S

slodat

ALLIANCE MEMBER
Joined
Feb 6, 2010
Messages
3,679
Location
Central-ish, WA
You could also space the plate over a half inch to provide another through slot for various usages.

Funny you mention this. The 1" plate is an inch narrower than the big plate. I have a friend with a milling machine. We're sorting out everything it needs to hopefully get it all in one day on the mill. I want to square up both plates, put a small bevel on the edges and drill holes on the top to drop socket head cap screws into for mounting.

As far as attaching the 1" plates, I'd like to space them up to the level of the bigger section and mount them on slotted angle mounts on the frame. The slots would allow a t-nut to slide a couple of inches.

IMG_6531.jpg
 
To avoid these ads, REGISTER NOW!
OP
S

slodat

ALLIANCE MEMBER
Joined
Feb 6, 2010
Messages
3,679
Location
Central-ish, WA
Got things situated. I'll use it for a while and see how it goes before painting. First project is the frame for the wagon I'm building for my god daughter.

IMG_6533.jpg
 

bad_idea

Well-known member
Joined
Jun 11, 2011
Messages
4,329
Location
Pasquotank, NC
My weld table is about 600-800lbs. It is on 4" caster wheels and is a bit of a bear to push around the garage. I recently got some 8" caster wheels and have been trying to figure out what to use them for. I saw the build picture of your table showing the wheels and it sparked the idea to swap the 4" wheels out for the 8" wheels. It turns out it will be a bit of work to swap them though. I may still swap them though. Anyways, sorry for the distraction. Your table is turning out nicely.
 
Joined
Jul 12, 2006
Messages
22
Location
Orange County CA
I like the table design alot I am currently designing a new welding table so if you have any input I would like to hear it, also is that a Miller 180 SD I just picked one up with less than 30 min. on it and could use a few pointer thanks!
 
OP
S

slodat

ALLIANCE MEMBER
Joined
Feb 6, 2010
Messages
3,679
Location
Central-ish, WA
I like the table design alot I am currently designing a new welding table so if you have any input I would like to hear it, also is that a Miller 180 SD I just picked one up with less than 30 min. on it and could use a few pointer thanks!

Yes, it is a 180SD. I bought mine used with similar run time. It was nearly new. My advice? Water cooled torch. I bought mine right after I bought the welder. Very happy I did.

Do you think there will be a problem with weld spatter in the threaded holes?

Not at all. I only use TIG on this table. It is for fixture work.

Likely there will be, but he can buy a box of setscrews as plugs until holes are needed.

I did buy a box of short set screws and they are in the 95 threaded holes on the table. I wanted to keep them clean. Clearing out all of the stuff from it's former life as a milling machine was a lot of work.
 

OccupantRJ

Well-known member
Joined
May 15, 2009
Messages
10,906
Location
Eastern North Carolina
I did buy a box of short set screws and they are in the 95 threaded holes on the table. I wanted to keep them clean. Clearing out all of the stuff from it's former life as a milling machine was a lot of work.

A spiral pointed tap from the hardware store in a variable speed drill would have knocked that job right out.
 

Tazfink

Well-known member
Joined
Sep 1, 2009
Messages
82
Location
Watertown, SD
Very cool table!!! I like the T-Slot and all of the holes for fixturing. Looking forward to more pics and progress.
 
OP
S

slodat

ALLIANCE MEMBER
Joined
Feb 6, 2010
Messages
3,679
Location
Central-ish, WA
I’ve been fabricating parts for my car lately. This welding table never disappoints. I made this angle iron flange to mount the fuel tank to. Clamping to the table resulted in a dead flat piece. No rocking. I need to sort out leveling the 1” plate with the top.

A few ways I’ve used it recently. I’m thinking about blowing it apart and finally painting it.

98d48b2befffa24f1f862c2813c73a1b.jpg

544f6da2f27f0731929b1741698502aa.jpg

8a9b87056f0ab32ade362edad019167a.jpg

2a1a7c330937930f12b69d31bf475edf.jpg

0e2a00f531cb6533ac7c29c07cb5bf9a.jpg

I’ve been having problems seeing in my old hood. Picked up an Optrel Crystal 2.0 hood. Now it’s clear I’m still a beginner welder.

b9c9ba7b6ce2064e0d746a8b3a640390.jpg
 

Attachments

  • 98d48b2befffa24f1f862c2813c73a1b.jpg
    98d48b2befffa24f1f862c2813c73a1b.jpg
    392.5 KB · Views: 0
  • 544f6da2f27f0731929b1741698502aa.jpg
    544f6da2f27f0731929b1741698502aa.jpg
    360.8 KB · Views: 0
  • 8a9b87056f0ab32ade362edad019167a.jpg
    8a9b87056f0ab32ade362edad019167a.jpg
    709.1 KB · Views: 0
  • 2a1a7c330937930f12b69d31bf475edf.jpg
    2a1a7c330937930f12b69d31bf475edf.jpg
    765.6 KB · Views: 0
  • 0e2a00f531cb6533ac7c29c07cb5bf9a.jpg
    0e2a00f531cb6533ac7c29c07cb5bf9a.jpg
    747.3 KB · Views: 0
  • b9c9ba7b6ce2064e0d746a8b3a640390.jpg
    b9c9ba7b6ce2064e0d746a8b3a640390.jpg
    931.2 KB · Views: 0
To avoid these ads, REGISTER NOW!
Top Bottom