To avoid these ads, REGISTER NOW!

figuring out cantilever angles

rieferman

Well-known member
Joined
May 18, 2009
Messages
2,586
Location
Collegeville PA (30 min west of Philly)
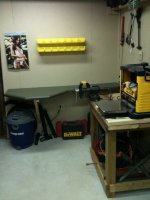
I made a bench the other night. I cantilever as many things off the wall as possible as it facilitates sweeping the floor and also eliminates the need for leveling feet.

Sometimes I cantilver with just a 45 degree cut on both sides of the support piece, and let it hit the wall as dictated by that cut.

But other times, I want to have the cantilever hit certain part of my table top, or rest at a structural spot on the wall. In these cases, you have to figure out the angle.

I've accomplished the feat several times, and each time it's been a pain in the ****. SO, tell me your method of choice for a task like this.

(note: keep in mind that if the flat part of your cut rests against the wall, it'll be a slightly different process than if the flat part rests against the floor... so account for that in your instruction please)
 

Attachments

  • fastener sorting station1.jpg
    fastener sorting station1.jpg
    109.3 KB · Views: 176
To avoid these ads, REGISTER NOW!

hidollartoys

Well-known member
Joined
Jul 15, 2008
Messages
594
Location
K. C. Metro area
This is a simple trig math problem. Once you find the first angle, substract from 90 and you have the second angle.
 
Last edited:
OP
R

rieferman

Well-known member
Joined
May 18, 2009
Messages
2,586
Location
Collegeville PA (30 min west of Philly)
So, picture a 2x4 support that runs from the front edge of the table to the place where the wall meets the floor. If you want the 2x4 on the low side to be equally touching the wall and the floor (so it's cut to a triangular point) and on the high side you want it to reach the the very front of the table. Is the math as simple as you say in that instance?

Edit: Also, assume that the building is not perfect, and therefore using 90 degree angle would create an error in the equation. What then? Measure the 92 degree angle and use that in the equation instead?

Edit 2: Without a protractor, what would you do?
 

Ign

Well-known member
Joined
Jul 7, 2006
Messages
12,769
Location
Butte Peak ND
Sounds to me like you're talking about a right triangle in all instances. This is really easy w a reference book w sine/cosine tables..............or anymore I just cheat and use this calculator online (there's lots of them but I prefer this one):
http://www.cleavebooks.co.uk/scol/calrtri.htm

You only need to know any two values. Just keep in mind if you're figuring lengths of a side you need to be consistent about using either inside or outside dim, realizing that the thickness of, say, a 2x4 will make one "side" of a side different - IOW the math assumes a thin pencil line
 

joeswamp

Well-known member
Joined
Jul 25, 2007
Messages
2,418
Location
Massachusetts
Hold the piece in place then use a carpenter's pencil flat on the wall to trace the cut line on the piece. You might need to shim the piece and/or hold the other end off by half the width of the pencil.

This is how trim carpenters get tight fitting moldings, if you can somehow measure/scribe the piece in place you can be accurate to tenths of angles. No way can you do that with a protractor.
 
OP
R

rieferman

Well-known member
Joined
May 18, 2009
Messages
2,586
Location
Collegeville PA (30 min west of Philly)
Joe, thank you.. This happens to be the method that I use, but I was curious if others had nifty tricks (or curious to see who would teach me how to disect a 90 degree angle.. ha ha).

More specifically, in cases where I can't fit my full piece into the location to test, I'll run a string or straight edge between my two points, and then will hold a shorter piece of scrap along that string so that I can scribe the angles. I'll then transfer that scribed angle onto my full length piece to make the cuts.

Of course, if I'm not obstructed, you can scribe directly onto the full length piece to shorten the number of steps.
 

Stuart in MN

Well-known member
Joined
Sep 8, 2005
Messages
23,039
Location
Minneapolis
I have a sliding T bevel tool that works well for this sort of thing:

sliding-t-bevel-protractor.JPG
http://diytoolsca.com/index.php?main_page=popup_image&pID=776

For a one time use on something that doesn't need to be perfectly accurate, you could make something similar out of couple pieces of scrap, or maybe cut a couple pieces off an old yardstick and bolt them together.
 

Ign

Well-known member
Joined
Jul 7, 2006
Messages
12,769
Location
Butte Peak ND
I have a sliding T bevel tool that works well for this sort of thing:

For a one time use on something that doesn't need to be perfectly accurate, you could make something similar out of couple pieces of scrap, or maybe cut a couple pieces off an old yardstick and bolt them together.

You can get the Empire version of that at HD for cheap, but I find it less than precise.

Starrett sells a similar unit which is awesome. It's $$ but it's heavy and feels quality. I love it and it's become one of the go-to fab tools in my shop.
http://www.amazon.com/dp/B0000DCBLW/?tag=atomicindus08-20

Or yeah, you can make some "scissors" w some flat bar and a bolt.
 
To avoid these ads, REGISTER NOW!

shopnut

Well-known member
Joined
Feb 22, 2006
Messages
4,237
Location
Florida
The link in the prior post didn't work for me so I apologize if I'm repeating something. Although I often use the old trial-and-error method, here's the simple math behind the cuts in case someone wants it:

Cantilever shelf.JPG

You, of course, will need a simple trig calculator to do it this way, but they are very cheap now. The key is measuring your "X" and "Y" dimensions. Be sure to deduct the "Offset X" and "Offset Y" from your X and Y measurements if your design calls for them. "h" is simply the square root of the sum of the squares of X and Y (I think the scarecrow in Wizard of Oz stated that formula after he got a brain!). Make sure to use the "arc-sine" or "inverse sine" function (sin-1) on your calculator when determining A1.

Once you have your h, A1, and A2, mark distance h on one side of your board. Draw your cut lines, with the appropriate angles and offsets (if any). Make your cuts. If wall and floor aren't square, this is were the "tweaking" comes in. You can always mark your cuts, but cut the board slightly bigger to check fit and then trim as necessary.

Using an angle finder to determine A1 and A2, and tape measure to determine h will also work in most cases if you don't have a calculator handy.

Good luck!
 

D.J.

Well-known member
Joined
Sep 16, 2009
Messages
1,116
Location
New Haven IL
I guess I'm old school but I thought all you would do is lay a couple of 2 x 4's on the floor and up against the wall. Then put the brace board down and mark the front and top of the boards you put on the floor and on the wall on the brace board. Then repete with a piece of scrap wood and transfer the top marks to the brace board?
D.J.
________
MEDICAL MARIJUANA DISPENSARIES
 
Last edited:

Kevin54

MEMBER EMERITUS
Joined
Jan 12, 2005
Messages
29,341
Location
Urbana, Ohio
I cheat......I use AutoCad.....gets me within .001".

AutoCad might get you within .001 but by the time you factor in ****** lumber, saw blade, etc, your lucky to hit .050 if that close :lol_hitti

For a great drawing (CAD) program that is cheap but very good, I recommend DeltaCad. You can download a 30 day trial version and to get the full version is something like $29. For 2D drawings it is fantastic. Very easy to learn. I design tooling on a daily basis and I used to use SmartCam which was a high dollar program. DeltaCad is cheap, does everything other 2D packages does, and you can import and export to other programs. You can check it out here http://deltacad.com/demo.html
 

OccupantRJ

Well-known member
Joined
May 15, 2009
Messages
10,977
Location
Eastern North Carolina
Just pull a string or attach one with tape, where you want a brace, then set a sliding T bevel to match the angle(s) created. This also gives you the correct length. In fabrication, angles can be measured as off the horizontal surface, or as off the vertical surface. Some framing squares have a brace table inscribed into them.
 

wedel1

Member
Joined
Nov 14, 2009
Messages
8
Location
Not Chicago IL
I would just use your carpenters square. Lay it across the brace figuring the desired rise and run of the support and cut it. Foolproof, no math required...
 
OP
R

rieferman

Well-known member
Joined
May 18, 2009
Messages
2,586
Location
Collegeville PA (30 min west of Philly)
occupantrj, I've definitely used the string method with good success, even in my crooked old barn where there's not a right angle to be found anywhere. String + bevel gauge works nicely - used it for my stairs to the 2nd story and got perfect angles.
 

Rosco

Well-known member
Joined
Jan 4, 2009
Messages
1,140
Location
South Georgia
If it is a one or two time use thing I always use cardboard strips or a solid piece as a template. learned to do it working sheetmetal on aircraft and cars.
 

onewaydave

Well-known member
Joined
Sep 28, 2009
Messages
961
Location
Down the road from Dorothy and Toto
I think of a cantilever as being an overhang that is unsupported.

http://en.wikipedia.org/wiki/Cantilever

But that may be to being untrained. To find the length of an angled brace to support a bench top for instance, math works just fine. If you don't want to use math, use two sticks of what ever demensions is convienent. Say 1/2 x 3/4 and a couple of quick clamps (those spring clamps that you squeeze to open would be fine). Use a level to set the top height and measure the angle with the clamps from the position of attachment of each end by sliding the 2 sticks to the proper length. Then transfer this length to the support brace and cut with confidence. Always cut with confidence, 'cause if you let a board know your scared or nervous they can sense it...

This technique is often used by cabinet makers to measure inside demensions.

Cantilever barns are common in east Tennessee. Maybe a 20x30' first floor with 30x40' second floor joists giving an unsupported 5' overhang all the way around.

I love old barns too, Rieferman.

Dave.
 

Kevin54

MEMBER EMERITUS
Joined
Jan 12, 2005
Messages
29,341
Location
Urbana, Ohio
Reiferman....after going back and re-reading your original post, I know what you are going now. You're designing as you go and not ahead of time. Same thing I had to do in my garage as the wall was so long and I had a bow in it in a couple of places.
What I did was mounted and leveled the table top. In my case I had the skeleton of the top made and no actual top on it so it made it easier. It looks like in your case you have a solid top. Clamps are your best friend, If it is a solid top, clamp on or two 2x's on the top sticking out, then use those to clamp legs straight down to the floor. Now you can work on finding your angles that you need. If the wall is 90 degrees to the top, then the angle on your bottom of your angled brace will match the angle at the top. By that I mean the portion that fastens to the wall and the portion that fastens to the top will have the same angle. A lot of times it is trial and error until you get your first piece cut. Use the first piece as a template but make sure that you try that first piece in several areas. You may find that the angle is the same but the lengths may vary slightly so you have to adjust accordingly for that. The easiest way that I find to do it besides laying it out in a drawing program and build to print, it to use a length of 1" x 4" that is close to what you need but not full length. Then cut two pieces of cardboard to the same 4" width Use the cardboard on each end to get your correct angles and clamp to your 1" x 4" board. This way, every board you cut, you can trial fit with your template and adjust your length accordingly
 
To avoid these ads, REGISTER NOW!
Top Bottom