To avoid these ads, REGISTER NOW!

Finally back to work in the shop My C.O.E.

Dan in Pasadena

Well-known member
Joined
Feb 18, 2009
Messages
13,162
Location
Pasadena, CA
Ok, I'll be "that" guy. You're doing a nice, logical disassembly and that's good but doesnt doing it that way eat up a lot of time and your friend will be here for a limited time? If everything is going to the dump anyway, why be so neat (and time consuming)

Wouldn't it work to just go at it with a Sawzall with a few demo blades? Of course after you remove all the things you want to keep like the generator, for example?
 
Last edited:
To avoid these ads, REGISTER NOW!
OP
D

don long

Well-known member
Joined
Mar 31, 2012
Messages
8,856
Location
southern california
Ok, I'll be "that" guy. You're doing a nice, logical disassembly and that's good but doesnt doing it that way eat up a lot of time and your friend will be here for a limited time? If everything is going to the dump anyway, why be so neat (and time consuming)

Wouldn't it work to just go at it with a Sawzall with a few demo blades? Of course after you remove all the things you want to keep like the generator, for example?
2 reasons Dan
1 Not ever touching a coach before I don't know what is behind the walls or closets
2 it makes stacking the trash easier to handle.
Tomorrow the walls and roof will be stacked neatly in my trailer. The dash will be intacked so we can start it up and driveit onto the lift in the shop
 

fouckhest

Well-known member
Joined
Jul 24, 2013
Messages
1,869
Location
Greer, SC
I've been waiting for you to kick this build back off as well, I've always wanted a truck like this to haul a car!
 
OP
D

don long

Well-known member
Joined
Mar 31, 2012
Messages
8,856
Location
southern california
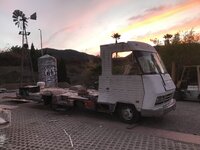
Today went pretty well. The roof came off without much of a fight with the help of my extended forks and the fork lift.
It looks worse than it was.

IMG_0256.JPG
Those chairs are for our many breaks during the day. We filled the trailer and made it to the dump without a hitch.
When we returned the walls came down but the bathroom was a bit of a fight with all the plumbing and heater wires, but with some strong language it all made it into the trailer tonite
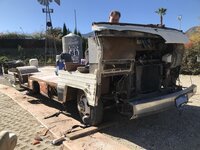
We are leaving the front end til last to try saving the dash wiring, but from the rear it is looking like we made good progress today

IMG_0257.JPG


IMG_0258.JPG


Clean up and pulling the windshield is set for tomorrow
 
OP
D

don long

Well-known member
Joined
Mar 31, 2012
Messages
8,856
Location
southern california
I think it needs one last roll down the road, especially with that rogue toilet just sitting there :ROFLMAO::ROFLMAO:
Well GRN
I hope it still runs after this transformation.
Like that Crohn's medication commercial with a toilet as the drivers seat... :ROFLMAO:

@don long - You're done! It's already a COE configuration!
Thanks rharman
The toilet is still there because neither of us want to touch that thing
That coe is a bit to new for my taste lol
 
OP
D

don long

Well-known member
Joined
Mar 31, 2012
Messages
8,856
Location
southern california
A little progress report on the C.O.E.
I pulled the toilet off the floor of the coach with my forklift this morning. Then while Brett (my buddy) was working on gutting out the windshield and pulling the guts of the a/c from under the dash before cutting it all off, I went to work pulling the carpet to see what was under it for the floor. I found a 1/4" sheet of plywood glued to 1" thick foam spaced between the 1" square tubing checkerboard base and to make matters worse the laid down a thin sheet of tin on the top of the frame. The whole floor unit was bolted down every 3 feet with a 3/8 flat headed bolt.
The process for me was.
1st, cut a circle around each bolt with a 3" hole saw on my drill,
2nd, with my battery skill saw set at a 1/4" depth , cut 3' squares in the plywood.
3rd, pry the plywood away from the foam insulation.
4th, with a die grinder slice the steel tubing at the 6' mark and cut the bolt heads off the 3' wood circle that the saw left
Now it was time to grab the forklift and pry the 6' floor section off the chassis.
All this after pulling the generator away from the coach.
IMG_0263.JPG


While I spent most of the day fighting the floor Brett worked on the front of the coach getting the windshield in the dumpster and removing the right side of the cab

JQVH8326.JPG

IMG_0268.JPG
 

Attachments

  • IMG_0267.JPG
    IMG_0267.JPG
    689.3 KB · Views: 26
OP
D

don long

Well-known member
Joined
Mar 31, 2012
Messages
8,856
Location
southern california
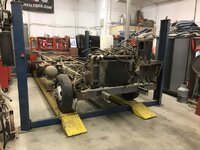
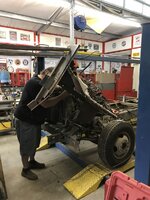
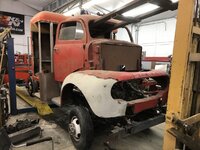
We've managed to get the coach into the shop and almost have it completely dismantled.
I was planning on saving the wiring until I saw the amount of extra wire that exists to operate the coach. There are 9 yes 9 large ground wires in a bank for the 2 12 volt batteries and a slug of smaller positive wires leaving the positive side through several relays all of which will not be needed for my truck. So being so careful not to destroy anything as we took it apart was A waste of time. It will be much easier to put a wiring kit back in the truck when the time comes.

IMG_0395.JPG
 
OP
D

don long

Well-known member
Joined
Mar 31, 2012
Messages
8,856
Location
southern california
We finally got the frame stripped down enough to drag it outside and give it a quick pressure wash

The last piece to remove
IMG_0399.JPG
The pile of wire we pulled off the motor and dash
IMG_0400.JPG

The first time I felt like we were getting close to having something good
IMG_0401.JPG

The last step for the evening. Our first cab fitting. Boy do we have a long way to go

IMG_0406.JPG
 
To avoid these ads, REGISTER NOW!
OP
D

don long

Well-known member
Joined
Mar 31, 2012
Messages
8,856
Location
southern california
So today was a full court press on the C.O.E.
We started out chasing down parts for the truck. A new serpentine pulley system for the motor.
A new steering box and rods, and some steel bars to build bracing for lowering the cab and sleeper.
After spending 4 1/2 hours driving around town (150 miles) we made it home and went to work

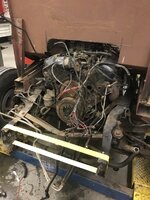
I worked on the front of the truck, pulling the fenders off and stripping down the front of the motor

IMG_0444.JPG

IMG_0445.JPG

I also cut and trimmed the firewall and floor to allow the motor to fit

IMG_0443.JPG


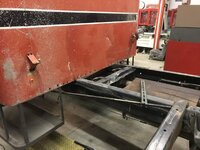
Brett went to work fitting and cutting and notching the steel bars needed to reinforce the cab and sleeper for the frame to fit up into the the cab and back of the sleeper

IMG_0439.JPG

IMG_0437.JPG
 

zmotorsports

ALLIANCE MEMBER
Joined
Oct 20, 2009
Messages
21,454
Location
Northern Utah
What's the plan for servicing the engine?

I'm curious as well after working on my share of GM P32 chassis Class A RV's from the 80's and 90's. They were not easily accessible but I am curious about the rocker cover to floor clearances as they look awfully close. Maybe the picture is exaggerating the close proximity however.
 
OP
D

don long

Well-known member
Joined
Mar 31, 2012
Messages
8,856
Location
southern california
What's the plan for servicing the engine?
Extreme
I appreciate this question. My first response is I only make um look good I don't make um run. with that said I'm workin on it
I'm curious as well after working on my share of GM P32 chassis Class A RV's from the 80's and 90's. They were not easily accessible but I am curious about the rocker cover to floor clearances as they look awfully close. Maybe the picture is exaggerating the close proximity however.
Mike
I could only wish that you were close enough to assist me with this project. The floor is not staying where you see it today. I'm working on raising it a few inches and making it removable for motor access I'm also making sure that removing the cab will be as easy as possible wish me luck in both endeavors please!!
 
OP
D

don long

Well-known member
Joined
Mar 31, 2012
Messages
8,856
Location
southern california
We have been spending more time chasing parts than working on the truck this past several days. We are finally ready to make some serious progress.
The frame horns have been cut and squared. The cab mounts have been located,designed,made and welded or bolted into position and the cab and sleeper set at a nice ride height on the mounts. The steering box mounted, the steering column positioned and pinned to the steering box.
Next we move to the brake hydro boost system to be mounted to the cowl and the brake pedal positioned inside the cab.

Here are a few progress shots

Frame horn squared, plate welded to frame for mounting steering box, steering box mounted, body mount welded onto frame, steering knuckles secured

IMG_0465.JPG

IMG_0466.JPG

Body mounts to be bolted to the frame to adjust the ride height of the sleeper

IMG_0462.JPG
 

xtremek

Well-known member
Joined
Apr 13, 2012
Messages
11,603
Location
St. Johns, Mi
Nice progress. The reason I asked about servicing is, I'm about to build a COE as well. Trying to decide if I should make the whole floor removable, or the whole cab tilt.
 

zmotorsports

ALLIANCE MEMBER
Joined
Oct 20, 2009
Messages
21,454
Location
Northern Utah
Extreme
I appreciate this question. My first response is I only make um look good I don't make um run. with that said I'm workin on it

Mike
I could only wish that you were close enough to assist me with this project. The floor is not staying where you see it today. I'm working on raising it a few inches and making it removable for motor access I'm also making sure that removing the cab will be as easy as possible wish me luck in both endeavors please!!

Don, making a removable "doghouse" will go along way to improve repair access so you've definitely got this hurdle figured out.
 

fouckhest

Well-known member
Joined
Jul 24, 2013
Messages
1,869
Location
Greer, SC
Don, making a removable "doghouse" will go along way to improve repair access so you've definitely got this hurdle figured out.

I'd second this, in a previous work life I worked for a company that built fire trucks and vocational COE trucks, while the big cab (4dr) trucks, the whole cab did tilt, you could also remove the doghouse for general trouble shooting, makes life much easier
 
OP
D

don long

Well-known member
Joined
Mar 31, 2012
Messages
8,856
Location
southern california
The truck is on hold again now til after the first of the year. With Christmas just around the corner and a short vacation planned after that I hope my smashed fingers will be healed enough to get back to work again.
I failed to mention that while removing the propane tank 2 weeks ago. The damn thing broke loose and smashed my left thumb and on my index finger the nail is trying to come off and the 2nd knuckle is not bending too well so this break in the action is well needed.
I have been trying to work with 1 1/2 hands but it's been a little tough
 
OP
D

don long

Well-known member
Joined
Mar 31, 2012
Messages
8,856
Location
southern california
Take your time and heal up Don. All your wonderful projects will still be there waiting.

jhn9840
John
cab hinge lift would be so cool
I hope you heal faster than I do. Speedy recovery.
Don best wishes. Heal up! Working injured makes a job miserable! You should be enjoying it.

Thanks guys for the well wishes!!
BUT I couldn't stay out of the garage any longer the finger is coming along and the knuckle moves so I've been sneaking out when Ann goes shopping lol.
 
OP
D

don long

Well-known member
Joined
Mar 31, 2012
Messages
8,856
Location
southern california
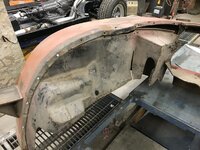
The truck is taking shape. I thought that while I was coasting that it would be a good time to put the inner fenders on the front group. So I gathered up what I could find over in the barn and brought the pieces over for a fit
IMG_0490.JPG

Found out that the inner fenders bolt to the outside of the fenders
I don't recall but I must have cut the inner fenders up that line to fit the other frame. I don't like that look so I'll be patching that up after I'm sure that there is clearance on this frame.

IMG_0489.JPG

After getting the front group together, my curiosity drove me to calling my neighbor over and with the help of him and Jose my helper we got the front end on the truck.

IMG_0494.JPG

It didn't fit too well the first time so I marked where the inner fenders were hitting and after pulling the front group off and turning it over so the bottom was up, I cut and hammered where needed and we put the fenders on again.
it fit much better the second time

IMG_0495.JPG

With a little more tweaking the left fender fits like a glove
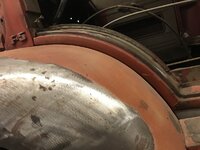
IMG_0496.JPG

The right side will require some finessing due to the fact that when we were taking the cab off the other frame , we forgot to unbolt the running board from the frame and pulled the metal a bit but not a big problem and the inner fenders are not the problem over on the right,

IMG_0499.JPG

So now I'm feeling pretty good and want to go back to work on the floor board and seat positioning after the successful front end project.

One look at the seat and it is obvious that the seat mounts need to be the first thing to address. So out comes the torch for some heat to warm up the mounts and give them some new angles for mounting
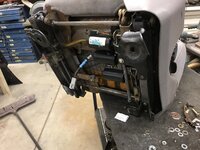
IMG_0492.JPG

I welded some cross members into the floor of the cab to raise the height about 4"s to lessen the height of the dog house over the motor and give a little more foot space

2022-12-16 15.26.55.jpg

I threw a piece of plywood in for the floor and placed the seat on it to get a feel for the seat location
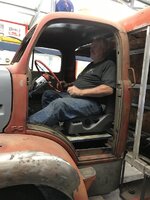
IMG_0502.JPG

I'm liking it A LOT

IMG_0507.JPG
 
Last edited:

Michael B.

Well-known member
Joined
Sep 22, 2020
Messages
998
Location
Huntsville Al
Don the front wheels are centered nicely in the wheel well. If you’re going to install a visor those seats might be a little too high.
 
To avoid these ads, REGISTER NOW!
Top Bottom