To avoid these ads, REGISTER NOW!

Finally Building My Detached Garage, Build Thread

xcgates

Well-known member
Joined
Apr 7, 2008
Messages
678
Location
TX
*SNIP*
Lane, that is a GREAT looking setup, that is what I want to do down the road, but right now, I am just keeping it simple and cheap.
*SNIP*

:spit: I'm sorry, I really am, but that had to be quoted.

I'm with you, you really have kept it pretty simple overall, but I wonder what your wife would say. I know I've said it before, but every time you say something, I can't help but imagine what her face looks like through this whole gig.:p123
 
To avoid these ads, REGISTER NOW!
OP
K

KYGTP

Well-known member
Joined
Jul 28, 2010
Messages
360
Location
Greater Cincinnati Area
Well, I first want to say thanks for all the input you guys have givin' me on these benches.

I am keeping the benches all 24" deep since I am going to put cabinet above and any deeper than that will make it hard for me to get into them. BUT, I am going to take the last 6' of the "L" and make it 36" deep to make it a good spot for sitting at to watch the TV with some bar stools and to use as a larger work surface if I need it.

The other part of the "L" against the wall, I made three different height shelves to accomadate my two Craftman top boxes and the third shelf as storage.

I also dropped the other bench on the wall down about 5" to make it easier to use the bench grinder, my table top lathe and mill that I have, the drill press and a sander that I have. I also cut off about 36" to allow the Kennedy roller box to fit in the corner, and I will put all my machinist tools in that box. I also have two more Kennedy top boxes at my work that I do not use much any more, so I am going to bring them home. I think with the Kennedy in the corner, it will not stand out too much with all the red boxes, plus I have them and it adds storage.

Well here are some pics from the day, I know it does not look like much, but I spent some time out there today. At times, I needed about 6 hands, but I finally got some more stuff finished up.

Anyways, first the redo of the "L" with the new shelves:

SANY1301.jpg


SANY1302.jpg


SANY1305.jpg


SANY1309.jpg


Here is the Cut down bench on the wall with the Kennedy box and a shelf below.

SANY1307.jpg


SANY1303.jpg


I am going to get everything painted the wall color, so that it all blends in. The shelves will be painted also, and with the color in which they sit. So on the shelves, some will be grey, some black, and the rest white, with the three colors on the one support on the end. I know, it is a little over the top, but at least it will all match.:eek:

I still need to get a shelf under the end of the "L" and get more wood for the top, but then I will be ready for paint.

Hope I am on the right road.......:headscrat
 
OP
K

KYGTP

Well-known member
Joined
Jul 28, 2010
Messages
360
Location
Greater Cincinnati Area
:spit: I'm sorry, I really am, but that had to be quoted.

I'm with you, you really have kept it pretty simple overall, but I wonder what your wife would say. I know I've said it before, but every time you say something, I can't help but imagine what her face looks like through this whole gig.:p123

Well, beleive it or not, she has been great through all of this, UNTIL here toward the end, when we are running out of money. I guess that is why I am goin with the wood and not full out cabinets, even though, half way through the build, BOTH my wife and I talked about doing just that, ALL cabinets to match all around the garage, BUT, we are running out of funds for now. Once I get some "spending" money built back up, I will take it all apart and install some type of cabinet system.

At times, here face has been priceless, but she IS the best, hands down.
 

Shayne_B

New member
Joined
Nov 28, 2010
Messages
3
Wow, What an interesting read, I really enjoyed it. I just found this site Sunday night, ran across you thread and stayed up until 3am reading every page and looking at all the pictures and reading everyone's input. I am amazed at all the concrete and rebar that went in. it's like a bomb shelter!
It turned out very nice and thanks for posting.
 

drof

Active member
Joined
Jul 2, 2010
Messages
30
Location
Garage
I am completely amazed at the build of your garage. I have heard about Garage Mahals before but have never seen one until now. You are my hero.
 
OP
K

KYGTP

Well-known member
Joined
Jul 28, 2010
Messages
360
Location
Greater Cincinnati Area
Wow, What an interesting read, I really enjoyed it. I just found this site Sunday night, ran across you thread and stayed up until 3am reading every page and looking at all the pictures and reading everyone's input. I am amazed at all the concrete and rebar that went in. it's like a bomb shelter!
It turned out very nice and thanks for posting.

Wow, thanks for taking the time to read up on my build, I just hope you did not have to get up in the morning and go to work after staying up that late.:wtf:

Yes, Yes there is a lot of rebar, but there are two of the walls that are retianing the hillside, I think I will be OK.

I am completely amazed at the build of your garage. I have heard about Garage Mahals before but have never seen one until now. You are my hero.

Well, thanks. I feel that it is far from a "Mahal", it is nice to here though:thumbup:

I hope to be able to do a little more on the inside, once my "wallet" recovers from so much flying out of it.:rolleyes:
 
OP
K

KYGTP

Well-known member
Joined
Jul 28, 2010
Messages
360
Location
Greater Cincinnati Area
Just a little update on some stuff I have been working on.

The other day I got the rest of my RaceDeck end peices to finish out the strip along the entry door. I also ordered two of the Alum Parking Pads, one for the bay with my everyday driver and one for the bay with the lift. I wanted to be able to just have my car clear the door, so that I have more room behind it for the sitting area.

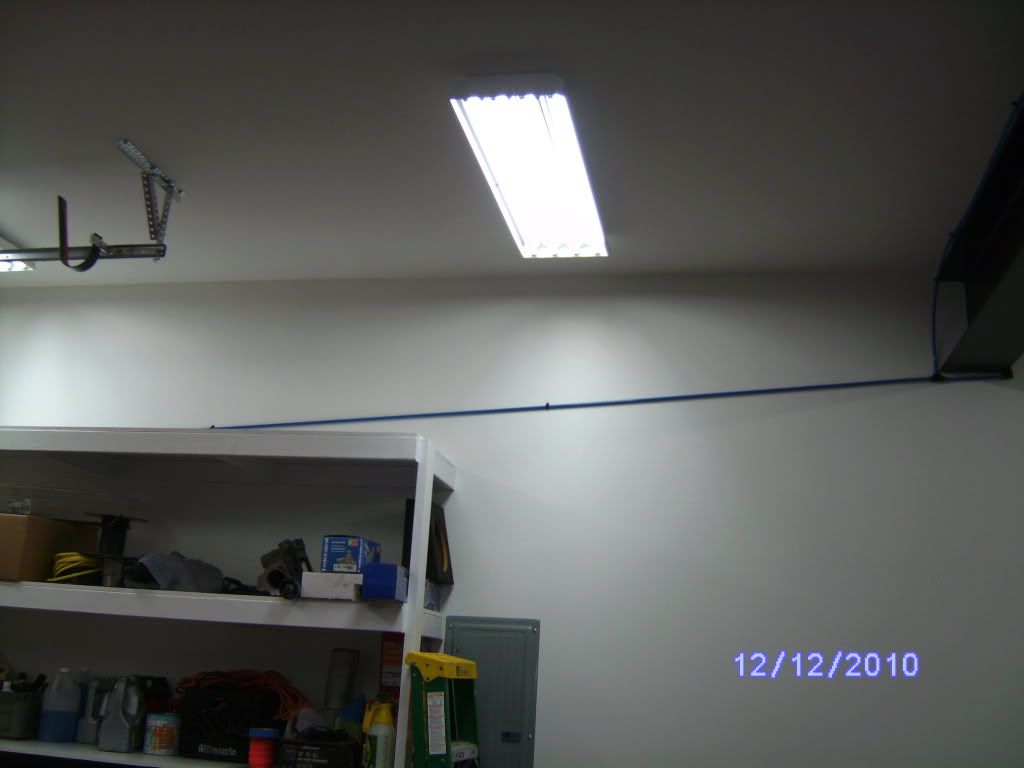
I also finished up all of my work benches and shelves finished up. I got them all painted the wall color, but the shelves are the wall color in which they sit in. I also took the end of the "L" and shaped it a little bit, just to make it a little easier to move around.

Here are some pics:

First the Alum Pads:


SANY1318.jpg


The shelves, which I think turned out pretty nice, and they MATCH:

SANY1324.jpg


SANY1323.jpg


SANY1328.jpg


SANY1330.jpg


I know, I know, too many pics of a silly home built shelves out of crappy 2x4 from Lowes, but I think it turned out kinda neat. Now it will be no time I will have them filled up:rolleyes:


Here are some shots of the finished benches. I am keeping the tops bare MDF for now, I know they will get messed up and painting them jsut means that when you drag something over it, the paint will come right off. Plus, once they get really bad, I will just unscrew them, and flip the MDF over, instant new surface.

SANY1322.jpg


SANY1321.jpg


SANY1320.jpg


SANY1319.jpg


SANY1332.jpg


There you have it, now I just need to start moving all of my stuff from the house to here and start settling in. I still need to run my air lines, which I hope to order tomorrow. I am going to go with the Rapid air system, since we use it at work as well, and seems to do well.

I also hope to pic up some cheap wall cabinets with weekend and get them hung over the main bench. Once I get them installed, I will post some pics up.

I need to figure out where to hang my stop light, walk and don't walk sign too, along with a Marlboro race sign my father-in-law bought at a estate sale. I will get some pics of those and get your option on that later.

Thanks for looking.........
 

xcgates

Well-known member
Joined
Apr 7, 2008
Messages
678
Location
TX
Yep, shelves get filled up much faster than you think...

The only reason I have any space on my one shelving unit is that I just added a filing cabinet, and am sizing my spray cans for some spray can only shelving made out of some planks that used to be my neighbor's fence. Might even paint them, as a matter of fact. If I get ambitious, that is. I'd have to go get paint and a brush.

Hey, wait! An excuse to take the bike somewhere! YAY! :lol_hitti

(Yes, I still get excited, even if I'm only going grocery shopping. My goal is to never grow up in that respect.:))
 
OP
K

KYGTP

Well-known member
Joined
Jul 28, 2010
Messages
360
Location
Greater Cincinnati Area
On my main workbench the top is 2x10's & I put a piece of masonite on top of that as a sacraficial surface.

On all of my past benches that I built, that is what I did, put a piece of masonite on it, I learned that one from my Dad. I still may do that since everything is still new.
 

Boosted1

Well-known member
Joined
Nov 25, 2007
Messages
1,679
Location
Georgetown, KY
KYGTP,
The sacrificial masonite is a good idea to keep your mdf base intact.
I actually used this with some Rustoleum Industrial paint to top a Skate Board Quarter pipe I build for the kids. It was strong enough to hold up to skate boarding for quite a while. The only thing that will kill it is moisture, but if you just put a quick coat of polyurethane on it, you will be able to easily wipe up spills.
If you keep the mdf, you may want to poly coat it for easy cleanup.

The painting of the shelves and benches really helps them blend in very nicely. Nice work.
 

jinxd

Well-known member
Joined
Aug 8, 2010
Messages
48
Location
Ohio
I may have missed it somewhere, but are there plans for the concrete floor in the sitting area? Thought with your taste, epoxy may be in the future. Shelves and everything look really nice and neat. :thumbup:
 
OP
K

KYGTP

Well-known member
Joined
Jul 28, 2010
Messages
360
Location
Greater Cincinnati Area
I may have missed it somewhere, but are there plans for the concrete floor in the sitting area? Thought with your taste, epoxy may be in the future. Shelves and everything look really nice and neat. :thumbup:

I am thinking of doing a cheap carpet Reminet. I know that it will get trashed, but that is why I will go with a Reminet. That way it is a little more comfortable for my son and wife to hang out.
 
OP
K

KYGTP

Well-known member
Joined
Jul 28, 2010
Messages
360
Location
Greater Cincinnati Area
I like your Kennedy box. Please don't paint it red. Your build is great!

My Kennedy Box will NOT get painted red. I also have a 3 drawer box and a top machinist box to put on it still. That Kennedy box was my first real nice box that I got when I worked in a machine shop several years ago, I traded it for a RC car that I had to a guy I worked with.
 

ZRX61

Well-known member
Joined
Aug 15, 2006
Messages
28,716
Location
Solar Blight Valley, SoCal
Garage carpets:
Go hit the dumpsters at your local convention center after a big show, there will literally be 1000's of sq ft of week old carpet free for the taking. That's where all the blue carpet in mine came from.
 
OP
K

KYGTP

Well-known member
Joined
Jul 28, 2010
Messages
360
Location
Greater Cincinnati Area
I think your 2x4 lowes shelves look great, Im rethinking my metal shelves now..

Thanks!!

Garage carpets:
Go hit the dumpsters at your local convention center after a big show, there will literally be 1000's of sq ft of week old carpet free for the taking. That's where all the blue carpet in mine came from.

You know, I never thought of that. I know someone in the stage hands union, maybe I can get up with him and see if there is anything coming to town and if they are using any carpet. Thanks for bring that one up.
 
OP
K

KYGTP

Well-known member
Joined
Jul 28, 2010
Messages
360
Location
Greater Cincinnati Area
Is that a "blower" in the last pic, next to the tool box?

Dave
59 Coupe deVille

Yes it is.:)

It is a blower that goes in my 98 Grand prix GTP that I have torn apart at the moment. I chipped a piston at the beginning of the race season. I have the motor together, I just need to order my push rods, but this build kinda consumed me all summer. But the blower is a Gen V Eaton M90 that is ported and polish with the "silencer" ports closed off. And the Throttle body is a 78mm LS1 TB to allow for my air to be "sucked" in.

It is a fun little car to drive, not alot of people expect to see a FWD Grand prix run high 11's in the 1/4.:headscrat
 
To avoid these ads, REGISTER NOW!
OP
K

KYGTP

Well-known member
Joined
Jul 28, 2010
Messages
360
Location
Greater Cincinnati Area
Well, just placed my order with Rapid Air to run all of my air lines this weekend, I just hope the wife does not have "other" plans for me.

I will say this, Stacy at Rapid Air was GREAT to work with on everything I need for my install!!

I need to get these lines ran so I can get my car out of the house garage and into this garage. With it not having a motor or trans in it, I just want to move it once and with two hose reels right where I will park it, it will be nice to just get it all hooked up, then do the big move.

I will get some pics of everything I bought and how the install goes later on this weekend.
 

JC23

Well-known member
Joined
Dec 31, 2009
Messages
11,718
Location
Northcoast
C'mon, now, KY, You got us all juiced up! Don't stop posting now!

Whatcha been up to on the Palace?
 
OP
K

KYGTP

Well-known member
Joined
Jul 28, 2010
Messages
360
Location
Greater Cincinnati Area
C'mon, now, KY, You got us all juiced up! Don't stop posting now!

Whatcha been up to on the Palace?

Sorry, just been kinda busy with all kinds of stuff in and out of the garage. In the garage, I have started to move eveything out of the house garage and get it into the new garage.

I ended up putting masonite on the tops of the work benches just to give a little bit more protection.

I PUSHED my Grand prix out of the house and into the its new home, right in the middle where the lift is. I hope to be able to get it all back together this winter and running.

I received all of the Rapid Air stuff on Friday and I am getting ready to head out and start installing everything.

I also got a couple more cabinets to put up on the back wall over the work bench and some white peg board to be able to hang tools and such off it.

So, I hope to be able to get some pics of the Rapid Air install later tonight or tomorrow for ya, and some other little stuff as well.

Total Cost if u dont mind sharing?

To be honest with ya, I have no clue. So much was payed with cash and some with check. If I sat down and looked at all of my paper work and notes I am sure I would be able to know, BUT, I don't think I want to know.

I do know, is that I have NO money left......................I am sure you could have built a nice size house with the same amount of money, depending on where you live.
 

ambenz

Well-known member
Joined
Dec 12, 2010
Messages
4,236
Location
NW Chicago Suburbs
I just joined the forum today and this was the first post "I had to check out!!!!"
KY, nice rewarding build that will pay you back 10 fold in the future!!!
I took about 1 1/2 hours to go through the whole thread and I must say, you did it right.
From thinking "BIG" and putting everything on the wish list you could do, you have a great Garage Mahal to park your toys in!!!
"I love this thread"...and wish I was a member when I built my garage.
Very cool "Mancave!"
 
OP
K

KYGTP

Well-known member
Joined
Jul 28, 2010
Messages
360
Location
Greater Cincinnati Area
Who pushed it???:lol_hitti

Sorry Moontang, let me reword my statement:

I had a friend help me push it OUT of the house garage and HE pushed me into the spot in the new garage while I steared. And after moving it back and forth and wearing out "Moontang" from pushing we got right where I wanted it.

I just joined the forum today and this was the first post "I had to check out!!!!"
KY, nice rewarding build that will pay you back 10 fold in the future!!!
I took about 1 1/2 hours to go through the whole thread and I must say, you did it right.
From thinking "BIG" and putting everything on the wish list you could do, you have a great Garage Mahal to park your toys in!!!
"I love this thread"...and wish I was a member when I built my garage.
Very cool "Mancave!"

Ambenz,

Thank you very much and for taking the time to read all of these pages on my build. I am glad you enjoyed it. I must say it fun being able to share with everyone the build.

Ever since I started moving things in, I have found my self speading a little too much time out there, BUT the wife did come out the other night and hang out to watch tv while I put up my air lines as my son tooled around on his little pedal car. Thanks again!!!


I know I said I was going to get some pics up, but time has seem to fly by, but Ihave nothing going on tonight, so I will update you guys with some new pics of some of the stuff I have done.

Oh, and BTW Ambenz, I LOVE your aviator, with the "Cars" looking at each other. My son LOVES "Cars", and if you where to ever see him, he ALWAYS has at least 2 two of the "Cars" cars in his hand. If you look back at some of the pics I post of Preston, he has them in his hands. Very cool!!
 
Last edited:
OP
K

KYGTP

Well-known member
Joined
Jul 28, 2010
Messages
360
Location
Greater Cincinnati Area
On to the pics, sorry it took so long to get them up but here they are.

First up is the finishing touches of the RaceDeck Floor, with all the edges trimmed out and everthing cut in:

SANY1311.jpg


SANY1312.jpg


SANY1313.jpg


I ended up getting the post cut in, but it took many cuts to get it just right, but turned out pretty good:

SANY1315.jpg


SANY1318-1.jpg


Last Friday I got all of my RapidAir supplies to run all of my air lines, and I must say, this stuff is REALLY nice and went together pretty easy. The cutter that is supplied with the tubing makes the job super easy to trim the hose. This is what all I got to get me started:

SANY1337.jpg


SANY1339.jpg


First, here is the front bay where the lift is:

SANY1347.jpg


SANY1348.jpg


Here are the two reals in the back half of the garage:

The right one:

SANY1351.jpg


Left one:

SANY1350.jpg


Here are some shots of the one of connections: (Sorry for the crappy pic)

SANY1352.jpg


I ended up running the line around the beam and connecting the two with a "T" which is connected to the home run back to the compressor, which is angled down for moisture collection at the end of that run.

SANY1353.jpg


SANY1349.jpg


SANY1354.jpg


I also put up two 36" cabinet sections above the back bench, which is kinda lost on the wall, but it gives me a addital 6' of closed up storage:

SANY1340.jpg


I got most of all the stuff out of the garage from the house and put into the new space, but I still have alot of organizing to do still though.

SANY1356.jpg


SANY1355.jpg


SANY1357.jpg


And the best of all, the new lift put to use the way it was intended to be used. I am going to LOVE this lift and make things SO much easier when working on my car:

SANY1346.jpg


Well, I think that is all that I have done for now, I still have more to do and more plans for stuff. Sorry it has been a while, but I hope you enjoyed looking at the pics and the updates, even though I am not building any more.

Till next time................
 

nathank

Well-known member
Joined
Jul 2, 2008
Messages
509
Location
West Texas
Looking good.

That Rapid Air system looks like it went together pretty easily. How expensive is that system?
 
OP
K

KYGTP

Well-known member
Joined
Jul 28, 2010
Messages
360
Location
Greater Cincinnati Area
Looking good.

That Rapid Air system looks like it went together pretty easily. How expensive is that system?

With everything you see in the pic, along with another section of 100' hose, the total was about $360. BUT, they do have a starter kit with 3/8" line that is much cheaper, around $140. I went with 1/2 throughout the whole garage, so it was a little more and I bought the Regulator and oiler, which is industrial quality.

I am glad I went this route, very clean install and VERY easy to use. And if you want to add to, it would be no problem what so ever.
 

gasgas17

Well-known member
Joined
Nov 7, 2009
Messages
443
Location
Nova Scotia, Canada
I just ordered a Rapid Air kit for my wood shop. You can buy it direct off their web site. The master kit is only 140.00 and would do most smaller shops. I expect to have enough pipe left over to do a small run in my bike shop.
 

Clinotus

Active member
Joined
Aug 18, 2010
Messages
38
It was nice watching the build, and now that you've got stuff inside it and 'lifted' you must be feeling relieved despite the sore facial muscles from the constant grinning. :)
 

Shayne_B

New member
Joined
Nov 28, 2010
Messages
3
This might be a silly question,but, I noticed your air line running back to the compressor was running down the wall at a angle? instead of a straight line then 90 down. was this your preference or was there a reason?
Just curious.
 
OP
K

KYGTP

Well-known member
Joined
Jul 28, 2010
Messages
360
Location
Greater Cincinnati Area
This might be a silly question,but, I noticed your air line running back to the compressor was running down the wall at a angle? instead of a straight line then 90 down. was this your preference or was there a reason?
Just curious.

It is angled down for moisture collection at the end of that run, which goes straight into the compressor closet to a drop with a drain on the end, and a "T" that is about 12" above that, and then that line runs in to the tank. It is a little bit of a extreme angle, but it should work.
 

Motown 454

Well-known member
Joined
Sep 25, 2008
Messages
1,359
That looks like a nice system and the install looks great. It looks even better with all your stuff in there. Very nice.
 

4StarCstms

Well-known member
Joined
Mar 14, 2008
Messages
938
Location
Kentucky
Been out of touch for awhile, Great job on the finishing touches and all the air lines - probably should have gone with that system for mine, instead of all the copper, **** ton more work, and probably more cost too...

Great Job!
 

xcgates

Well-known member
Joined
Apr 7, 2008
Messages
678
Location
TX
KYGTP,

If I may bring up your 2X4 shelves, I was wondering how far apart your cross-supports are?

Looks like they are ~3ft?
 
To avoid these ads, REGISTER NOW!
Top Bottom