To avoid these ads, REGISTER NOW!

Above 1200 Sq/FT Finally getting a seat at the grown up table

Wokspaces above 1200 squarefeet.
OP
S

strength_and_power

Well-known member
Joined
Apr 26, 2015
Messages
1,420
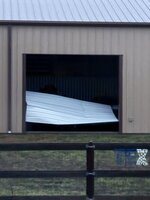
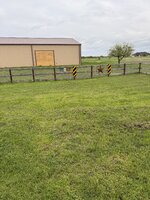
All right, where were we? Well, hit a small setback when a bad storm came ripping through in early March and took my doors and some contents for a wild Wizard of Oz style ride. Almost a blessing in disguise as once repaired, the slider doors on the front will be gone and a commercial insulated door with Liftmaster operator will be going in. Opening will be reduced from 20’ wide x 14’ high to 14’x14’ which is fine since I don’t have anything remotely that big.
 

Attachments

  • IMG_7284.jpeg
    IMG_7284.jpeg
    467.4 KB · Views: 251
  • IMG_7282.jpeg
    IMG_7282.jpeg
    825.6 KB · Views: 122
  • IMG_7291.jpeg
    IMG_7291.jpeg
    867.6 KB · Views: 79
  • IMG_7625.jpeg
    IMG_7625.jpeg
    1.6 MB · Views: 71
  • IMG_2115.jpeg
    IMG_2115.jpeg
    1.4 MB · Views: 74
  • IMG_2050.jpeg
    IMG_2050.jpeg
    1.5 MB · Views: 89
To avoid these ads, REGISTER NOW!
OP
S

strength_and_power

Well-known member
Joined
Apr 26, 2015
Messages
1,420
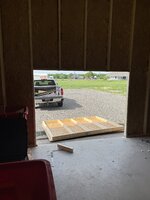
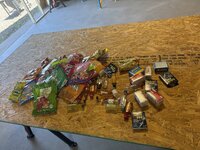
A long time friend of mine’s birthday is on Cinco de Mayo. I decided to host a get together and tie his birthday and Cinco de Mayo together. Front of the shop is still boarded up so I removed 2 sheets and made a removable section which also let me get the mower out and trim down the jungle my yard had become.you can’t have a Cinco De Mayo themed birthday party without a piñata. Not liking what I saw, I decided to use my well honed cardboard-box-a-gami skills and make one that was going to withstand the beating a group of powerliters can inflict. 3 XL moving boxes, a can of spray glue, masking tape and spray paint yielded a 4 chamber piñata. 7 adults, 3 children and 40 minutes later, the piñata was finally emptied.
 

Attachments

  • IMG_7789.jpeg
    IMG_7789.jpeg
    763.9 KB · Views: 77
  • IMG_7726.jpeg
    IMG_7726.jpeg
    762.6 KB · Views: 70
  • IMG_7788.jpeg
    IMG_7788.jpeg
    853.6 KB · Views: 73
  • IMG_7791.jpeg
    IMG_7791.jpeg
    867.1 KB · Views: 72
  • IMG_7792.jpeg
    IMG_7792.jpeg
    1 MB · Views: 75
  • IMG_7858.jpeg
    IMG_7858.jpeg
    1.1 MB · Views: 75
  • IMG_7859.jpeg
    IMG_7859.jpeg
    734.8 KB · Views: 77
  • IMG_7860.jpeg
    IMG_7860.jpeg
    965.6 KB · Views: 72
  • IMG_7915.jpeg
    IMG_7915.jpeg
    853 KB · Views: 70
  • IMG_7730.jpeg
    IMG_7730.jpeg
    764.2 KB · Views: 77
OP
S

strength_and_power

Well-known member
Joined
Apr 26, 2015
Messages
1,420
In Mid May, the repair to the shop happened. Opening was narrowed and the sliding doors were replaced with a 14’x14’ insulated commercial door and Liftmaster jackshaft opener. I added lights on either side of the door. The west wall that had a roll up door was blocked off. The contractor who did the repairs warned me the panels would be off color slightly and he was correct although after a month, the difference is minimal.
 

Attachments

  • IMG_8382.jpeg
    IMG_8382.jpeg
    938.8 KB · Views: 50
  • IMG_7975.jpeg
    IMG_7975.jpeg
    996 KB · Views: 44
  • IMG_7973.jpeg
    IMG_7973.jpeg
    1.1 MB · Views: 48
OP
S

strength_and_power

Well-known member
Joined
Apr 26, 2015
Messages
1,420
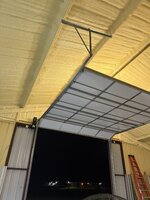
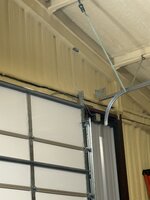
The long term plan has always included a HVLS fan. The new rollup door became a bit of an issue to this as the door in the raised position was going to encroach on the fans diameter albeit on different planes. Talked to my garage door guy about altering the tracks to go vertical another 20” which would alleviate the potential interference. Price was reasonable so we set up an appointment. He arrived, unloaded his scissor lift, removed the opener, springs, shaft, pulleys and moved the horizontal tracks out of the sway. I then hopped on his scissor lift and welded in a piece of purlin to give the vertical extension a place to mount. He then installed new (longer) cables, new ( much larger) springs, new pulleys, raised the horizontal tracks and reinstalled the opener. 48 1/4 turns per spring later, we were back in business. It was super impressive to watch him work as he is a one man show and was super efficient. In a bit of good luck, I asked about renting his scissor lift so I could install my new lights. He would t rent it to me but I was welcome to borrow it for the weekend. Here are the before during and after pics of the high lift conversion
 

Attachments

  • IMG_7982.jpeg
    IMG_7982.jpeg
    899.9 KB · Views: 42
  • IMG_8334.jpeg
    IMG_8334.jpeg
    441.8 KB · Views: 38
  • IMG_8337.jpeg
    IMG_8337.jpeg
    1 MB · Views: 38
  • IMG_8335.jpeg
    IMG_8335.jpeg
    645.3 KB · Views: 39
  • IMG_8332.jpeg
    IMG_8332.jpeg
    739.8 KB · Views: 50
OP
S

strength_and_power

Well-known member
Joined
Apr 26, 2015
Messages
1,420
I knew I wanted the shop to be bright, like surface of the sun bright. The original lighting was 3- 4 tube 48” fluorescent fixtures.
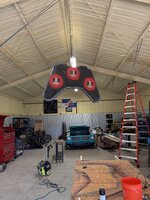
I went with 10 200w high bay UFO lights, 5 down either side and ultimately there will be 3-5 240w fixtures down the middle. Due to time constraints, I only installed one of the 240w fixtures. I’m not a huge fan of heights. The lights on the side weren’t a big deal, I wasn’t brave enough to move the lift without lowering it a good bit then move, then raise to work and repeat the process. On the center section, I wasn’t a fan of it at all. Pretty sure I made a few diamonds with how puckered. Pretty sure I’ll outsource the fan install. Each row of lights is on its own circuit. From the panel I ran 12-2 to a bank of GFCI outlets, one of each row. Those are mounted above the switches at the top of the interior metal paneling. The GFCi outlets have an indicator light so in the event of an issue, I can easily see where the issue is. From there, I wired in 2 switches per row, one switch controls 2 lights and the other 3. With the three rows, I have a ton of lighting possibilities, bright, brighter and holy f@ck that’s bright.
 

Attachments

  • IMG_8377.jpeg
    IMG_8377.jpeg
    813 KB · Views: 61
OP
S

strength_and_power

Well-known member
Joined
Apr 26, 2015
Messages
1,420
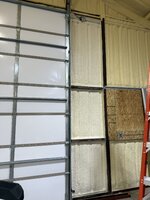
The company who did my spray foam originally, NTX Foamworx came out Saturday and foamed the new panels that were added.
One area was where a 12’ x 10’ roll up door used to reside and the other areas were 3’ x 14’, which shrunk the original opening to 14’x14’. With this done, I can now install the interior wall panels and move onto the next project. Debating if I should add an outlet closer to the door opening, ( closest current outlets are 4-5’ from opening). On the 12’ opening, I’m going to add 2-3 outlets which will make it match the rest of the shop. The junction boxes I put at the top of the interior panels will make this pretty easy as I don’t have to remove anything but the cover.

Pulled a hamstring at the gym today. There isn’t any bruising and no balled up area which would indicate a tear. Still hobbling so I doubt I’ll make much progress in the shop today.
 

Attachments

  • IMG_8631.jpeg
    IMG_8631.jpeg
    907.8 KB · Views: 39
  • IMG_8635.jpeg
    IMG_8635.jpeg
    874.7 KB · Views: 31
  • IMG_8636.jpeg
    IMG_8636.jpeg
    1.2 MB · Views: 30
  • IMG_8628.jpeg
    IMG_8628.jpeg
    877.2 KB · Views: 54
OP
S

strength_and_power

Well-known member
Joined
Apr 26, 2015
Messages
1,420
While this isn’t exactly shop related, it kinda is. As much as I’d love to always be working on or in the shop, the house to do list is real. We had some tile pop up/ crack in the laundry room. My dad being retired with entirely too much free time started visiting various flooring stores looking for a reasonable match. I spent a good bit of time getting the old mortar up and then borrowed a tile saw from my boss who kindly gave me a 1/2 bag of mortar. Watched a few YT vids and it was off to the races. It’s definitely not perfect and definitely not permanent, but it is down and I just need to grout the gaps after I watch a few more YT vids. I can now start a project in the shop with a mostly clear conscience.
Eventually I’m sure the whole house will get new tile, not sure if I’m up for that undertaking or if I’ll let a pro do it.
 

Attachments

  • IMG_8677.jpeg
    IMG_8677.jpeg
    685.7 KB · Views: 60
OP
S

strength_and_power

Well-known member
Joined
Apr 26, 2015
Messages
1,420
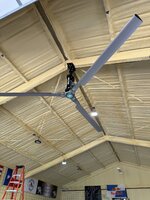
Been a productive week in the shop. Got my fan installed and wired, hung the last of my lights and fence panels. Poured a tiny bit of concrete where they had cut a step in for the garage door. Also got the interior wall paneling complete on one side of the door including hiding the opener’s sensor wires.
 

Attachments

  • IMG_8739.jpeg
    IMG_8739.jpeg
    990.2 KB · Views: 39
  • IMG_8790.jpeg
    IMG_8790.jpeg
    631.4 KB · Views: 37
  • IMG_8789.jpeg
    IMG_8789.jpeg
    821.9 KB · Views: 34
  • IMG_8797.jpeg
    IMG_8797.jpeg
    753 KB · Views: 39
OP
S

strength_and_power

Well-known member
Joined
Apr 26, 2015
Messages
1,420
Replaced the steer wheels on my pallet jack. Wheels came from Fast Lift Parts, super helpful folks and got my order out fast.
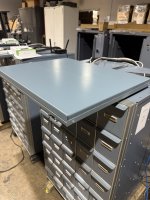
Did some organizing on my bolt bin/ small part storage. Also found places for various items that were on pallets and now have a home which resulted in emptying 3 pallets. Not sure if things will stay where I put them but they definitely needed to come off the pallets
 

Attachments

  • IMG_9032.jpeg
    IMG_9032.jpeg
    708.7 KB · Views: 35
  • IMG_9050.jpeg
    IMG_9050.jpeg
    688.3 KB · Views: 49
To avoid these ads, REGISTER NOW!
OP
S

strength_and_power

Well-known member
Joined
Apr 26, 2015
Messages
1,420
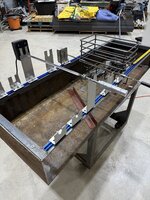
Brought home the smallest welder in my arsenal from work to make some progress on a new grill build I started for almost no reason. I used my one 220v circuit for the HVLS fan so it’s running on 110 but for the short tacks, it will suffice. Getting my panel swapped out and having more circuits has definitely gone up on the priority list. The welder came from a pawn shop I was doing work at and the manager made me a deal I couldn’t refuse.
Put it on the $49 HF welding cart just to make it easier to move around. I will say they have the auto set parameters pretty well dialed in.
Between putting the cart together and getting the welder set up I didn’t get any work done on the grill. Still, it was time spent in the shop so no complaints.
 

Attachments

  • IMG_9315.jpeg
    IMG_9315.jpeg
    669.3 KB · Views: 39
  • IMG_9314.jpeg
    IMG_9314.jpeg
    761.4 KB · Views: 56
OP
S

strength_and_power

Well-known member
Joined
Apr 26, 2015
Messages
1,420
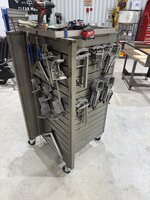
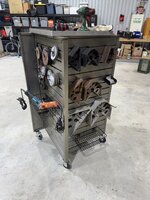
Scrolling through FB marketplace and came across a metal Slatwall set up on wheels. $75 made it mine and Amazon had an assortment of hooks on my door the next day. Turned it into an accessory rack for fab work. It’s not going to hold all my clamps and squares but it will free up some drawers in the tool box.
 

Attachments

  • IMG_9425.jpeg
    IMG_9425.jpeg
    832.1 KB · Views: 41
  • IMG_9426.jpeg
    IMG_9426.jpeg
    688 KB · Views: 56
OP
S

strength_and_power

Well-known member
Joined
Apr 26, 2015
Messages
1,420
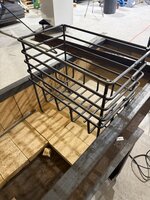
Spent Saturday high on cough syrup and sleeping. Woke up Sunday feeling g much better and made it into the shop for a bit. Mounted a vise and a manual bender I picked up from Eastwood. With the bender, I cut and bent close to 40’ of 3/8” rod and made my brasero for my new grill build. It isn’t the prettiest thing and not perfect but it will probably be modified/rebuilt down the road.
I’m pretty much just winging this build, I have a vision in my head and trying to use materials I have on hand for the most part. Brasero isn’t fully welded, I ran out of steam, I’ll get back to it later this week
 

Attachments

  • IMG_9458.jpeg
    IMG_9458.jpeg
    867.5 KB · Views: 37
  • IMG_9457.jpeg
    IMG_9457.jpeg
    877.4 KB · Views: 44
OP
S

strength_and_power

Well-known member
Joined
Apr 26, 2015
Messages
1,420
Got the T-track mounted tonight. The rotisserie brackets I’m having made will attach to the track and allow me to vary spacing as needed . Used Anchor Lune for the drilling and tapping, good stuff and less mess than cutting oul
 

Attachments

  • IMG_9475.jpeg
    IMG_9475.jpeg
    677.4 KB · Views: 31
OP
S

strength_and_power

Well-known member
Joined
Apr 26, 2015
Messages
1,420
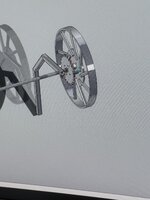
So yesterday a buddy had a free minute and Drew up a few parts for the grill in Solidworks. He took it a step further and created a model of what the wheels and Santa Maria height adjuster will look like. All this in about 20 minutes. I really need to buckle down and learn Solidworks. Sent the files this morning to the laser shop and was picking up completed parts at 2:30pm, the pieces had been cut for an hour and still held some heat from cutting. They also had the brackets for the rotisserie motors and guides done. I had them form the brackets at 3 heights figuring the taller height could be used as a warming area. Plan is to work on the doors this weekend if I get some tasks around the house completed.
 

Attachments

  • IMG_9480.jpeg
    IMG_9480.jpeg
    518.7 KB · Views: 16
  • IMG_9485.jpeg
    IMG_9485.jpeg
    594.9 KB · Views: 16
  • IMG_9500.jpeg
    IMG_9500.jpeg
    954.2 KB · Views: 17
  • IMG_9499.jpeg
    IMG_9499.jpeg
    862.5 KB · Views: 36
OP
S

strength_and_power

Well-known member
Joined
Apr 26, 2015
Messages
1,420
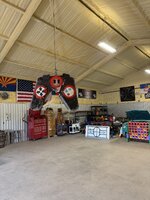
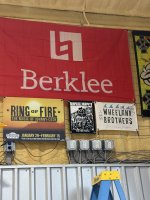
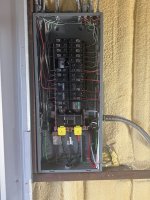
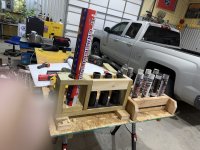
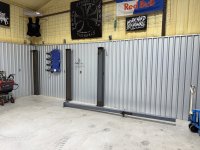
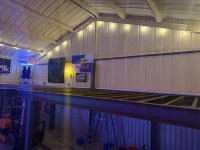
Its crazy how time flies. Been plugging away in the shop on various tasks and projects, finishing some and adding others. Picked up a small single axle trailer to rehab and use for small tasks. Dragging a tandem axle trailer home from work gets expensive in tolls and fuel. Built some mortar racks during a snow day, 4th of July will be here fast and I want to be ready. Finally got my electrical panel swapped out for a larger panel. Big thanks to a forum member for answering my many questions. Also got the last bit of wall covered in metal paneling, that 3’ bare section was driving me nuts.With that done, I can wire up the bandsaw and start cutting columns for the mezzanine which at my current pace, should happen sometime in 2027. Joking. Hopefully it will be sooner. The GF and I went to a few concerts and picked up some items for the shop walls. Got those hung today while enjoying a frosty beverage and beautiful weather.
 

Attachments

  • IMG_0234.jpeg
    IMG_0234.jpeg
    634.6 KB · Views: 48
  • IMG_0173.jpeg
    IMG_0173.jpeg
    1.1 MB · Views: 34
  • IMG_0585.jpeg
    IMG_0585.jpeg
    1.9 MB · Views: 34
  • IMG_0576.jpeg
    IMG_0576.jpeg
    1 MB · Views: 25
  • IMG_0577.jpeg
    IMG_0577.jpeg
    720.2 KB · Views: 28
  • IMG_0584.jpeg
    IMG_0584.jpeg
    678.3 KB · Views: 37
OP
S

strength_and_power

Well-known member
Joined
Apr 26, 2015
Messages
1,420
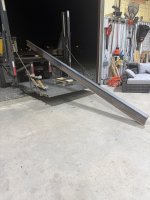
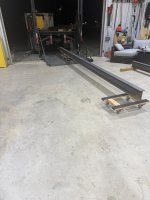
The owner of the gym I train at hit me up for some equipment for his latest gym purchase. Had my buddy laser cut the pieces while I was in Miami last week and since I was already paying a delivery fee, I pulled the trigger on 8” 15# I-beams for the long spans on my mezzanine. Just so happened I have a job in the morning closer to my house than the office so I took my work truck home and dammed if those beams didn’t end up on the truck. A couple of H-dollies, the truck’s 6k liftgate and some finagling, I got the beams off the truck in under 30 minutes. Hoping to kick that project off over Easter weekend since it’s a 3 day weekend.
 

Attachments

  • IMG_0719.jpeg
    IMG_0719.jpeg
    889.3 KB · Views: 33
  • IMG_0720.jpeg
    IMG_0720.jpeg
    749.3 KB · Views: 30
  • IMG_0721.jpeg
    IMG_0721.jpeg
    664.5 KB · Views: 29
  • IMG_0722.jpeg
    IMG_0722.jpeg
    642.9 KB · Views: 46
OP
S

strength_and_power

Well-known member
Joined
Apr 26, 2015
Messages
1,420
More mezzanine progress. A fabricator friend and serious bargain hunter on FBM found a motorcycle lift close to my place and hooked up a trailer and loaded a forklift to go get the thing. Lift is on his trailer, forklift is now in my shop for use with the 20’ beams and I am grateful.
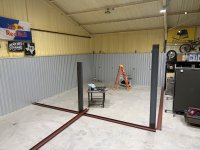
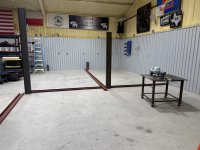
Anchor bolts and 5/8 SD bit arrived while I was out of town and I spent last night moving everything from the back 1/3 of the shop to the front so I have a clean canvas. Did a super rough mock up of the mezzanine and am liking what I’m seeing
 

Attachments

  • IMG_0931.jpeg
    IMG_0931.jpeg
    721 KB · Views: 32
  • IMG_0934.jpeg
    IMG_0934.jpeg
    752 KB · Views: 31
  • IMG_0933.jpeg
    IMG_0933.jpeg
    774.4 KB · Views: 31
  • IMG_0935.jpeg
    IMG_0935.jpeg
    764.9 KB · Views: 44
OP
S

strength_and_power

Well-known member
Joined
Apr 26, 2015
Messages
1,420
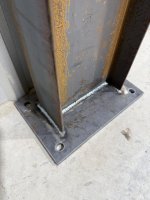
Made some progress on the mezzanine columns today. Started off by finding shop center and some other key measurements. Cut up some columns and welded up the base plates and top plates. Didn’t get as far as I wanted but progress is progress. A good chunk of my fab tools are still at work so I had to get creative. Will grab a few things which should make progress a bit faster next weekend. The hour long chat with a long time friend from AZ about his shop build didn’t help but he has always been generous with his time and advice and the things he was talking about were rabbit holes I went down not too long ago so it was good to give back.
 

Attachments

  • IMG_0942.jpeg
    IMG_0942.jpeg
    413.9 KB · Views: 27
  • IMG_0945.jpeg
    IMG_0945.jpeg
    709.8 KB · Views: 28
  • IMG_0946.jpeg
    IMG_0946.jpeg
    564.1 KB · Views: 48
OP
S

strength_and_power

Well-known member
Joined
Apr 26, 2015
Messages
1,420
Burned up some PTO today and got some progress made on the mezzanine. Not sure when my buddy will need his forklift back so trying to get the main structure done. GF came over and went to work painting the beams and columns. Figuring this will make them a bit cleaner so if/when friends come over to hang out, they have a better chance of staying clean.
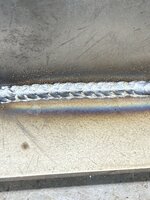
Love how smooth the Fronius welds, still on the original tip and nozzle, going on five years. Not too shabby.
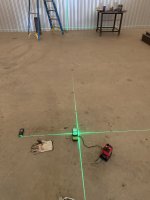
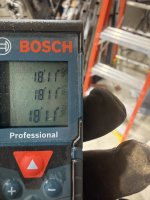
Self leveling three plane laser and laser tape measure have super handy especially doing this solo.
Really impressed with the Milwaukee M18 drycut saw, pretty dang accurate even with having to make three cuts to get through the I-beams.
 

Attachments

  • IMG_1026.jpeg
    IMG_1026.jpeg
    699.6 KB · Views: 33
  • IMG_1027.jpeg
    IMG_1027.jpeg
    614.2 KB · Views: 30
  • IMG_1028.jpeg
    IMG_1028.jpeg
    485.4 KB · Views: 35
OP
S

strength_and_power

Well-known member
Joined
Apr 26, 2015
Messages
1,420
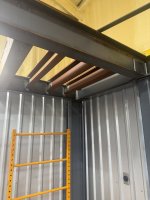
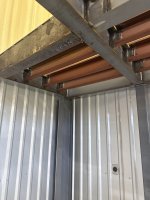
More progress on the mezzanine. Focused on the 10’x20’ section. Got all the I-beams in, including framing out for a dumbwaiter which I’ll add later if I don’t find a used forklift first. After having my buddy’s forklift for the past few weeks, I am seriously thinking I need one.
Forklift also became the ZeroTurn lift for blade replacement.
 

Attachments

  • IMG_1056.jpeg
    IMG_1056.jpeg
    758.2 KB · Views: 13
  • IMG_1057.jpeg
    IMG_1057.jpeg
    748.7 KB · Views: 15
  • IMG_1053.jpeg
    IMG_1053.jpeg
    753 KB · Views: 14
To avoid these ads, REGISTER NOW!
Top Bottom