To avoid these ads, REGISTER NOW!

First Fabrication

drummingpariah

Well-known member
Joined
Jul 20, 2009
Messages
306
Location
Manchester, NH
Over the past few months, I've been unintentionally equipping my single-bay (rental) garage with some basic fabrication tools. I upgraded from the 'training' old-harbor-freight FCAW welder (that was broken, it turns out) to a basic little Hobart 140 (no bottle yet, just flux core for now), picked up a couple vises, and even cleared some space to work on things! It's been a little too chilly and wet to work on my Datsun(s) so I took some time today to play out in the garage.

My girlfriend has been pretty frustrated by our current towel hanger in the bathroom, so I set out to make a replacement. Unfortunately, I was only working with scrap. Also, the only cutting tools I have are angle grinders and I only have a 12v battery-powered drill to poke holes in things. I dug up the scrap I had, took some measurements, and made this:
11259301814_d1f59c7ba5_c.jpg
(I'll get better photos tomorrow when it's light out)

It works and she loves it and is already thinking about paint schemes, but I'm having a tough time seeing past the many shortcomings of my work. I'm still just a novice welder, so I'm happy when I put down boogers that don't break when I smack the part with a hammer, so in that regard this was a success. Unfortunately, I tacked all three wrenches on before I did any grinding, and getting a cleanup tool in between them proved to be a big challenge.

I think I've been looking at ztfab's welds too much lately. I suppose my biggest inspiration is Jack Olsen. He solves problems really elegantly, without spending a ton of money on equipment, time on being OCD, and without having piles and piles of raw talent (like ztfab). I was hoping this project would go something like his projects, but I'm generally dissatisfied with it.

What should my focus be to make future projects more satisfying-feeling? It's a generic and weak question, but someone on this forum always seems to know what advice I'm asking for even if I don't know what my question was.
 
To avoid these ads, REGISTER NOW!

DoghouseForge

Well-known member
Joined
May 11, 2013
Messages
374
Location
Lakeland, Fl
First - you have a girlfriend that digs your wrench and tube towel bar. Thats a win.

Second - just build more stuff. I try to visualize things in my head and just build them. kind of adapting to whatever issues arise. You'll end up finding really useful ways to accomplish stuff. If your not happy with your work then do it again, or find something else to create. I have alot of things im happy with but there are piles of fails laying around the shop as well.

Remember, if you dont draw or write down what its supposed to look like in the end, you can never build something you werent intending to... :headscrat:thumbup:

I think its cool, would make a nice rack for my sanding belts...

JP
 

R.Anderson

Well-known member
Joined
May 26, 2012
Messages
906
Location
Wisconsin
Nice, what ya using the other half of the three wrenches for? Using whole wrenches would make a cool coat rack.
 
OP
D

drummingpariah

Well-known member
Joined
Jul 20, 2009
Messages
306
Location
Manchester, NH
Nice, what ya using the other half of the three wrenches for? Using whole wrenches would make a cool coat rack.

A bucket of these wrenches was dropped in my trunk a few weeks ago when a friend couldn't sell them off in his grandfather's estate sale. I picked out all the metric ones (I don't have any USDM cars any more) so these don't really serve a purpose for me any more. I'm going to take a couple of the bigger ones and add them to my welding cart for a MIG gun holder, the rest will probably end up going together as a screwdriver rack or similar.

I like the idea of a coat rack, some of these wrenches were bent to 90-degree angles by the PO. I might be able to make that into a passable christmas present for someone. I'll have to try to source a local powder coater, and see if they can get a coat rack (or three?) done before the holidays.
 

PugetDude

ALLIANCE MEMBER
Joined
Mar 13, 2013
Messages
22,481
Location
Superstition Mountains, AZ
Great start! If the welds aren't to your liking, a dremel with a stone will clean them up nicely, you can always hit the pits with a little filler metal and re-grind.

BTW, flat black spray paint hides a lot of evil.....

Keep us posted.
 

Bigblue&Goldie

Well-known member
Joined
Mar 12, 2009
Messages
10,734
Location
AZ
The key to nice welds is in the preparation; surfaces need to be clean metal. Any impurities will create the craters and pitting you see. Scotch brite pads, flapper discs, & wire wheels all have their place in surface preparation without really gouging the metal. Also, get a gas bottle and switch over to mig wire if your machine allows it.
 

aggierailroad

Well-known member
Joined
Jan 8, 2012
Messages
581
Location
Houston, TX
And remember, most people only post their "good sides." You see stuff complete and post-ground and painted. Everyone has booger weld days.
 

Aquaticbob

Well-known member
Joined
Dec 3, 2013
Messages
488
Location
Seattle
I am really digging that towel rack! I'm gonna have to go and make one when I pick up a welder this Christmas and have the skills
 

CodyY

Well-known member
Joined
Jun 9, 2012
Messages
103
Location
Fort Worth, TX
Cutoff wheels are fine for cutting stuff don't get discouraged.

When welding non-structural parts, they dont have to be immaculate clean, knock the paint/rust/slag off and burn it in. Your towels will never know the difference. I like a "whip" technique on T joints. Basically shoving the wire into the corner of the joint and then back-fill the puddle an 1/8" or so. Followed by driving wire forward a 1/4" or so. Repeat. Makes a nice looking weld and after you get the feel for it your puddle will stay nice and consistent. Useful for 99% of what the home fabricator will do. Looks like this:
y2e5e7ub.jpg


4y5y8eby.jpg


uzy8a9uz.jpg


They key to good fabricating is layout and thinking ahead. If you don't already have them get yourself a digital set of calipers and a combination square set.

At home I use a cheapie HF set.
http://m.harborfreight.com/12-inch-...t-92471.html?utm_referrer=direct/not provided

At work we use a little more precise set of instruments, but same tools. I always shoot to build "perfect parts" because Its always gonna need to be ground back, finish sanded, or will move from heat and stay within tolerance.
 

R.Anderson

Well-known member
Joined
May 26, 2012
Messages
906
Location
Wisconsin
Cutoff wheels are fine for cutting stuff don't get discouraged.

When welding non-structural parts, they dont have to be immaculate clean, knock the paint/rust/slag off and burn it in. Your towels will never know the difference. I like a "whip" technique on T joints. Basically shoving the wire into the corner of the joint and then back-fill the puddle an 1/8" or so. Followed by driving wire forward a 1/4" or so. Repeat. Makes a nice looking weld and after you get the feel for it your puddle will stay nice and consistent. Useful for 99% of what the home fabricator will do. Looks like this

They key to good fabricating is layout and thinking ahead. If you don't already have them get yourself a digital set of calipers and a combination square set.

I doubt the OP is going to have a use for a digital caliper for welding, a rule that goes down to 32nds or 64ths is all you need for home/garage/hobby welding. Squares ya but that will only get you so far, for better results square things up with a tape measure especially on larger projects.

Using the box end of the wrenches for a screw driver holder is a great idea drummingpariah.
 

CodyY

Well-known member
Joined
Jun 9, 2012
Messages
103
Location
Fort Worth, TX
This isnt about "welding". OP is about Fabrication in general. Plus, a set of digital calipers runs less than $20. I use them all day for layout like an adjustable sheetmetal scribe. Tape measure/sharpie or square/soapstone is only so accurate. And as I stated above, if you try to build "perfect parts" you'll always fall well within tolerance.

My day job is managing a fabrication shop. I could teach a class, but this thread isn't the place.
 
Last edited:
To avoid these ads, REGISTER NOW!

Aquaticbob

Well-known member
Joined
Dec 3, 2013
Messages
488
Location
Seattle
This isnt about "welding". OP is about Fabrication in general. Plus, a set of digital calipers runs less than $20.


I agree with this. I use my calipers for all sorts of things, and I don't do fabrication (yet)
 

CodyY

Well-known member
Joined
Jun 9, 2012
Messages
103
Location
Fort Worth, TX
I agree with this. I use my calipers for all sorts of things, and I don't do fabrication (yet)

And once you get accustomed to using decimal equivalents it makes getting the right drillbit that much easier. Even my 33 yo eyes are having a hard time reading the little bastards
 

kazlx

Well-known member
Joined
Oct 30, 2012
Messages
2,851
Location
Tustin, CA
I wouldn't fabricated without a set of digital calipers. The tighter your layout and fitup is, the better your end product will be.

FWIW, Something like the wrenches, I would chemically etch first before welding. Dilute down some muriatic acid and let them take a bath for a bit.

If you were local, I'd invite you over to hang out in the garage and play with my toys.
 

BD1

Well-known member
Joined
Mar 18, 2007
Messages
4,602
Location
north side
Digital calipers are handy for sure. Not to mention using a carbide tip scriber for layout. Proper tools and accurate layout make projects easier. :thumbup:
 
OP
D

drummingpariah

Well-known member
Joined
Jul 20, 2009
Messages
306
Location
Manchester, NH
They key to good fabricating is layout and thinking ahead. If you don't already have them get yourself a digital set of calipers and a combination square set.

At home I use a cheapie HF set.
http://m.harborfreight.com/12-inch-...t-92471.html?utm_referrer=direct/not provided

At work we use a little more precise set of instruments, but same tools. I always shoot to build "perfect parts" because Its always gonna need to be ground back, finish sanded, or will move from heat and stay within tolerance.

That's the exact square set I have, and did my best to use it to good effect. I really need to approach things with more of a plan next time, but this turned out to be a pretty solid learning experience. I finally have room for a drill press now that my spare small block chevy sold, so I'm going to get to make a stand for that (and I boogered together a "welding cart" without a plan as well ... which needs another iteration before it's right).

Those photos are hugely helpful.

I have a set of cheap digital calipers, and picked up one of these for measuring brass after resizing it (reloading ammunition):
http://www.harborfreight.com/6-inch-dial-caliper-66541.html

I hadn't even considered using them. I think with anything else I build, I need to plan out making it square ahead of time, since I don't have sufficient experience to be able to 'wing it' and have things come out nicely.
 
Last edited:

kazlx

Well-known member
Joined
Oct 30, 2012
Messages
2,851
Location
Tustin, CA
I would suggest the digital calipers, I use mine almost every day. I use cheapie HF ones for all kinds of stuff. Want a hole 3" from a corner? Set your calipers to 3.00 and lock them. Scribe from both edges.

Some other stuff:
http://littlemachineshop.com/Instructions/UsingCalipers.pdf

Planning makes perfect. There are multiple ways to accomplish the same thing. A very solid way to learn metal working is card stock. Rough out a drawing of what you want and the pieces you want to make. Then, draw full size templates on card stock.

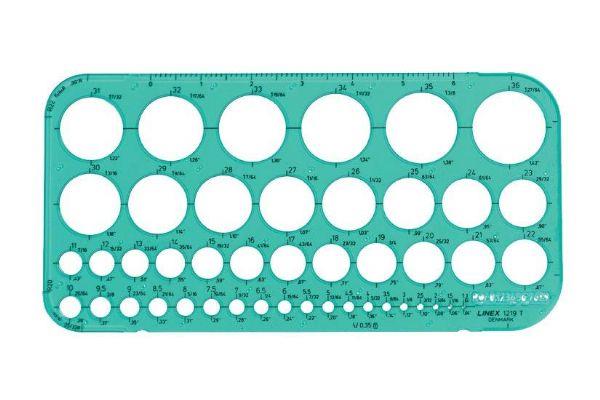
Go to Staples or the like and get some templates, french curves, etc. It's very easy to lay out things on paper, cut them out and use them as patterns, ie you want two of the same thing. Cut/file/gnaw to the lines. You don't need fancy tools to make build cool/sleek things....they usually just make it quicker and easier.

ALVN-421.jpg


3112.jpg
 
Last edited:

CodyY

Well-known member
Joined
Jun 9, 2012
Messages
103
Location
Fort Worth, TX
Also dont hesitate to grab whatevers laying around for a template.

Grinder hubs, drops, big washers, tools.... I take grinding rocks for radiusing tables, brackets, etc. Trace with your soap, whack it off with a torch, clean up w grinder and flap wheel.
 

R.Anderson

Well-known member
Joined
May 26, 2012
Messages
906
Location
Wisconsin
This isnt about "welding". OP is about Fabrication in general. Plus, a set of digital calipers runs less than $20. I use them all day for layout like an adjustable sheetmetal scribe. Tape measure/sharpie or square/soapstone is only so accurate. And as I stated above, if you try to build "perfect parts" you'll always fall well within tolerance.

My day job is managing a fabrication shop. I could teach a class, but this thread isn't the place.

"My day job is managing a fabrication shop. I could teach a class, but this thread isn't the place." Well I'm Santa Claus :dunno: just words. I have seen more than my fair share of managers that do not know squat about welding, fabrication, hell manufacturing in general and some that know enough to be dangerous. I'm not saying you are one of those types and I'm sure your not.

"Tape measure/sharpie or square/soapstone is only so accurate. And as I stated above, if you try to build "perfect parts" you'll always fall well within tolerance." you telling me this is just like telling a chef how to make toast, just letting you know:) Tolerances is exactly it, but there no need to bust down to thousandths of an inch if your tolerances are +-1/32" one can measure and layout all day long with a tape or rule, just got to know how.

Your right "Tape measure/sharpie or square/soapstone is only so accurate" but you must of miss read what I said "Squares ya but that will only get you so far, for better results square things up with a tape measure especially on larger projects." If one does not understand what I mean by this :dunno: I highly doubt one could teach a class on fabrication.

I'm not saying do it this way or another, that choice is yours. I am saying calipers are not needed(not to be confused with want) in general welding fabrication projects. There are other tools one should consider getting first when setting up shop such as Grinders, clamps, bandsaw, chopsaw, drill press, vise, bits, etc. Then tune in as one goes to what one wanted/need for projects and or jobs.
 
Last edited by a moderator:

Spareparts

Well-known member
Joined
Mar 12, 2010
Messages
2,045
Location
Lansing Ks.
My sugestion would be pick up some of the magnetic squares to hold your projects square while tacking, remember when you weld one side it will draw that way. You tack one side and move the magnetic square to that side and weld the other side. Just remember to sit them away from the grinding area of they will attract the grinding dust.
 

NUTTSGT

Super Moderator
Staff member
Joined
Sep 14, 2009
Messages
51,156
Location
Northern Central Ohio
I edited or deleted a few posts out of this thread gentlemen. Lets try to keep it on track before it goes over board and gets closed down.
 
To avoid these ads, REGISTER NOW!
Top Bottom